Reflexions-Probes
Einführung
Wie in 3D Materialien (Spatial) angegeben, können Objekte reflektiertes oder diffuses Licht zeigen. Reflexions-Probes werden als Quelle für reflektiertes Licht und Umgebungslicht für Objekte in ihrem Einflussbereich verwendet.
Eine Tester (Probe) dieses Typs erfasst die Umgebung (als eine Art 360 Grad Bild) und speichert Versionen davon mit zunehmendem Grad an Unschärfe. Dies wird verwendet um die Rauheit von Materialien sowie die Umgebungsbeleuchtung zu simulieren.
Diese Probs sind zwar eine effiziente Methode zum Speichern von Reflexionen, weisen jedoch einige Mängel auf:
Sie sind effizient zu rendern, aber teuer zu berechnen. Dies führt zu einem Standardverhalten, bei dem sie nur beim Laden der Szene erfasst werden.
Sie eignen sich am besten für rechteckig geformte Räume oder Orte, da sonst die gezeigten Reflexionen nicht so genau sind (insbesondere wenn die Rauheit 0 ist).
Einrichtung
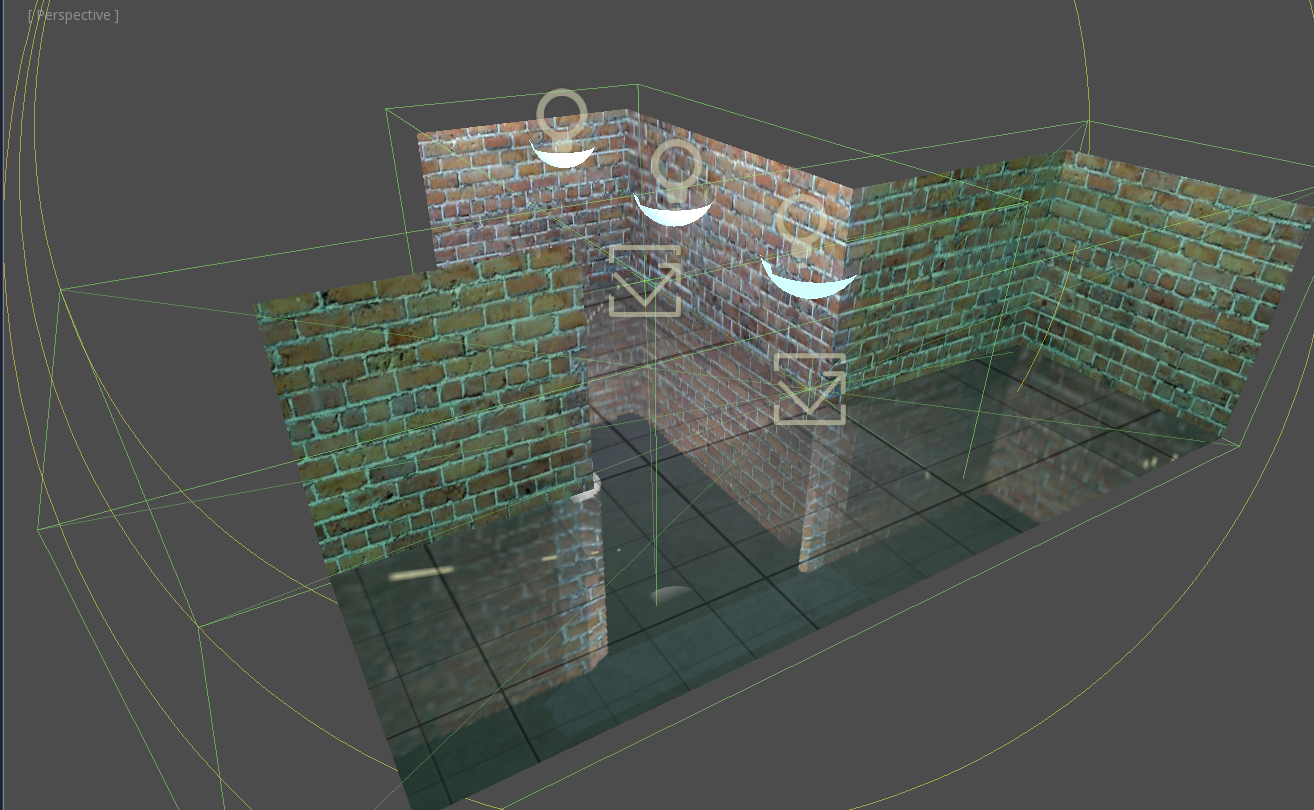
Erstellen Sie einen ReflectionProbe-Node und wickeln Sie ihn um den Bereich, in dem Sie Reflexionen haben möchten:
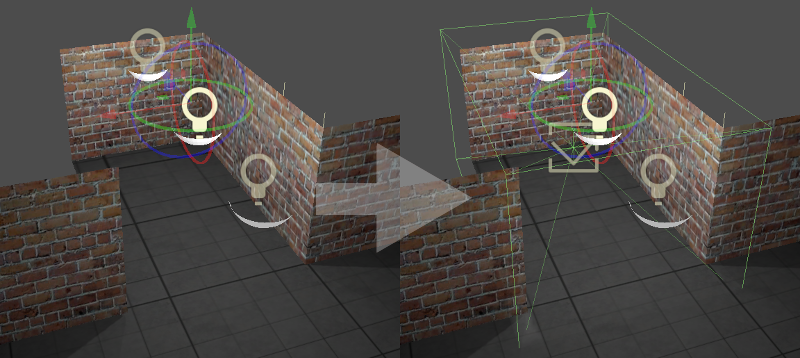
Dies sollte zu sofortigen lokalen Reflexionen führen. Wenn Sie eine Himmels-Textur verwenden, werden Reflexionen standardmäßig damit gemischt.
Standardmäßig scheinen Reflexionen in Innenräumen nicht sehr konsistent zu sein. Stellen Sie in diesem Szenario sicher, dass Sie die Eigenschaft "Box Correct" ankreuzen.

Diese Einstellung ändert die Reflexion von einer unendlichen Himmelsbox in eine Box von der Größe des Probes:
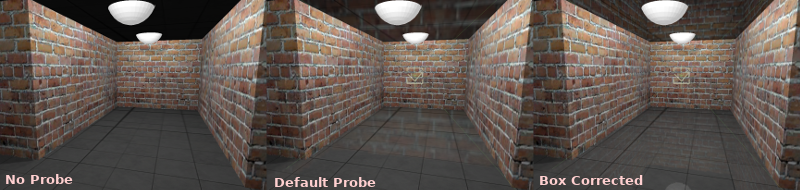
Das Anpassen der Boxenwände kann dazu beitragen die Reflexion ein wenig zu verbessern, sieht jedoch in rechteckigen Räumen immer am besten aus.
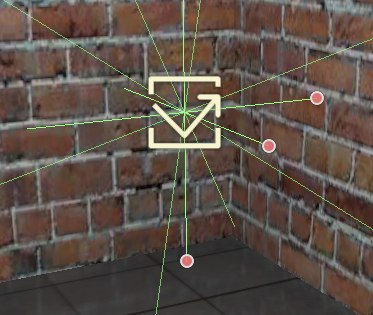
The probe captures the surrounding from the center of the gizmo. If, for some reason, the room shape or contents occlude the center, it can be displaced to an empty place by moving the handles in the center:
By default, shadow mapping is disabled when rendering probes (only in the rendered image inside the probe, not the actual scene). This is a simple way to save on performance and memory. If you want shadows in the probe, they can be toggled on/off with the Enable Shadow setting:

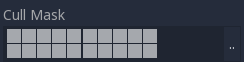
Finally, keep in mind that you may not want the Reflection Probe to render some objects. A typical scenario is an enemy inside the room which will move around. To keep objects from being rendered in the reflections, use the Cull Mask setting:
Innen oder Außen
If you are using reflection probes in an interior setting, it is recommended that the Interior property be enabled. This stops the probe from rendering the sky and also allows custom ambient lighting settings.
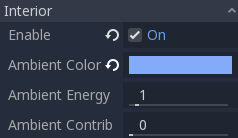
When probes are set to Interior, custom constant ambient lighting can be specified per probe. Just choose a color and an energy.
Optionally, you can blend this ambient light with the probe diffuse capture by tweaking the Ambient Contribution property (0.0 means pure ambient color, while 1.0 means pure diffuse capture).
Überblenden
Multiple reflection probes can be used, and Godot will blend them where they overlap using a smart algorithm:
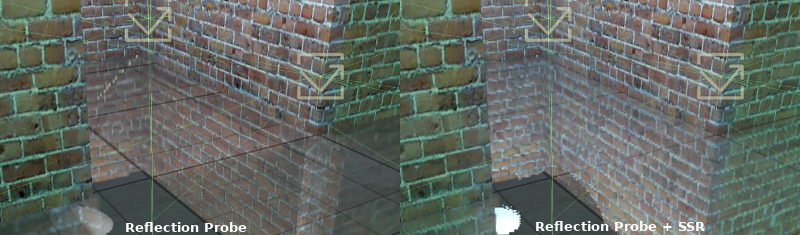
As you can see, this blending is never perfect (after all, these are box reflections, not real reflections), but these artifacts are only visible when using perfectly mirrored reflections. Normally, scenes have normal mapping and varying levels of roughness, which can hide this.
Alternatively, Reflection Probes work well blended together with Screen Space Reflections to solve these problems. Combining them makes local reflections appear more faithful, while probes are only used as a fallback when no screen-space information is found:
Finally, blending interior and exterior probes is the recommended approach when making levels that combine both interiors and exteriors. Near the door, a probe can be marked as exterior (so it will get sky reflections) while on the inside, it can be interior.
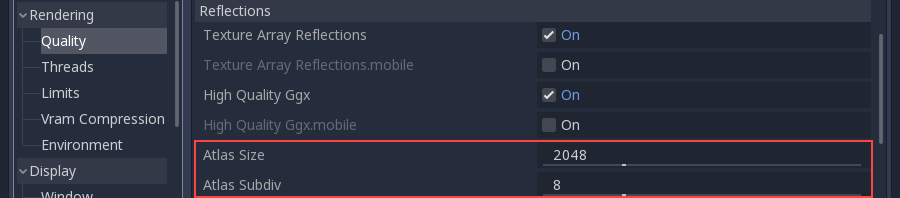
Reklexionsatlas
In the current renderer implementation, all probes are the same size and are fit into a Reflection Atlas. The size and amount of probes can be customized in Project Settings -> Quality -> Reflections
The default setting of Atlas Subdiv: 8 will allow up to 16 reflection probes in a scene. This value needs to be increased if you need more reflection probes.