Your second 3D shader
From a high-level, what Godot does is give the user a bunch of parameters that
can be optionally set (AO, SSS_Strength, RIM, etc.). These
parameters correspond to different complex effects (Ambient Occlusion,
SubSurface Scattering, Rim Lighting, etc.). When not written to, the code is
thrown out before it is compiled and so the shader does not incur the cost of
the extra feature. This makes it easy for users to have complex PBR-correct
shading, without writing complex shaders. Of course, Godot also allows you to
ignore all these parameters and write a fully customized shader.
Eine vollständige Liste dieser Parameter finden Sie im Referenzdokument Spatial Shader.
A difference between the vertex function and a fragment function is that the
vertex function runs per vertex and sets properties such as VERTEX
(position) and NORMAL, while the fragment shader runs per pixel and, most
importantly, sets the ALBEDO color of the Mesh.
Ihre erste Spatial Fragment Funktion
As mentioned in the previous part of this tutorial. The standard use of the
fragment function in Godot is to set up different material properties and let
Godot handle the rest. In order to provide even more flexibility, Godot also
provides things called render modes. Render modes are set at the top of the
shader, directly below shader_type, and they specify what sort of
functionality you want the built-in aspects of the shader to have.
For example, if you do not want to have lights affect an object, set the render
mode to unshaded:
render_mode unshaded;
You can also stack multiple render modes together. For example, if you want to use toon shading instead of more-realistic PBR shading, set the diffuse mode and specular mode to toon:
render_mode diffuse_toon, specular_toon;
This model of built-in functionality allows you to write complex custom shaders by changing only a few parameters.
Eine vollständige Liste der Rendermodi finden Sie unter :ref:'Spatial shader reference <doc_spatial_shader>'.
In this part of the tutorial, we will walk through how to take the bumpy terrain from the previous part and turn it into an ocean.
Lassen Sie uns zuerst die Farbe des Wassers einstellen, was über die Einstellung ALBEDO geschieht.
ALBEDO ist ein vec3 das die Farbe des Objekts enthält.
Lassen Sie uns es auf einen schönen Blauton einstellen.
void fragment() {
  ALBEDO = vec3(0.1, 0.3, 0.5);
}
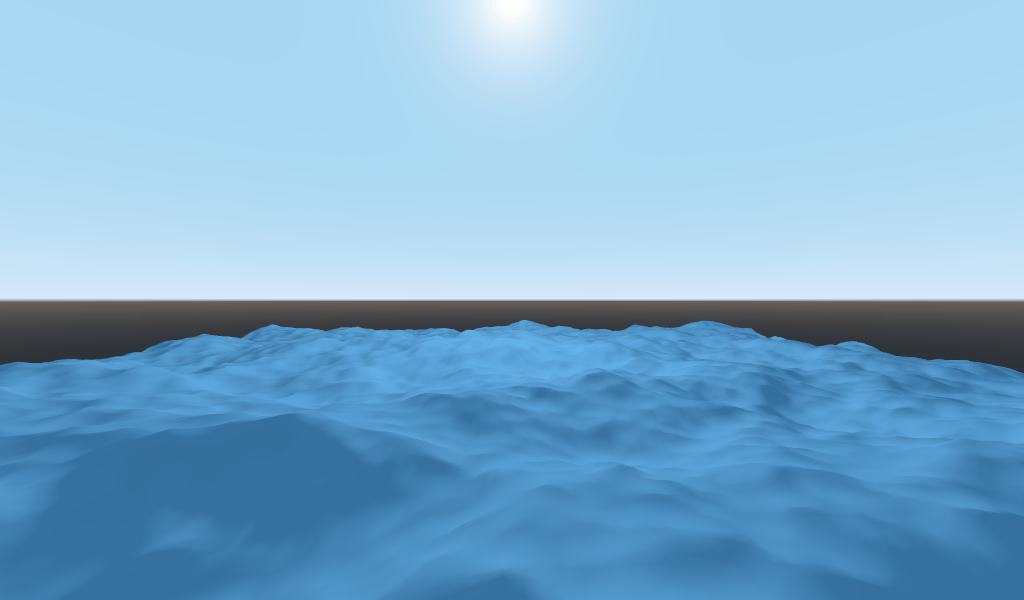
We set it to a very dark shade of blue because most of the blueness of the water will come from reflections from the sky.
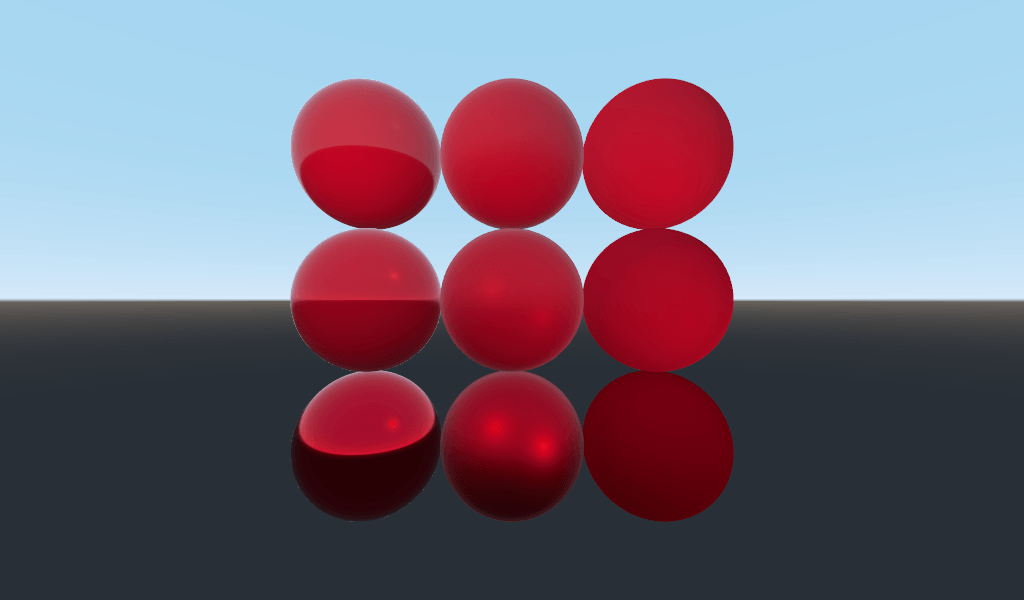
Das von Godot verwendete PBR-Modell basiert auf zwei Hauptparametern: METALLIC und ROUGHNESS.
ROUGHNESS specifies how smooth/rough the surface of a material is. A low
ROUGHNESS will make a material appear like a shiny plastic, while a high
roughness makes the material appear more solid in color.
METALLIC specifies how much like a metal the object is. It is better set
close to 0 or 1. Think of METALLIC as changing the balance between
the reflection and the ALBEDO color. A high METALLIC almost ignores
ALBEDO altogether, and looks like a mirror of the sky. While a low
METALLIC has a more equal representation of sky color and ALBEDO color.
ROUGHNESS increases from 0 to 1 from left to right while
METALLIC increase from 0 to 1 from top to bottom.
Bemerkung
METALLIC should be close to 0 or 1 for proper PBR shading.
Only set it between them for blending between materials.
Water is not a metal, so we will set its METALLIC property to 0.0. Water
is also highly reflective, so we will set its ROUGHNESS property to be quite
low as well.
void fragment() {
  METALLIC = 0.0;
  ROUGHNESS = 0.01;
  ALBEDO = vec3(0.1, 0.3, 0.5);
}
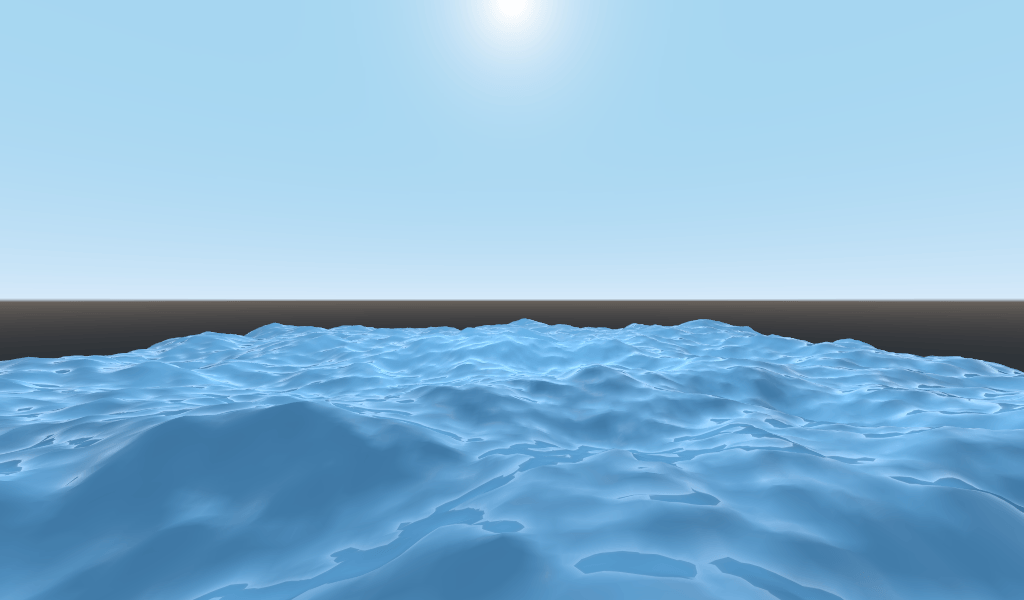
Jetzt haben wir eine glatte, plastisch aussehende Oberfläche. Es ist Zeit, über einige besondere Eigenschaften von Wasser nachzudenken, die wir emulieren möchten. Es gibt zwei Hauptmerkmale, die dies von einer seltsamen Kunststoffoberfläche zu schön stilisiertem Wasser führen. Das erste sind Spiegelreflexionen. Spiegelreflexionen sind die hellen Flecken, von denen aus Sie die Sonne direkt in Ihr Auge reflektieren. Das zweite ist das Fresnel-Reflexionsvermögen. Das Fresnel-Reflexionsvermögen ist die Eigenschaft von Objekten, in flachen Winkeln reflektierender zu werden. Es ist der Grund, warum Sie unter sich ins Wasser sehen können, aber weiter entfernt reflektiert es den Himmel.
In order to increase the specular reflections, we will do two things. First, we will change the render mode for specular to toon because the toon render mode has larger specular highlights.
render_mode specular_toon;
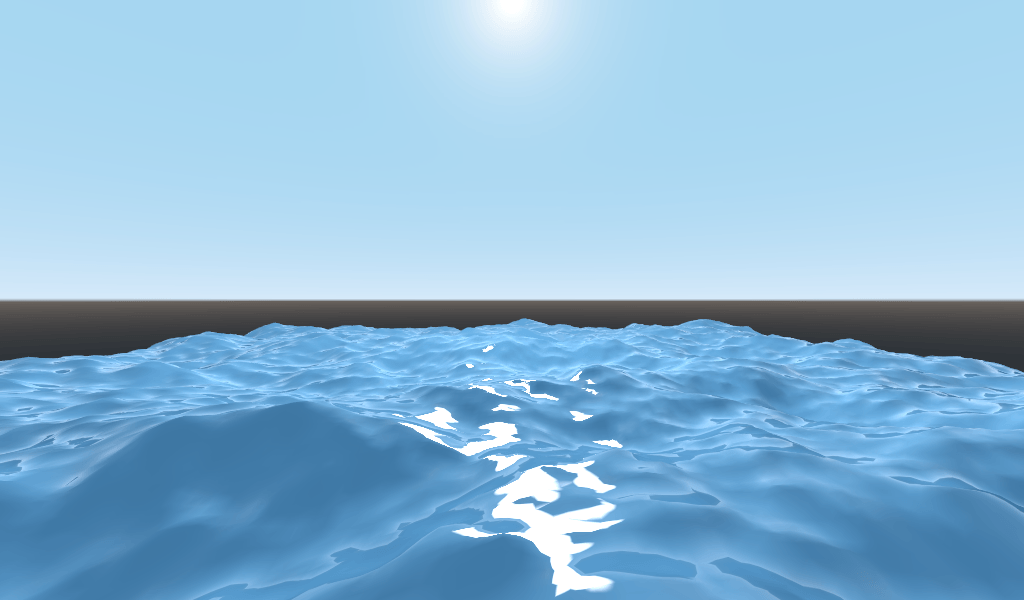
Second we will add rim lighting. Rim lighting increases the effect of light at glancing angles. Usually it is used to emulate the way light passes through fabric on the edges of an object, but we will use it here to help achieve a nice watery effect.
void fragment() {
  RIM = 0.2;
  METALLIC = 0.0;
  ROUGHNESS = 0.01;
  ALBEDO = vec3(0.1, 0.3, 0.5);
}
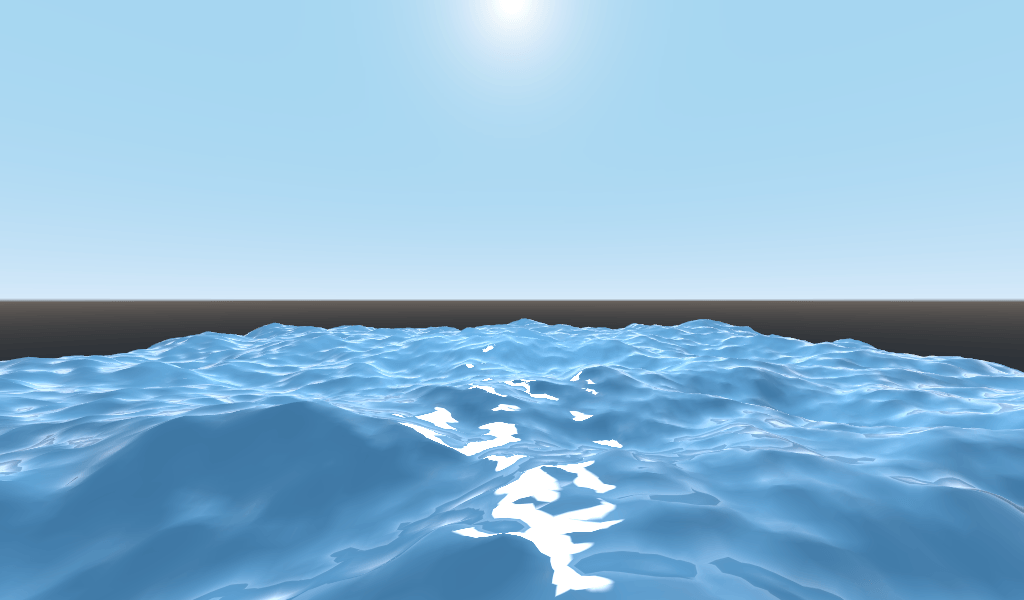
Um ein fresneles Reflexionsvermögen hinzuzufügen, berechnen wir einen Fresnel-Term in unserem Fragment-Shader. Hier werden wir aus Leistungsgründen keinen echten Fresnel-Begriff verwenden. Stattdessen approximieren wir es mit dem Skalarprodukt der Vektoren NORMAL und VIEW. Der NORMAL-Vektor zeigt von der Netzoberfläche weg, während der VIEW-Vektor die Richtung zwischen Ihrem Auge und diesem Punkt auf der Oberfläche darstellt. Das Skalarprodukt zwischen ihnen ist eine praktische Methode, um festzustellen, wann Sie die Oberfläche frontal oder in einem flüchtigen Winkel betrachten.
float fresnel = sqrt(1.0 - dot(NORMAL, VIEW));
And mix it into both ROUGHNESS and ALBEDO. This is the benefit of
ShaderMaterials over SpatialMaterials. With SpatialMaterial, we could set
these properties with a texture, or to a flat number. But with shaders we can
set them based on any mathematical function that we can dream up.
void fragment() {
  float fresnel = sqrt(1.0 - dot(NORMAL, VIEW));
  RIM = 0.2;
  METALLIC = 0.0;
  ROUGHNESS = 0.01 * (1.0 - fresnel);
  ALBEDO = vec3(0.1, 0.3, 0.5) + (0.1 * fresnel);
}
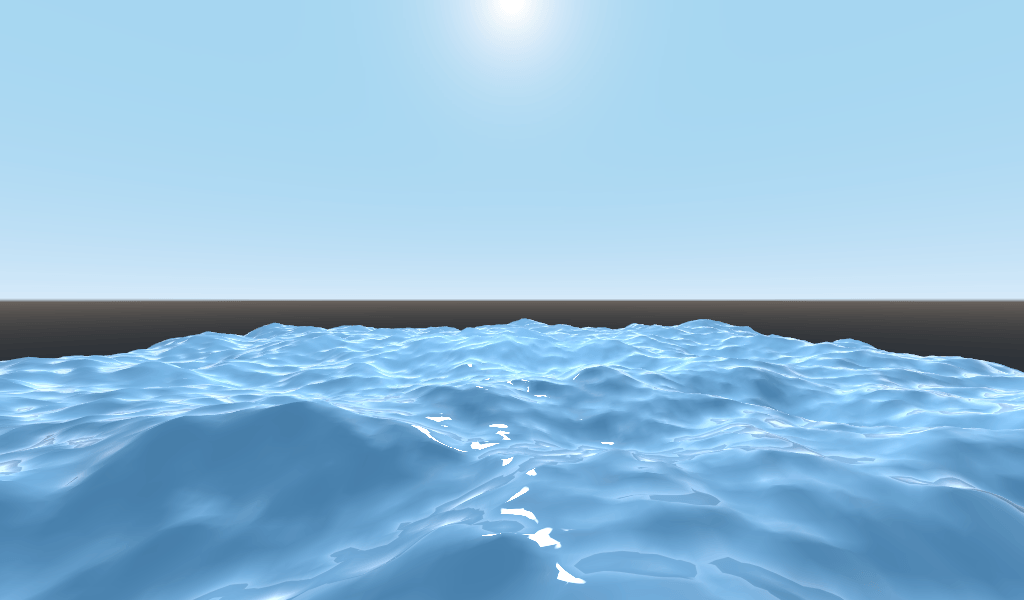
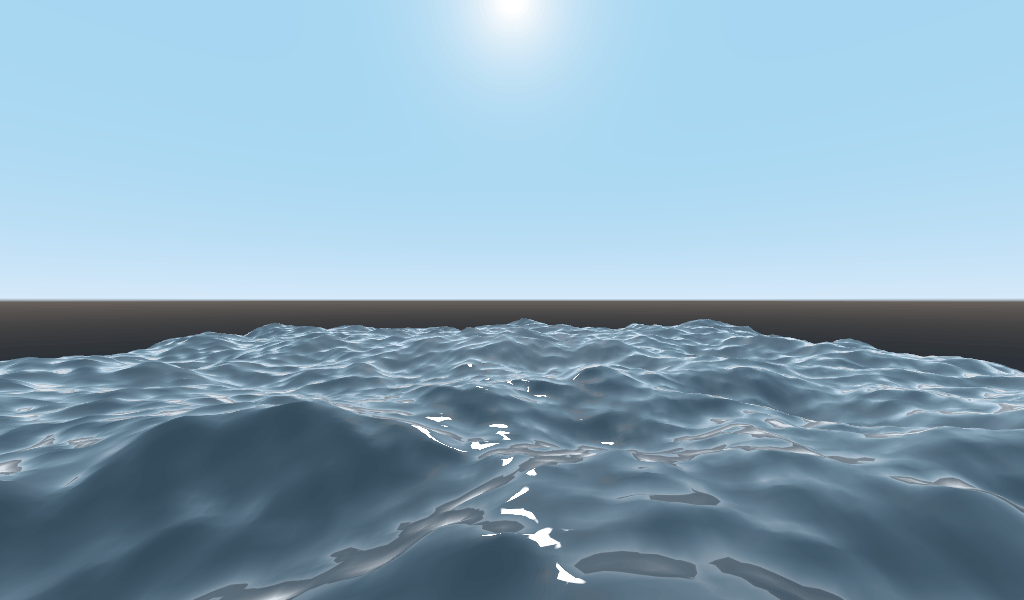
And now, with only 5 lines of code, you can have complex looking water. Now that
we have lighting, this water is looking too bright. Let's darken it. This is
done easily by decreasing the values of the vec3 we pass into ALBEDO.
Let's set them to vec3(0.01, 0.03, 0.05).
Animieren mit TIME
Going back to the vertex function, we can animate the waves using the built-in
variable TIME.
TIME ist eine integrierte Variable, auf die über die Vertex- und Fragmentfunktionen zugegriffen werden kann.
In the last tutorial we calculated height by reading from a heightmap. For this
tutorial, we will do the same. Put the heightmap code in a function called
height().
float height(vec2 position) {
  return texture(noise, position / 10.0).x; // Scaling factor is based on mesh size (this PlaneMesh is 10×10).
}
In order to use TIME in the height() function, we need to pass it in.
float height(vec2 position, float time) {
}
Und stellen Sie sicher, dass sie innerhalb der Vertexfunktion korrekt übergeben wird.
void vertex() {
  vec2 pos = VERTEX.xz;
  float k = height(pos, TIME);
  VERTEX.y = k;
}
Instead of using a normalmap to calculate normals. We are going to compute them
manually in the vertex() function. To do so use the following line of code.
NORMAL = normalize(vec3(k - height(pos + vec2(0.1, 0.0), TIME), 0.1, k - height(pos + vec2(0.0, 0.1), TIME)));
We need to compute NORMAL manually because in the next section we will be
using math to create complex-looking waves.
Now, we are going to make the height() function a little more complicated by
offsetting position by the cosine of TIME.
float height(vec2 position, float time) {
  vec2 offset = 0.01 * cos(position + time);
  return texture(noise, (position / 10.0) - offset).x;
}
This results in waves that move slowly, but not in a very natural way. The next section will dig deeper into using shaders to create more complex effects, in this case realistic waves, by adding a few more mathematical functions.
fortschrittliche Effekte: Wellen
What makes shaders so powerful is that you can achieve complex effects by using
math. To illustrate this, we are going to take our waves to the next level by
modifying the height() function and by introducing a new function called
wave().
wave() hat einen Parameter position, der mit height() identisch ist.
We are going to call wave() multiple times in height() in order to fake
the way waves look.
float wave(vec2 position){
  position += texture(noise, position / 10.0).x * 2.0 - 1.0;
  vec2 wv = 1.0 - abs(sin(position));
  return pow(1.0 - pow(wv.x * wv.y, 0.65), 4.0);
}
Das sieht zunächst kompliziert aus. Gehen wir es also Zeile für Zeile durch.
position += texture(noise, position / 10.0).x * 2.0 - 1.0;
Offset the position by the noise texture. This will make the waves curve, so
they won't be straight lines completely aligned with the grid.
vec2 wv = 1.0 - abs(sin(position));
Define a wave-like function using sin() and position. Normally sin()
waves are very round. We use abs() to absolute to give them a sharp ridge
and constrain them to the 0-1 range. And then we subtract it from 1.0 to put
the peak on top.
return pow(1.0 - pow(wv.x * wv.y, 0.65), 4.0);
Multiply the x-directional wave by the y-directional wave and raise it to a
power to sharpen the peaks. Then subtract that from 1.0 so that the ridges
become peaks and raise that to a power to sharpen the ridges.
Wir können jetzt den Inhalt unserer height() Funktion durch wave() ersetzen.
float height(vec2 position, float time) {
  float h = wave(position);
  return h;
}
Damit erhalten Sie:
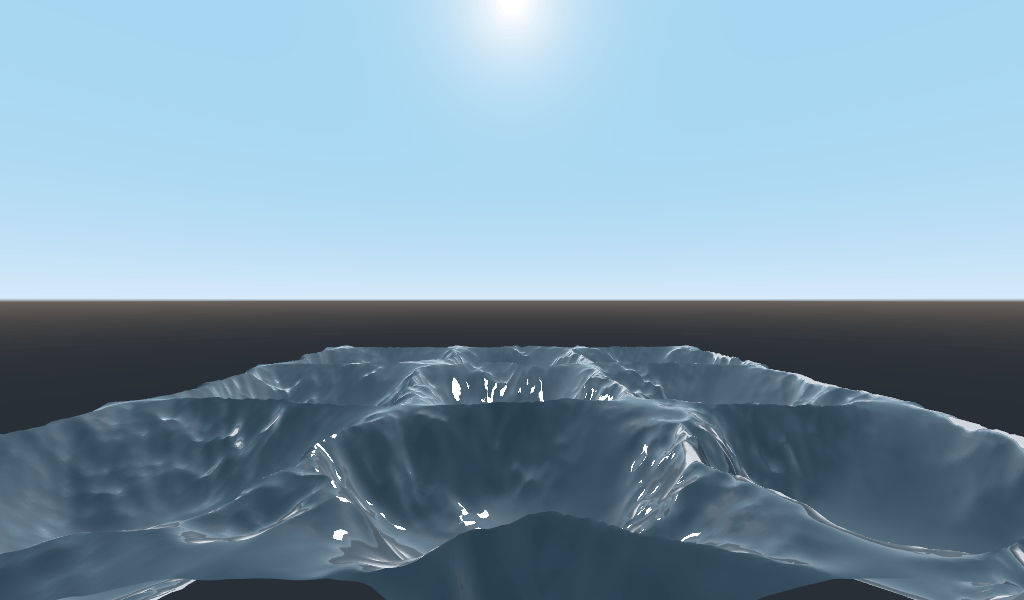
The shape of the sin wave is too obvious. So let's spread the waves out a bit.
We do this by scaling position.
float height(vec2 position, float time) {
  float h = wave(position * 0.4);
  return h;
}
Nun sieht es viel besser aus.
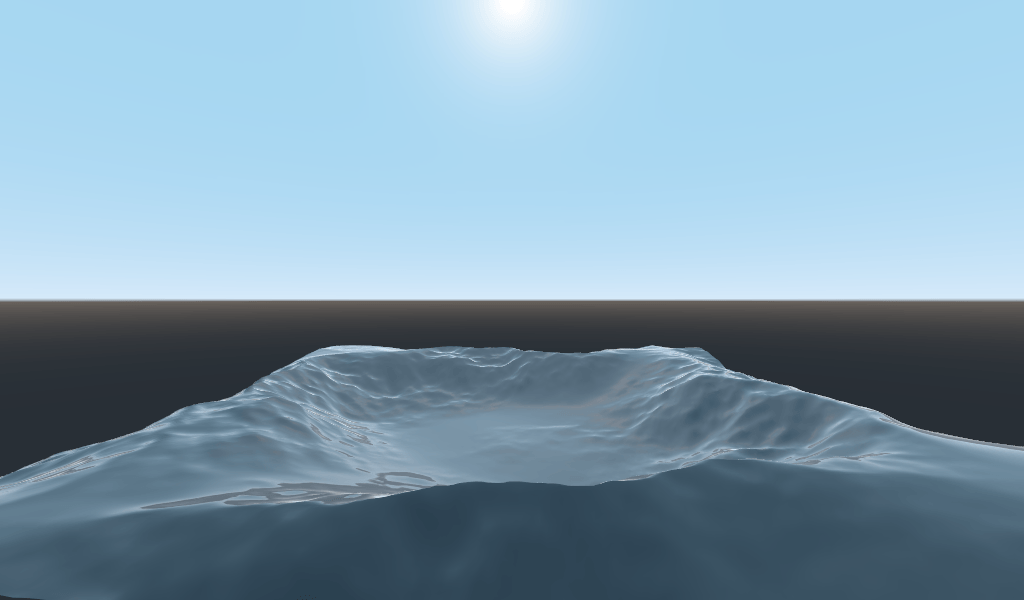
We can do even better if we layer multiple waves on top of each other at varying frequencies and amplitudes. What this means is that we are going to scale position for each one to make the waves thinner or wider (frequency). And we are going to multiply the output of the wave to make them shorter or taller (amplitude).
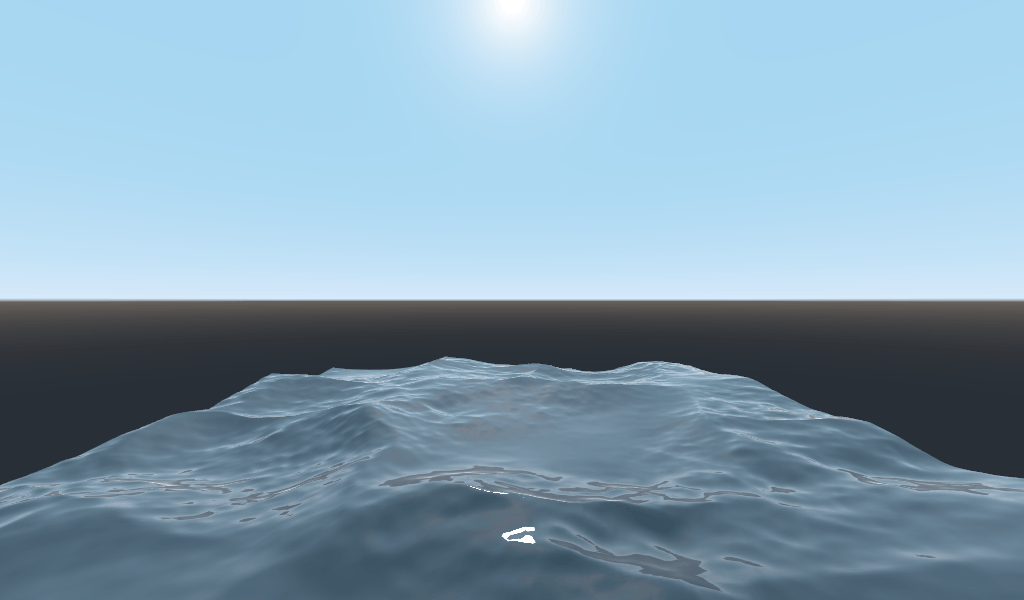
Here is an example for how you could layer the four waves to achieve nicer looking waves.
float height(vec2 position, float time) {
  float d = wave((position + time) * 0.4) * 0.3;
  d += wave((position - time) * 0.3) * 0.3;
  d += wave((position + time) * 0.5) * 0.2;
  d += wave((position - time) * 0.6) * 0.2;
  return d;
}
Note that we add time to two and subtract it from the other two. This makes the
waves move in different directions creating a complex effect. Also note that the
amplitudes (the number the result is multiplied by) all add up to 1.0. This
keeps the wave in the 0-1 range.
With this code you should end up with more complex looking waves and all you had to do was add a bit of math!
Weitere Informationen zu räumlichen Shadern finden Sie in den Dokumenten Shader Sprache und Spatial-Shader. Weitere fortgeschrittene Anleitungen finden Sie im Shading-Abschnitt und 3D Abschnitt .