BBCode in RichTextLabel
Einführung
Beschriftungs-Nodes eignen sich hervorragend für die Anzeige von einfachem Text, aber sie haben ihre Grenzen. Wenn Sie die Farbe des Textes oder seine Ausrichtung ändern möchten, wirkt sich diese Änderung auf den gesamten Text im Beschriftungs-Node aus. Sie können nicht nur einen Teil des Textes in einer Farbe darstellen oder nur einen Teil des Textes zentrieren. Um diese Einschränkung zu umgehen, würden Sie ein RichTextLabel verwenden.
RichTextLabel ermöglicht die Anzeige von komplexen Textauszeichnungen in einem Control. Es hat eine eingebaute API für die Erzeugung des Markups, kann aber auch einen BBCode parsen.
Beachten Sie, dass die BBCode-Tags in gewissem Umfang auch in der XML source of the class reference verwendet werden können.
BBCode verwenden
Für einheitlich formatierten Text können Sie in die Eigenschaft "Text" schreiben, aber wenn Sie BBCode-Markup verwenden möchten, sollten Sie stattdessen die Eigenschaft "Text" im Abschnitt "BBCode" verwenden (bbcode_text). Wenn Sie in diese Eigenschaft schreiben, wird das Markup analysiert, um den Text wie gewünscht zu formatieren. Bevor dies geschieht, müssen Sie das Kontrollkästchen "Aktiviert" im Abschnitt "BBCode" (bbcode_enabled) umschalten.
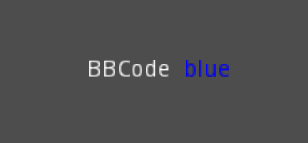
Zum Beispiel würde BBCode [color=blue]blau[/color] das Wort "blau" mit einer blauen Farbe rendern.
You'll notice that after writing in the BBCode "Text" property the regular "Text" property now has the text without the BBCode. While the text property will be updated by the BBCode property, you can't edit the text property or you'll lose the BBCode markup. All changes to the text must be done in the BBCode parameter.
Bemerkung
For BBCode tags such as [b] (bold), [i] (italics) or [code] to
work, you must set up custom fonts for the RichTextLabel node first.
Es gibt noch keine BBCode-Tags zur Steuerung der vertikalen Zentrierung von Text.
Referenz
Befehl |
Tag |
Beschreibung |
bold |
|
Macht {Text} fett. |
italics |
|
Macht {text} kursiv. |
underline |
|
Macht {text} unterstrichen. |
strikethrough |
|
Macht {text} durchgestrichen. |
code |
|
Lässt {text} die Code-Schriftart verwenden (normalerweise Monospace). |
center |
|
zeigt {Text} horizontal zentriert. |
right |
|
zeigt {text} horizontal rechtsbündig. |
fill |
|
Lässt {Text} die Breite des RichTextLabels ausfüllen. |
indent |
|
Erhöht die Einrückungsstufe von {text}. |
url |
|
Show {url} as such, underline it and make it clickable. Must be handled with the "meta_clicked" signal to have an effect. See Umgang mit [url]-Tag-Klicks. |
url (ref) |
|
Makes {text} reference <url> (underlined and clickable). Must be handled with the "meta_clicked" signal to have an effect. See Umgang mit [url]-Tag-Klicks. |
image |
|
Bild an Ressource {Pfad} einfügen. |
resized image |
|
Fügen Sie mit <width> ein Bild an der Ressource {path} ein (behält das Verhältnis bei). |
resized image |
|
Bild an der Ressource {Pfad} mit <Breite>×<Höhe> einfügen. |
font |
|
verwende eigenen Zeichensatz bei <Pfad> für {text}. |
color |
|
Ändert {text} Farbe; verwende Name oder # Format, z.B. |
table |
|
Erzeugt eine Tabelle mit <Anzahl> Spalten. |
cell |
|
Fügt Zellen mit dem {text} zur Tabelle hinzu. |
vorhandene Farbnamen
Liste der gültigen Farbnamen für den [color=<name>] Tag:
aqua
black
blue
fuchsia
gray
green
lime
maroon
navy
purple
red
silver
teal
white
yellow
Hexadezimale Farbcodes
For opaque RGB colors, any valid 6-digit hexadecimal code is supported, e.g. [color=#ffffff]white[/color].
Short RGB color codes such as #6f2 (equivalent to #66ff22) are also supported.
For transparent RGB colors, any 8-digit hexadecimal code can be used, e.g. [color=#88ffffff]translucent white[/color].
In this case, note that the alpha channel is the first component of the color code, not the last one.
Short RGBA color codes such as #86f2 (equivalent to #8866ff22) are also supported.
Umgang mit [url]-Tag-Klicks
By default, [url] tags do nothing when clicked. This is to allow flexible use
of [url] tags rather than limiting them to opening URLs in a web browser.
To handle clicked [url] tags, connect the RichTextLabel node's
meta_clicked signal to a script function.
For example, the following method can be connected to meta_clicked to open
clicked URLs using the user's default web browser:
# This assumes RichTextLabel's `meta_clicked` signal was connected to
# the function below using the signal connection dialog.
func _richtextlabel_on_meta_clicked(meta):
    # `meta` is not guaranteed to be a String, so convert it to a String
    # to avoid script errors at run-time.
    OS.shell_open(str(meta))
For more advanced use cases, it's also possible to store JSON in an [url]
tag's option and parse it in the function that handles the meta_clicked signal.
For example: [url={"example": "value"}]JSON[/url]
Vertikaler Bildversatz (Offset)
Verwenden Sie eine benutzerdefinierte Schriftart für Ihr Bild, um es vertikal auszurichten.
Erstellen einer
BitmapFontRessourceSet this bitmap font with a positive value for the
ascentproperty, that's your height offsetSetzen Sie den BBCode-Tag wie folgt:
[font=<font-path>][img]{image-path}[/img][/font]
Animationseffekte
BBCode can also be used to create different text animation effects. Five customizable effects are provided out of the box, and you can easily create your own.
Wellen

Wave makes the text go up and down. Its tag format is [wave amp=50 freq=2][/wave].
amp controls how high and low the effect goes, and freq controls how fast the
text goes up and down.
Tornado
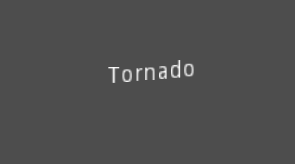
Tornao makes the text move around in a circle. Its tag format is
[tornado radius=5 freq=2][/tornado].
radius is the radius of the circle that controls the offset, freq is how
fast the text moves in a circle.
Schütteln
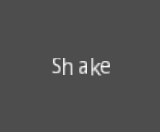
Shake makes the text shake. Its tag format is [shake rate=5 level=10][/shake].
rate controls how fast the text shakes, level controls how far the text is
offset from the origin.
Ein- und Aus-Blenden
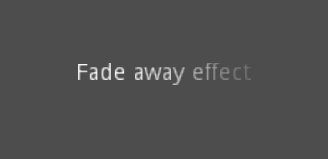
Fade creates a fade effect over the text that is not animated. Its tag format is
[fade start=4 length=14][/fade].
start controls the starting position of the falloff relative to where the fade
command is inserted, length controls over how many characters should the fade
out take place.
Regenbogen
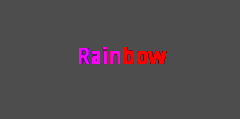
Rainbow gives the text a rainbow color that changes over time. Its tag format is
[rainbow freq=0.2 sat=10 val=20][/rainbow].
freq is the number of full rainbow cycles per second, sat is the saturation
of the rainbow, val is the value of the rainbow.