Ragdoll System (Gliederpuppe)
Einführung
Seit Version 3.1 unterstützt Godot die Ragdoll-Physik. Ragdolls verlassen sich auf Physiksimulationen, um realistische prozedurale Animationen zu erstellen. Sie werden in vielen Spielen für Todesanimationen verwendet.
In dieser Anleitung verwenden wir die Platformer3D-Demo, um eine Ragdoll einzurichten.
Bemerkung
Sie können die Platformer3D-Demo auf GitHub oder über die Bestandsbibliothek herunterladen.
Ragdoll einrichten
Rig erstellen
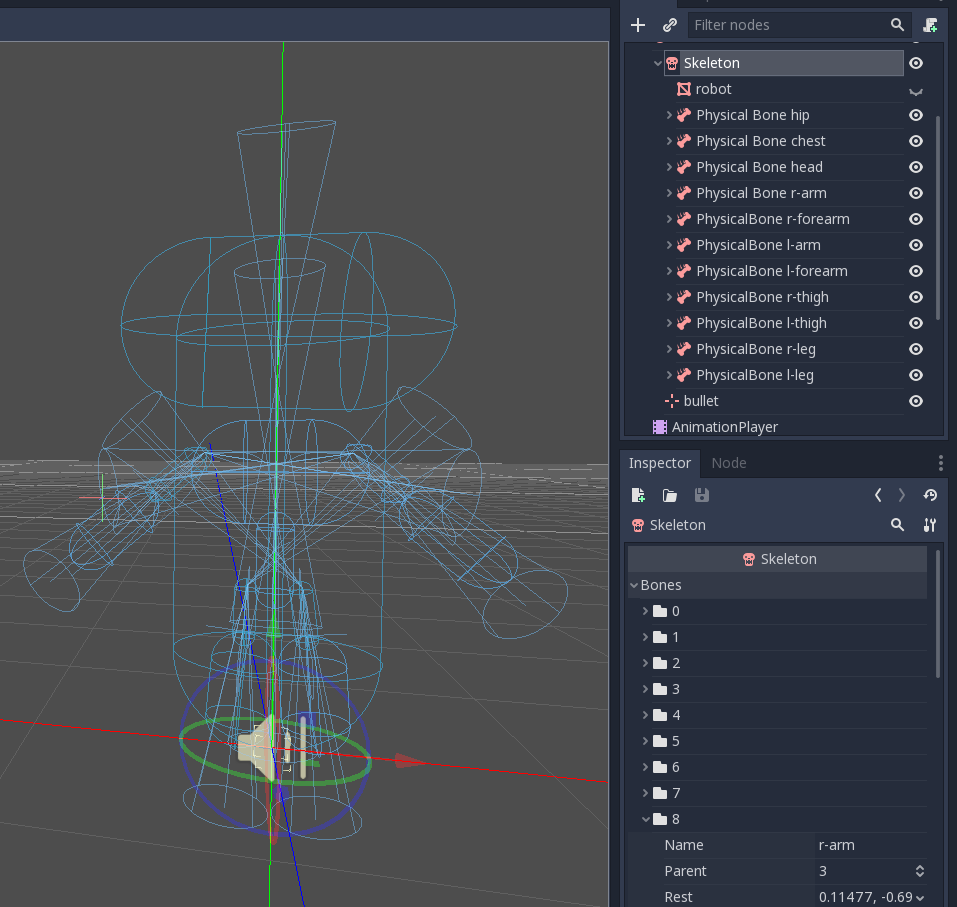
Like many other features in the engine, there is a node to set up a ragdoll: the PhysicalBone node. To simplify the setup, you can generate PhysicalBone nodes with the "Create physical skeleton" feature in the skeleton node.
Open the platformer demo in Godot, and then the Robi scene. Select the Skeleton node. A skeleton button appears on the top bar menu:
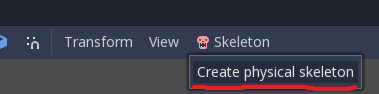
Click it and select the Create physical skeleton option. Godot will generate PhysicalBone nodes and collision shapes for each bone in the skeleton and pin joints to connect them together:
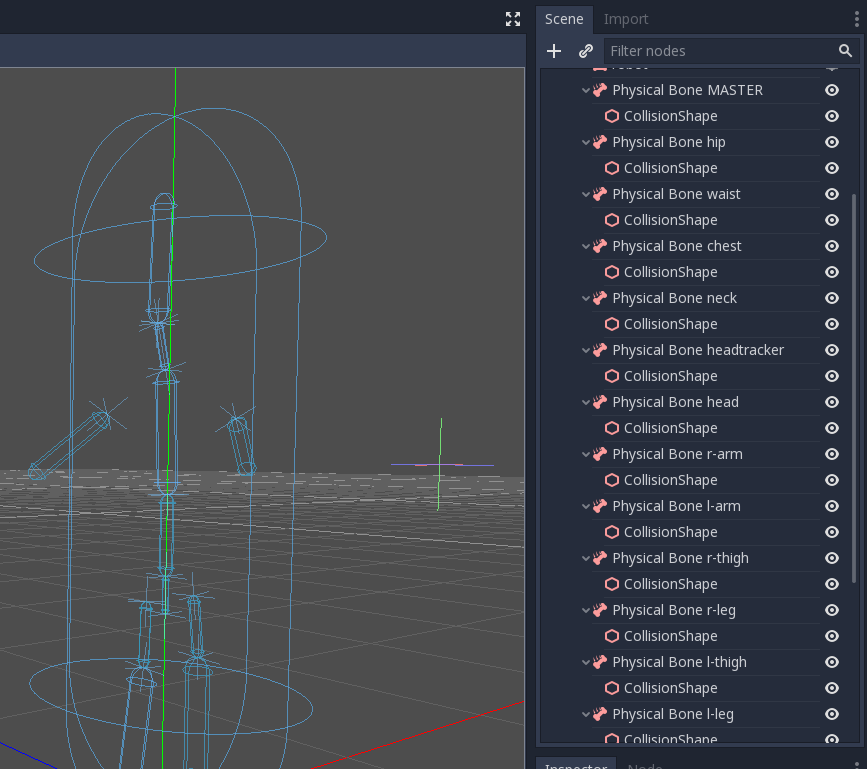
Some of the generated bones aren't necessary: the MASTER bone for example. So we're going to clean up the skeleton by removing them.
Rig optimieren
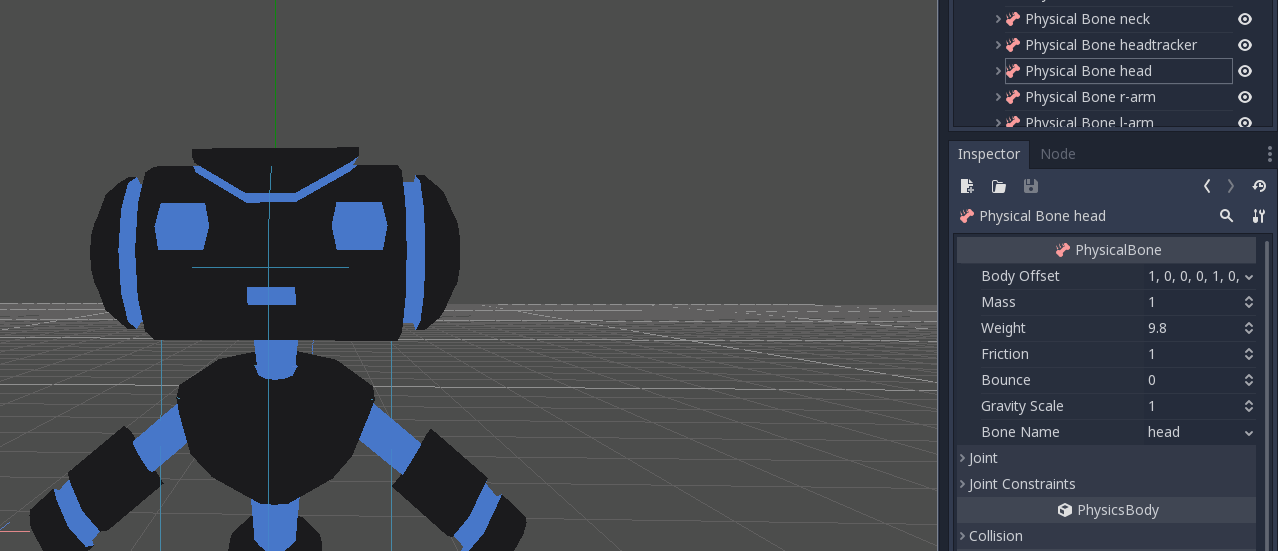
Each PhysicalBone the engine needs to simulate has a performance cost, so you want to remove every bone that is too small to make a difference in the simulation, as well as all utility bones.
For example, if we take a humanoid, you do not want to have physical bones for each finger. You can use a single bone for the entire hand instead, or one for the palm, one for the thumb, and a last one for the other four fingers.
Remove these physical bones: MASTER, waist, neck, headtracker. This gives us an optimized skeleton and makes it easier to control the ragdoll.
Anpassen der Kollisionsform (Collision Shape)
The next task is adjusting the collision shape and the size of physical bones to match the part of the body that each bone should simulate.
Gelenkeinstellung
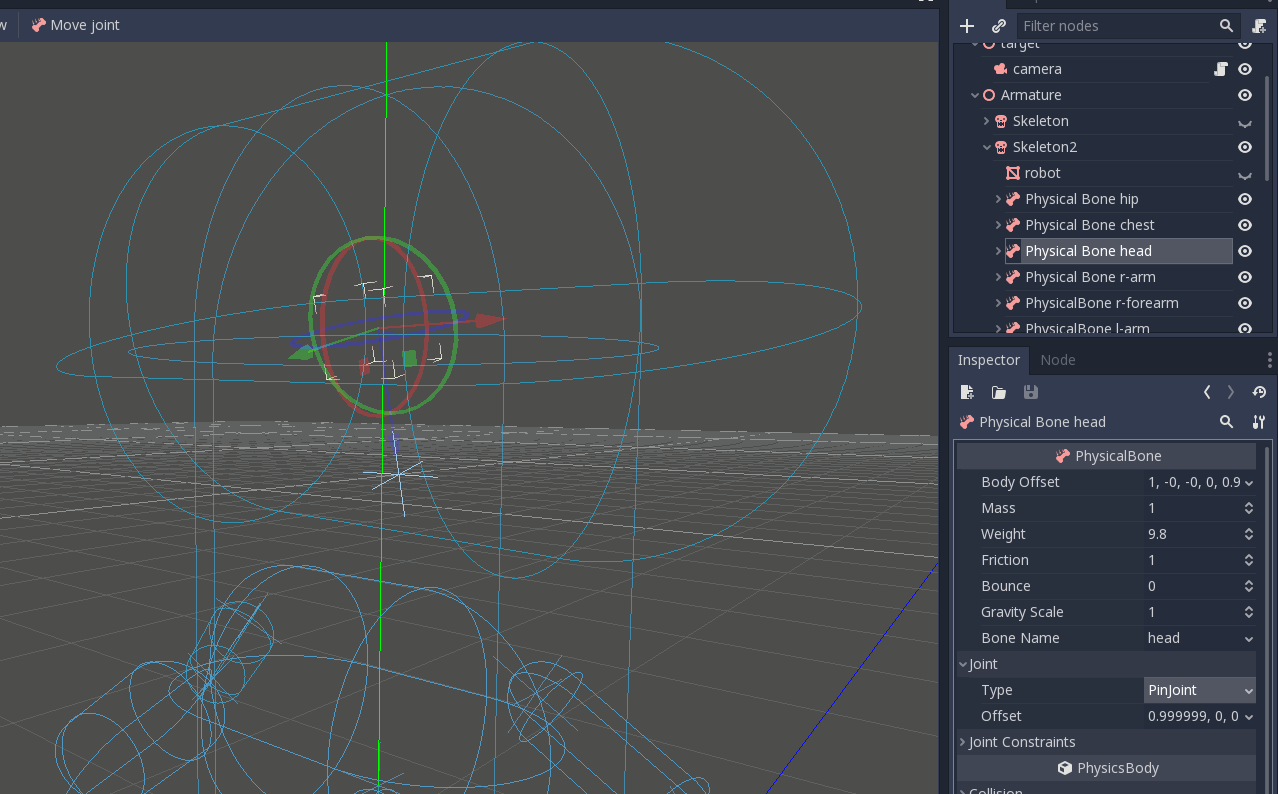
Once you adjusted the collision shapes, your ragdoll is almost ready. You just want to adjust the pin joints to get a better simulation. PhysicalBone nodes have an unconstrained pin joint assigned to them by default. To change the pin joint, select the PhysicalBone and change the constraint type in the Joint section. There, you can change the constraint's orientation and its limits.
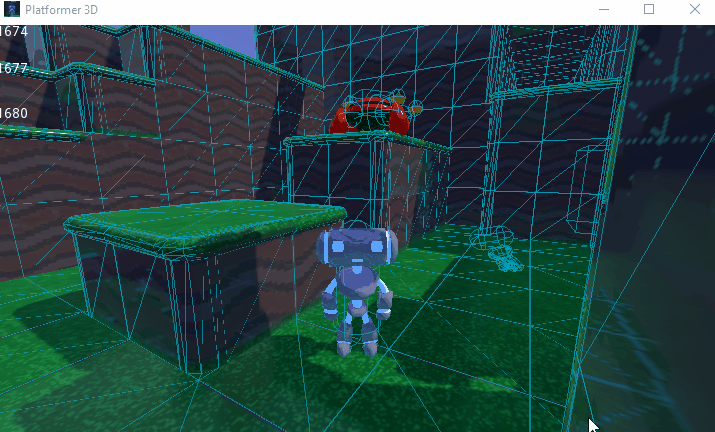
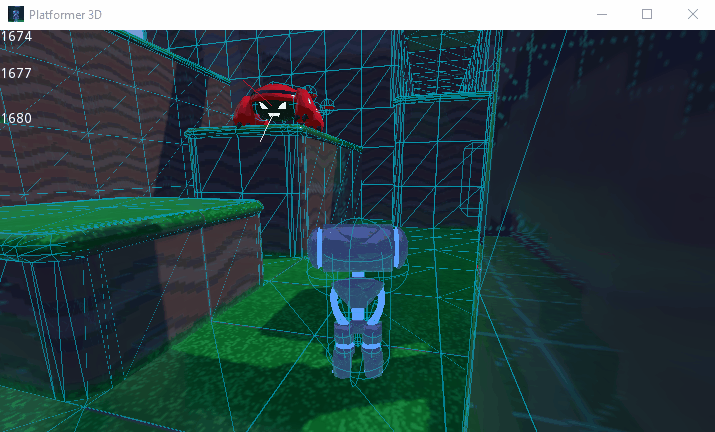
Dies ist das Endergebnis:
Simulation der Ragdoll
Die Ragdoll ist jetzt einsatzbereit. Um die Simulation zu starten und die Ragdoll-Animation abzuspielen, müssen Sie die Methode physical_bones_start_simulation aufrufen. Hängen Sie ein Skript an den Skelett-Node an und rufen Sie diese Methode in der _ready Methode auf:
func _ready():
    physical_bones_start_simulation()
Um die Simulation zu stoppen, rufen Sie die Methode physical_bones_stop_simulation() auf.
You can also limit the simulation to only a few bones. To do so, pass the bone names as a parameter. Here's an example of partial ragdoll simulation:
Kollisionsebene und Maske
Stellen Sie sicher, dass Ihre Kollisionsebenen und Masken ordnungsgemäß eingerichtet sind, damit die Kapsel des KinematicBody der Physiksimulation nicht im Wege steht:

Für weitere Informationen, siehe Kollisionsebenen und -masken.