Entwickeln für Oculus Quest
Einführung
This tutorial goes over how to get started developing for the Meta Quest with the Godot Oculus Mobile plugin.
Bevor Sie beginnen, gibt es zwei Dinge, die Sie tun müssen:
First you need to go through the steps on the Exportiere für Android page. This leads you through installing the toolset that Godot needs to export to Android devices.
Next you need the Quest plugin. You can get it from the Asset Library or manually download it from here.
Godot einrichten
Zum Start öffnen Sie Godot und erstellen Sie ein neues Projekt.
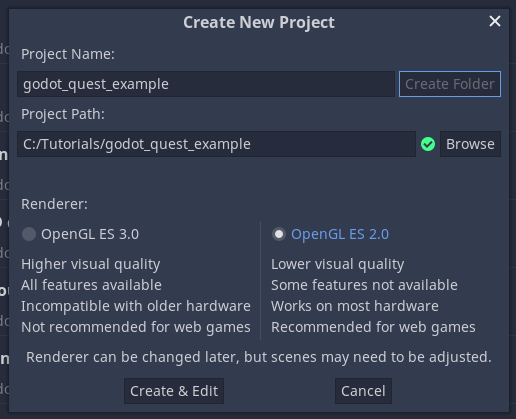
Make sure to choose the GLES2 renderer. Due to the
Quest's GPU this backend is far better suited for the Quest.
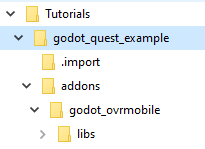
Copy the addons folder from the Oculus Mobile asset into your Godot project. Your project tree should look similar to this:
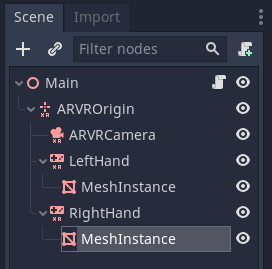
Jetzt können Sie mit dem Aufbau der Hauptszene beginnen:
Fügen Sie zuerst einen ARVROrigin-Node hinzu.
Then add three child nodes to the origin node, one ARVRCamera and two ARVRController nodes.
Weisen Sie dem ersten ARVRController die Controller-ID 1 zu und benennen Sie diese in
LeftHandum.Weisen Sie dem zweiten ARVRController die Controller-ID 2 zu und benennen Sie diese in
RightHandum.Finally add a MeshInstance as a child node to our first ARVRController and create a box shape, resize the box so each side is set to 0.1. Now duplicate the MeshInstance and move it to the second ARVRController node. These will stand in for our controllers.
Fügen Sie nun dem Haupt-Node ein Skript mit folgendem Code hinzu:
extends Spatial


var perform_runtime_config = false


onready var ovr_init_config = preload("res://addons/godot_ovrmobile/OvrInitConfig.gdns").new()
onready var ovr_performance = preload("res://addons/godot_ovrmobile/OvrPerformance.gdns").new()


func _ready():
    var interface = ARVRServer.find_interface("OVRMobile")
    if interface:
        ovr_init_config.set_render_target_size_multiplier(1)

        if interface.initialize():
            get_viewport().arvr = true


func _process(_delta):
    if not perform_runtime_config:
        ovr_performance.set_clock_levels(1, 1)
        ovr_performance.set_extra_latency_mode(1)
        perform_runtime_config = true
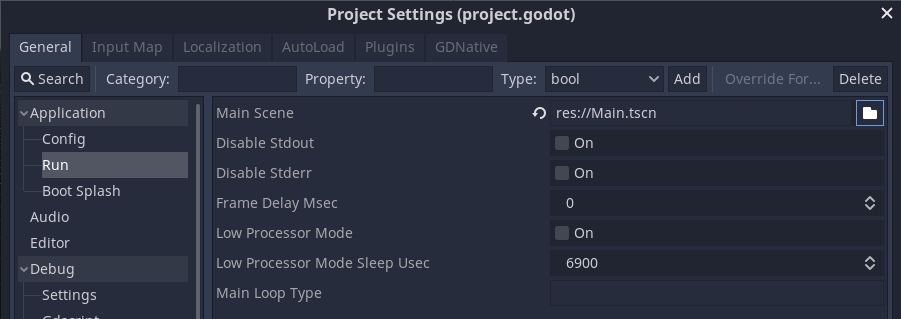
Bevor Sie dieses Projekt in die Quest exportieren können, müssen Sie drei weitere Schritte ausführen.
Gehen Sie zuerst in die Projekteinstellungen und stellen Sie sicher, dass die Hauptszene die Szene ist, die wir ausführen. Godot fordert Sie beim Export nicht auf dies festzulegen.
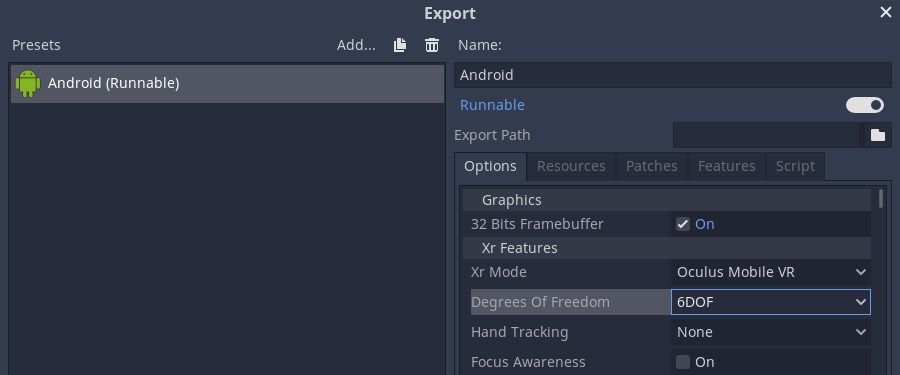
Then go into the export menu and configure a new Android export. If you still haven't gone through the Exportiere für Android page do it now. If you didn't you'll have some red messages on this screen.
If you did you can forge ahead and make a few small changes to the
export settings. First change the XR Mode to Oculus Mobile VR.
Then change the Degrees of Freedom mode to 6DOF.
Speichern und schließen Sie nun das Exportfenster.
Den Quest einrichten
Follow these instructions to setup your device for development.
Once your device is set up and connected, click the Android logo that should be visible in the top-right corner of the Godot editor. When clicked, it exports your project and runs it on the connected device. If you do not see this Android logo, make sure you have create an Android export preset and that the preset is marked as Runnable in the Export dialog.
Das oben Genannte ist das Mindeste um Ihr Projekt auf dem Quest zum Laufen zu bringen. Es ist nicht sehr aufregend. Holger Dammertz hat ein großartiges Toolkit für den Quest erstellt, das viele Szenen enthält, um Ihnen auf Ihrem Weg zu helfen, einschließlich wirklich netter Controller-Meshes.
Sie finden das Toolkit hier.
Wenn Sie bei der Verbesserung des Plugins helfen möchten, treten Sie uns bitte hier bei.