Exporting
Overview
Now that you have a working game, you probably want to share your success with others. However, it's not practical to ask your friends to download Godot just so they can open your project. Instead, you can export your project, converting it into a "package" that can be run by anyone.
The way you export your game depends on what platform you are targeting. In this tutorial, you'll learn how to export the Dodge the Creeps game for a variety of platforms. First, however, we need to make some changes to the way the game works.
Note
If you haven't made Dodge the Creeps yourself yet, please read Your first game before continuing with this tutorial.
Preparing the project
In Dodge the Creeps, we used keyboard controls to move the player's character. This is fine if your game is being played on a PC platform, but on a phone or tablet, you need to support touchscreen input. Because a click event can be treated the same as a touch event, we'll convert the game to a click-and-move input style.
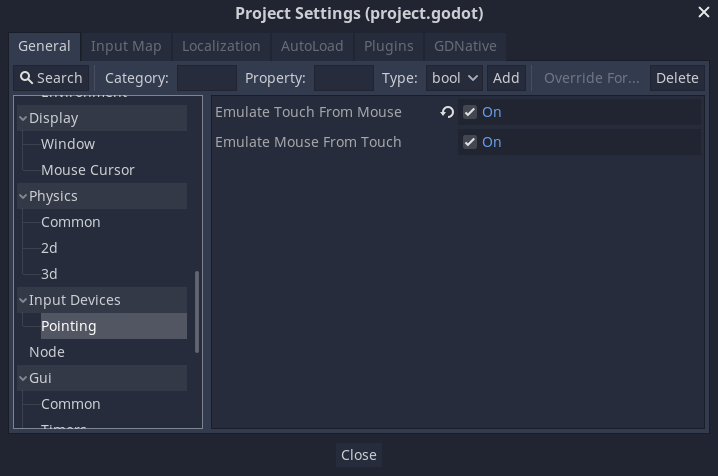
By default, Godot emulates mouse input from touch input. That means that if anything is coded to happen on a mouse event, touch will trigger it as well. Godot can also emulate touch input from mouse clicks, which we will need to be able to keep playing our game on our computer after we switch to touch input.
In Project > Project Settings, under Input Devices > Pointing, enable Emulate Touch From Mouse.
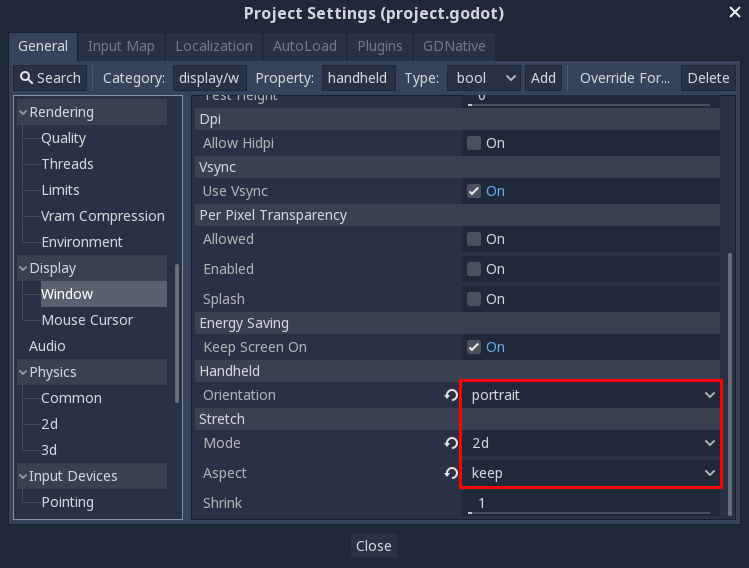
We also want to ensure that the game scales consistently on different-sized screens,
so in the project settings go to Display, then click on Window. In the Stretch
options, set Mode to 2d and Aspect to keep.
Since we are already in the Window settings, we should also set under Handheld
the Orientation to portrait.
Next, we need to modify the Player.gd script to change the input method.
We'll remove the key inputs and make the player move towards a "target" that's
set by the touch (or click) event.
Here is the full script for the player, with comments noting what we've changed:
extends Area2D

signal hit

export var speed = 400
var screen_size
# Add this variable to hold the clicked position.
var target = Vector2()

func _ready():
    hide()
    screen_size = get_viewport_rect().size

func start(pos):
    position = pos
    # Initial target is the start position.
    target = pos
    show()
    $CollisionShape2D.disabled = false

# Change the target whenever a touch event happens.
func _input(event):
    if event is InputEventScreenTouch and event.pressed:
        target = event.position

func _process(delta):
    var velocity = Vector2()
    # Move towards the target and stop when close.
    if position.distance_to(target) > 10:
        velocity = target - position

# Remove keyboard controls.
#    if Input.is_action_pressed("ui_right"):
#       velocity.x += 1
#    if Input.is_action_pressed("ui_left"):
#        velocity.x -= 1
#    if Input.is_action_pressed("ui_down"):
#        velocity.y += 1
#    if Input.is_action_pressed("ui_up"):
#        velocity.y -= 1

    if velocity.length() > 0:
        velocity = velocity.normalized() * speed
        $AnimatedSprite.play()
    else:
        $AnimatedSprite.stop()

    position += velocity * delta
    # We still need to clamp the player's position here because on devices that don't
    # match your game's aspect ratio, Godot will try to maintain it as much as possible
    # by creating black borders, if necessary.
    # Without clamp(), the player would be able to move under those borders.
    position.x = clamp(position.x, 0, screen_size.x)
    position.y = clamp(position.y, 0, screen_size.y)

    if velocity.x != 0:
        $AnimatedSprite.animation = "walk"
        $AnimatedSprite.flip_v = false
        $AnimatedSprite.flip_h = velocity.x < 0
    elif velocity.y != 0:
        $AnimatedSprite.animation = "up"
        $AnimatedSprite.flip_v = velocity.y > 0

func _on_Player_body_entered( body ):
    hide()
    emit_signal("hit")
    $CollisionShape2D.set_deferred("disabled", true)
using Godot;
using System;

public class Player : Area2D
{
    [Signal]
    public delegate void Hit();

    [Export]
    public int Speed = 400;

    private Vector2 _screenSize;
    // Add this variable to hold the clicked position.
    private Vector2 _target;

    public override void _Ready()
    {
        Hide();
        _screenSize = GetViewport().Size;
    }

    public void Start(Vector2 pos)
    {
        Position = pos;
        // Initial target us the start position.
        _target = pos;
        Show();
        GetNode<CollisionShape2D>("CollisionShape2D").Disabled = false;
    }

    // Change the target whenever a touch event happens.
    public override void _Input(InputEvent @event)
    {
        if (@event is InputEventScreenTouch eventMouseButton && eventMouseButton.Pressed)
        {
            _target = (@event as InputEventScreenTouch).Position;
        }
    }

    public override void _Process(float delta)
    {
        var velocity = new Vector2();
        // Move towards the target and stop when close.
        if (Position.DistanceTo(_target) > 10)
        {
            velocity = _target - Position;
        }

        // Remove keyboard controls.
        //if (Input.IsActionPressed("ui_right"))
        //{
        //    velocity.x += 1;
        //}

        //if (Input.IsActionPressed("ui_left"))
        //{
        //    velocity.x -= 1;
        //}

        //if (Input.IsActionPressed("ui_down"))
        //{
        //    velocity.y += 1;
        //}

        //if (Input.IsActionPressed("ui_up"))
        //{
        //    velocity.y -= 1;
        //}

        var animatedSprite = GetNode<AnimatedSprite>("AnimatedSprite");

        if (velocity.Length() > 0)
        {
            velocity = velocity.Normalized() * Speed;
            animatedSprite.Play();
        }
        else
        {
            animatedSprite.Stop();
        }

        Position += velocity * delta;
        // We still need to clamp the player's position here because on devices that don't
        // match your game's aspect ratio, Godot will try to maintain it as much as possible
        // by creating black borders, if necessary.
        // Without clamp(), the player would be able to move under those borders.
        Position = new Vector2(
            x: Mathf.Clamp(Position.x, 0, _screenSize.x),
            y: Mathf.Clamp(Position.y, 0, _screenSize.y)
        );

        if (velocity.x != 0)
        {
            animatedSprite.Animation = "walk";
            animatedSprite.FlipV = false;
            animatedSprite.FlipH = velocity.x < 0;
        }
        else if(velocity.y != 0)
        {
            animatedSprite.Animation = "up";
            animatedSprite.FlipV = velocity.y > 0;
        }
    }
    public void OnPlayerBodyEntered(PhysicsBody2D body)
    {
        Hide(); // Player disappears after being hit.
        EmitSignal("Hit");
        GetNode<CollisionShape2D>("CollisionShape2D").SetDeferred("disabled", true);
    }
}
Setting a main scene
The main scene is the one that your game will start in. For this
Dodge the Creeps example, in
Project -> Project Settings -> Application -> Run, set Main Scene
to Main.tscn by clicking the folder icon and selecting it.
Export templates
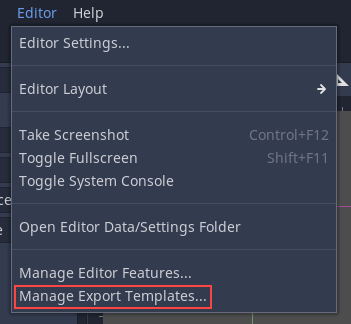
To export the project, you need to download the export templates from the http://godotengine.org/download. These templates are optimized versions of the engine without the editor pre-compiled for each platform. You can also download them in Godot by clicking on Editor -> Manage Export Templates:
Note
If you've downloaded Godot from Steam, export templates are already included. Therefore, you don't need to download them using the Manage Export Templates dialog.
In the window that appears, you can click Download to get the template version that matches your version of Godot.
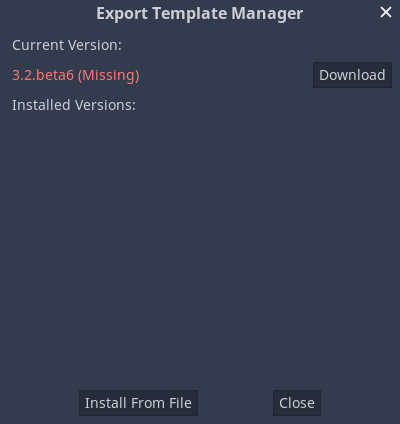
Note
Export templates are bound to a specific Godot version. If you upgrade Godot, you must download templates that match the new version.
Export presets
Next, you can configure the export settings by clicking on Project -> Export.
Create a new export preset by clicking Add... and selecting a platform. You can make as many presets as you like with different settings.
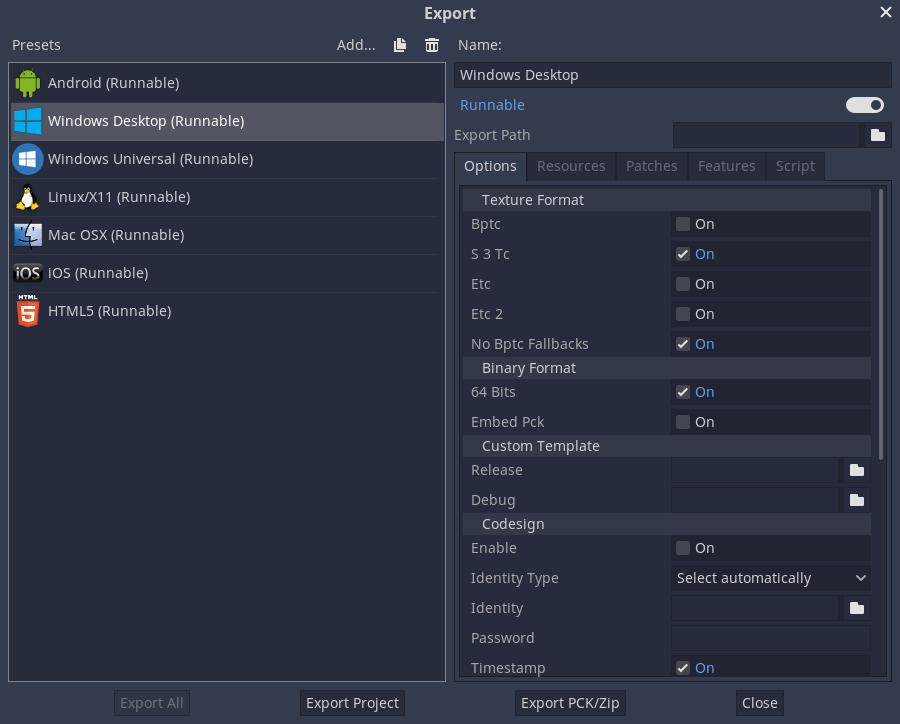
At the bottom of the window are two buttons. Export PCK/ZIP only creates a packed version of your project's data. This doesn't include an executable so the project can't be run on its own.
The second button, Export Project, creates a complete executable version
of your game, such as an .apk for Android or an .exe for Windows.
In the Resources and Features tabs, you can customize how the game is exported for each platform. We can leave those settings alone for now.
Exporting by platform
In this section, we'll walk through the process for each platform, including any additional software or requirements you'll need.
PC (Linux/macOS/Windows)
Exporting PC platforms works the same across the three supported operating systems. Open the export window and click Add... to create the preset(s) you want to make. Then click Export Project and choose a name and destination folder. Choose a location outside of your project folder.
Click Save and the engine will build the export files.
Note
When exporting for macOS, if you export from a macOS computer, you'll end up
with a .dmg file, while using Linux or Windows produces a .zip. In
either case, the compressed file contains a macOS .app that you can
double-click and run.
Note
On Windows, if you want your exported executable to have a different icon than the default one, you need to change it manually. See Changing application icon for Windows.
Android
Tip
Mobile devices come with a wide variety of capabilities. In most cases, Godot's default settings will work, but mobile development is sometimes more art than science, and you may need to do some experimenting and searching for help in order to get everything working.
Before you can export your project for Android, you must download the following software:
Android SDK: https://developer.android.com/studio/
Open JDK (version 8 is required, more recent versions won't work): https://adoptopenjdk.net/index.html
When you run Android Studio for the first time, click on Configure -> SDK Manager
and install Android SDK Platform Tools. This installs the adb
command-line tool that Godot uses to communicate with your device.
Next, create a debug keystore by running the following command on your system's command line:
keytool -keyalg RSA -genkeypair -alias androiddebugkey -keypass android -keystore debug.keystore -storepass android -dname "CN=Android Debug,O=Android,C=US" -validity 9999
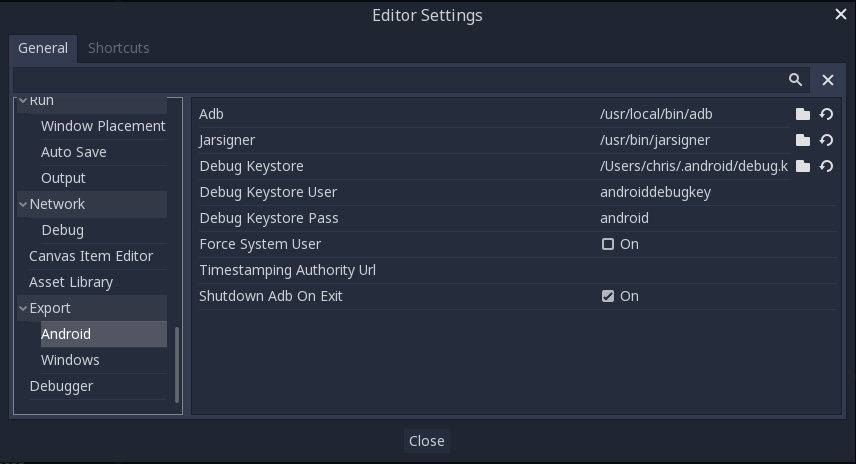
Click on Editor -> Editor Settings in Godot and select the Export/Android section. Here, you need to set the paths to the Android SDK applications on your system and the location of the keystore you just created.
Now you're ready to export. Click on Project -> Export and add a preset for Android (see above). Select the newly added Android preset. Under Options, go to Screen and set Orientation to Portrait. If your game is in landscape mode (i.e. the window width in pixels is greater than the window height), leave this on Landscape.
Click the Export Project button and Godot will build an APK you can download on your device. To do this on the command line, use the following:
adb install dodge.apk
Note
Your device may need to be in developer mode. Consult your device's documentation for details.
If your system supports it, connecting a compatible Android device will cause a One-click Deploy button to appear in Godot's playtest button area:

Clicking this button builds the APK and copies it onto your device in one step.
iOS
Note
To build your game for iOS, you must have a computer running macOS with Xcode installed.
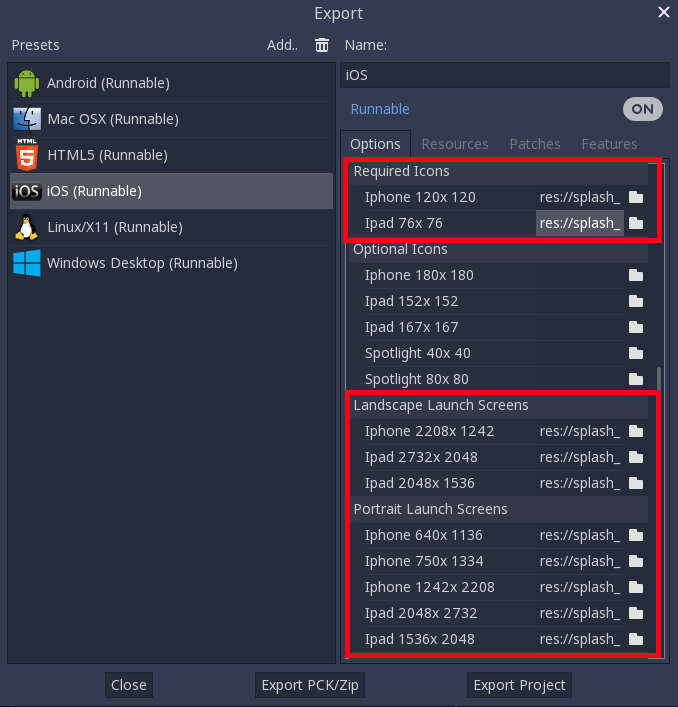
Before exporting, there are some settings that you must complete for the project to export successfully. First, the App Store Team Id, which you can find by logging in to your Apple developer account and looking in the Membership section.
You must also provide icons and splash screen images as shown below:
Click Export Project and select a destination folder.
Once you have successfully exported the project, you'll find the following folders and files have been created in your selected location:
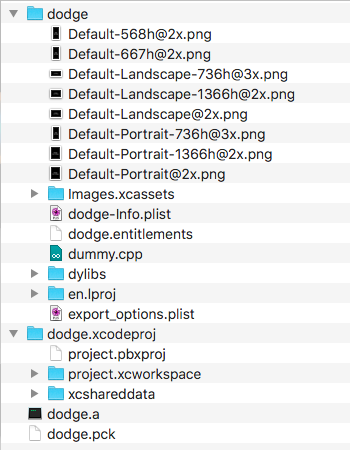
You can now open the project in Xcode and build the project for iOS. The Xcode build procedure is beyond the scope of this tutorial. See https://help.apple.com/xcode/mac/current/#/devc8c2a6be1 for more information.
HTML5 (web)
Click Export Project on the HTML5 preset. We don't need to change any of the default settings.
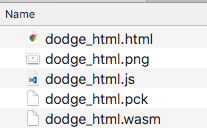
When the export is complete, you'll have a folder containing the following files:
Viewing the .html file in your browser lets you play the game. However, you
can't open the file directly. Instead, it needs to be served by a web server. If
you don't have one set up on your computer, you can search online to find
suggestions for your specific OS.
Point your browser at the URL where you've placed the HTML file. You may have to wait a few moments while the game loads before you see the start screen.
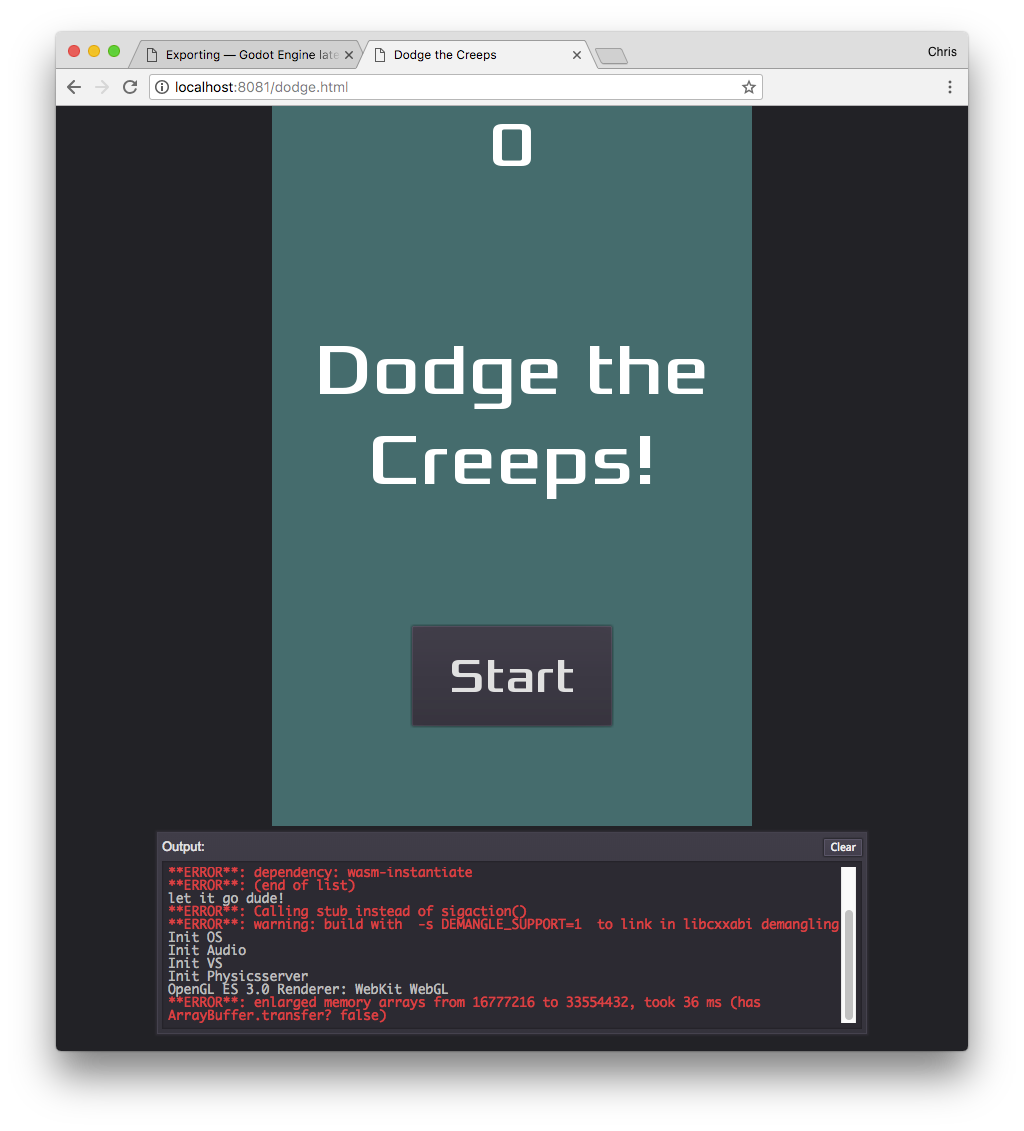
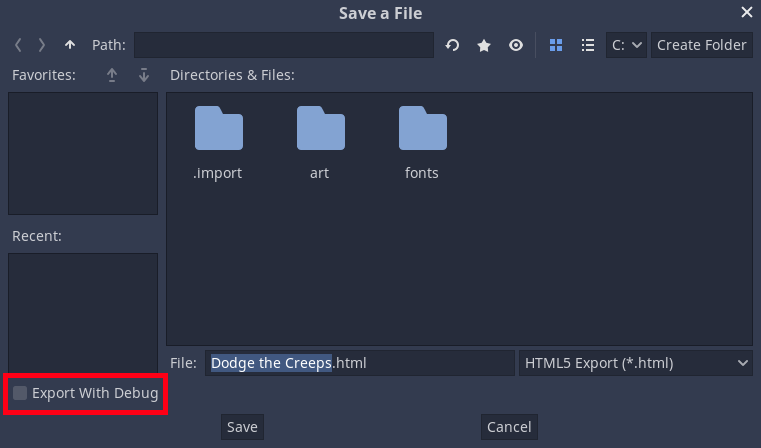
The console window beneath the game tells you if anything goes wrong. You can disable it by disabling Export With Debug in the final file dialog that appears when you export the project.
Note
While WebAssembly is supported in all major browsers, it is still an emerging technology and you may find some things that don't work. Make sure you have updated your browser to the most recent version, and report any bugs you find on the Godot GitHub repository.