Part 3
Part overview
In this part, we will be limiting the player's weapons by giving them ammo. We will also be giving the player the ability to reload, and we will be adding sounds when the weapons fire.
Note
You are assumed to have finished Part 2 before moving on to this part of the tutorial. The finished project from Part 2 will be the starting project for part 3
Let's get started!
Changing levels
Now that we have a fully working FPS, let's move to a more FPS-like level.
Open up Space_Level.tscn (assets/Space_Level_Objects/Space_Level.tscn)
and/or Ruins_Level.tscn (assets/Ruin_Level_Objects/Ruins_Level.tscn).
Space_Level.tscn and Ruins_Level.tscn are complete custom FPS levels
created for the purpose of this tutorial. Press Play Current Scene button,
or F6 on keyboard, and give each a try.
Warning
Space_Level.tscn is more graphically demanding of the GPU than Ruins_Level.tscn. If your computer is struggling to render
Space_Level.tscn, try using Ruins_Level.tscn instead.
Note
Due to Godot updates since this tutorial was published, if you are using Godot 3.2 or later, you may need to apply the following changes to the Space Level and Ruins Level scenes:
Open
res://assets/Space_Level_Objects/Space_Level.tscn.In the Scene tree dock, select the Floor_and_Celing node. In the Inspector dock, if the Mesh Library field under GridMap is
[empty], set it toSpace_Level_Mesh_Lib.tresby dragging the fileres://assets/Space_Level_Objects/Space_Level_Mesh_Lib.tresfrom the FileSystem dock to that field.Do the same for the Walls node.
Open
res://assets/Ruin_Level_Objects/Ruins_Level.tscn.In the Scene tree dock, select the Floor node. In the Inspector dock, if the Mesh Library field under GridMap is
[empty], set it toRuin_Level_Mesh_Lib.tresby dragging the fileres://assets/Ruin_Level_Objects/Ruin_Level_Mesh_Lib.tresfrom the FileSystem dock into that field.Do the same for the Walls node.
You might have noticed there are several RigidBody nodes placed throughout the level.
We can place RigidBody_hit_test.gd on them and then they will react to being hit with bullets, so let's do that!
Follow the instructions below for either (or both) of the scenes you want to use
Expand "Other_Objects" and then expand "Physics_Objects".

Expand one of the "Barrel_Group" nodes and then select "Barrel_Rigid_Body" and open it using
the "Open in Editor" button.
This will bring you to the "Barrel_Rigid_Body" scene. From there, select the root node and
scroll the inspector down to the bottom.
Select the drop down arrow under the "Node" tab, and then select "Load". Navigate to
"RigidBody_hit_test.gd" and select "Open".

Return back to "Space_Level.tscn".

Expand one of the "Box_Group" nodes and then select "Crate_Rigid_Body" and open it using the
"Open in Editor" button.
This will bring you to the "Crate_Rigid_Body" scene. From there, select the root node and
scroll the inspector down to the bottom.
Select the drop down arrow under the "Node" tab, and then select "Load". Navigate to
"RigidBody_hit_test.gd" and select "Open".

Return to "Space_Level.tscn".
Expand "Misc_Objects" and then expand "Physics_Objects".

Select all the "Stone_Cube" RigidBodies and then in the inspector scroll down to the bottom.
Select the drop down arrow under the "Node" tab, and then select "Load". Navigate to
"RigidBody_hit_test.gd" and select "Open".

Return to "Ruins_Level.tscn".
Now you can fire at all the rigid bodies in either level and they will react to bullets hitting them!
Adding ammo
Now that the player has working guns, let's give them a limited amount of ammo.
Firstly, we need to define a few variables in each of our weapon scripts.
Open up Weapon_Pistol.gd and add the following class variables:
var ammo_in_weapon = 10
var spare_ammo = 20
const AMMO_IN_MAG = 10
ammo_in_weapon: The amount of ammo currently in the pistolspare_ammo: The amount of ammo we have left in reserve for the pistolAMMO_IN_MAG: The amount of ammo in a fully reloaded weapon/magazine
Now all we need to do is add a single line of code to fire_weapon.
Add the following right under Clone.BULLET_DAMAGE = DAMAGE: ammo_in_weapon -= 1
This will remove one from ammo_in_weapon every time the player fires. Notice we're not checking to see
if the player has enough ammo or not in fire_weapon. Instead, we're going to check to see if the player has enough ammo in Player.gd.
Now we need to add ammo for both the rifle and the knife.
Note
You may be wondering why we are adding ammo for the knife given it does not consume any ammunition. The reason we want to add ammo to the knife is so we have a consistent interface for all our weapons.
If we did not add ammo variables for the knife, we would have to add checks for the knife. By adding the ammo variables to the knife, we don't need to worry about whether or not all our weapons have the same variables.
Add the following class variables to Weapon_Rifle.gd:
var ammo_in_weapon = 50
var spare_ammo = 100
const AMMO_IN_MAG = 50
And then add the following to fire_weapon: ammo_in_weapon -= 1. Make sure that ammo_in_weapon -= 1 is outside of the if ray.is_colliding() check so
the player loses ammo regardless of whether the player hit something or not.
Now all that's left is the knife. Add the following to Weapon_Knife.gd:
var ammo_in_weapon = 1
var spare_ammo = 1
const AMMO_IN_MAG = 1
Because the knife does not consume ammo, that is all we need to add.
Now we need to change one thing in Player.gd, that is to say,
how we're firing the weapons in process_input. Change the code for firing weapons to the following:
# ----------------------------------
# Firing the weapons
if Input.is_action_pressed("fire"):
    if changing_weapon == false:
        var current_weapon = weapons[current_weapon_name]
        if current_weapon != null:
            if current_weapon.ammo_in_weapon > 0:
                if animation_manager.current_state == current_weapon.IDLE_ANIM_NAME:
                    animation_manager.set_animation(current_weapon.FIRE_ANIM_NAME)
# ----------------------------------
Now the weapons have a limited amount of ammo, and will stop firing when the player runs out.
Ideally, we'd like to let the player be able to see how much ammo is left. Let's make a new function called process_UI.
First, add process_UI(delta) to _physics_process.
Now add the following to Player.gd:
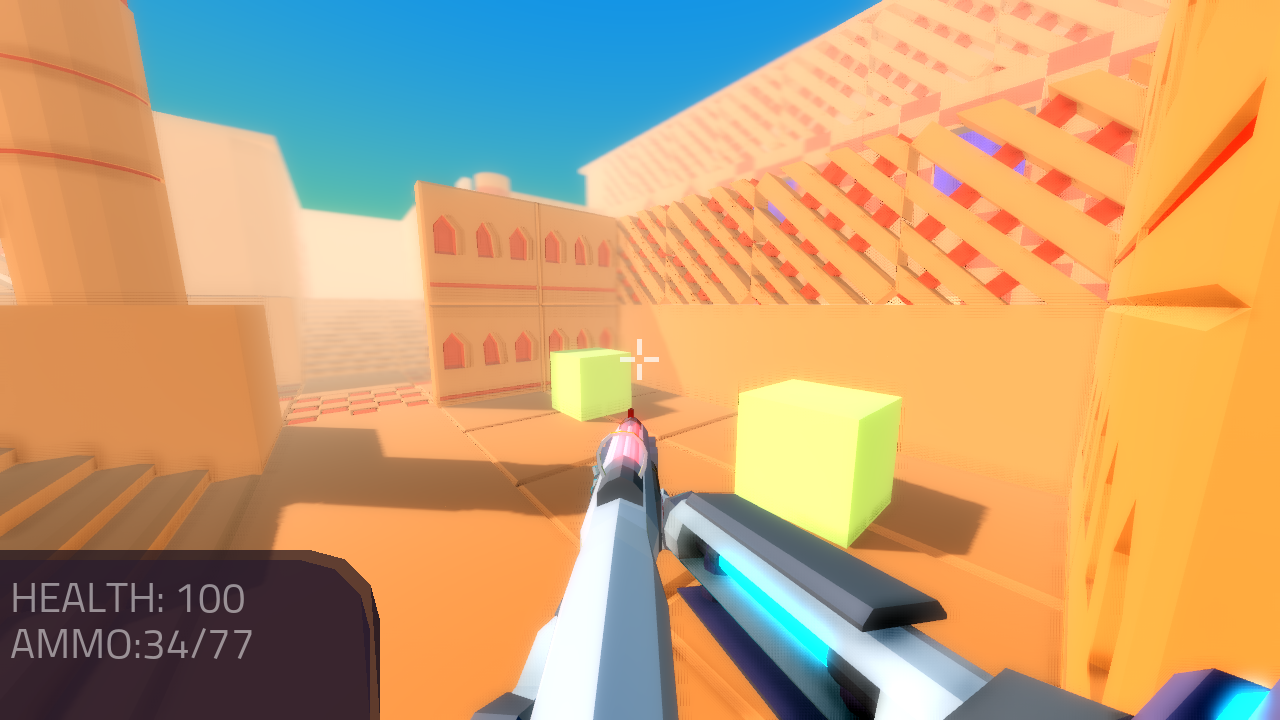
func process_UI(delta):
    if current_weapon_name == "UNARMED" or current_weapon_name == "KNIFE":
        UI_status_label.text = "HEALTH: " + str(health)
    else:
        var current_weapon = weapons[current_weapon_name]
        UI_status_label.text = "HEALTH: " + str(health) + \
                "\nAMMO: " + str(current_weapon.ammo_in_weapon) + "/" + str(current_weapon.spare_ammo)
Let's go over what's happening:
Firstly, we check to see if the current weapon is either UNARMED or KNIFE. If it is, we
change the UI_status_label's text to only show the player's health since UNARMED and KNIFE do not consume ammo.
If the player is using a weapon that consumes ammo, we first get the weapon node.
Then we change UI_status_label's text to show the player's health, along with how much ammo the player has in the weapon
and how much spare ammo the player has for that weapon.
Now we can see how much ammo the player has through the HUD.
Adding reloading to the weapons
Now that the player can run out of ammo, we need a way to let the player fill them back up. Let's add reloading next!
For reloading, we need to add a few more variables and a function to every weapon.
Open up Weapon_Pistol.gd and add the following class variables:
const CAN_RELOAD = true
const CAN_REFILL = true

const RELOADING_ANIM_NAME = "Pistol_reload"
CAN_RELOAD: A boolean to track whether this weapon has the ability to reloadCAN_REFILL: A boolean to track whether we can refill this weapon's spare ammo. We will not be usingCAN_REFILLin this part, but we will in the next part!RELOADING_ANIM_NAME: The name of the reloading animation for this weapon.
Now we need to add a function for handling reloading. Add the following function to Weapon_Pistol.gd:
func reload_weapon():
    var can_reload = false

    if player_node.animation_manager.current_state == IDLE_ANIM_NAME:
        can_reload = true

    if spare_ammo <= 0 or ammo_in_weapon == AMMO_IN_MAG:
        can_reload = false

    if can_reload == true:
        var ammo_needed = AMMO_IN_MAG - ammo_in_weapon

        if spare_ammo >= ammo_needed:
            spare_ammo -= ammo_needed
            ammo_in_weapon = AMMO_IN_MAG
        else:
            ammo_in_weapon += spare_ammo
            spare_ammo = 0

        player_node.animation_manager.set_animation(RELOADING_ANIM_NAME)

        return true

    return false
Let's go over what's happening:
First we define a variable to see whether or not this weapon can reload.
Then we check to see if the player is in this weapon's idle animation state because we only want to be able to reload when the player is not firing, equipping, or unequipping.
Next we check to see if the player has spare ammo, and if the ammo already in the weapon is equal to a fully reloaded weapon. This way we can ensure the player cannot reload when the player has no ammo or when the weapon is already full of ammo.
If we can still reload, then we calculate the amount of ammo needed to reload the weapon.
If the player has enough ammo to fill the weapon, we remove the ammo needed from spare_ammo and then set ammo_in_weapon to a full weapon/magazine.
If the player does not have enough ammo, we add all the ammo left in spare_ammo, and then set spare_ammo to 0.
Next we play the reloading animation for this weapon, and then return true.
If the player could not reload, we return false.
Now we need to add reloading to the rifle. Open up Weapon_Rifle.gd and add the following class variables:
const CAN_RELOAD = true
const CAN_REFILL = true

const RELOADING_ANIM_NAME = "Rifle_reload"
These variables are exactly the same as the pistol, just with RELOADING_ANIM_NAME changed to the rifle's reloading animation.
Now we need to add reload_weapon to Weapon_Rifle.gd:
func reload_weapon():
    var can_reload = false

    if player_node.animation_manager.current_state == IDLE_ANIM_NAME:
        can_reload = true

    if spare_ammo <= 0 or ammo_in_weapon == AMMO_IN_MAG:
        can_reload = false

    if can_reload == true:
        var ammo_needed = AMMO_IN_MAG - ammo_in_weapon

        if spare_ammo >= ammo_needed:
            spare_ammo -= ammo_needed
            ammo_in_weapon = AMMO_IN_MAG
        else:
            ammo_in_weapon += spare_ammo
            spare_ammo = 0

        player_node.animation_manager.set_animation(RELOADING_ANIM_NAME)

        return true

    return false
This code is exactly the same as the one for the pistol.
The last bit we need to do for the weapons is add 'reloading' to the knife. Add the following class variables to Weapon_Knife.gd:
const CAN_RELOAD = false
const CAN_REFILL = false

const RELOADING_ANIM_NAME = ""
Since we both cannot reload or refill a knife, we set both constants to false. We also define RELOADING_ANIM_NAME as an empty string, since the knife
has no reloading animation.
Now we need to add reloading_weapon:
func reload_weapon():
    return false
Since we cannot reload a knife, we always return false.
Adding reloading to the player
Now we need to add a few things to Player.gd. First we need to define a new class variable:
var reloading_weapon = false
reloading_weapon: A variable to track whether or not the player is currently trying to reload.
Next we need to add another function call to _physics_process.
Add process_reloading(delta) to _physics_process. Now _physics_process should look something like this:
func _physics_process(delta):
    process_input(delta)
    process_movement(delta)
    process_changing_weapons(delta)
    process_reloading(delta)
    process_UI(delta)
Now we need to add process_reloading. Add the following function to Player.gd:
func process_reloading(delta):
    if reloading_weapon == true:
        var current_weapon = weapons[current_weapon_name]
        if current_weapon != null:
            current_weapon.reload_weapon()
        reloading_weapon = false
Let's go over what's happening here.
Firstly, we check to make sure the player is trying to reload.
If the player is trying to reload, we then get the current weapon. If the current weapon does not equal null, we call its reload_weapon function.
Note
If the current weapon is equal to null, then the current weapon is UNARMED.
Finally, we set reloading_weapon to false because, regardless of whether the player successfully reloaded, we've tried reloading
and no longer need to keep trying.
Before we can let the player reload, we need to change a few things in process_input.
The first thing we need to change is in the code for changing weapons. We need to add an additional check (if reloading_weapon == false:) to see if the player is reloading:
if changing_weapon == false:
    # New line of code here!
    if reloading_weapon == false:
        if WEAPON_NUMBER_TO_NAME[weapon_change_number] != current_weapon_name:
            changing_weapon_name = WEAPON_NUMBER_TO_NAME[weapon_change_number]
            changing_weapon = true
This makes it so the player cannot change weapons if the player is reloading.
Now we need to add the code to trigger a reload when the player pushes the reload action. Add the following code to process_input:
# ----------------------------------
# Reloading
if reloading_weapon == false:
    if changing_weapon == false:
        if Input.is_action_just_pressed("reload"):
            var current_weapon = weapons[current_weapon_name]
            if current_weapon != null:
                if current_weapon.CAN_RELOAD == true:
                    var current_anim_state = animation_manager.current_state
                    var is_reloading = false
                    for weapon in weapons:
                        var weapon_node = weapons[weapon]
                        if weapon_node != null:
                            if current_anim_state == weapon_node.RELOADING_ANIM_NAME:
                                is_reloading = true
                    if is_reloading == false:
                        reloading_weapon = true
# ----------------------------------
Let's go over what's happening here.
First we make sure the player is not reloading already, nor is the player trying to change weapons.
Then we check to see if the reload action has been pressed.
If the player has pressed reload, we then get the current weapon and check to make sure it is not null. Then we check to see whether the
weapon can reload or not using its CAN_RELOAD constant.
If the weapon can reload, we then get the current animation state, and make a variable for tracking whether the player is already reloading or not.
We then go through every weapon to make sure the player is not already playing that weapon's reloading animation.
If the player is not reloading any weapon, we set reloading_weapon to true.
One thing I like to add is where the weapon will reload itself if you try to fire it and it's out of ammo.
We also need to add an additional if check (is_reloading_weapon == false:) so the player cannot fire the current weapon while
reloading.
Let's change our firing code in process_input so it reloads when trying to fire an empty weapon:
# ----------------------------------
# Firing the weapons
if Input.is_action_pressed("fire"):
    if reloading_weapon == false:
        if changing_weapon == false:
            var current_weapon = weapons[current_weapon_name]
            if current_weapon != null:
                if current_weapon.ammo_in_weapon > 0:
                    if animation_manager.current_state == current_weapon.IDLE_ANIM_NAME:
                        animation_manager.set_animation(current_weapon.FIRE_ANIM_NAME)
                else:
                    reloading_weapon = true
# ----------------------------------
Now we check to make sure the player is not reloading before we fire the weapon, and when we have 0 or less ammo in the current weapon,
we set reloading_weapon to true if the player tries to fire.
This will make it so the player will try to reload when attempting to fire an empty weapon.
With that done, the player can now reload! Give it a try! Now you can fire all the spare ammo for each weapon.
Adding sounds
Finally, let's add some sounds that accompany the player firing, reloading and changing weapons.
Tip
There are no game sounds provided in this tutorial (for legal reasons). https://gamesounds.xyz/ is a collection of "royalty free or public domain music and sounds suitable for games". I used Gamemaster's Gun Sound Pack, which can be found in the Sonniss.com GDC 2017 Game Audio Bundle.
Open up Simple_Audio_Player.tscn. It is simply a Spatial with an AudioStreamPlayer as its child.
Note
The reason this is called a 'simple' audio player is because we are not taking performance into account and because the code is designed to provide sound in the simplest way possible.
If you want to use 3D audio, so it sounds like it's coming from a location in 3D space, right click the AudioStreamPlayer and select "Change type".
This will open the node browser. Navigate to AudioStreamPlayer3D and select "change". In the source for this tutorial, we will be using AudioStreamPlayer, but you can optionally use AudioStreamPlayer3D if you desire, and the code provided below will work regardless of which one you chose.
Create a new script and call it Simple_Audio_Player.gd. Attach it to the Spatial in Simple_Audio_Player.tscn
and insert the following code:
extends Spatial

# All of the audio files.
# You will need to provide your own sound files.
var audio_pistol_shot = preload("res://path_to_your_audio_here")
var audio_gun_cock = preload("res://path_to_your_audio_here")
var audio_rifle_shot = preload("res://path_to_your_audio_here")

var audio_node = null

func _ready():
    audio_node = $Audio_Stream_Player
    audio_node.connect("finished", self, "destroy_self")
    audio_node.stop()


func play_sound(sound_name, position=null):

    if audio_pistol_shot == null or audio_rifle_shot == null or audio_gun_cock == null:
        print ("Audio not set!")
        queue_free()
        return

    if sound_name == "Pistol_shot":
        audio_node.stream = audio_pistol_shot
    elif sound_name == "Rifle_shot":
        audio_node.stream = audio_rifle_shot
    elif sound_name == "Gun_cock":
        audio_node.stream = audio_gun_cock
    else:
        print ("UNKNOWN STREAM")
        queue_free()
        return

    # If you are using an AudioStreamPlayer3D, then uncomment these lines to set the position.
    #if audio_node is AudioStreamPlayer3D:
    #    if position != null:
    #        audio_node.global_transform.origin = position

    audio_node.play()


func destroy_self():
    audio_node.stop()
    queue_free()
Tip
By setting position to null by default in play_sound, we are making it an optional argument,
meaning position doesn't necessarily have to be passed in to call play_sound.
Let's go over what's happening here:
In _ready, we get the AudioStreamPlayer and connect its finished signal to the destroy_self function.
It doesn't matter if it's an AudioStreamPlayer or AudioStreamPlayer3D node,
as they both have the finished signal. To make sure it is not playing any sounds, we call stop on the AudioStreamPlayer.
Warning
Make sure your sound files are not set to loop! If it is set to loop, the sounds will continue to play infinitely and the script will not work!
The play_sound function is what we will be calling from Player.gd. We check if the sound
is one of the three possible sounds, and if it is one of the three sounds we set the audio stream in AudioStreamPlayer
to the correct sound.
If it is an unknown sound, we print an error message to the console and free the audio player.
If you are using an AudioStreamPlayer3D, remove the # to set the position of
the audio player node so it plays at the correct position.
Finally, we tell the AudioStreamPlayer to play.
When the AudioStreamPlayer is finished playing the sound, it will call destroy_self because
we connected the finished signal in _ready. We stop the AudioStreamPlayer and free the audio player
to save on resources.
Note
This system is extremely simple and has some major flaws:
One flaw is we have to pass in a string value to play a sound. While it is relatively simple to remember the names of the three sounds, it can be increasingly complex when you have more sounds. Ideally, we'd place these sounds in some sort of container with exposed variables so we do not have to remember the name(s) of each sound effect we want to play.
Another flaw is we cannot play looping sounds effects, nor background music, easily with this system. Because we cannot play looping sounds, certain effects, like footstep sounds, are harder to accomplish because we then have to keep track of whether or not there is a sound effect and whether or not we need to continue playing it.
One of the biggest flaws with this system is we can only play sounds from Player.gd.
Ideally we'd like to be able to play sounds from any script at any time.
With that done, let's open up Player.gd again.
First we need to load the Simple_Audio_Player.tscn. Place the following code in the class variables section of the script:
var simple_audio_player = preload("res://Simple_Audio_Player.tscn")
Now we need to instance the simple audio player when we need it, and then call its
play_sound function and pass the name of the sound we want to play. To make the process simpler,
let's create a create_sound function in Player.gd:
func create_sound(sound_name, position=null):
    var audio_clone = simple_audio_player.instance()
    var scene_root = get_tree().root.get_children()[0]
    scene_root.add_child(audio_clone)
    audio_clone.play_sound(sound_name, position)
Let's walk through what this function does:
The first line instances the Simple_Audio_Player.tscn scene and assigns it to a variable
named audio_clone.
The second line gets the scene root, and this has a large (though safe) assumption.
We first get this node's SceneTree,
and then access the root node, which in this case is the Viewport this entire game is running under.
Then we get the first child of the Viewport, which in our case happens to be the root node in
Test_Area.tscn or any of the other provided levels. We are making a huge assumption that the first child of the root node
is the root scene that the player is under, which may not always be the case.
If this doesn't make sense to you, don't worry too much about it. The second line of code only does not work reliably if you have multiple scenes loaded as children of the root node at a time, which will rarely happen for most projects and will not be happening in this tutorial series. This is only potentially a issue depending on how you handle scene loading.
The third line adds our newly created Simple_Audio_Player scene to be a child of the scene root. This
works exactly the same as when we are spawning bullets.
Finally, we call the play_sound function and pass in the arguments passed in to create_sound. This will call
Simple_Audio_Player.gd's play_sound function with the passed in arguments.
Now all that is left is playing the sounds when we want to. Let's add sound to the pistol first!
Open up Weapon_Pistol.gd.
Now, we want to make a noise when the player fires the pistol, so add the following to the end of the fire_weapon function:
player_node.create_sound("Pistol_shot", self.global_transform.origin)
Now when the player fires the pistol, we'll play the Pistol_shot sound.
To make a sound when the player reloads, we need to add the following right under player_node.animation_manager.set_animation(RELOADING_ANIM_NAME) in the
reload_weapon function:
player_node.create_sound("Gun_cock", player_node.camera.global_transform.origin)
Now when the player reloads, we'll play the Gun_cock sound.
Now let's add sounds to the rifle.
Open up Weapon_Rifle.gd.
To play sounds when the rifle is fired, add the following to the end of the fire_weapon function:
player_node.create_sound("Rifle_shot", ray.global_transform.origin)
Now when the player fires the rifle, we'll play the Rifle_shot sound.
To make a sound when the player reloads, we need to add the following right under player_node.animation_manager.set_animation(RELOADING_ANIM_NAME) in the
reload_weapon function:
player_node.create_sound("Gun_cock", player_node.camera.global_transform.origin)
Now when the player reloads, we'll play the Gun_cock sound.
Final notes
Now you have weapons with limited ammo that play sounds when you fire them!
At this point, we have all the basics of an FPS game working. There are still a few things that would be nice to add, and we're going to add them in the next three parts!
For example, right now we have no way to add ammo to our spares, so we'll eventually run out. Also, we don't have anything to shoot at outside of the RigidBody nodes.
In Part 4 we'll add some targets to shoot at, along with some health and ammo pick ups! We're also going to add joypad support, so we can play with wired Xbox 360 controllers!
Warning
If you ever get lost, be sure to read over the code again!
You can download the finished project for this part here: Godot_FPS_Part_3.zip