VR starter tutorial part 2
Introduction
In this part of the VR starter tutorial series, we will be adding a number of special RigidBody-based nodes that can be used in VR.
This continues from where we left on in the last tutorial part, where we just finished getting the VR controllers working and defined a custom
class called VR_Interactable_Rigidbody.
Tip
You can find the finished project on the OpenVR GitHub repository.
Adding destroyable targets
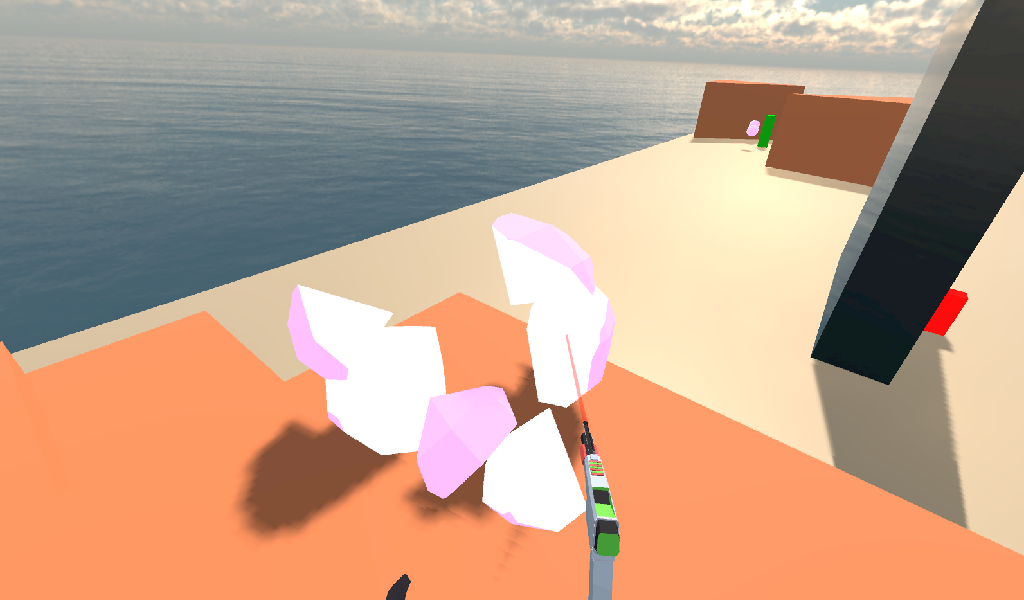
Before we make any of the special RigidBody-based nodes, we need something for them to do. Let's make a simple sphere target that will break into a bunch of pieces when destroyed.
Open up Sphere_Target.tscn, which is in the Scenes folder. The scene is fairly simple, with just a StaticBody with a sphere shaped
CollisionShape, a MeshInstance node displaying a sphere mesh, and an AudioStreamPlayer3D node.
The special RigidBody nodes will handle damaging the sphere, which is why we are using a StaticBody node instead of something like an Area or RigidBody node. Outside of that, there isn't really a lot to talk about, so let's move straight into writing the code.
Select the Sphere_Target_Root node and make a new script called Sphere_Target.gd. Add the following code:
extends Spatial

var destroyed = false
var destroyed_timer = 0
const DESTROY_WAIT_TIME = 80

var health = 80

const RIGID_BODY_TARGET = preload("res://Assets/RigidBody_Sphere.scn")


func _ready():
    set_physics_process(false)


func _physics_process(delta):
    destroyed_timer += delta
    if destroyed_timer >= DESTROY_WAIT_TIME:
        queue_free()


func damage(damage):
    if destroyed == true:
        return

    health -= damage

    if health <= 0:

        get_node("CollisionShape").disabled = true
        get_node("Shpere_Target").visible = false

        var clone = RIGID_BODY_TARGET.instance()
        add_child(clone)
        clone.global_transform = global_transform

        destroyed = true
        set_physics_process(true)

        get_node("AudioStreamPlayer").play()
        get_tree().root.get_node("Game").remove_sphere()
Let's go over how this script works.
Explaining the Sphere Target code
First, let's go through all the class variables in the script:
destroyed: A variable to track whether the sphere target has been destroyed.destroyed_timer: A variable to track how long the sphere target has been destroyed.DESTROY_WAIT_TIME: A constant to define the length of time the target can be destroyed for before it frees/deletes itself.health: A variable to store the amount of health the sphere target has.RIGID_BODY_TARGET: A constant to hold the scene of the destroyed sphere target.
Note
Feel free to check out the RIGID_BODY_TARGET scene. It is just a bunch of RigidBody nodes and a broken sphere model.
We'll be instancing this scene so when the target is destroyed, it looks like it broke into a bunch of pieces.
_ready function step-by-step explanation
All the _ready function does is that it stops the _physics_process from being called by calling set_physics_process and passing false.
The reason we do this is because all the code in _physics_process is for destroying this node when enough time has passed, which we only want to
do when the target has been destroyed.
_physics_process function step-by-step explanation
First this function adds time, delta, to the destroyed_timer variable. It then checks to see if destroyed_timer is greater than or equal to
DESTROY_WAIT_TIME. If destroyed_timer is greater than or equal to DESTROY_WAIT_TIME, then the sphere target frees/deletes itself by calling
the queue_free function.
damage function step-by-step explanation
The damage function will be called by the special RigidBody nodes, which will pass the amount of damage done to the target, which is a function argument
variable called damage. The damage variable will hold the amount of damage the special RigidBody node did to the sphere target.
First this function checks to make sure the target is not already destroyed by checking if the destroyed variable is equal to true. If destroyed is equal to true, then
the function calls return so none of the other code is called. This is just a safety check so that if two things damage the target at exactly the same time, the target cannot be
destroyed twice.
Next the function removes the amount of damage taken, damage, from the target's health, health. If then checks to see if health is equal to zero or less, meaning that the
target has just been destroyed.
If the target has just been destroyed, then we disable the CollisionShape by setting it's disabled property to true. We then make the Sphere_Target
MeshInstance invisible by setting the visible property to false. We do this so the target can no longer effect the physics world and so the non-broken target mesh is not visible.
After this the function then instances the RIGID_BODY_TARGET scene and adds it as a child of the target. It then sets the global_transform of the newly instanced scene, called clone, to the
global_transform of the non-broken target. This makes it where the broken target starts at the same position as the non-broken target with the same rotation and scale.
Then the function sets the destroyed variable to true so the target knows it has been destroyed and calls the set_physics_process function and passes true. This will start
executing the code in _physics_process so that after DESTROY_WAIT_TIME seconds have passed, the sphere target will free/destroy itself.
The function then gets the AudioStreamPlayer3D node and calls the play function so it plays its sound.
Finally, the remove_sphere function is called in Game.gd. To get Game.gd, the code uses the scene tree and works its way from the root of the scene tree to the root of the
Game.tscn scene.
Adding the remove_sphere function to Game.gd
You may have noticed we are calling a function in Game.gd, called remove_sphere, that we have not defined yet. Open up Game.gd and
add the following additional class variables:
var spheres_left = 10
var sphere_ui = null
spheres_left: The amount of sphere targets left in the world. In the providedGamescene, there are10spheres, so that is the initial value.sphere_ui: A reference to the sphere UI. We will use this later in the tutorial to display the amount of spheres left in the world.
With these variables defined, we can now add the remove_sphere function. Add the following code to Game.gd:
func remove_sphere():
    spheres_left -= 1

    if sphere_ui != null:
        sphere_ui.update_ui(spheres_left)
Let's go through what this function does real quick:
First, it removes one from the spheres_left variable. It then checks to see if the sphere_ui variable is not equal to null, and if it is not
equal to null it calls the update_ui function on sphere_ui, passing in the number of spheres as an argument to the function.
Note
We will add the code for sphere_ui later in this tutorial!
Now the Sphere_Target is ready to be used, but we don't have any way to destroy it. Let's fix that by adding some special RigidBody-based nodes
that can damage the targets.
Adding a pistol
Let's add a pistol as the first interactable RigidBody node. Open up Pistol.tscn, which you can find in the Scenes folder.
Let's quickly go over a few things of note in Pistol.tscn real quick before we add the code.
All of the nodes in Pistol.tscn expect the root node are rotated. This is so the pistol is in the correct rotation relative to the VR controller when it is picked up. The root node
is a RigidBody node, which we need because we're going to use the VR_Interactable_Rigidbody class we created in the last part of this tutorial series.
There is a MeshInstance node called Pistol_Flash, which is a simple mesh that we will be using to simulate the muzzle flash on the end of the pistol's barrel.
A MeshInstance node called LaserSight is used to as a guide for aiming the pistol, and it follows the direction of the Raycast node,
called Raycast, that the pistol uses to detect if its 'bullet' hit something. Finally, there is an AudioStreamPlayer3D node at the end of the
pistol that we will use to play the sound of the pistol firing.
Feel free to look at the other parts of the scene if you want. Most of the scene is fairly straightforward, with the major changes mentioned above. Select the RigidBody
node called Pistol and make a new script called Pistol.gd. Add the following code:
extends VR_Interactable_Rigidbody

var flash_mesh
const FLASH_TIME = 0.25
var flash_timer = 0

var laser_sight_mesh
var pistol_fire_sound

var raycast
const BULLET_DAMAGE = 20
const COLLISION_FORCE = 1.5


func _ready():
    flash_mesh = get_node("Pistol_Flash")
    flash_mesh.visible = false

    laser_sight_mesh = get_node("LaserSight")
    laser_sight_mesh.visible = false

    raycast = get_node("RayCast")
    pistol_fire_sound = get_node("AudioStreamPlayer3D")


func _physics_process(delta):
    if flash_timer > 0:
        flash_timer -= delta
        if flash_timer <= 0:
            flash_mesh.visible = false


func interact():
    if flash_timer <= 0:

        flash_timer = FLASH_TIME
        flash_mesh.visible = true

        raycast.force_raycast_update()
        if raycast.is_colliding():

            var body = raycast.get_collider()
            var direction_vector = raycast.global_transform.basis.z.normalized()
            var raycast_distance = raycast.global_transform.origin.distance_to(raycast.get_collision_point())

            if body.has_method("damage"):
                body.damage(BULLET_DAMAGE)
            elif body is RigidBody:
                var collision_force = (COLLISION_FORCE / raycast_distance) * body.mass
                body.apply_impulse((raycast.global_transform.origin - body.global_transform.origin).normalized(), direction_vector * collision_force)

        pistol_fire_sound.play()

        if controller != null:
            controller.rumble = 0.25


func picked_up():
    laser_sight_mesh.visible = true


func dropped():
    laser_sight_mesh.visible = false
Let's go over how this script works.
Explaining the pistol code
First, notice how instead of extends RigidBody, we instead have extends VR_Interactable_Rigidbody. This makes it where the pistol script extends the
VR_Interactable_Rigidbody class so the VR controllers know this object can be interacted with and that the functions defined in VR_Interactable_Rigidbody
can be called when this object is held by a VR controller.
Next, let's look at the class variables:
flash_mesh: A variable to hold the MeshInstance node that is used to simulate muzzle flash on the pistol.FLASH_TIME: A constant to define how long the muzzle flash will be visible. This will also define how fast the pistol can fire.flash_timer: A variable to hold the amount of time the muzzle flash has been visible for.laser_sight_mesh: A variable to hold the MeshInstance node that acts as the pistol's 'laser sight'.pistol_fire_sound: A variable to hold the AudioStreamPlayer3D node used for the pistol's firing sound.raycast: A variable to hold the Raycast node that is used for calculating the bullet's position and normal when the pistol is fired.BULLET_DAMAGE: A constant to define the amount of damage a single bullet from the pistol does.COLLISION_FORCE: A constant that defines the amount of force that is applied to RigidBody nodes when the pistol's bullet collides.
_ready function step-by-step explanation
This function gets the nodes and assigns them to their proper variables. For the flash_mesh and laser_sight_mesh nodes, both have their visible property set to false
so they are not visible initially.
_physics_process function step-by-step explanation
The _physics_process function first checks to see if the pistol's muzzle flash is visible by checking if flash_timer is more than zero. If flash_timer is more than
zero, then we remove time, delta from it. Next we check if the flash_timer variable is zero or less now that we removed delta from it. If it is, then the pistol
muzzle flash timer just finished and so we need to make flash_mesh invisible by setting it's visible property to false.
interact function step-by-step explanation
The interact function first checks to see if the pistol's muzzle flash is invisible by checking to see if flash_timer is less than or equal to zero. We do this so we
can limit the rate of fire of the pistol to the length of time the muzzle flash is visible, which is a simple solution for limiting how fast the player can fire.
If flash_timer is zero or less, we then set flash_timer to FLASH_TIME so there is a delay before the pistol can fire again. After that we set flash_mesh.visible
to true so the muzzle flash at the end of the pistol is visible while flash_timer is more than zero.
Next we call the force_raycast_update function on the Raycast node in raycast so that it gets the latest collision info from the physics world.
We then check if the raycast hit something by checking if the is_colliding function is equal to true.
If the raycast hit something, then we get the PhysicsBody it collided with through the get_collider function. We assign the
hit PhysicsBody to a variable called body.
We then get the direction of the Raycast by getting it's positive Z directional axis from the Basis on the raycast node's global_transform.
This will give us the direction the raycast is pointing on the Z axis, which is the same direction as the blue arrow on the Spatial gizmo when
Local space mode is enabled in the Godot editor. We store this direction in a variable called direction_vector.
Next we get the distance from the Raycast origin to the Raycast collision point by getting the distance from the global position, global_transform.origin
of the raycast node to the collision point of the Raycast, raycast.get_collision_point, using the distance_to function. This will give us the distance the
Raycast traveled before it collided, which we store in a variable called raycast_distance.
Then the code checks if the PhysicsBody, body, has a function/method called damage using the has_method function. If the PhysicsBody
has a function/method called damage, then we call the damage function and pass BULLET_DAMAGE so it takes damage from the bullet colliding into it.
Regardless of whether the PhysicsBody has a damage function, we then check to see if body is a RigidBody-based node. If body is a
RigidBody-based node, then we want to push it when the bullet collides.
To calculate the amount of force applied, we simply take COLLISION_FORCE and divide it by raycast_distance, then we multiply the whole thing by body.mass. We store this calculation in
a variable called collision_force. This will make collisions over a shorter distance apply move force than those over longer distances, giving a slightly more realistic collision response.
We then push the RigidBody using the apply_impulse function, where the position is a zero Vector3 so the force is applied from the center, and the collision force is the collision_force variable we calculated.
Regardless of whether the raycast variable hit something or not, we then play the pistol shot sound by calling the play function on the pistol_fire_sound variable.
Finally, we check to see if the pistol is being held by a VR controller by checking to see if the controller variable is not equal to null. If it is not equal to null,
we then set the rumble property of the VR controller to 0.25, so there is a slight rumble when the pistol fires.
picked_up function step-by-step explanation
This function simply makes the laser_sight_mesh MeshInstance visible by setting the visible property to true.
dropped function step-by-step explanation
This function simply makes the laser_sight_mesh MeshInstance invisible by setting the visible property to false.
Pistol finished
That is all we need to do to have working pistols in the project! Go ahead and run the project. If you climb up the stairs and grab the pistols, you can fire them at the sphere targets in the scene using the trigger button on the VR controller! If you fire at the targets long enough, they will break into pieces.
Adding a shotgun
Next let's add a shotgun to the VR project.
Adding a special shotgun RigidBody should be fairly straightforward, as almost everything with the shotgun is the same as the pistol.
Open up Shotgun.tscn, which you can find in the Scenes folder and take a look at the scene. Almost everything is the same as in Pistol.tscn.
The only thing that is different, beyond name changes, is that instead of a single Raycast, there are five Raycast nodes.
This is because a shotgun generally fires in a cone shape, so we are going to emulate that effect by having several Raycast nodes that will rotate
randomly in a cone shape when the shotgun fires.
Outside of that, everything is more or less the same as Pistol.tscn.
Let's write the code for the shotgun. Select the RigidBody node called Shotgun and make a new script called Shotgun.gd. Add the following code:
extends VR_Interactable_Rigidbody

var flash_mesh
const FLASH_TIME = 0.25
var flash_timer = 0

var laser_sight_mesh
var shotgun_fire_sound

var raycasts
const BULLET_DAMAGE = 30
const COLLISION_FORCE = 4


func _ready():
    flash_mesh = get_node("Shotgun_Flash")
    flash_mesh.visible = false

    laser_sight_mesh = get_node("LaserSight")
    laser_sight_mesh.visible = false

    raycasts = get_node("Raycasts")
    shotgun_fire_sound = get_node("AudioStreamPlayer3D")


func _physics_process(delta):
    if flash_timer > 0:
        flash_timer -= delta
        if flash_timer <= 0:
            flash_mesh.visible = false


func interact():
    if flash_timer <= 0:

        flash_timer = FLASH_TIME
        flash_mesh.visible = true

        for raycast in raycasts.get_children():

            if not raycast is RayCast:
                continue

            raycast.rotation_degrees = Vector3(90 + rand_range(10, -10), 0, rand_range(10, -10))

            raycast.force_raycast_update()
            if raycast.is_colliding():

                var body = raycast.get_collider()
                var direction_vector = raycasts.global_transform.basis.z.normalized()
                var raycast_distance = raycasts.global_transform.origin.distance_to(raycast.get_collision_point())

                if body.has_method("damage"):
                    body.damage(BULLET_DAMAGE)

                if body is RigidBody:
                    var collision_force = (COLLISION_FORCE / raycast_distance) * body.mass
                    body.apply_impulse((raycast.global_transform.origin - body.global_transform.origin).normalized(), direction_vector * collision_force)

        shotgun_fire_sound.play()

        if controller != null:
            controller.rumble = 0.25


func picked_up():
    laser_sight_mesh.visible = true


func dropped():
    laser_sight_mesh.visible = false
The majority of this code is exactly the same as the code for the pistol with just a few minor changes that are primarily just different names. Due to how similar these scripts are, let's just focus on the changes.
Explaining the shotgun code
Like with the pistol, the shotgun extends VR_Interactable_Rigidbody so the VR controllers know that this object can be interacted with and what functions are
available.
There is only one new class variable:
raycasts: A variable to hold the node that has all of the Raycast nodes as its children.
The new class variable replaces the raycast variable from Pistol.gd, because with the shotgun we need to process multiple Raycast nodes
instead of just one. All of the other class variables are the same as Pistol.gd and function the same way, some just are renamed to be non-pistol specific.
interact function step-by-step explanation
The interact function first checks to see if the shotgun's muzzle flash is invisible by checking to see if flash_timer is less than or equal to zero. We do this so we
can limit the rate of fire of the shotgun to the length of time the muzzle flash is visible, which is a simple solution for limiting how fast the player can fire.
If flash_timer is zero or less, we then set flash_timer to FLASH_TIME so there is a delay before the shotgun can fire again. After that we set flash_mesh.visible
to true so the muzzle flash at the end of the shotgun is visible while flash_timer is more than zero.
Next we call the force_raycast_update function on the Raycast node in raycast so that it gets the latest collision info from the physics world.
We then check if the raycast hit something by checking if the is_colliding function is equal to true.
Next we go through each of the child nodes of the raycasts variable using a for loop. This way the code will go through each of the Raycast nodes
that are children of the raycasts variable.
For each node, we check to see if raycast is not a Raycast node. If the node is not a Raycast node, we simply use continue to skip it.
Next we rotate the raycast node randomly around a small 10 degrees cone by settings the rotation_degrees variable of the raycast to a Vector3 where the X and Z axis
are a random number from -10 to 10. This random number is selected using the rand_range function.
Then we call the force_raycast_update function on the Raycast node in raycast so that it gets the latest collision info from the physics world.
We then check if the raycast hit something by checking if the is_colliding function is equal to true.
The rest of the code is exactly the same, but this process is repeated for each Raycast node that is a child of the raycasts variable.
If the raycast hit something, then we get the PhysicsBody it collided with through the get_collider function. We assign the
hit PhysicsBody to a variable called body.
We then get the direction of the raycast by getting it's positive Z directional axis from the Basis on the raycast node's global_transform.
This will give us the direction the raycast is pointing on the Z axis, which is the same direction as the blue arrow on the Spatial gizmo when
Local space mode is enabled in the Godot editor. We store this direction in a variable called direction_vector.
Next we get the distance from the raycast origin to the raycast collision point by getting the distance from the global position, global_transform.origin of the raycast
node to the collision point of the raycast, raycast.get_collision_point, using the distance_to function. This will give us the distance the Raycast
traveled before it collided, which we store in a variable called raycast_distance.
Then the code checks if the PhysicsBody, body, has a function/method called damage using the has_method function. If the PhysicsBody
has a function/method called damage, then we call the damage function and pass BULLET_DAMAGE so it takes damage from the bullet colliding into it.
Regardless of whether the PhysicsBody has a damage function, we then check to see if body is a RigidBody-based node. If body is a
RigidBody-based node, then we want to push it when the bullet collides.
To calculate the amount of force applied, we simply take COLLISION_FORCE and divide it by raycast_distance, then we multiply the whole thing by body.mass. We store this calculation in
a variable called collision_force. This will make collisions over a shorter distance apply move force than those over longer distances, giving a slightly more realistic collision response.
We then push the RigidBody using the apply_impulse function, where the position is a zero Vector3 so the force is applied from the center,
and the collision force is the collision_force variable we calculated.
Once all of the Raycasts in the raycast variable have been iterated over, we then play the shotgun shot sound by calling the play function on the shotgun_fire_sound variable.
Finally, we check to see if the shotgun is being held by a VR controller by checking to see if the controller variable is not equal to null. If it is not equal to null,
we then set the rumble property of the VR controller to 0.25, so there is a slight rumble when the shotgun fires.
Shotgun finished
Everything else is exactly the same as the pistol, with at most just some simple name changes.
Now the shotgun is finished! You can find the shotgun in the sample scene by looking around the back of one of the walls (not in the building though!).
Adding a bomb
Okay, let's add a different special RigidBody. Instead of adding something that shoots, let's add something we can throw - a bomb!
Open up Bomb.tscn, which is in the Scenes folder.
The root node is a RigidBody node that we'll be extending to use VR_Interactable_Rigidbody, which has a CollisionShape
like the other special RigidBody nodes we've made so far. Likewise, there is a MeshInstance called Bomb that is used to
display the mesh for the bomb.
Then we have an Area node simply called Area that has a large CollisionShape as its child. We'll use this Area
node to effect anything within it when the bomb explodes. Essentially, this Area node will be the blast radius for the bomb.
There is also a couple Particles nodes. One of the Particles nodes are for the smoke coming out of the bomb's fuse, while another is for the explosion. You can take a look at the ParticlesMaterial resources, which define how the particles work, if you want. We will not be covering how the particles work in this tutorial due to it being outside of the scope of this tutorial.
There is one thing with the Particles nodes that we need to make note of. If you select the Explosion_Particles node, you'll find that its lifetime property
is set to 0.75 and that the one shot checkbox is enabled. This means that the particles will only play once, and the particles will last for 0.75 seconds.
We'll need to know this so we can time the removal of the bomb with the end of the explosion Particles.
Let's write the code for the bomb. Select the Bomb RigidBody node and make a new script called Bomb.gd. Add the following code:
extends VR_Interactable_Rigidbody

var bomb_mesh

const FUSE_TIME = 4
var fuse_timer = 0

var explosion_area
const EXPLOSION_DAMAGE = 100
const EXPLOSION_TIME = 0.75
var explosion_timer = 0
var exploded = false

const COLLISION_FORCE = 8

var fuse_particles
var explosion_particles
var explosion_sound


func _ready():

    bomb_mesh = get_node("Bomb")
    explosion_area = get_node("Area")
    fuse_particles = get_node("Fuse_Particles")
    explosion_particles = get_node("Explosion_Particles")
    explosion_sound = get_node("AudioStreamPlayer3D")

    set_physics_process(false)


func _physics_process(delta):

    if fuse_timer < FUSE_TIME:

        fuse_timer += delta

        if fuse_timer >= FUSE_TIME:

            fuse_particles.emitting = false

            explosion_particles.one_shot = true
            explosion_particles.emitting = true

            bomb_mesh.visible = false

            collision_layer = 0
            collision_mask = 0
            mode = RigidBody.MODE_STATIC

            for body in explosion_area.get_overlapping_bodies():
                if body == self:
                    pass
                else:
                    if body.has_method("damage"):
                        body.damage(EXPLOSION_DAMAGE)

                    if body is RigidBody:
                        var direction_vector = body.global_transform.origin - global_transform.origin
                        var bomb_distance = direction_vector.length()
                        var collision_force = (COLLISION_FORCE / bomb_distance) * body.mass
                        body.apply_impulse(Vector3.ZERO, direction_vector.normalized() * collision_force)

            exploded = true
            explosion_sound.play()


    if exploded:

        explosion_timer += delta

        if explosion_timer >= EXPLOSION_TIME:

            explosion_area.monitoring = false

            if controller != null:
                controller.held_object = null
                controller.hand_mesh.visible = true

                if controller.grab_mode == "RAYCAST":
                    controller.grab_raycast.visible = true

            queue_free()


func interact():
    set_physics_process(true)

    fuse_particles.emitting = true
Let's go over how this script works.
Explaining the bomb code
Like with the other special RigidBody nodes, the bomb extends VR_Interactable_Rigidbody so the VR controllers know this object can be interacted with and
that the functions defined defined in VR_Interactable_Rigidbody can be called when this object is held by a VR controller.
Next, let's look at the class variables:
bomb_mesh: A variable to hold the MeshInstance node that is used for the non-exploded bomb.FUSE_TIME: A constant to define how long the fuse will 'burn' before the bomb explodesfuse_timer: A variable to hold the length of time that has passed since the bomb's fuse has started to burn.explosion_area: A variable to hold the Area node used to detect objects within the bomb's explosion.EXPLOSION_DAMAGE: A constant to define how much damage is applied with the bomb explodes.EXPLOSION_TIME: A constant to define how long the bomb will last in the scene after it explodes. This value should be the same as thelifetimeproperty of the explosion Particles node.explosion_timerA variable to hold the length of time that has passed since the bomb exploded.exploded: A variable to hold whether the bomb has exploded or not.COLLISION_FORCE: A constant that defines the amount of force that is applied to RigidBody nodes when the bomb explodes.fuse_particles: A variable to hold a reference to the Particles node used for the bomb's fuse.explosion_particles: A variable to hold a reference to the Particles node used for the bomb's explosion.explosion_sound: A variable to hold a reference to the AudioStreamPlayer3D node used for the explosion sound.
_ready function step-by-step explanation
The _ready function first gets all of the nodes from the bomb scene and assigns them to their respective class variables for later use.
Then we call set_physics_process and pass false so _physics_process is not executed. We do this because the code in _physics_process will start burning
the fuse and exploding the bomb, which we only want to do when the user interacts with the bomb. If we did not disable _physics_process, the bomb's fuse would start
before the user has a chance to get to the bomb.
_physics_process function step-by-step explanation
The _physics_process function first checks to see if fuse_timer is less than FUSE_TIME. If it is, then the bomb's fuse is still burning.
If the bomb's fuse is still burning, we then add time, delta, to the fuse_timer variable. We then check to see if fuse_timer is more than or equal to FUSE_TIME
now that we have added delta to it. If fuse_timer is more than or equal to FUSE_TIME, then the fuse has just finished and we need to explode the bomb.
To explode the bomb, we first stop emitting particles for the fuse by setting emitting to false on fuse_particles. We then tell the explosion Particles
node, explosion_particles, to emit all of its particle in a single shot by setting one_shot to true. After that, we set emitting to true on explosion_particles so it looks
like the bomb has exploded. To help make it look like the bomb exploded, we hide the bomb MeshInstance node by setting bomb_mesh.visible to false.
To keep the bomb from colliding with other objects in the physics world, we set the collision_layer and collision_mask properties of the bomb to 0. We also
change the RigidBody mode to MODE_STATIC so the bomb RigidBody does not move.
Then we need to get all of the PhysicsBody nodes within the explosion_area node. To do this, we use the get_overlapping_bodies in a for loop. The get_overlapping_bodies
function will return an array of PhysicsBody nodes within the Area node, which is exactly what we are looking for.
For each PhysicsBody node, which we store in a variable called body, we check to see if it is equal to self. We do this so the bomb does not accidentally explode
itself, as the explosion_area could potentially detect the Bomb RigidBody as a PhysicsBody within the explosion area.
If the PhysicsBody node, body, is not the bomb, then we first check to see if the PhysicsBody node has a function
called damage. If the PhysicsBody node has a function called damage, we call it and pass EXPLOSION_DAMAGE to it so it takes damage from the explosion.
Next we check to see if the PhysicsBody node is a RigidBody. If body is a RigidBody, we want to move it
when the bomb explodes.
To move the RigidBody node when the bomb explodes, we first need to calculate the direction from the bomb to the RigidBody node. To do this
we subtract the global position of the bomb, global_transform.origin from the global position of the RigidBody. This will give us a Vector3
that points from the bomb to the RigidBody node. We store this Vector3 in a variable called direction_vector.
We then calculate the distance the RigidBody is from the bomb by using the length function on direction_vector. We store the distance in a variable called
bomb_distance.
We then calculate the amount of force the bomb will be applied to the RigidBody node when the bomb explodes by dividing COLLISION_FORCE by
bomb_distance, and multiplying that by collision_force. This will make it so if the RigidBody node is closer to the bomb, it will be pushed farther.
Finally, we push the RigidBody node using the apply_impulse function, with a Vector3 position of zero and collision_force
multiplied by direction_vector.normalized as the force. This will send the RigidBody node flying when the bomb explodes.
After we have looped through all of the PhysicsBody nodes within the explosion_area, we set the exploded variable to true so the code knows the bomb
exploded and call play on explosion_sound so the sound of an explosion is played.
Alright, the next section of code starts by first checking if exploded is equal to true.
If exploded is equal to true, then that means the bomb is waiting for the explosion particles to finish before it frees/destroys itself. We add time, delta, to
explosion_timer so we can track how long it has been since the bomb has exploded.
If explosion_timer is greater than or equal to EXPLOSION_TIME after we added delta, then the explosion timer just finished.
If the explosion timer just finished, we set explosion_area.monitoring to false. The reason we do this is because there was a bug that would print an error when you
freed/deleted an Area node when the monitoring property was true. To make sure this doesn't happen, we simply set monitoring to false on explosion_area.
Next we check to see if the bomb is being held by a VR controller by checking to see if the controller variable is not equal to null. If the bomb is being held by a VR controller,
we set the held_object property of the VR controller, controller, to null. Because the VR controller is no longer holding anything, we make the VR controller's hand mesh
visible by setting controller.hand_mesh.visible to true. Then we check to see if the VR controller grab mode is RAYCAST, and if it is we set controller.grab_raycast.visible to
true so the 'laser sight' for the grab raycast is visible.
Finally, regardless if the bomb is being held by a VR controller or not, we call queue_free so the bomb scene is freed/removed from the scene.
interact function step-by-step explanation
First the interact function calls set_physics_process and passes true so the code in _physics_process starts executing. This will start the bomb's fuse and
eventually lead to the bomb exploding.
Finally, we start the fuse particles by setting fuse_particles.visible to true.
Bomb finished
Now the bomb is ready to go! You can find the bombs in the orange building.
Because of how we are calculating the VR controller's velocity, it is easiest to throw the bombs using a thrusting-like motion instead of a more natural throwing-like motion. The smooth curve of a throwing-like motion is harder to track with the code we are using for calculating the velocity of the VR controllers, so it does not always work correctly and can lead inaccurately calculated velocities.
Adding a sword
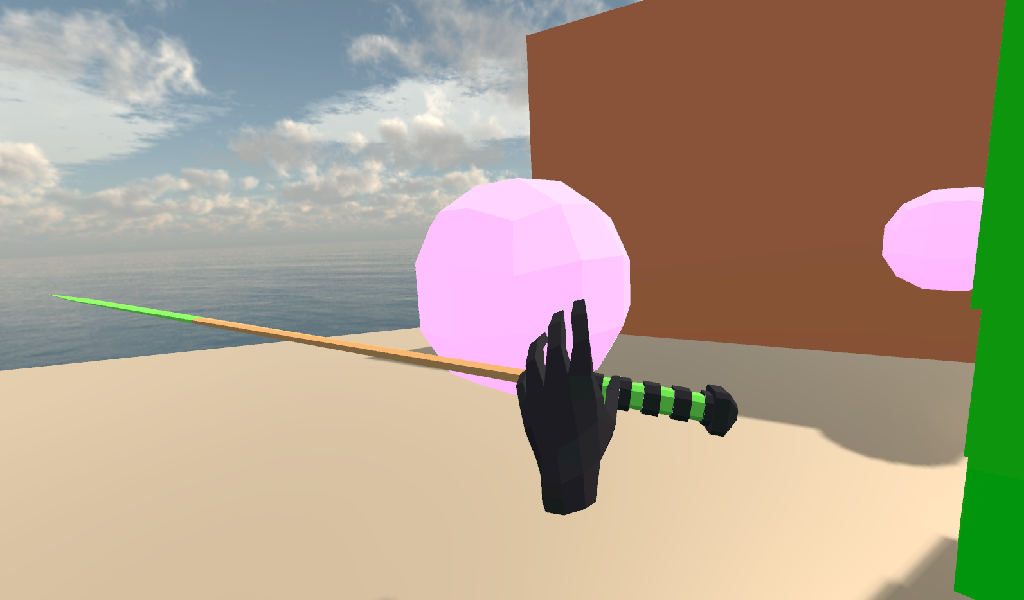
Let's add one last special RigidBody-based node that can destroy targets. Let's add a sword so we can slice through the targets!
Open up Sword.tscn, which you can find in the Scenes folder.
There is not a whole lot going on here. All of the child nodes of the root Sword RigidBody node are rotated to they are positioned correctly when the
VR controller picks them up, there is a MeshInstance node for displaying the sword, and there is an AudioStreamPlayer3D
node that holds a sound for the sword colliding with something.
There is one thing that is slightly different though. There is a KinematicBody node called Damage_Body. If you take a look at it, you'll find that it
is not on any collision layers, and is instead only on a single collision mask. This is so the KinematicBody will not effect other
PhysicsBody nodes in the scene, but it will still be effected by PhysicsBody nodes.
We are going to use the Damage_Body KinematicBody node to detect the collision point and normal when the sword collides with something in the scene.
Tip
While this is perhaps not the best way of getting the collision information from a performance point of view, it does give us a lot of information we can use for post-processing! Using a KinematicBody this way means we can detect exactly where the sword collided with other PhysicsBody nodes.
That is really the only thing note worthy about the sword scene. Select the Sword RigidBody node and make a new script called Sword.gd.
Add the following code:
extends VR_Interactable_Rigidbody

const SWORD_DAMAGE = 2

const COLLISION_FORCE = 0.15

var damage_body = null


func _ready():
    damage_body = get_node("Damage_Body")
    damage_body.add_collision_exception_with(self)
    sword_noise = get_node("AudioStreamPlayer3D")


func _physics_process(_delta):

    var collision_results = damage_body.move_and_collide(Vector3.ZERO, true, true, true);

    if (collision_results != null):
        if collision_results.collider.has_method("damage"):
            collision_results.collider.damage(SWORD_DAMAGE)

        if collision_results.collider is RigidBody:
            if controller == null:
                collision_results.collider.apply_impulse(
                    collision_results.position,
                    collision_results.normal * linear_velocity * COLLISION_FORCE)
            else:
                collision_results.collider.apply_impulse(
                    collision_results.position,
                    collision_results.normal * controller.controller_velocity * COLLISION_FORCE)

        sword_noise.play()
Let's go over how this script works!
Explaining the sword code
Like with the other special RigidBody nodes, the sword extends VR_Interactable_Rigidbody so the VR controllers know this object can be interacted with and
that the functions defined defined in VR_Interactable_Rigidbody can be called when this object is held by a VR controller.
Next, let's look at the class variables:
SWORD_DAMAGE: A constant to define the amount of damage the sword does. This damage is applied to every object in the sword on every_physics_processcallCOLLISION_FORCE: A constant that defines the amount of force applied to RigidBody nodes when the sword collides with a PhysicsBody.damage_body: A variable to hold the KinematicBody node used to detect whether the sword is stabbing a PhysicsBody node or not.sword_noise: A variable to hold the AudioStreamPlayer3D node used to play a sound when the sword collides with something.
_ready function step-by-step explanation
All we are doing in the _ready function is getting the Damage_Body KinematicBody node and assigning it to damage_body.
Because we do not want the sword to detect a collision with the root RigidBody node of the sword, we call
add_collision_exception_with on damage_body and pass self so the sword will not be detected.
Finally, we get the AudioStreamPlayer3D node for the sword collision sound and apply it to the sword_noise variable.
_physics_process function step-by-step explanation
First we need to determine whether the sword is colliding with something or not. To do this, we use the move_and_collide function of the damage_body node.
Unlike how move_and_collide is normally used, we are not passing a velocity and instead are passing an empty Vector3. Because we do not
want the damage_body node to move, we set the test_only argument (the fourth argument) as true so the KinematicBody generates
collision info without actually causing any collisions within the collision world.
The move_and_collide function will return a KinematicCollision class that has all of the information we need for detecting collisions
on the sword. We assign the return value of move_and_collide to a variable called collision_results.
Next we check to see if collision_results is not equal to null. If collision_results is not equal to null, then we know that the sword has collided with something.
We then check to see if the PhysicsBody the sword collided with has a function/method called damage using the has_method function. If the
PhysicsBody has a function called damage_body, we call it and pass the amount of damage the sword does, SWORD_DAMAGE, to it.
Next we check to see if the PhysicsBody the sword collided with is a RigidBody. If what the sword collided with is a
RigidBody node, we then check to see if the sword is being held by a VR controller or not by checking to see if controller is equal to null.
If the sword is not being held by a VR controller, controller is equal to null, then we move the RigidBody node the sword collided with using
the apply_impulse function. For the position of the apply_impulse function, we use collision_position variable stored within the KinematicCollision
class in collision_results. For the velocity of the apply_impulse function, we use the collision_normal multiplied by the linear_velocity of the sword's
RigidBody node multiplied by COLLISION_FORCE.
If the sword is being held by a VR controller, controller is not equal to null, then we move the RigidBody node the sword collided with using
the apply_impulse function. For the position of the apply_impulse function, we use collision_position variable stored within the KinematicCollision
class in collision_results. For the velocity of the apply_impulse function, we use the collision_normal multiplied by the VR controller's velocity multiplied by COLLISION_FORCE.
Finally, regardless of whether the PhysicsBody is a RigidBody or not, we play the sound of the sword colliding with
something by calling play on sword_noise.
Sword finished
With that done, you can now slice through the targets! You can find the sword in the corner in between the shotgun and the pistol.
Updating the target UI
Let's update the UI as the sphere targets are destroyed.
Open up Main_VR_GUI.tscn, which you can find in the Scenes folder.
Feel free to look at how the scene is setup if you want, but in an effort to keep this tutorial from becoming too long, we will not be covering the scene setup in this tutorial.
Expand the GUI Viewport node and then select the Base_Control node. Add a new script called Base_Control.gd, and add the following:
extends Control

var sphere_count_label

func _ready():
    sphere_count_label = get_node("Label_Sphere_Count")

    get_tree().root.get_node("Game").sphere_ui = self


func update_ui(sphere_count):
    if sphere_count > 0:
        sphere_count_label.text = str(sphere_count) + " Spheres remaining"
    else:
        sphere_count_label.text = "No spheres remaining! Good job!"
Let's go over how this script works real quick.
First, in _ready, we get the Label that shows how many spheres are left and assign it to the sphere_count_label class variable.
Next, we get Game.gd by using get_tree().root and assign sphere_ui to this script.
In update_ui, we change the sphere Label's text. If there is at least one sphere remaining, we change the text to show how many spheres are still
left in the world. If there are no more spheres remaining, we change the text and congratulate the player.
Adding the final special RigidBody
Finally, before we finish this tutorial, let's add a way to reset the game while in VR.
Open up Reset_Box.tscn, which you will find in Scenes. Select the Reset_Box RigidBody node and make a new script called Reset_Box.gd.
Add the following code:
extends VR_Interactable_Rigidbody

var start_transform

var reset_timer = 0
const RESET_TIME = 10
const RESET_MIN_DISTANCE = 1


func _ready():
    start_transform = global_transform


func _physics_process(delta):
    if start_transform.origin.distance_to(global_transform.origin) >= RESET_MIN_DISTANCE:
        reset_timer += delta
        if reset_timer >= RESET_TIME:
            global_transform = start_transform
            reset_timer = 0


func interact():
    # (Ignore the unused variable warning)
    # warning-ignore:return_value_discarded
    get_tree().change_scene("res://Game.tscn")


func dropped():
    global_transform = start_transform
    reset_timer = 0
Let's quickly go over how this script works.
Explaining the reset box code
Like with the other special RigidBody-based objects we've created, the reset box extends VR_Interactable_Rigidbody.
The start_transform class variable will store the global transform of the reset box when the game starts, the reset_timer class variable will hold the length of
time that has passed since the reset box's position has moved, the RESET_TIME constant defines the length of time the reset box has to wait before being reset, and
the RESET_MIN_DISTANCE constant defines how far the reset box has to be away from it's initial position before the reset timer starts.
In the _ready function all we are doing is storing the global_transform of the reset position when the scene starts. This is so we can reset the position, rotation, and scale
of the reset box object to this initial transform when enough time has passed.
In the _physics_process function, the code checks to see if the reset box's initial position to the reset box's current position is farther than RESET_MIN_DISTANCE. If it is
farther, then it starts adding time, delta, to reset_timer. Once reset_timer is more than or equal to RESET_TIME, we reset the global_transform to the start_transform
so the reset box is back in its initial position. We then set reset_timer to 0.
The interact function simply reloads the Game.tscn scene using get_tree().change_scene. This will reload the game scene, resetting everything.
Finally, the dropped function resets the global_transform to the initial transform in start_transform so the reset box has its initial position/rotation. Then reset_timer is
set to 0 so the timer is reset.
Reset box finished
With that done, when you grab and interact with the reset box, the entire scene will reset/restart and you can destroy all the targets again!
Note
Resetting the scene abruptly without any sort of transition can lead to discomfort in VR.
Final notes
Whew! That was a lot of work.
Now you have a fully working VR project with multiple different types of special RigidBody-based nodes that can be used and extended. Hopefully this will help serve as an introduction to making fully-featured VR games in Godot! The code and concepts detailed in this tutorial can be expanded on to make puzzle games, action games, story-based games, and more!
Warning
You can download the finished project for this tutorial series on the OpenVR GitHub repository, under the releases tab!