Import process
Importing assets in Godot 3.0+
Previously, importing assets in Godot 2.x required manual maintenance of a separate directory with source assets. Without doing this, it was impossible to specify how to convert and change import flags for textures, audio files, scenes, etc.
In Godot 3.0+, we use a more modern approach to importing: Simply drop your assets (image files, scenes, audio files, fonts, etc) directly in the project folder (copy them manually with your OS file explorer). Godot will automatically import these files internally and keep the imported resources hidden in a res://.import folder.
This means that when trying to access imported assets through code you need to use the Resource Loader as it will automatically take into account where the internal files are saved. If you try and access an imported asset using the File class it will work in the editor, but break in the exported project.
However, the Resource Loader cannot access non imported files, only the File class can.
Changing import parameters
To change the import parameters of an asset in Godot (again, keep in mind import parameters are only present in non-native Godot resource types) select the relevant resource in the filesystem dock:
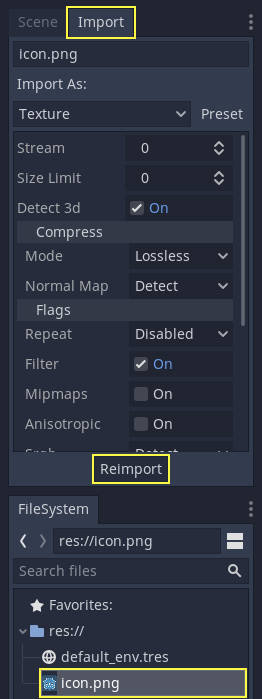
Then, after adjusting the parameters, press "Reimport". These parameters will only be used for this asset and on future reimports.
Changing the import parameters of several assets at the same time is also possible. Simply select all of them together in the resources dock and the exposed parameters will apply to all of them when reimporting.
Reimporting multiple assets
While working on a project you may find that several assets need to have the same parameters changed, such as enabling mipmaps, but you only want those specific parameters changed. To do this, select every asset you want to reimport in the file system. In the import tab there will now be a checkbox to the left of every import parameter.
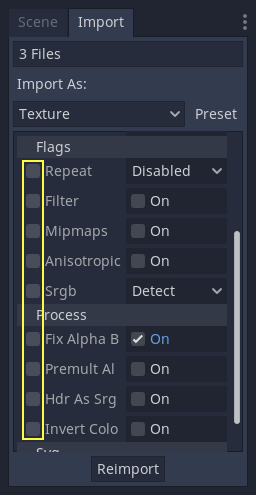
Select the checkbox of the parameters you want to change on your imported assets, then change the parameters normally. Finally, click the reimport button and every selected asset will be reimported with only those parameters changed.
Automatic reimport
When the MD5 checksum of the source asset changes, Godot will perform an automatic reimport of it, applying the preset configured for that specific asset.
Files generated
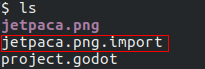
Importing will add an extra <asset>.import file, containing the import configuration. Make sure to commit these to your version control system!
Additionally, extra assets will be preset in the hidden res://.import folder:

If any of the files present in this folder is erased (or the whole folder), the asset or assets will be reimported automatically. As such, committing this folder to the version control system is optional. It can shorten reimporting time when checking out on another computer, but it takes considerably more space and transfer time. Pick your poison!
Changing import resource type
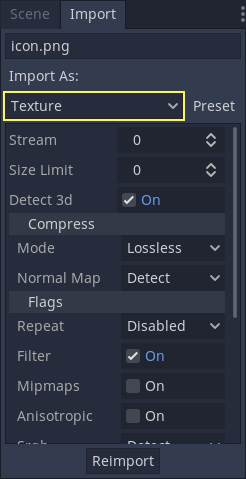
Some source assets can be imported as different types of resources. For this, select the relevant type of resource desired and press "Reimport":
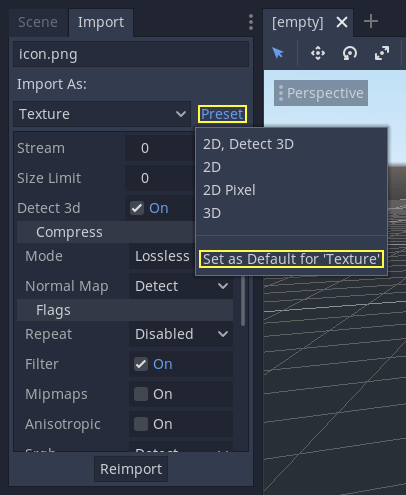
Changing default import parameters
Different types of games might require different defaults. Changing the defaults per project can be achieved by using the "Preset.." Menu. Besides some resource types offering presets, the default setting can be saved and cleared too:
Simplicity is key!
This is a very simple workflow which should take very little time to get used to. It also enforces a more correct way to deal with resources.
There are many types of assets available for import, so please continue reading to understand how to work with all of them!