Attention: Here be dragons
This is the latest
(unstable) version of this documentation, which may document features
not available in or compatible with released stable versions of Godot.
Checking the stable version of the documentation...
프로젝트 설정하기
이 짧은 첫 번째 파트에서는 프로젝트를 설정하고 정리해 보겠습니다.
Godot를 실행하고 새로운 프로젝트를 만듭니다.
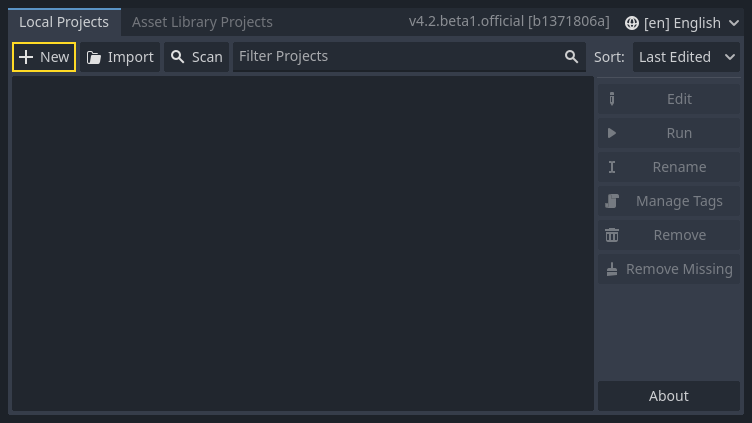
새 프로젝트를 만들 때 올바른 프로젝트 경로만 선택하면 됩니다. 다른 디폴트 설정은 그대로 두셔도 됩니다.
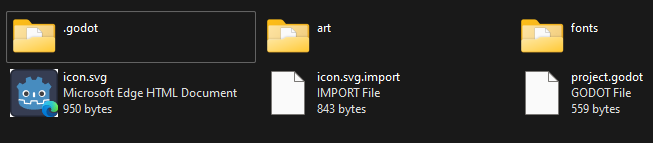
Godot를 실행하고 새 프로젝트를 만드세요. 그런 다음 dodge_assets.zip을 다운로드하세요. 여기에는 게임에 쓸 이미지와 소리가 포함되어 있습니다. 프로젝트 폴더에서 압축을 풀어줍니다.
Godot를 실행하고 새 프로젝트를 만드세요. 그런 다음 dodge_assets.zip을 다운로드하세요. 여기에는 게임에 쓸 이미지와 소리가 포함되어 있습니다. 프로젝트 폴더에서 압축을 풀어줍니다.
Godot에서 C#을 사용하기 위해 필요한 종속성(dependencies)이 있는지 확인하세요. 안정적인 최신 .NET SDK와 VS Code와 같은 편집기가 필요합니다. 참조 준비사항을 참조하세요.
이 튜토리얼의 C++ 부분은 아직 새로운 GDExtension 시스템에 맞게 재작성되지 않았습니다.
씬 트리는 다음과 같아야 합니다:
이 게임은 포트레이트 모드로 설계되었으므로 게임 창의 크기를 조절해야 합니다. 프로젝트 -> 프로젝트 설정을 클릭하여 프로젝트 설정 창을 열고, 왼쪽 열에서 표시 -> 창 탭을 엽니다. 거기에서 "뷰포트 너비"를 480으로, "뷰포트 높이"를 720으로 설정합니다. 왼쪽 상단 모서리에서 "프로젝트" 메뉴를 볼 수 있습니다.
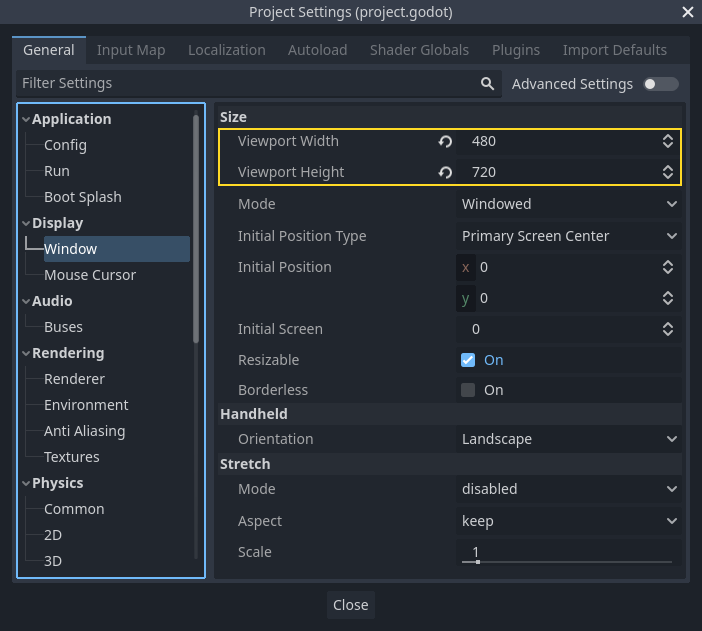
또한 늘이기 옵션 아래의, 모드를 canvas_items로 그리고 비율을 keep으로 설정하세요. 이렇게 하면 게임이 다양한 크기의 화면에서 일관되게 유지됩니다.

프로젝트 조직하기
이 프로젝트에서는 Player, Mob, HUD 등 3개의 독립적인 씬을 만들고 이를 게임의 '메인' 씬에 결합할 것입니다.
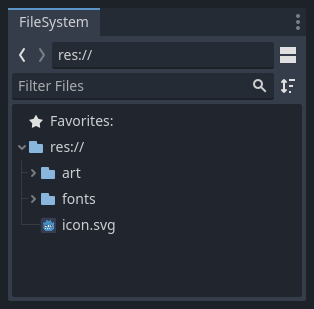
이 프로젝트에서는 Player, Mob, HUD의 3개의 독립적인 씬을 만들고 게임의 Main 씬으로 결합할 것입니다. 더 큰 프로젝트에서는 다양한 씬과 해당 스크립트를 저장할 폴더를 만드는 것이 유용할 수 있지만 이와 같이 비교적 작은 게임의 경우 res://로 식별되는 프로젝트의 루트 폴더에 씬과 스크립트를 저장할 수 있습니다. 왼쪽 아래의 파일시스템 독에서 프로젝트 폴더를 볼 수 있습니다:
프로젝트가 준비되었으므로 다음 단원에서 Player 씬을 디자인할 준비가 되었습니다.