Attention: Here be dragons
This is the latest
(unstable) version of this documentation, which may document features
not available in or compatible with released stable versions of Godot.
Checking the stable version of the documentation...
노드와 씬
Godot의 주요 개념 개요에서 우리는 Godot 게임이 씬의 트리이며 각 씬은 노드의 트리라는 것을 알아보았습니다. 이 단원에서는 이들에 대해 좀 더 자세히 설명합니다. 또한 첫 번째 씬을 만들 것입니다.
노드
노드는 게임의 기본 구성 요소입니다. 이들은 요리 레시피의 재료와 같습니다. 이미지를 표시하거나 소리를 재생하거나 카메라를 표현하는 등 수십 가지 종류가 있습니다.
모든 노드에는 다음과 같은 특징이 있습니다:
이름.
편집할 수 있는 속성.
매 프레임마다 업데이트를 위한 콜백을 받습니다.
새 속성과 기능으로 그것들을 확장시킬 수 있습니다.
다른 노드의 자식으로 그것들을 추가할 수 있습니다.
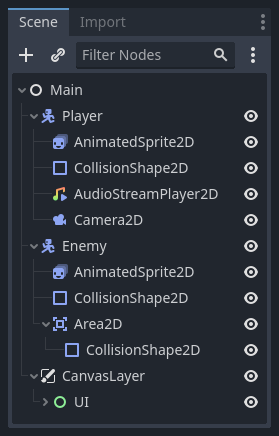
The last characteristic is important. Together, nodes form a tree, which is a powerful feature to organize projects. Since different nodes have different functions, combining them produces more complex behavior. As we saw before, you can build a playable character that the camera follows using a CharacterBody2D node, a Sprite2D node, a Camera2D node, and a CollisionShape2D node.
씬
노드를 캐릭터와 같이 트리로 조직할 때, 이 구조를 씬이라고 부릅니다. 씬을 저장한 후에는, 편집기에서 새로운 노드 유형처럼 작동하여 기존 노드의 자식으로 추가할 수 있습니다. 이 경우 씬의 인스턴스는 내부를 숨긴 단일 노드로 표시됩니다.
씬을 사용하면 게임의 코드를 원하는 대로 구성할 수 있습니다. **노드를 조합**하여 게임 캐릭터의 달리기와 점프, 체력 바, 상호작용할 수 있는 상자 등과 같이 사용자 정의 및 복잡한 노드 유형을 만들 수 있습니다.

기본적으로 Godot 편집기는 씬 편집기입니다. UI로 되어있는 2D와 3D 씬을 수정하는 툴은 많이 있지만, Godot 프로젝트는 당신이 필요로 하는 그 많은 씬을 포함합니다. 게임 엔진은 그저 메인 씬만을 필요로 하며, 게임을 만들거나 플레이할 때 Godot가 제일 먼저 불러옵니다.
노드처럼 작동하는 것 외에도, 씬에는 다음과 같은 특징이 있습니다:
예시의 "Player"처럼 항상 하나의 루트 노드를 가집니다.
로컬 드라이브에 저장하고 나중에 다시 불러올 수 있습니다.
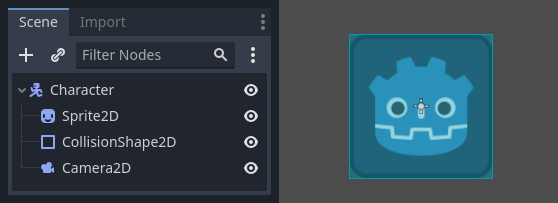
씬의 인스턴스를 원하는 만큼 생성할 수 있습니다. 예를 들어, "Character" 씬에서 게임 내에 다섯 개 또는 열 개의 캐릭터를 생성할 수 있습니다.
첫 번째 씬 만들기
이제 노드 하나만 있는 첫 번째 씬을 만들어 봅시다. 그러려면 먼저 새 프로젝트 만들기를 해야 합니다. 프로젝트를 열면 빈 편집기 화면이 보일 것입니다.
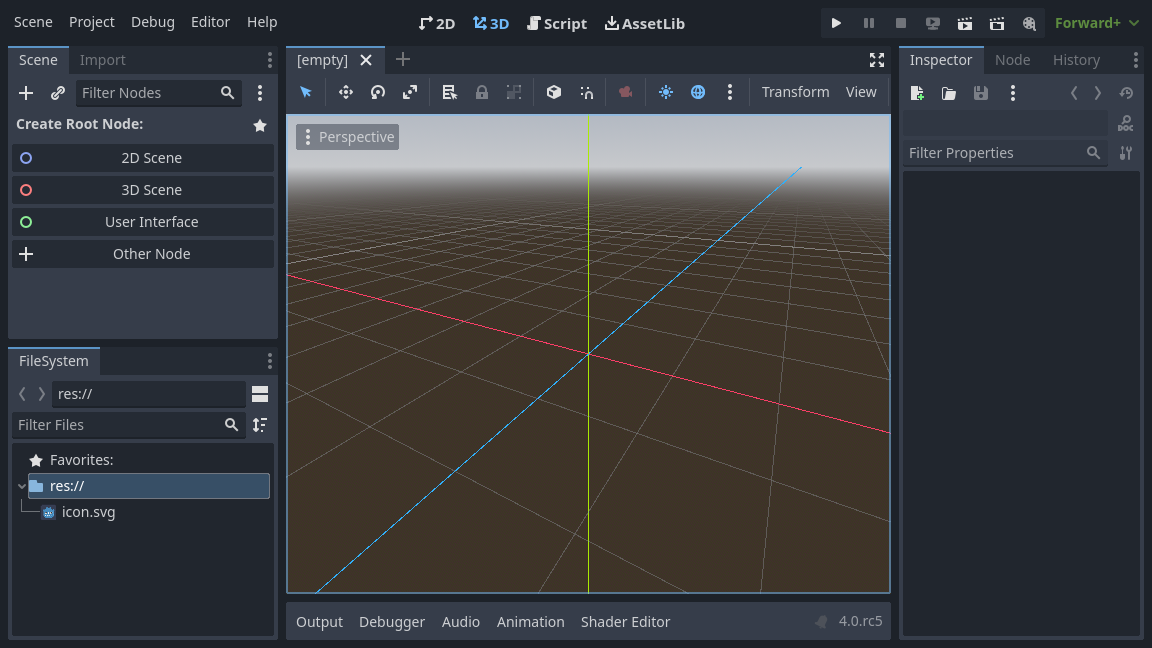
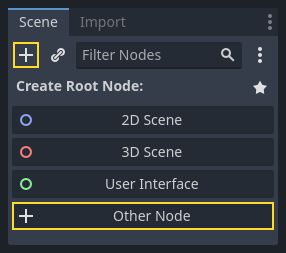
비어 있는 씬에서는 왼쪽의 씬 독에 루트 노드를 빠르게 추가할 수 있는 여러 선택지가 표시됩니다. 노드를, 노드를, 노드를 추가합니다. 이 프리셋은 편의를 위한 것이며 필수는 아닙니다. 버튼을 누르는 것과 같으며, 이 버튼은 보통 현재 선택된 노드의 자식으로 새 노드를 추가합니다.
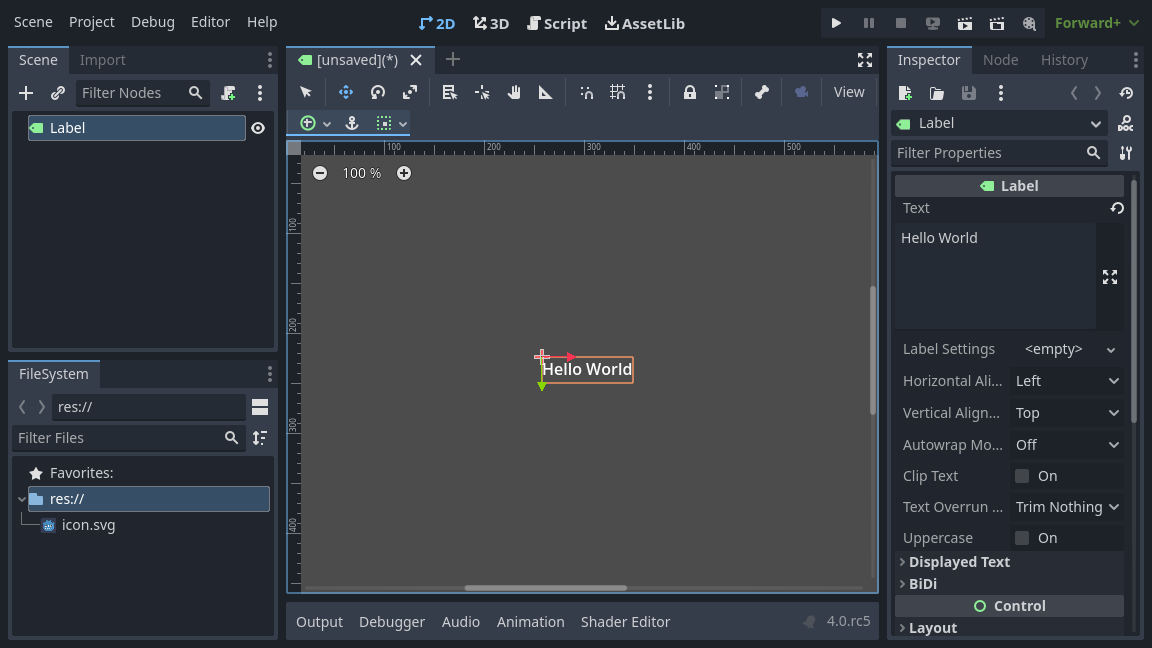
이번에는 씬에 Label 노드 하나를 추가하겠습니다. 이 노드는 화면에 텍스트를 그리는 역할을 합니다.
버튼이나 버튼을 눌러 루트 노드를 만드세요.
새 노드 만들기 대화 상자가 열리고, 사용 가능한 노드의 긴 목록이 표시됩니다.
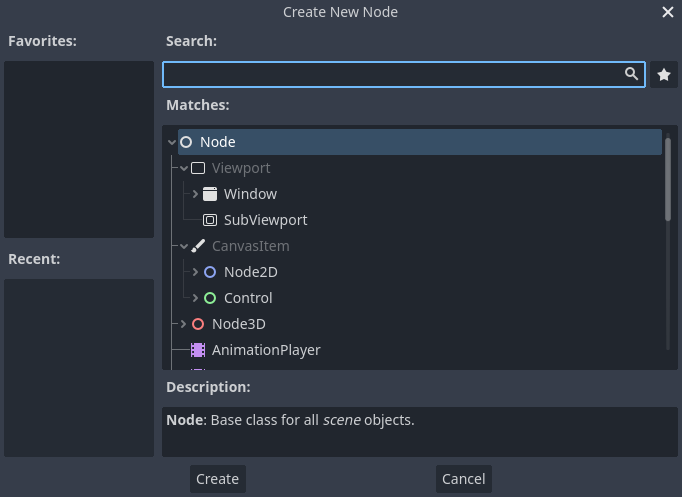
Label 노드를 선택합니다. 목록을 필터링하기 위해 이름을 입력할 수 있습니다.
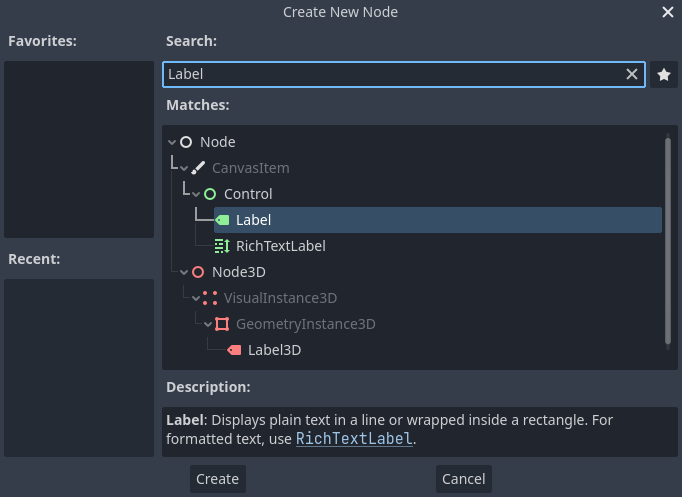
Label 노드를 클릭해 선택한 다음, 창 아래쪽의 버튼을 클릭하세요.
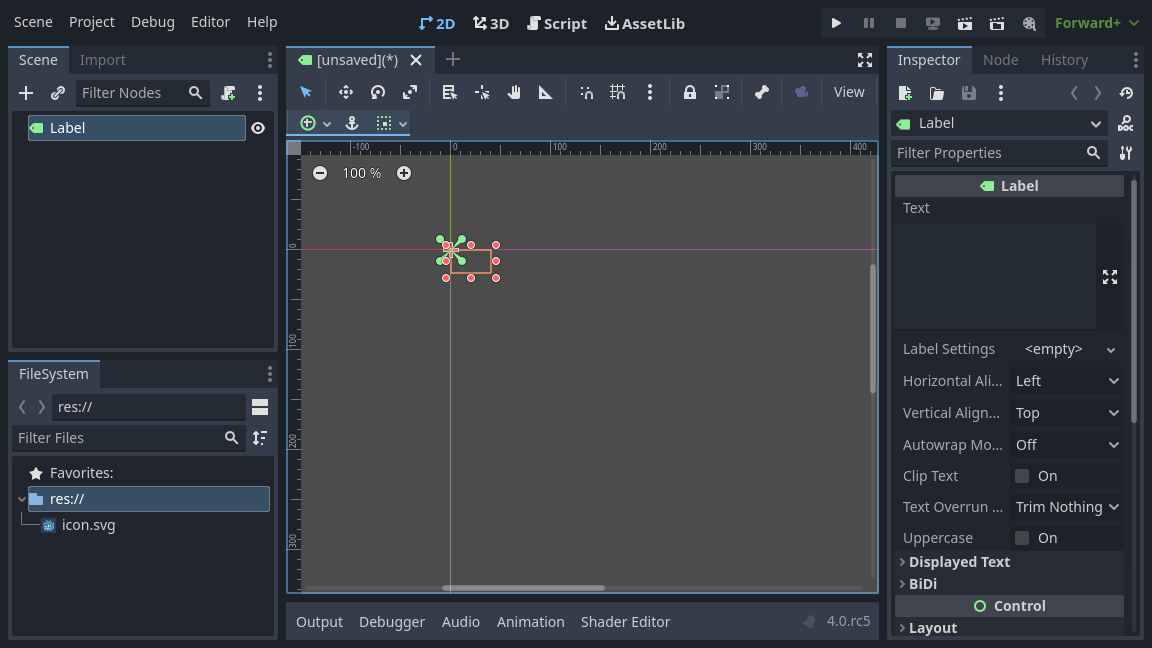
씬의 첫 번째 노드를 추가하면 많은 일이 발생합니다. Label은 2D 노드 유형이므로 씬이 2D 작업 영역으로 변경됩니다. Label이 선택된 채로 뷰포트의 좌상단에 나타납니다. 노드는 왼쪽의 씬 독에 나타나며, 노드의 속성은 오른쪽의 인스펙터 독에 나타납니다.
노드 속성 변경
다음 단계는 Label의 Text 속성을 바꾸는 것입니다. 이를 "Hello World"로 바꿔 봅시다.
뷰포트 오른쪽의 인스펙터 독으로 이동하세요. Text 속성 아래의 입력 필드를 클릭하고 "Hello World"를 입력하세요.
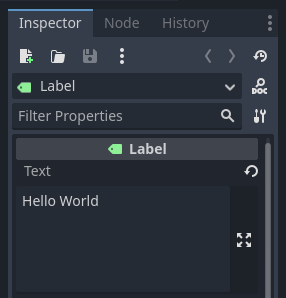
입력하는 동안 뷰포트에 텍스트가 그려지는 것을 볼 수 있을 것입니다.
더 보기
텍스트에서 했던 것처럼 인스펙터에 나열된 모든 속성을 편집할 수 있습니다. 인스펙터 독에 대한 전체 참조는 doc_inspector_plugins을 참조하세요.
툴바에서 이동 툴을 선택하여 Label 노드를 뷰포트에서 이동할 수 있습니다.

Label을 선택한 상태에서 뷰포트에서 어느 곳이든 클릭한 채로 드래그하여 사각형으로 지정된 뷰의 중앙으로 이동시킵니다.
씬 실행하기
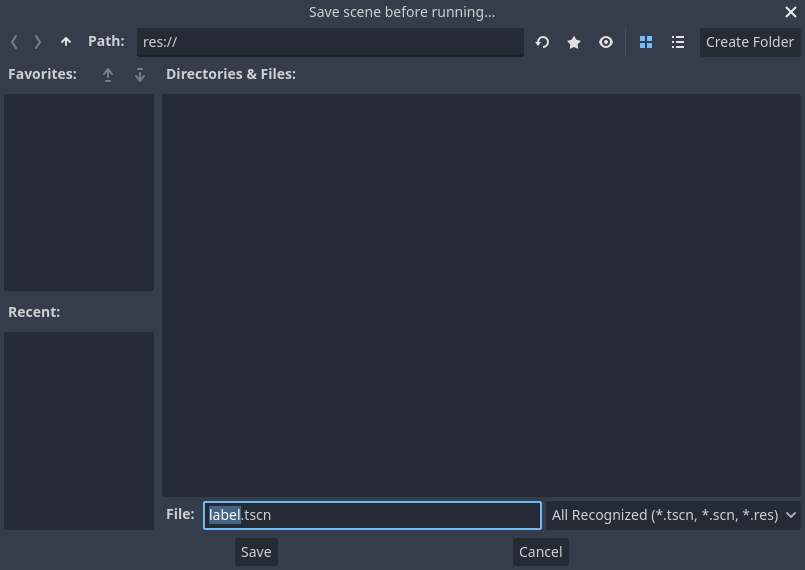
이제 씬을 실행할 준비가 끝났습니다! 화면 오른쪽 위의 버튼을 누르거나 F6`(macOS에서는 :kbd:`Cmd + R)을 누르세요.

팝업이 씬을 저장하라고 안내합니다. 씬을 실행하려면 저장이 필요합니다. 파일 브라우저에서 버튼을 눌러 ``label.tscn``으로 저장하세요.
참고
편집기의 다른 파일 대화 상자와 마찬가지로 새 씬을 다른 이름으로 저장 대화 상자는 프로젝트 내부에만 파일을 저장할 수 있습니다. 창 위쪽의 res:// 경로는 프로젝트의 루트 디렉터리를 나타내며, "resource path"를 뜻합니다. Godot의 파일 경로에 대한 자세한 내용은 파일 시스템을 참조하세요.
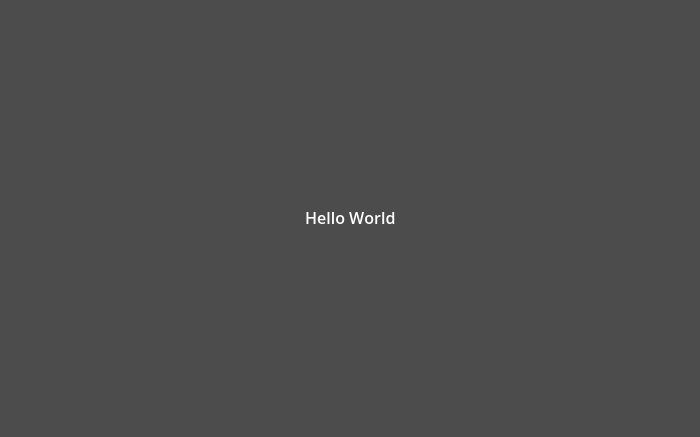
새 창에서 애플리케이션이 열리고 "Hello World"라는 텍스트가 표시되어야 합니다.
창을 닫거나 F8`(macOS에서는 :kbd:`Cmd + .)을 눌러 실행 중인 씬을 종료하세요.
더 보기
See Game embedding for more information about the Game window that appears when running the project.
메인 씬 설정하기
테스트 씬을 실행할 때는 버튼을 사용했습니다. 그 옆의 버튼을 사용하면 프로젝트의 **메인 씬**을 설정하고 실행할 수 있습니다. F5`(macOS에서는 :kbd:`Cmd + B)를 눌러도 됩니다.

참고
프로젝트의 메인 씬을 실행하는 것은 현재 씬을 실행하는 것과는 별개입니다. 예기치 않은 동작이 발생하면 올바른 씬을 실행하고 있는지 확인하세요.
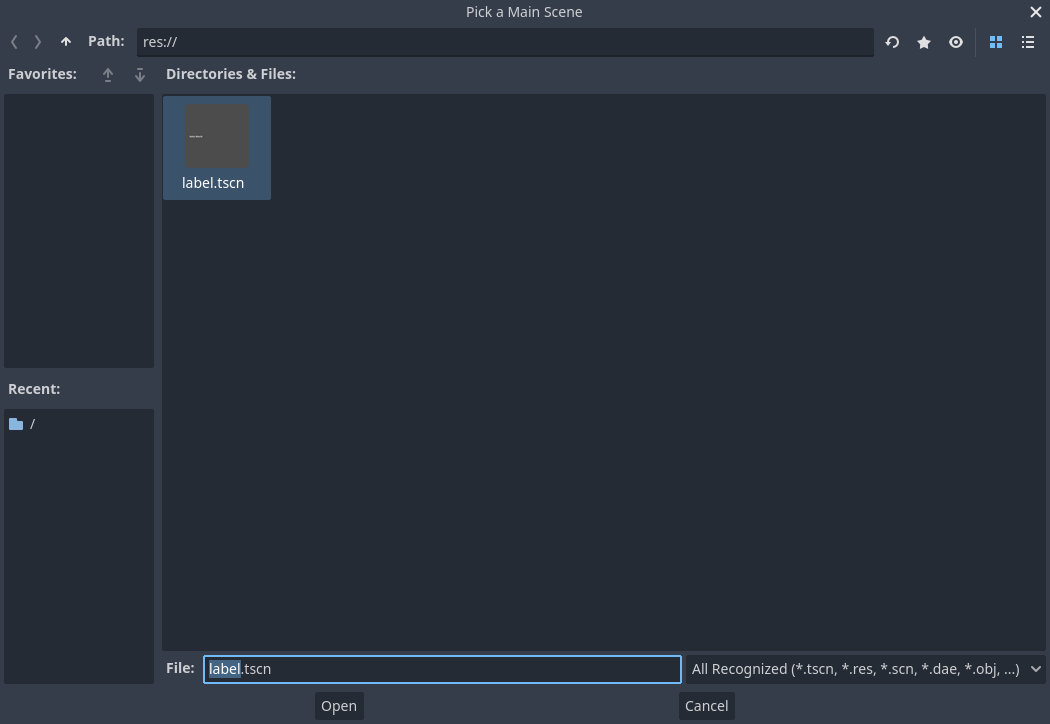
팝업 창이 나타나고 메인 씬을 선택하라는 메시지가 표시됩니다.
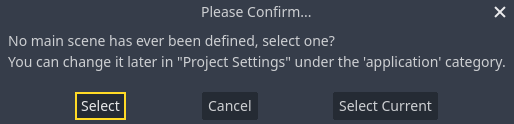
버튼을 클릭한 다음, 나타나는 파일 대화 상자에서 ``label.tscn``을 더블 클릭하세요.
데모가 다시 실행되어야 합니다. 앞으로 프로젝트를 실행할 때마다 Godot는 이 씬을 시작점으로 사용할 것입니다.
참고
편집기는 프로젝트 디렉터리의 project.godot 파일에 메인 씬의 경로를 저장합니다. 프로젝트 설정을 바꾸기 위해 이 텍스트 파일을 직접 편집할 수도 있지만, 창을 사용해도 됩니다. 자세한 내용은 프로젝트 설정을 참조하세요.
다음 파트에서는 게임 및 Godot에서 또 다른 중요한 개념인 씬의 인스턴스(instances)를 생성하는 것에 대해 논의하겠습니다.