Attention: Here be dragons
This is the latest
(unstable) version of this documentation, which may document features
not available in or compatible with released stable versions of Godot.
Checking the stable version of the documentation...
간단한 플러그인 만들기
이 페이지에서는 iOS 플러그인의 기능, 기존 플러그인 사용 방법, 새 플러그인 코딩 단계를 설명합니다.
iOS 플러그인을 사용하면 타사 라이브러리를 사용하고 앱 내 구매, GameCenter 통합, ARKit 지원 등과 같은 iOS 관련 기능을 지원할 수 있습니다.
간단한 플러그인 만들기
iOS 플러그인에는 .gdip 구성 파일, 즉 .a 정적 라이브러리 또는 .a 정적 라이브러리를 포함하는 ``.xcframework``일 수 있는 바이너리 파일과 기타 종속성이 필요합니다. 이를 사용하려면 다음을 수행해야 합니다.
플러그인 파일을 Godot 프로젝트의
res://ios/plugins디렉토리에 복사하세요. ``res://ios/plugins/my_plugin``와 같은 하위 디렉터리에 파일을 그룹화할 수도 있습니다.Godot 편집기는
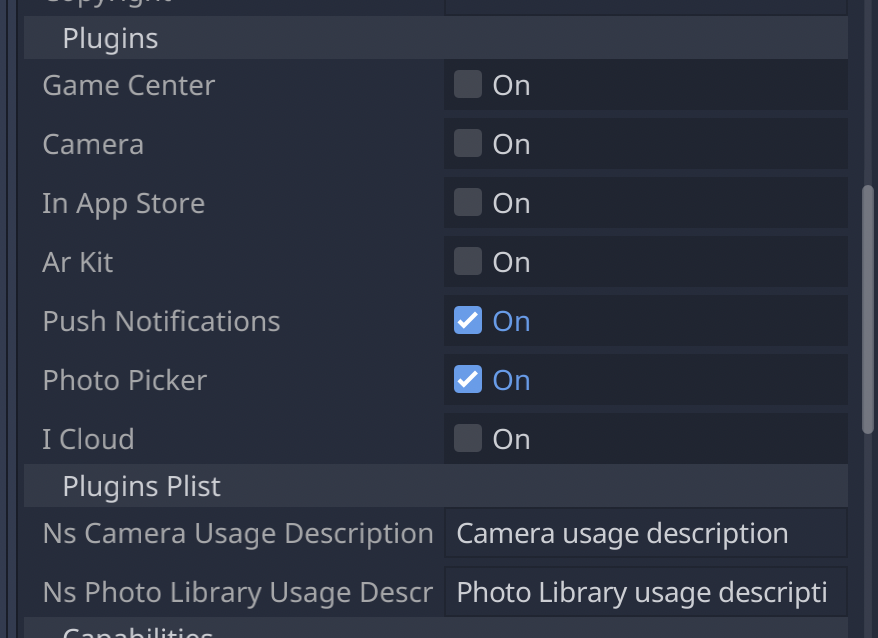
res://ios/plugins및 해당 하위 디렉터리 내의.gdip파일을 자동으로 감지하고 가져옵니다.프로젝트 -> 내보내기... -> iOS로 이동하고 옵션 탭에서 플러그인 섹션으로 스크롤하여 감지된 플러그인을 찾고 활성화할 수 있습니다.
플러그인이 활성화되면 ``Engine.get_singleton()``를 사용하여 코드에서 플러그인에 액세스할 수 있습니다.
if Engine.has_singleton("MyPlugin"):
    var singleton = Engine.get_singleton("MyPlugin")
    print(singleton.foo())
참고
플러그인의 파일은 res://ios/plugins/ 디렉토리나 하위 디렉토리에 있어야 합니다. 그렇지 않으면 Godot 편집기가 자동으로 감지하지 않습니다.
간단한 플러그인 만들기
기본적으로 Godot iOS 플러그인은 다음 요구 사항을 갖춘 iOS 라이브러리(.a 아카이브 파일 또는 정적 라이브러리가 포함된 .xcframework)입니다:
라이브러리는 Godot 엔진 헤더에 대한 종속성을 가져야 합니다.
라이브러리는
.gdip구성 파일과 함께 제공되어야 합니다.
iOS 플러그인은 Godot 모듈과 동일한 기능을 가질 수 있지만 더 많은 유연성을 제공하고 엔진을 다시 빌드할 필요가 없습니다.
플러그인 개발을 시작하는 단계는 다음과 같습니다. 개발 환경으로 `Xcode <https://developer.apple.com/develop/>`_을 사용하는 것이 좋습니다.
더 보기
https://github.com/godotengine/godot-demo-projects
`Godot iOS 플러그인 템플릿 <https://github.com/naithar/godot_ios_plugin>`_은 iOS 플러그인을 시작하는 데 필요한 모든 상용구를 제공합니다.
IOS 플러그인 빌드하기:
만들기는 Xcode 내부의 플러그인을 위한 Objective-C 정적 라이브러리입니다.
HEADER_SEARCH_PATHS``에 플러그인 라이브러리에 대한 종속성으로 Godot 엔진 헤더 파일을 추가하세요. ``Build Settings탭 내에서 설정을 찾을 수 있습니다.godot-cpp 저장소 의 사본.
SCons를 실행하여 헤더를 생성합니다. :ref:`doc_compiling_for_ios`를 읽으면 프로세스를 배울 수 있습니다. 엔진이 컴파일을 시작하기 전에 헤더가 생성되므로 컴파일이 완료될 때까지 기다릴 필요가 없습니다.
iOS 플러그인과 iOS 내보내기 템플릿에 동일한 헤더 파일을 사용해야 합니다.
Build Settings탭에서OTHER_CFLAGS``의 정적 라이브러리에 대한 컴파일 플래그를 지정합니다. 디버그 지원이 필요한 경우 가장 중요한 것은 ``-fcxx-modules,-fmodules및 ``-DDEBUG``입니다. 다른 플래그는 Godot를 컴파일하는 데 사용하는 것과 동일해야 합니다. 예를 들어:
-DPTRCALL_ENABLED -DDEBUG_ENABLED -DDEBUG_MEMORY_ALLOC -DDISABLE_FORCED_INLINE -DTYPED_METHOD_BIND
플러그인에 필요한 로직을 추가하고 라이브러리를 빌드하여
.a파일을 생성하세요. 아마도debug및release대상.a파일을 모두 빌드해야 할 것입니다. 필요에 따라 둘 중 하나 또는 둘 다를 선택하세요. 디버그 및 릴리스.a파일이 모두 필요한 경우 해당 이름은[PluginName].[TargetType].a패턴과 일치해야 합니다. SCons 구성을 사용하여 정적 라이브러리를 구축할 수도 있습니다.iOS 플러그인 시스템은
.xcframework파일도 지원합니다. 생성하려면 다음과 같은 명령을 사용할 수 있습니다.
xcodebuild -create-xcframework -library [DeviceLibrary].a -library [SimulatorLibrary].a -output [PluginName].xcframework
시스템이 플러그인을 감지하고 로드하는 데 도움이 되는 Godot iOS 플러그인 구성 파일 만들기:
구성 파일 확장자는
gdip``(예: ``MyPlugin.gdip)여야 합니다.가장 일반적인 사용 케이스는 다음과 같습니다:
[config]
name="MyPlugin"
binary="MyPlugin.a"

initialization="init_my_plugin"
deinitialization="deinit_my_plugin"

[dependencies]
linked=[]
embedded=[]
system=["Foundation.framework"]

capabilities=["arkit", "metal"]

files=["data.json"]

linker_flags=["-ObjC"]

[plist]
PlistKeyWithDefaultType="Some Info.plist key you might need"
StringPlistKey:string="String value"
IntegerPlistKey:integer=42
BooleanPlistKey:boolean=true
RawPlistKey:raw="
<array>
    <string>UIInterfaceOrientationPortrait</string>
</array>
"
StringPlistKeyToInput:string_input="Type something"
The config section and fields are required and defined as follow:
name: name of the plugin
binary: this should be the filepath of the plugin library (
aorxcframework) file.
The filepath can be relative (e.g.:
MyPlugin.a,MyPlugin.xcframework) in which case it's relative to the directory where thegdipfile is located.The filepath can be absolute:
res://some_path/MyPlugin.aorres://some_path/MyPlugin.xcframework.In case you need multitarget library usage, the filename should be
MyPlugin.aand.afiles should be named asMyPlugin.release.aandMyPlugin.debug.a.In case you use multitarget
xcframeworklibraries, their filename in the configuration should beMyPlugin.xcframework. The.xcframeworkfiles should be named asMyPlugin.release.xcframeworkandMyPlugin.debug.xcframework.
The dependencies and plist sections are optional and defined as follow:
dependencies:
linked: contains a list of iOS frameworks that the iOS application should be linked with.
embedded: contains a list of iOS frameworks or libraries that should be both linked and embedded into the resulting iOS application.
system: contains a list of iOS system frameworks that are required for plugin.
capabilities: contains a list of iOS capabilities that is required for plugin. A list of available capabilities can be found at Apple UIRequiredDeviceCapabilities documentation page.
files: contains a list of files that should be copied on export. This is useful for data files or images.
linker_flags: contains a list of linker flags to add to the Xcode project when exporting the plugin.
plist: should have keys and values that should be present in
Info.plistfile.
Each line should follow pattern:
KeyName:KeyType=KeyValueSupported values for
KeyTypearestring,integer,boolean,raw,string_inputIf no type is used (e.g.:
KeyName="KeyValue")stringtype will be used.If
rawtype is used value for corresponding key will be stored inInfo.plistas is.If
string_inputtype is used you will be able to modify value in Export window.