Attention: Here be dragons
This is the latest
(unstable) version of this documentation, which may document features
not available in or compatible with released stable versions of Godot.
Checking the stable version of the documentation...
편집기에서 코드 실행하기
@tool이 무엇입니까?
``@tool``는 스크립트 상단에 추가하면 편집기에서 실행되도록 하는 강력한 코드 줄입니다. 또한 스크립트의 어느 부분이 편집기에서 실행되고, 어느 부분이 게임에서 실행되고, 어느 부분이 둘 다에서 실행되는지 결정할 수도 있습니다.
많은 일을 하는 데 사용할 수 있지만, 레벨 디자인에서 우리 스스로 예측하기 어려운 것들을 시각적으로 표현하는 데 주로 유용합니다. 다음은 몇 가지 사용 사례입니다.
물리학(중력)의 영향을 받는 대포알을 발사하는 대포가 있는 경우 편집기에서 대포알의 궤적을 그릴 수 있으므로 레벨 디자인이 훨씬 쉬워집니다.
점프 높이가 다양한 점프 패드가 있는 경우 플레이어가 점프했을 때 도달할 수 있는 최대 점프 높이를 그릴 수 있어 레벨 디자인도 더 쉬워집니다.
플레이어가 스프라이트를 사용하지 않고 코드를 사용하여 자체적으로 그리는 경우 편집기에서 해당 그리기 코드를 실행하여 플레이어를 볼 수 있습니다.
사용하는 법
스크립트를 도구로 바꾸려면 코드 상단에 @tool 주석을 추가하세요.
현재 편집기에 있는지 확인하려면 ``Engine.is_editor_hint()``를 사용하세요.
예를 들어, 충돌이 발생한 공간의 지점을 찾으려면 다음과 같이 하면 됩니다:
if Engine.is_editor_hint():
    # Code to execute when in editor.
if (Engine.IsEditorHint())
{
    // Code to execute when in editor.
}
반면, 게임에서만 코드를 실행하려면 동일한 명령문을 무효화하면 됩니다.
if not Engine.is_editor_hint():
    # Code to execute when in game.
if (!Engine.IsEditorHint())
{
    // Code to execute when in game.
}
위의 2가지 조건 중 하나도 포함하지 않은 코드 조각은 에디터와 게임 내에서 모두 실행됩니다.
_process() 함수가 사용자를 찾는 방법은 다음과 같습니다.
func _process(delta):
    if Engine.is_editor_hint():
        # Code to execute in editor.

    if not Engine.is_editor_hint():
        # Code to execute in game.

    # Code to execute both in editor and in game.
public override void _Process(double delta)
{
    if (Engine.IsEditorHint())
    {
        // Code to execute in editor.
    }

    if (!Engine.IsEditorHint())
    {
        // Code to execute in game.
    }

    // Code to execute both in editor and in game.
}
더 많은 정보
일반적인 규칙은 **도구 스크립트가 사용하는 다른 GDScript도 또한 도구**여야 한다는 것입니다. 편집기는 @tool 없이 GDScript 파일에서 인스턴스를 생성할 수 없습니다. 즉, 그렇지 않으면 해당 파일에서 메서드를 호출하거나 멤버 변수를 참조할 수 없다는 의미입니다. 그러나 정적 메서드, 상수 및 열거형은 인스턴스를 생성하지 않고도 사용할 수 있으므로 이를 호출하거나 @tool 스크립트에서 도구가 아닌 다른 스크립트로 참조할 수 있습니다. 이에 대한 한 가지 예외는 :ref:`정적 변수 <doc_gdscript_basics_static_variables>`입니다. ``@tool``가 없는 스크립트에서 정적 변수 값을 읽으려고 하면 항상 ``null``가 반환되지만 그렇게 해도 경고나 오류가 인쇄되지 않습니다. 이 제한은 대상 스크립트가 도구 모드에 있는지 여부에 관계없이 호출될 수 있는 정적 메서드에는 적용되지 않습니다.
@tool 스크립트를 확장해도 확장 스크립트가 자동으로 @tool``로 만들어지지는 않습니다. 확장 스크립트에서 ``@tool``를 생략하면 슈퍼 클래스의 도구 동작이 비활성화됩니다. 따라서 확장 스크립트는 ``@tool 주석도 지정해야 합니다.
편집기의 수정 사항은 영구적이며 실행 취소/다시 실행이 불가능합니다. 예를 들어 다음 섹션에서 스크립트를 제거하면 노드는 회전을 유지합니다. 원치 않는 수정이 발생하지 않도록 주의하세요. 실수할 경우 작업 손실을 방지하려면 :ref:`version control <doc_version_control_systems>`을 설정하는 것이 좋습니다.
디버깅
디버거와 중단점은 스크립트 도구에서 직접 사용할 수 없지만, 편집기의 새 인스턴스를 시작하고 거기에서 디버그하는 것은 가능합니다. 이렇게 하려면 **디버그 > 실행 인스턴스 사용자 정의...**로 이동하여 **기본 실행 인수**에 `--editor`를 지정합니다.
자세한 정보는 프로젝트 내보내기를 참고하세요.
또한 print 문을 사용하여 대신 변수의 내용을 표시할 수 있습니다.
``@tool``를 사용해 보세요.
씬에 Sprite2D 노드를 추가하고 텍스처를 Godot 아이콘으로 설정하세요. 스크립트를 연결하고 열고 다음과 같이 변경합니다.
@tool
extends Sprite2D

func _process(delta):
    rotation += PI * delta
using Godot;

[Tool]
public partial class MySprite : Sprite2D
{
    public override void _Process(double delta)
    {
        Rotation += Mathf.Pi * (float)delta;
    }
}
스크립트를 저장하고 편집기로 돌아갑니다. 이제 개체가 회전하는 것을 볼 수 있습니다. 게임을 실행하면 회전도 됩니다.
참고
변경 사항이 표시되지 않으면 씬을 다시 로드합니다(닫고 다시 엽니다).
이제 어떤 코드가 언제 실행되는지 선택해 보겠습니다. _process() 함수를 다음과 같이 수정하세요.
func _process(delta):
    if Engine.is_editor_hint():
        rotation += PI * delta
    else:
        rotation -= PI * delta
public override void _Process(double delta)
{
    if (Engine.IsEditorHint())
    {
        Rotation += Mathf.Pi * (float)delta;
    }
    else
    {
        Rotation -= Mathf.Pi * (float)delta;
    }
}
스크립트를 저장합니다. 이제 개체는 편집기에서 시계 방향으로 회전하지만 게임을 실행하면 시계 반대 방향으로 회전합니다.
인스턴스 편집하기
스크립트에 가변 속도를 추가하고 내보냅니다. 속도를 업데이트하고 회전 각도도 재설정하려면 검사기의 입력으로 실행되는 설정기 ``set(new_speed)``를 추가하세요. 회전 속도를 포함하도록 ``_process()``를 수정합니다.
@tool
extends Sprite2D


@export var speed = 1:
    # Update speed and reset the rotation.
    set(new_speed):
        speed = new_speed
        rotation = 0


func _process(delta):
    rotation += PI * delta * speed
using Godot;

[Tool]
public partial class MySprite : Sprite2D
{
    private float _speed = 1;

    [Export]
    public float Speed
    {
        get => _speed;
        set
        {
            // Update speed and reset the rotation.
            _speed = value;
            Rotation = 0;
        }
    }

    public override void _Process(double delta)
    {
        Rotation += Mathf.Pi * (float)delta * _speed;
    }
}
참고
다른 노드의 코드는 편집기에서 실행되지 않습니다. 다른 노드에 대한 액세스가 제한됩니다. 트리와 노드 및 해당 기본 속성에 액세스할 수 있지만 사용자 변수에는 액세스할 수 없습니다. 그렇게 하려면 다른 노드도 편집기에서 실행해야 합니다.
Getting notified when arrays or dictionaries change
You can use an Array or Dictionary as an @export variable. In a @tool
script, you can react to any changes to that collection by using a setter.
Normally, at runtime, such a setter is only called when you assign to the
variable, but when you modify an Array or Dictionary in the inspector, the
setter will also be called.
@tool
class_name MyTool
extends Node

@export var my_array = []:
    set(new_array):
        my_array = new_array
        print("My array just changed!")

@export var my_dictionary = {}:
    set(new_dictionary):
        my_dictionary = new_dictionary
        print("My dictionary just changed!")
using Godot;

[Tool]
public partial class MyTool : Node
{
    private Array _myArray = new();
    private Dictionary _myDictionary = new();

    [Export]
    public Array MyArray
    {
        get => _myArray;
        set
        {
            _myArray = value;
            GD.Print("My array just changed!");
        }
    }

    [Export]
    public Dictionary MyDictionary
    {
        get => _myDictionary;
        set
        {
            _myDictionary = value;
            GD.Print("My dictionary just changed!");
        }
    }
}
여러분만의 리소스 만들기
때로는 도구가 리소스를 사용하기를 원할 수도 있습니다. 그러나 편집기에서 해당 리소스의 속성을 변경하면 도구의 set() 메서드가 호출되지 않습니다.
@tool
class_name MyTool
extends Node

@export var resource: MyResource:
    set(new_resource):
        resource = new_resource
        _on_resource_set()

# This will only be called when you create, delete, or paste a resource.
# You will not get an update when tweaking properties of it.
func _on_resource_set():
    print("My resource was set!")
using Godot;

[Tool]
public partial class MyTool : Node
{
    private MyResource _resource;

    [Export]
    public MyResource Resource
    {
        get => _resource;
        set
        {
            _resource = value;
            OnResourceSet();
        }
    }

    // This will only be called when you create, delete, or paste a resource.
    // You will not get an update when tweaking properties of it.
    private void OnResourceSet()
    {
        GD.Print("My resource was set!");
    }
}
이 문제를 해결하려면 먼저 리소스를 도구로 만들고 속성이 설정될 때마다 changed 시그널를 내보내도록 해야 합니다.
# Make Your Resource a tool.
@tool
class_name MyResource
extends Resource

@export var property = 1:
    set(new_setting):
        property = new_setting
        # Emit a signal when the property is changed.
        changed.emit()
using Godot;

[Tool]
public partial class MyResource : Resource
{
    private float _property = 1;

    [Export]
    public float Property
    {
        get => _property;
        set
        {
            _property = value;
            // Emit a signal when the property is changed.
            EmitChanged();
        }
    }
}
그런 다음 새 리소스가 설정되면 시그널를 연결하려고 합니다.
@tool
class_name MyTool
extends Node

@export var resource: MyResource:
    set(new_resource):
        resource = new_resource
        # Connect the changed signal as soon as a new resource is being added.
        if resource != null:
            resource.changed.connect(_on_resource_changed)

func _on_resource_changed():
    print("My resource just changed!")
using Godot;

[Tool]
public partial class MyTool : Node
{
    private MyResource _resource;

    [Export]
    public MyResource Resource
    {
        get => _resource;
        set
        {
            _resource = value;
            // Connect the changed signal as soon as a new resource is being added.
            if (_resource != null)
            {
                _resource.Changed += OnResourceChanged;
            }
        }
    }

    private void OnResourceChanged()
    {
        GD.Print("My resource just changed!");
    }
}
마지막으로, 이전 리소스를 사용하고 다른 곳에서 변경하면 불필요한 업데이트가 발생하므로 시그널 연결을 끊는 것을 잊지 마세요.
@export var resource: MyResource:
    set(new_resource):
        # Disconnect the signal if the previous resource was not null.
        if resource != null:
            resource.changed.disconnect(_on_resource_changed)
        resource = new_resource
        if resource != null:
            resource.changed.connect(_on_resource_changed)
[Export]
public MyResource Resource
{
    get => _resource;
    set
    {
        // Disconnect the signal if the previous resource was not null.
        if (_resource != null)
        {
            _resource.Changed -= OnResourceChanged;
        }
        _resource = value;
        if (_resource != null)
        {
            _resource.Changed += OnResourceChanged;
        }
    }
}
노드 구성 경고 보고하기
Godot는 노드 구성 경고 시스템을 사용하여 잘못 구성된 노드에 대해 사용자에게 경고합니다. 노드가 올바르게 구성되지 않으면 씬 독의 노드 이름 옆에 노란색 경고 기호가 나타납니다. 아이콘에 마우스를 올리거나 클릭하면 경고 메시지가 나타납니다. 스크립트에서 이 기능을 사용하면 귀하와 귀하의 팀이 장면을 설정할 때 실수를 피할 수 있습니다.
노드 구성 경고를 사용할 때 경고 변경 사항에 영향을 주거나 제거해야 하는 값이 있으면 update_configuration_warnings 를 호출해야 합니다. 기본적으로 경고는 씬을 닫았다가 다시 열 때만 업데이트됩니다.
# Use setters to update the configuration warning automatically.
@export var title = "":
    set(p_title):
        if p_title != title:
            title = p_title
            update_configuration_warnings()

@export var description = "":
    set(p_description):
        if p_description != description:
            description = p_description
            update_configuration_warnings()


func _get_configuration_warnings():
    var warnings = []

    if title == "":
        warnings.append("Please set `title` to a non-empty value.")

    if description.length() >= 100:
        warnings.append("`description` should be less than 100 characters long.")

    # Returning an empty array means "no warning".
    return warnings
EditorScript를 사용하여 일회성 스크립트 실행
때로는 편집기에서 바로 사용할 수 없는 특정 작업을 자동화하기 위해 코드를 한 번만 실행해야 하는 경우도 있습니다. 몇 가지 예는 다음과 같습니다.
프로젝트를 실행할 필요 없이 GDScript 또는 C# 스크립팅을 위한 놀이터로 사용하세요.
print()출력이 편집기 출력 패널에 표시됩니다.현재 편집된 씬에서 모든 조명 노드의 크기를 조정하세요. 원하는 위치에 조명을 배치한 후 레벨이 너무 어둡거나 너무 밝아 보이는 것을 알 수 있습니다.
나중에 쉽게 수정할 수 있도록 복사하여 붙여넣은 노드를 씬 인스턴스로 교체합니다.
이는 스크립트에서 :ref:`class_EditorScript`를 확장하여 Godot에서 사용할 수 있습니다. 이는 편집기 플러그인을 생성하지 않고도 편집기에서 개별 스크립트를 실행할 수 있는 방법을 제공합니다.
EditorScript를 생성하려면 FileSystem 도크에서 폴더나 빈 공간을 마우스 오른쪽 버튼으로 클릭한 다음 **New > 스크립트...**를 선택합니다. 스크립트 생성 대화상자에서 트리 아이콘을 클릭하여 확장할 객체를 선택합니다(또는 왼쪽 필드에 직접 ``EditorScript``를 입력합니다. 단, 대소문자를 구분합니다).
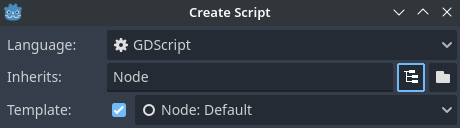
스크립트 편집기 만들기 대화 상자에서 편집기 스크립트를 만들기
그러면 _run() 메소드가 이미 삽입되어 있는 EditorScript에 적합한 스크립트 템플릿이 자동으로 선택됩니다.
@tool
extends EditorScript

# Called when the script is executed (using File -> Run in Script Editor).
func _run():
    pass
using Godot;

[Tool]
public partial class MyEditorScript : EditorScript
{
    // Called when the script is executed (right-click on Script -> Run in FileSystem dock).
    public override void _Run()
    {
        // ...
    }
}
This _run() method is executed when you use any of the 4 approaches that can be
used to run an EditorScript:
Use at the top of the script editor with the EditorScript being the current tab.
Press the keyboard shortcut Ctrl + Shift + X while the EditorScript is the current tab. This keyboard shortcut is only effective when focused on the script editor.
Right-click the script in the FileSystem dock and choose .
Add a
class_name <name>at the top of the script, bring up the command palette by pressing Ctrl + Shift + P, and enter the class name to run it. The entry will be named according to the class name, with automatic capitalization applied.
Scripts that extend EditorScript must be @tool scripts to function.
참고
EditorScripts can only be run from the Godot script editor. If you are using an external editor, use one of the last two approaches to run the script.
참고
C# EditorScripts cannot be run from the script editor as it only supports GDScript. Please refer to the above alternative approaches to run custom C# EditorScripts.
Keep in mind C# tool scripts will only appear in the command palette when denoted by the GlobalClass attribute.
위험
EditorScript에는 실행 취소/다시 실행 기능이 없으므로 스크립트가 데이터를 수정하도록 설계된 경우 실행하기 전에 씬을 저장하십시오.
To access nodes in the currently edited scene, use the EditorInterface.get_edited_scene_root() method which returns the root Node of the currently edited scene. Here's an example that recursively gets all nodes in the currently edited scene and doubles the range of all OmniLight3D nodes:
@tool
# Thanks to the class name, we can run this script by bringing up
# the command palette and searching "Scale Omni Lights".
class_name ScaleOmniLights
extends EditorScript

func _run():
    for node in EditorInterface.get_edited_scene_root().find_children("", "OmniLight3D"):
        # Don't operate on instanced subscene children, as changes are lost
        # when reloading the scene.
        # See the "Instancing scenes" section below for a description of `owner`.
        var is_instanced_subscene_child = node != get_scene() and node.owner != get_scene()
        if not is_instanced_subscene_child:
            node.omni_range *= 2.0
            EditorInterface.mark_scene_as_unsaved()
using Godot;

[GlobalClass, Tool]
// Thanks to the GlobalClass attribute, we can run this script by bringing up
// the command palette and searching "Scale Omni Lights".
public partial class ScaleOmniLights : EditorScript
{
    public override void _Run()
    {
        var sceneNode = EditorInterface.Singleton.GetEditedSceneRoot();

        foreach (OmniLight3D node in sceneNode.FindChildren("", "OmniLight3D"))
        {
            // Don't operate on instanced subscene children, as changes are lost
            // when reloading the scene.
            // See the "Instancing scenes" section below for a description of `owner`.
            var isInstancedSubsceneChild = node != sceneNode && node.Owner != sceneNode;
            if (!isInstancedSubsceneChild)
            {
                node.OmniRange *= 2.0f;
                EditorInterface.Singleton.MarkSceneAsUnsaved();
            }
        }
    }
}
In the above example, we also call EditorScript.mark_scene_as_unsaved() after any modification that affects the scene's state. This allows the editor to display the scene as "unsaved" (i.e. with an asterisk next to the name). This way, you also get a confirmation when trying to close the scene with unsaved changes.
팁
You can change the currently edited scene at the top of the editor even while the Script view is open. This will affect the return value of EditorInterface.get_edited_scene_root, so make sure you've selected the scene you intend to iterate upon before running the script.
씬 인스턴스화하기
패킹된 장면을 정상적으로 인스턴스화하고 현재 편집기에 열려 있는 씬에 추가할 수 있습니다. 기본적으로 노드 또는 노드.add_child(노드) 속성을 현재 편집된 항목으로 설정해야 합니다. 씬 루트.
``@tool``를 사용하는 경우:
func _ready():
    var node = Node3D.new()
    add_child(node) # Parent could be any node in the scene

    # The line below is required to make the node visible in the Scene tree dock
    # and persist changes made by the tool script to the saved scene file.
    node.owner = get_tree().edited_scene_root
public override void _Ready()
{
    var node = new Node3D();
    AddChild(node); // Parent could be any node in the scene

    // The line below is required to make the node visible in the Scene tree dock
    // and persist changes made by the tool script to the saved scene file.
    node.Owner = GetTree().EditedSceneRoot;
}
If you are using EditorScript:
func _run():
    # `parent` could be any node in the scene.
    var parent = get_scene().get_node("Parent")
    var node = Node3D.new()
    parent.add_child(node)

    # The line below is required to make the node visible in the Scene tree dock
    # and persist changes made by the tool script to the saved scene file.
    node.owner = get_scene()
public override void _Run()
{
    // `parent` could be any node in the scene.
    var parent = GetScene().GetNode("Parent");
    var node = new Node3D();
    parent.AddChild(node);

    // The line below is required to make the node visible in the Scene tree dock
    // and persist changes made by the tool script to the saved scene file.
    node.Owner = GetScene();
}
참고
Changes made by tool scripts and EditorScript (such as adding nodes or modifying properties)
do not automatically mark the scene as unsaved. To show the asterisk (*)
and prevent accidental data loss, call
EditorInterface.mark_scene_as_unsaved()
after modifications, or use EditorUndoRedoManager for undo support.
경고
@tool``를 부적절하게 사용하면 많은 오류가 발생할 수 있습니다. 먼저 원하는 대로 코드를 작성한 다음 맨 위에 ``@tool 주석을 추가하는 것이 좋습니다. 또한, 게임 내에서 실행되는 코드와 에디터에서 실행되는 코드를 분리해야 합니다. 이렇게 하면 버그를 더 쉽게 찾을 수 있습니다.