Attention: Here be dragons
This is the latest
(unstable) version of this documentation, which may document features
not available in or compatible with released stable versions of Godot.
Checking the stable version of the documentation...
2D 입자 시스템
소개
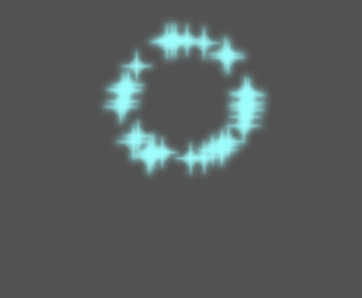
간단한(간단하지만 대부분 용도에 충분히 유연한) 입자 시스템이 제공됩니다. 입자 시스템은 스파크나 불, 마법 입자, 연기, 안개 등 복잡한 물리적 효과를 시뮬레이션하기 위해 쓰입니다.
아이디어는 "입자"가 고정된 간격과 고정된 수명으로 방출된다는 것입니다. 수명 동안 모든 입자는 동일한 기본 동작을 갖습니다. 각 입자를 나머지 입자와 다르게 만들고 보다 유기적인 모양을 제공하는 것은 각 매개변수와 관련된 "무작위성"입니다. 본질적으로 파티클 시스템을 생성한다는 것은 기본 물리 매개변수를 설정한 다음 여기에 임의성을 추가하는 것을 의미합니다.
입자 노드
Godot는 2D 입자에 대해 두 가지 다른 노드, GPUParticles2D 및 :ref:`class_CPUParticles2D`를 제공합니다. GPUParticles2D는 더욱 발전되었으며 GPU를 사용하여 입자 효과를 처리합니다. CPUParticles2D는 GPUParticles2D와 기능이 거의 비슷한 CPU 기반 옵션이지만 대량의 파티클을 사용할 경우 성능이 저하됩니다. 반면, CPUParticles2D는 저사양 시스템이나 GPU 병목 현상이 발생하는 상황에서 더 나은 성능을 발휘할 수 있습니다.
GPUParticles2D는 :ref:`class_ParticleProcessMaterial`(및 선택적으로 사용자 정의 셰이더)를 통해 구성되는 반면, 일치 옵션은 CPUParticles2D의 노드 속성을 통해 제공됩니다(트레일 설정 제외).
앞으로는 CPUParticles2D에 새로운 기능을 추가할 계획이 없지만, GPUParticles2D에 이미 기능을 추가하기 위한 풀 요청은 허용됩니다. 그러한 이유로 명시적인 이유가 없는 한 GPUParticles2D를 사용하는 것이 좋습니다.
씬 트리에서 노드를 클릭하고 2D 작업 공간을 선택한 다음 도구 모음에서 **CPUParticles2D > Convert to GPUParticles2D**를 선택하여 CPUParticles2D 노드를 GPUParticles2D 노드로 변환할 수 있습니다.
GPUParticles2D 노드를 CPUParticles2D 노드로 변환하는 것도 가능하지만 GPU 전용 기능을 사용하는 경우 문제가 발생할 수 있습니다.
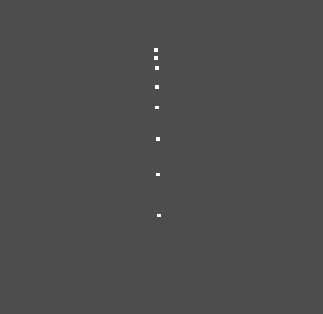
이 튜토리얼의 나머지 부분에서는 GPUParticles2D 노드를 사용할 것입니다. 먼저, GPUParticles2D 노드를 씬에 추가하세요. 노드를 생성한 후에는 흰색 점만 생성되었으며 씬 도크의 GPUParticles2D 노드 옆에 경고 아이콘이 있음을 알 수 있습니다. 이는 노드가 작동하려면 ParticleProcessMaterial이 필요하기 때문입니다.
ParticleProcessMaterial
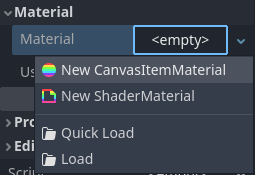
입자 노드에 프로세스 머티리얼을 추가하러면 인스펙터 패널에서 프로세스 머티리얼로 이동합니다. 머티리얼 옆에 박스를 클릭한 다음 드롭다운 메뉴에서 새 ParticlsMaterial을 선택하세요.

이제 GPUParticles2D 노드는 아래쪽으로 내려가는 흰 점이 방출되어야 합니다.
텍스처
파티클 시스템은 단일 텍스처나 애니메이션 *플립북*을 사용할 수 있습니다. 플립북은 재생하거나 방출하는 동안 무작위로 선택할 수 있는 애니메이션의 여러 프레임을 포함하는 텍스처입니다. 이는 파티클용 스프라이트시트와 동일합니다.
텍스처는 Texture 속성을 통해 설정됩니다.

애니메이션 트리
입자 플립북은 연기, 불, 폭발과 같은 복잡한 효과를 재현하는 데 적합합니다. 또한 모든 입자가 서로 다른 텍스처를 사용하도록 하여 임의의 텍스처 변형을 도입하는 데 사용할 수도 있습니다. 기존 입자 플립북 이미지를 온라인에서 찾거나 Blender 또는 `EmberGen <https://jangafx.com/software/embergen/>`__과 같은 외부 도구를 사용하여 사전 렌더링할 수 있습니다.
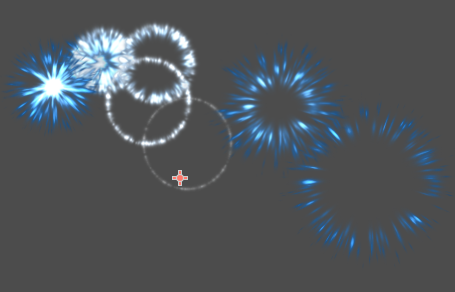
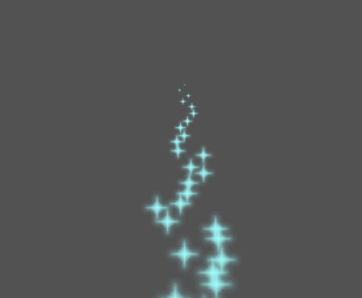
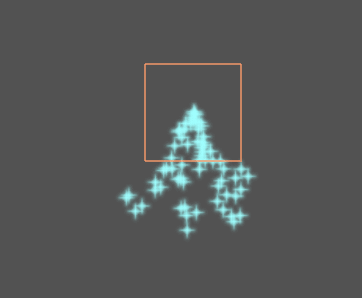
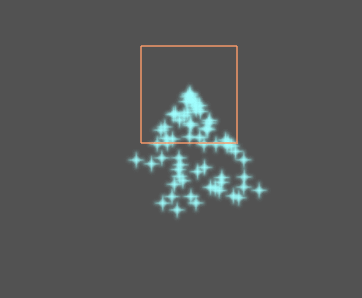
플립북 텍스처를 사용하는 파티클 시스템의 예
애니메이션 플립북을 사용하려면 단일 텍스처에 비해 추가 구성이 필요합니다. 시연을 위해 5개의 열과 7개의 행이 있는 이 텍스처를 사용하겠습니다(마우스 오른쪽 버튼을 클릭하고 다른 이름으로 저장... 선택).
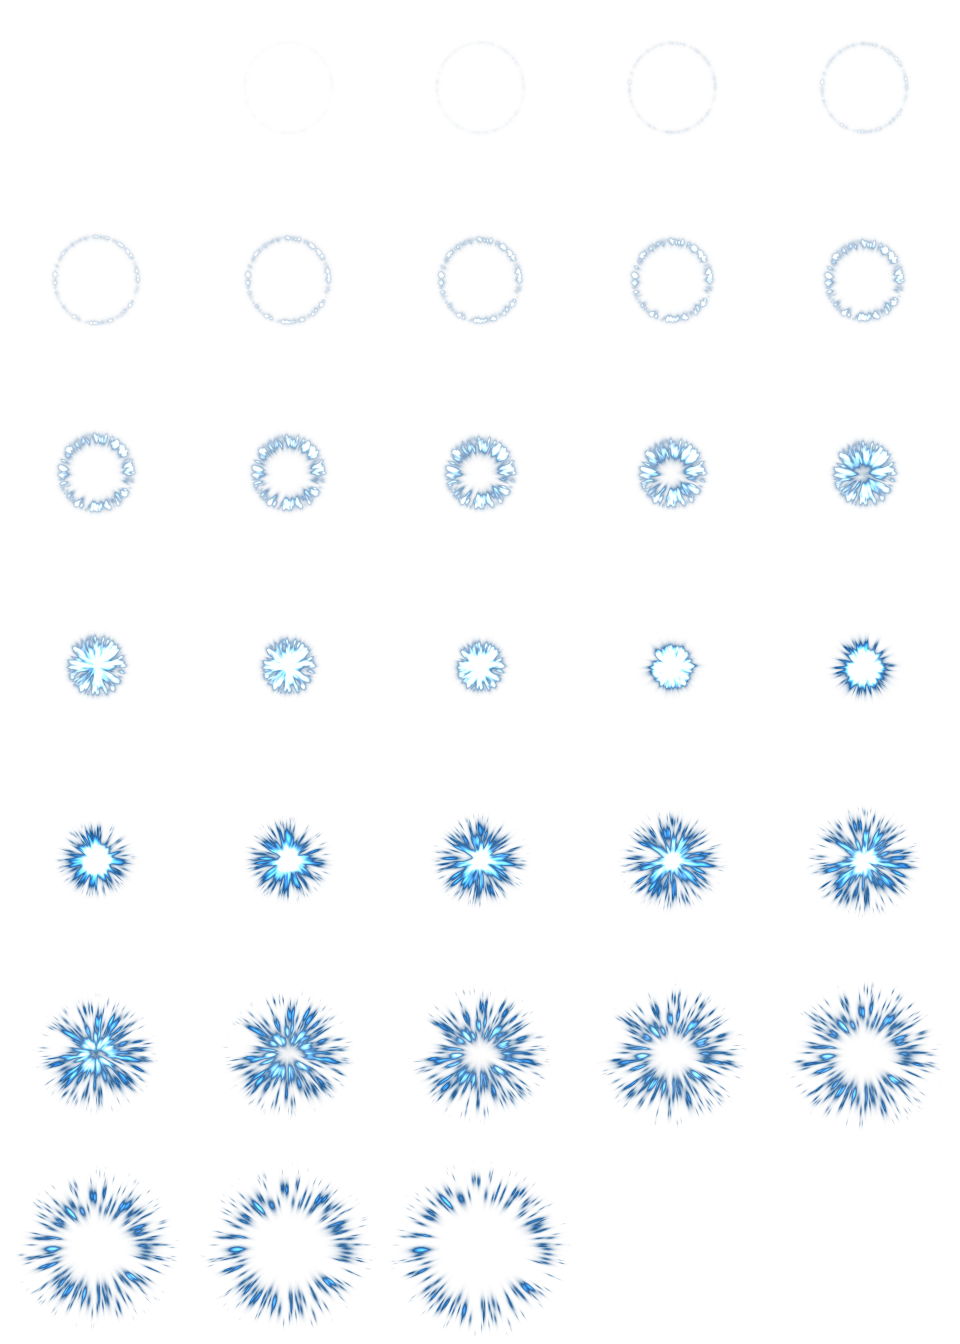
크레딧: `JoesAlotofthings <https://opengameart.org/content/alot-of-particles-indispersal-special-effect-alotofparticles30>`__(CC BY 4.0)
애니메이션 플립북을 사용하려면 GPUParticles2D(또는 CPUParticles2D) 노드의 Material 섹션에 새 CanvasItemMaterial을 생성해야 합니다.
입자 노드 검사기 하단에 CanvasItemMaterial 생성
이 CanvasItemMaterial에서 입자 애니메이션**을 활성화하고 **H 프레임 및 **V 프레임**을 플립북 텍스처에 있는 열과 행 수로 설정합니다.
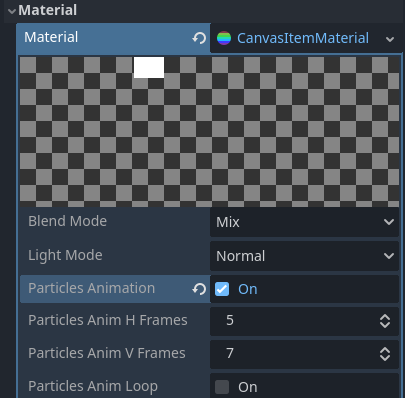
예제 플립북 텍스처에 대한 CanvasItemMaterial 구성
이 작업이 완료되면 ParticleProcessMaterial(GPUParticles2D용) 또는 CPUParticles2D 검사기의 :ref:`Animation 섹션 <doc_particle_systems_2d_animation>`이 효과적입니다.
팁
플립북 텍스처에 투명한 배경 대신 검은색 배경이 있는 경우 올바른 표시를 위해 블렌드 모드를 Mix 대신 Add**로 설정해야 합니다. 또는 이미지 편집기에서 투명한 배경을 갖도록 텍스처를 수정할 수 있습니다. `GIMP <https://gimp.org>`__에서는 **색상 > 색상을 알파로 메뉴를 사용하여 이 작업을 수행할 수 있습니다.
시간 매개변수
수명
입자가 머무는 시간(초). 수명(lifetime)이 끝나면 새로운 입자가 대체됩니다.
수명: 0.5
수명: 4.0
원샷
활성화되면 Particles2D 노드는 모든 입자를 한 번 방출하고 다시는 방출하지 않습니다.
전처리
입자 시스템은 0개의 입자를 방출된 채로 시작해서 방출합니다. 이 방식은 씬을 불러오고 당신이 들어온 순간부터 방출하기 시작하는 횃불, 안개 등과 같은 시스템은 불편할 수 있습니다. 사전프로세스는 시스템이 실제로 처음 그려지기 전에 주어진 시간(초)를 처리하도록 하는데 사용됩니다.
속도 배수
Speed Scale은 기본값으로 ``1"을 가지고 있으며 입자 시스템의 속도를 조절하는 데 사용된다. 값을 낮추면 입자가 느려지는 반면 값을 늘리면 입자가 훨씬 빨라진다.
폭발성
수명이 ``1"이고 10개의 입자가 있다면 0.1초마다 입자가 방출되는 것을 의미합니다. 폭발성 매개변수(explosiveness parameter)는 이것을 변화시키고, 입자를 모두 방출하도록 합니다. 범위:
0: 입자를 일정한 간격으로 방출합니다 (디폴트 값).
1: 동시에 모든 입자를 방출합니다.
중간 값도 허용됩니다. 이 특징은 폭발이나 갑작스러운 입자 폭발을 만들 때 유용합니다.
무작위성
모든 물리 매개변수는 무작위화될 수 있습니다. 무작위 값의 범위는 0부터 1까지입니다. 매개변수를 무작위화하는 공식은 다음과 같습니다.
initial_value = param_value + param_value * randomness
고정 FPS
이 설정은 입자 시스템을 고정 FPS로 렌더하는데 사용됩니다. 예로 들어 값을 2 로 바꿔 보면 입자를 초당 2 프레임으로 렌더합니다. 단, 입자 시스템을 느려지게 하는 것이 아니니 주의하세요.
참고
Godot 4.3은 현재 2D 입자에 대한 물리 보간을 지원하지 않습니다. 이 문제를 해결하려면 인스펙터 하단에서 **노드 > 물리 보간 > 모드**를 설정하여 입자 노드에 대한 물리 보간을 비활성화하세요.
분수 델타
분수 델타를 ``true``로 설정하면 분수 델타 계산이 발생하여 입자 표시 효과가 더 매끄러워집니다. 이렇게 향상된 부드러움은 더 높은 정확도에서 비롯됩니다. 무작위성이 높거나 빠르게 움직이는 입자가 있는 시스템에서는 차이가 더욱 두드러집니다. 이는 입자 시스템의 시각적 일관성을 유지하여 각 입자의 모션이 실제 수명과 일치하는지 확인하는 데 도움이 됩니다. 이 기능이 없으면 입자가 프레임 내의 한 지점에서 방출될 경우 단일 프레임에서 필요한 것보다 더 많이 점프하거나 움직이는 것처럼 보일 수 있습니다. 정확도가 높을수록 성능이 저하되며, 특히 입자 수가 많은 시스템에서는 더욱 그렇습니다.
도면 매개변수
가시성 직사각형
가시성 직사각형은 화면의 입자 가시성을 제어합니다. 이 직사각형이 뷰포트 외부에 있으면 엔진이 화면에 입자를 렌더링하지 않습니다.
직사각형의 W 및 H 속성은 각각 너비와 높이를 제어합니다. X 및 Y 속성은 입자 방사체를 기준으로 직사각형의 왼쪽 위 모서리 위치를 제어합니다.
You can have Godot generate a Visibility Rect automatically using the toolbar above the 2d view. To do so, select the Particles2D node and Click 입자 > 가시성 공간 생성. Godot will simulate the Particles2D node emitting particles for a few seconds and set the rectangle to fit the surface the particles take.
Generation Time (sec) 옵션을 사용하여 방출 기간을 제어할 수 있습니다. 최대값은 25초입니다. 입자가 이동하는 데 더 많은 시간이 필요한 경우 Particles2D 노드에서 preprocess 기간을 일시적으로 변경할 수 있습니다.
로컬 좌표
기본적으로 이 옵션은 켜져 있으며 이는 입자들이 방출되는 공간이 노드에 상대적인 걸 의미합니다. 만약 노드가 움직인다면 모든 입자들도 같이 움직입니다.
비활성화되면 입자는 전역 공간에 방출됩니다. 만약 노드가 움직이면 이미 방출된 입자는 영향을 받지 않습니다.
그리기 순서
각각의 입자가 그려지는 순서를 조절합니다. ``인덱스``는 방출 순서에 따라 입자가 그려집니다(기본). ``Lifetime``은 남아 있는 lifetime 순서로 그려집니다.
입자 프로세스 머티리얼 설정
ParticleProcessMaterial의 설정에 대한 자세한 내용은 :ref:`this page<doc_particle_process_material_2d>`를 참조하세요.