Configuring an IDE
We assume that you already cloned and compiled Godot.
You can easily develop Godot with any text editor and by invoking scons
on the command line, but if you want to work with an IDE (Integrated
Development Environment), here are setup instructions for some popular ones:
- Qt Creator (all desktop platforms)
- Kdevelop (all desktop platforms)
- Xcode (macOS)
- Visual Studio (Windows)
- Visual Studio Code (all desktop platforms)
It is possible to use other IDEs, but their setup is not documented yet.
Qt Creator
Importing the project
- Choose New Project -> Import Project -> Import Existing Project.
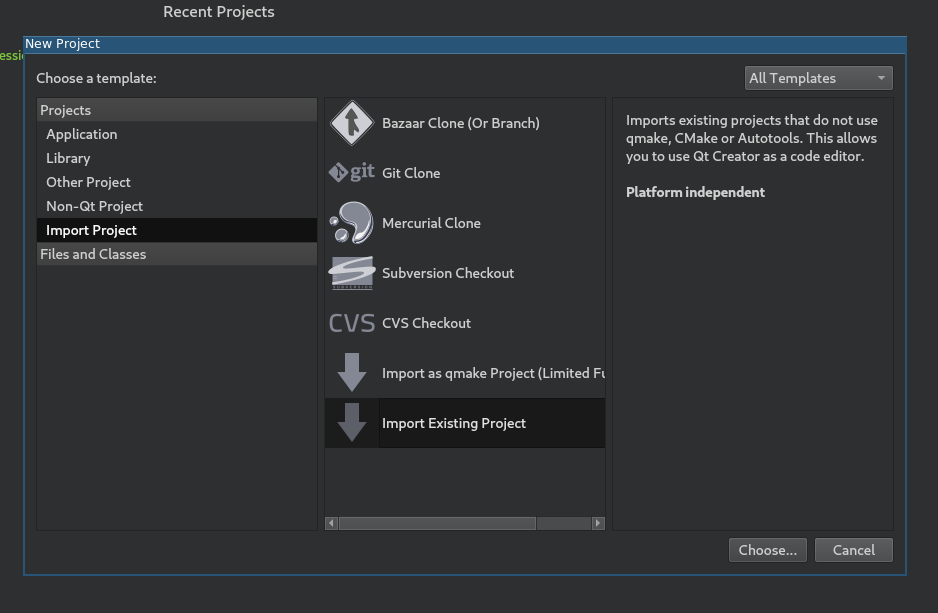
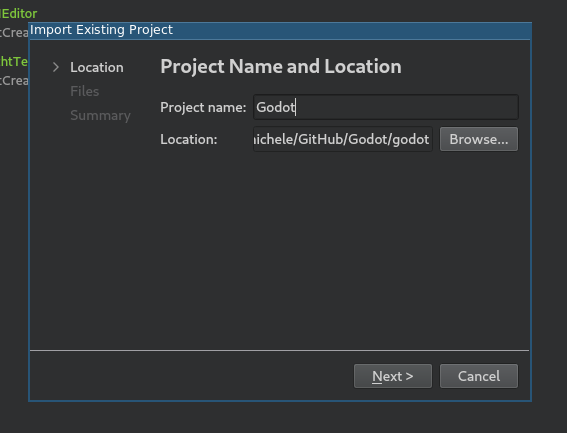
- Set the path to your Godot root directory and enter the project name.
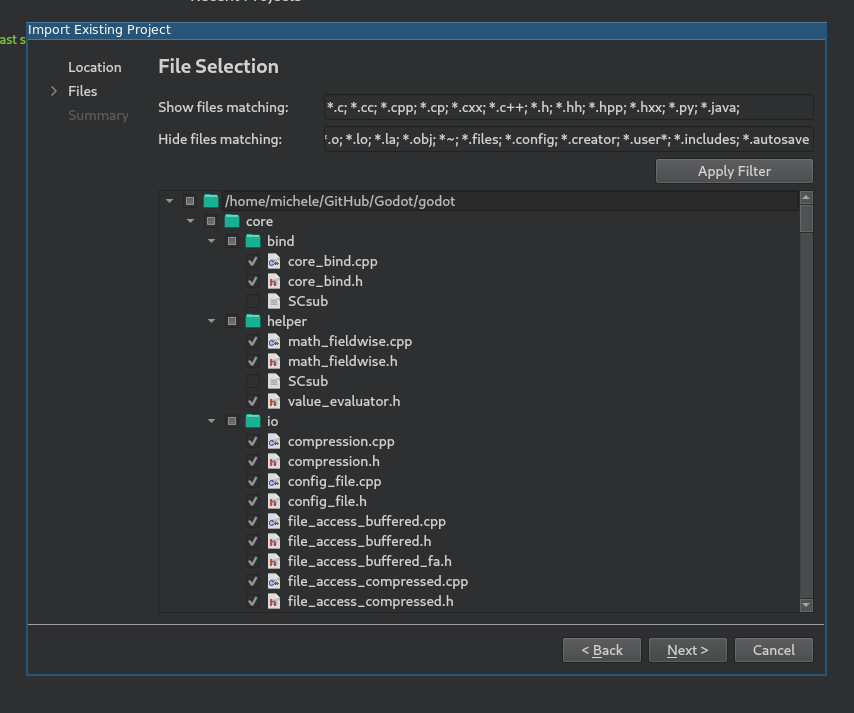
- Here you can choose which folders and files will be visible to the project. C/C++ files are added automatically. Potentially useful additions: *.py for buildsystem files, *.java for Android development, *.mm for macOS. Click “Next”.
- Click Finish.
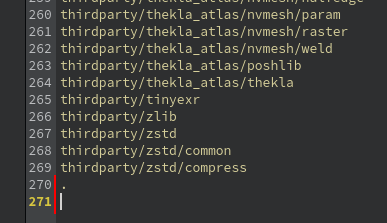
- Add a line containing
.to project_name.includes to get working code completion.
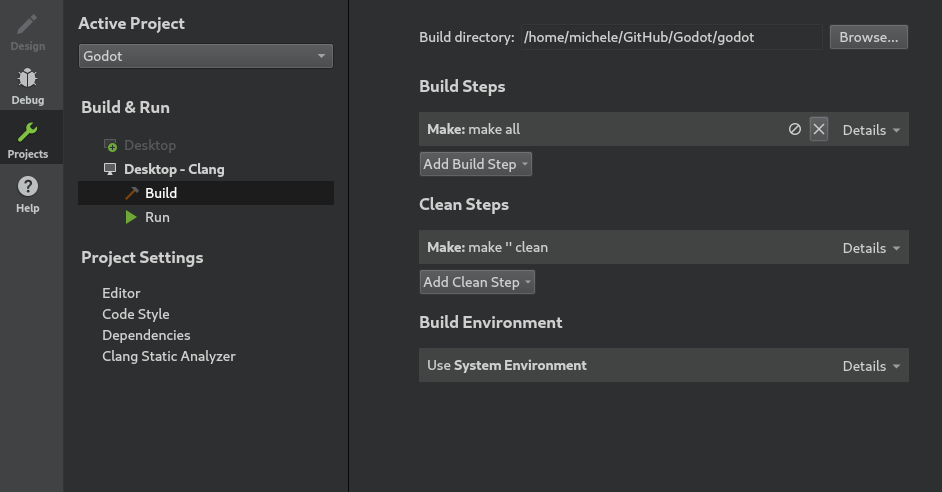
Build and run
Build configuration:
- Click on Projects and open the Build tab.
- Delete the pre-defined
makebuild step.
- Click Add Build Step -> Custom Process Step.
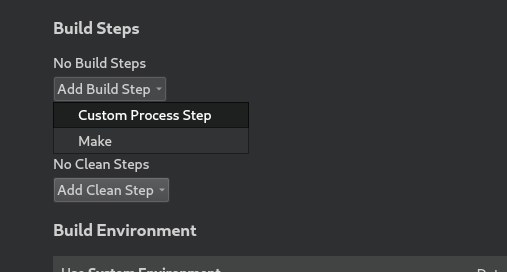
- Type
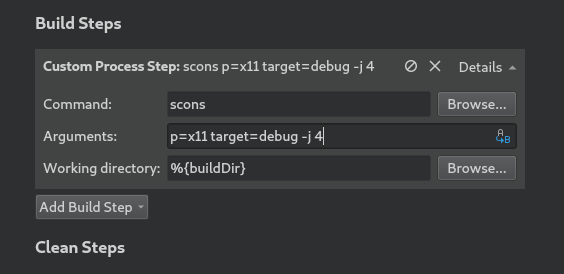
sconsin the Command field. If it fails with ‘Could not start process “scons”’, it can mean thatsconsis not in yourPATHenvironment variable, so you may have to use the full path to the SCons binary. - Fill the Arguments field with your compilation options. (e.g.:
p=x11 target=debug -j 4)
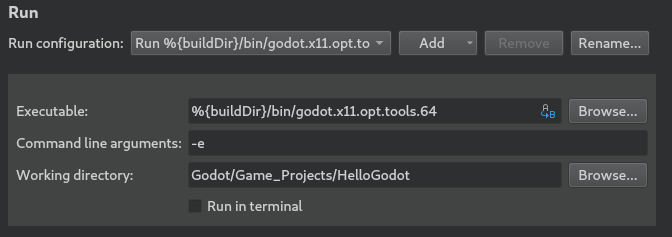
Run configuration:
- Open the Run tab.
- Point the Executable to your compiled Godot binary (e.g:
%{buildDir}/bin/godot.x11.opt.tools.64) - If you want to run a specific game or project, point Working directory to the game directory.
- If you want to run the editor, add
-eto the Command line arguments field.
Updating sources after pulling latest commits
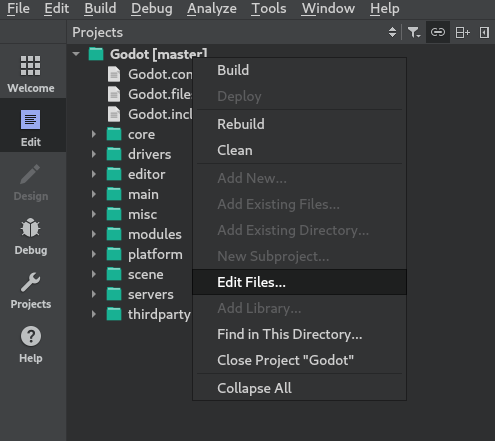
As a developer you usually want to frequently pull the latest commits from the upstream git repository or a specific fork etc. However this brings a little problem with it: as the development continues, source files (and folders) are added or removed. These changes needs to be reflected in your project files for Qt Creator too, so you continue to have a nice experience coding in it. A simple way to check these things, is to right click at your root folder in the “Projects View” and click on “Edit files…”
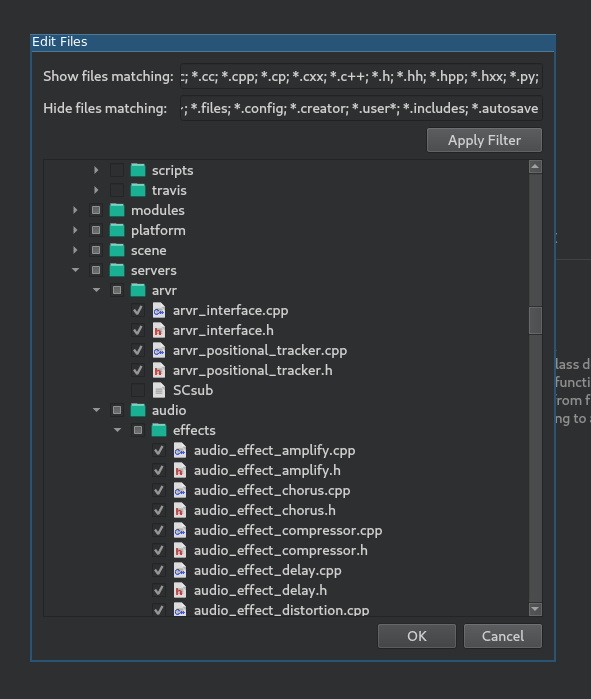
Now a new dialog should appear that is similar in functionality to the one in the third step of the “Importing the project” section. Here now you can check whether you want to add/remove specific files and/or folders. You can chose by clicking with your mouse or just simply by clicking the “Apply Filter” button. A simple click on “Ok” and you’re ready to continue your work.
Code style configuration
Developers must follow the project’s code style and IDE should help them to do it. By default, Qt Creator does use spaces for indentation which is incorrect for Godot project. You can change this behavior by changing the “Code Style” in Options -> C++.
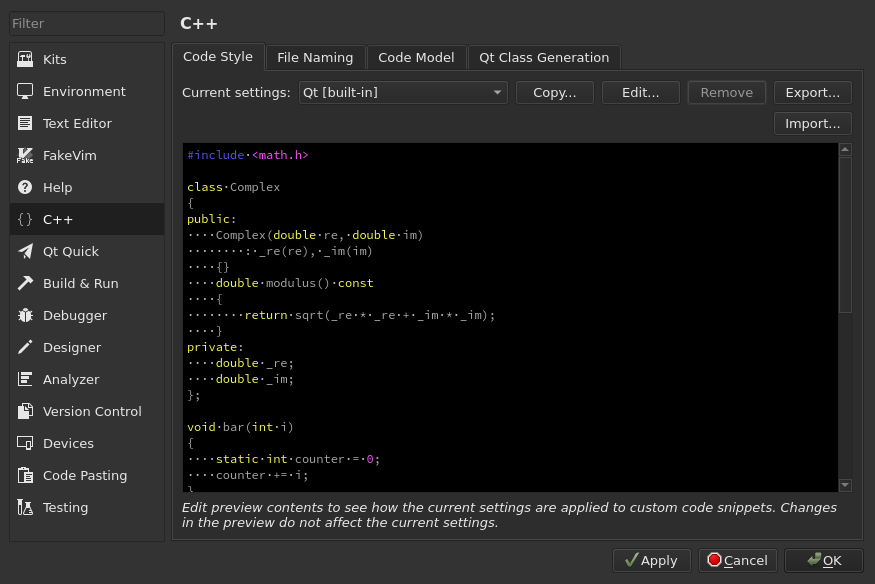
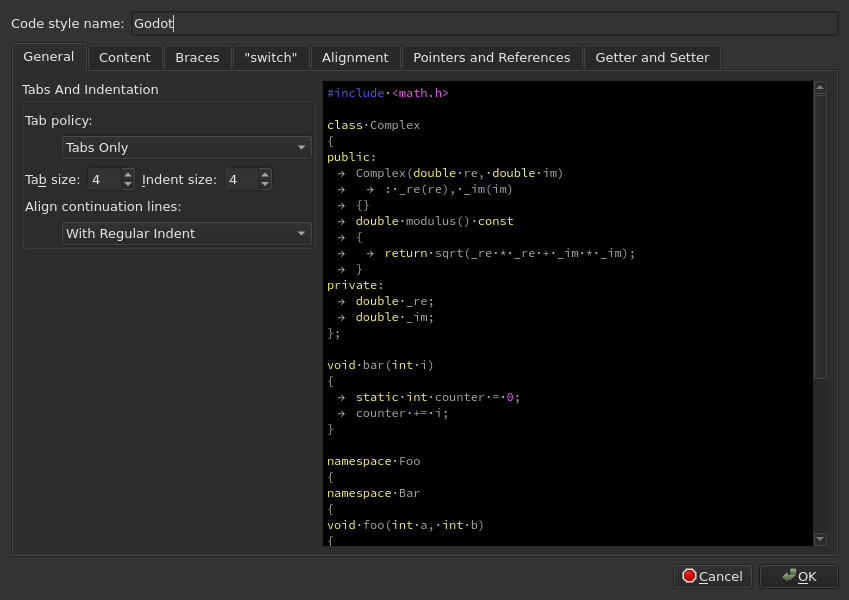
Click on Edit to change the current settings, then click on Copy Built-in Code Style button to set a new code style. Set a name for it (e.g. Godot) and change the Tab policy to be Tabs Only.
KDevelop
KDevelop is a free, open source IDE for all desktop platforms.
You can find a video tutorial here. Or you may follow this text version tutorial.
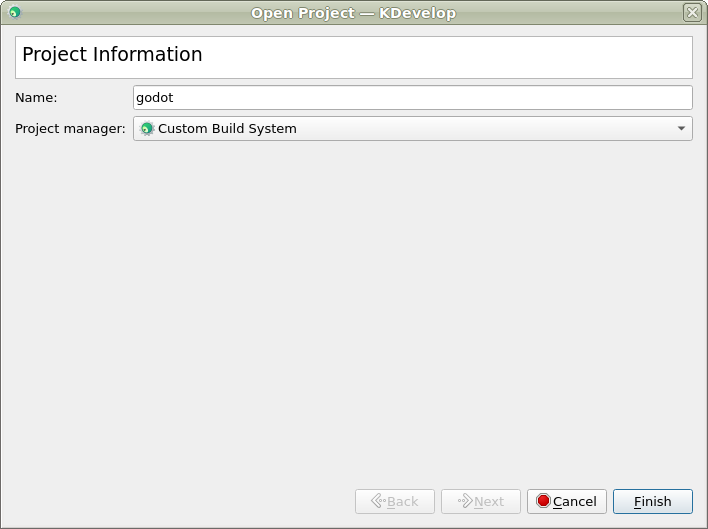
Start by opening KDevelop and choosing “open project”.
Choose the directory where you cloned Godot.
On the next screen, choose “Custom Build System” for the Project manager.
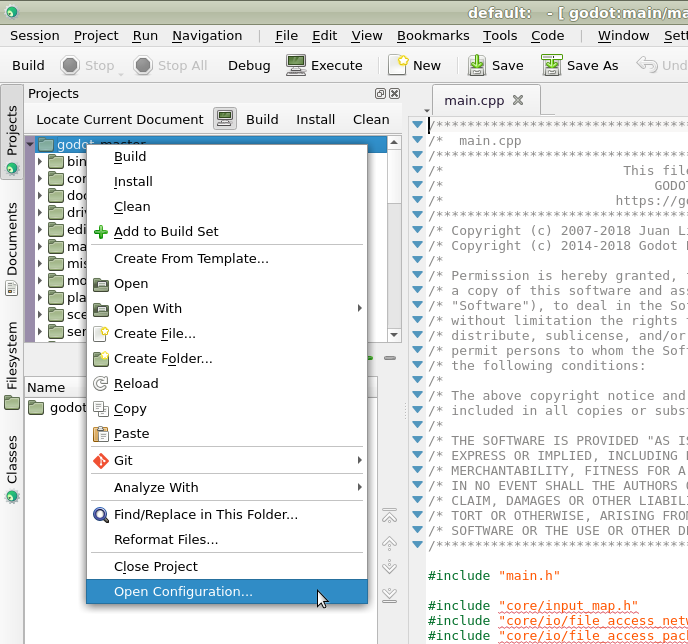
Now that the project has been imported, open the project configuration.
Add the following includes/imports:
.  // a dot to indicate the root of the Godot project
core/
core/os/
core/math/
drivers/
platform/x11/  // make that platform/osx/ if you're using macOS
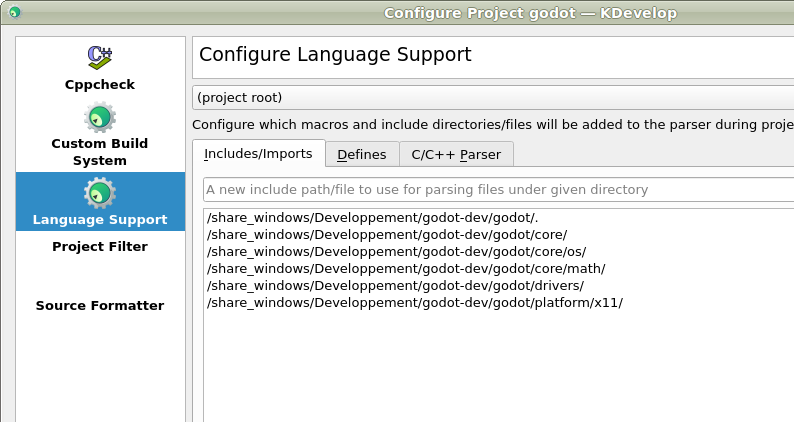
Apply the changes.
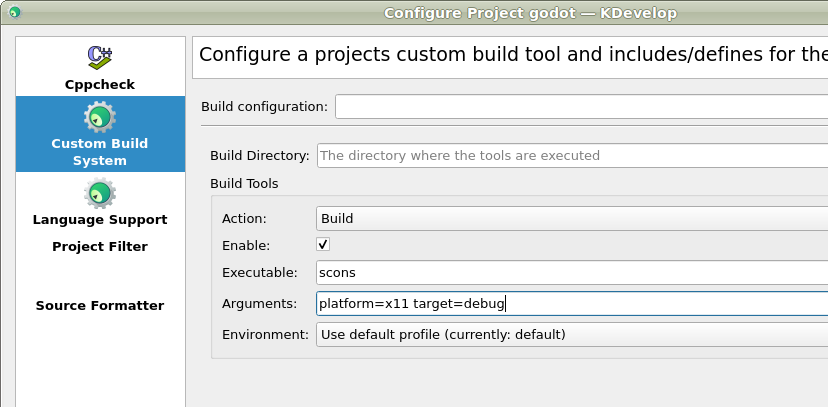
Switch to the “Custom Build System” tab. Add a build configuration
and keep the build directory blank. Enable build tools and add scons
as the executable then add platform=x11 target=debug (platform=osx
if you’re on macOS) as the arguments.
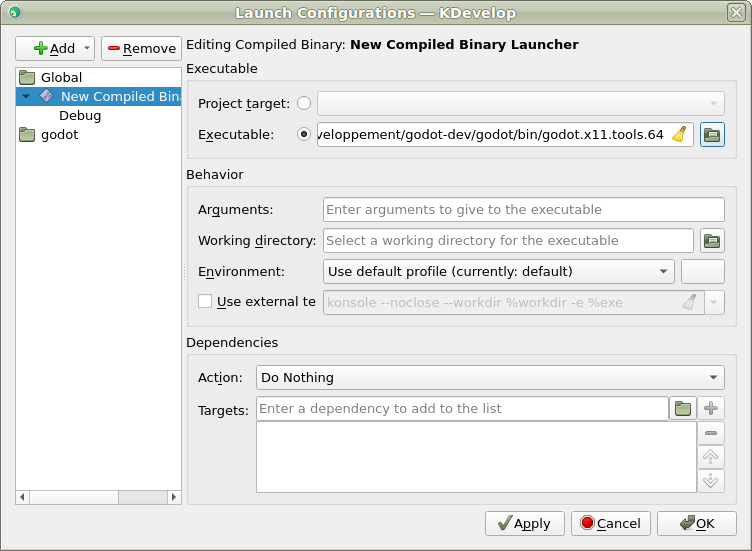
Next we need to tell KDevelop where to find the binary. From the “Run” menu, choose “Configure Launches”.
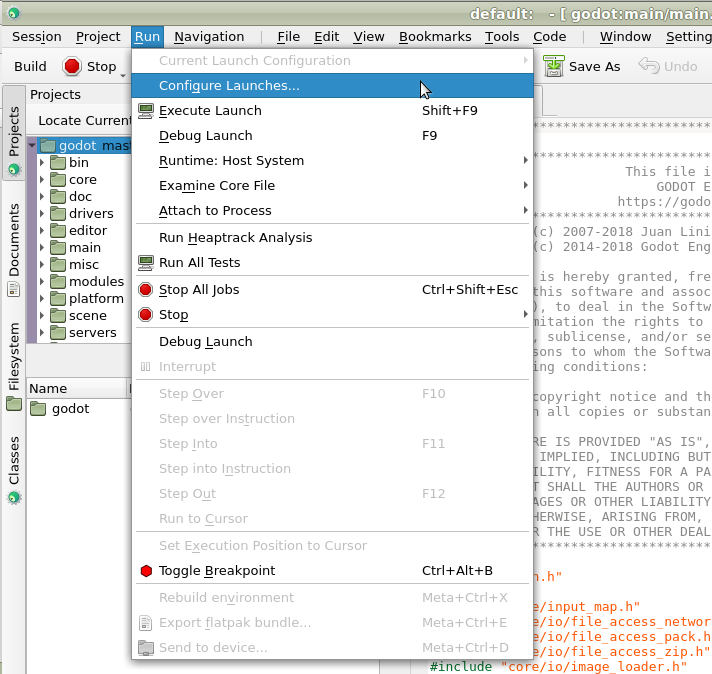
Click “Add” if no launcher exists. Then add the path to your
executable in the executable section. Your executable should be located
in the bin/ sub-directory and should be named something like
godot.x11.tools.64 (the name could be different depending on your
platform and depending on your build options).
That’s it! Now you should be good to go :)
Xcode
Project setup
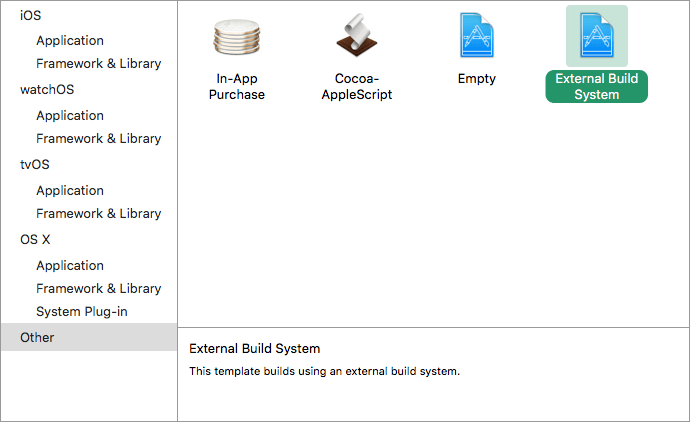
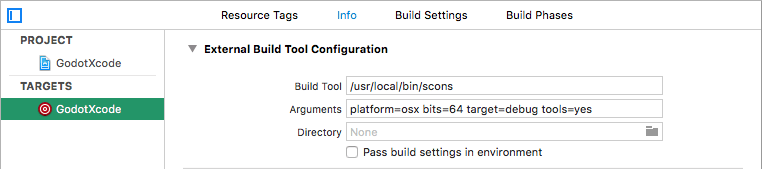
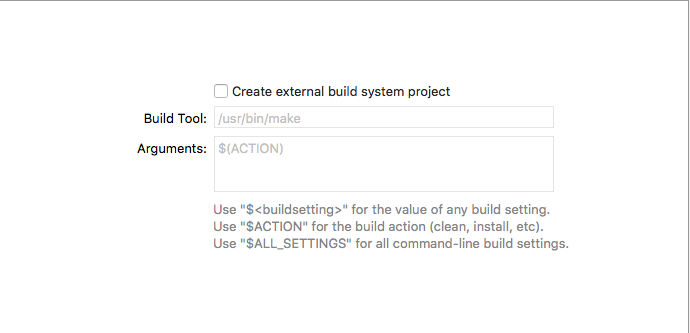
- Create an Xcode external build project anywhere
- Set the Build tool to the path to scons
Modify Build Target’s Xcode Info Tab:
- Set Arguments to something like: platform=osx tools=yes bits=64 target=debug
- Set Directory to the path to Godot’s source folder. Keep it blank if project is already there.
- You may uncheck Pass build settings in environment
Add a Command Line Target:
- Go to Xcode File > New > Target… and add a new Xcode command line target

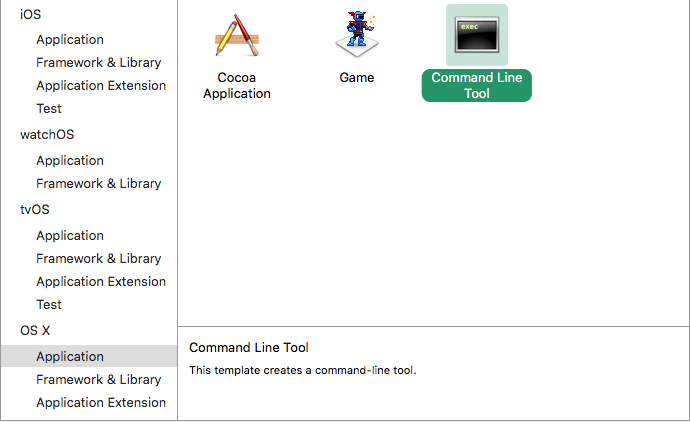
- Name it something so you know not to compile with this target
- e.g.
GodotXcodeIndex - Goto the newly created target’s Build Settings tab and search for Header Search Paths
- Set Header Search Paths to an absolute path to Godot’s source folder
- Make it recursive by adding two *’s to the end of the path
- e.g.
/Users/me/repos/godot-source/\**
Add Godot Source to the Project:
- Drag and drop Godot source into project file browser.
- Uncheck Create External Build System
- Click Next
- Select create groups

- Check off only your command line target in the Add to targets section
- Click finish. Xcode will now index the files.
- Grab a cup of coffee… Maybe make something to eat, too
- You should have jump to definition, auto completion, and full syntax highlighting when it is done.
Scheme setup
Edit Build Scheme of External Build Target:
- Open scheme editor of external build target
- Expand the Build menu
- Goto Post Actions
- Add a new script run action, select your project in
Provide build settings fromas this allows you to use${PROJECT_DIR}variable.
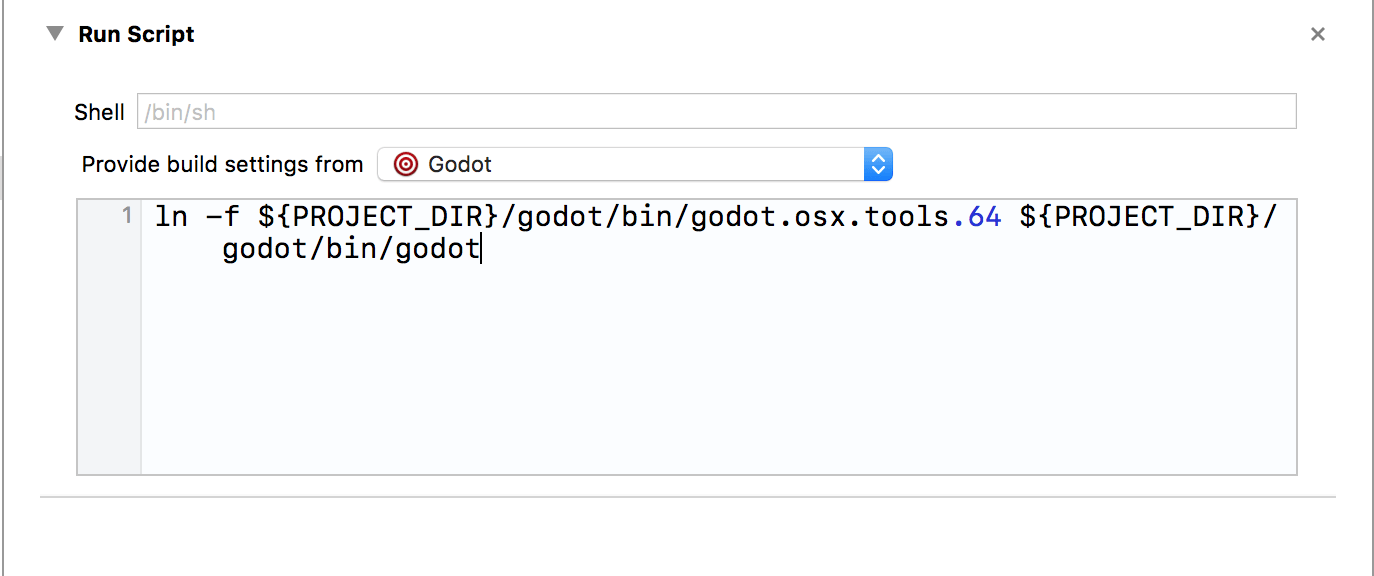
- Write a script that gives the binary a name that Xcode will recognize
- e.g.
ln -f ${PROJECT_DIR}/godot/bin/godot.osx.tools.64 ${PROJECT_DIR}/godot/bin/godot - Build the external build target
Edit Run Scheme of External Build Target:
- Open the scheme editor again
- Click Run
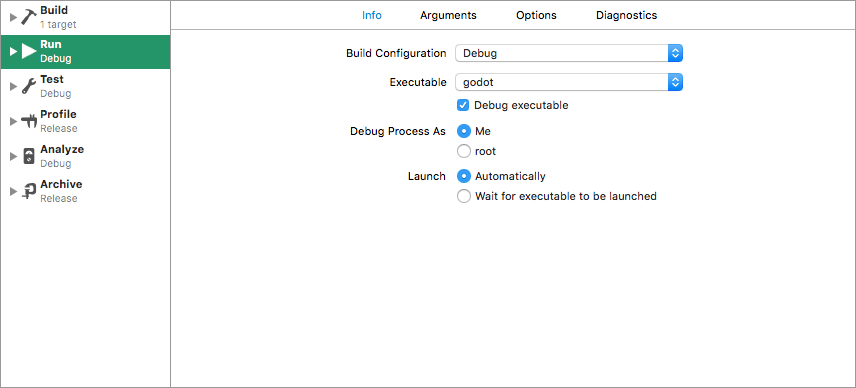
- Set the Executable to the file you linked in your post build action script
- Check Debug executable if it isn’t already
- You can go to Arguments tab and add an -e and a -path to a project to debug the editor not the project selection screen
Test it:
- Set a breakpoint in platform/osx/godot_main_osx.mm
- It should break at the point!
Visual Studio Code
- Ensure that C/C++ extension is installed. You can find instructions in docs.
- Now open cloned godot folder in VS Code (File > Open Folder…)
In order to build the project, we need configurations files: launch.json and tasks.json. To create them:
- Open Debug view (Ctrl + Shift + D) and select cogwheel with orange dot:

- Select C++ (GDB/LLDB) (it might be slightly differently called on macOS or Windows)
- Update launch.json to match:
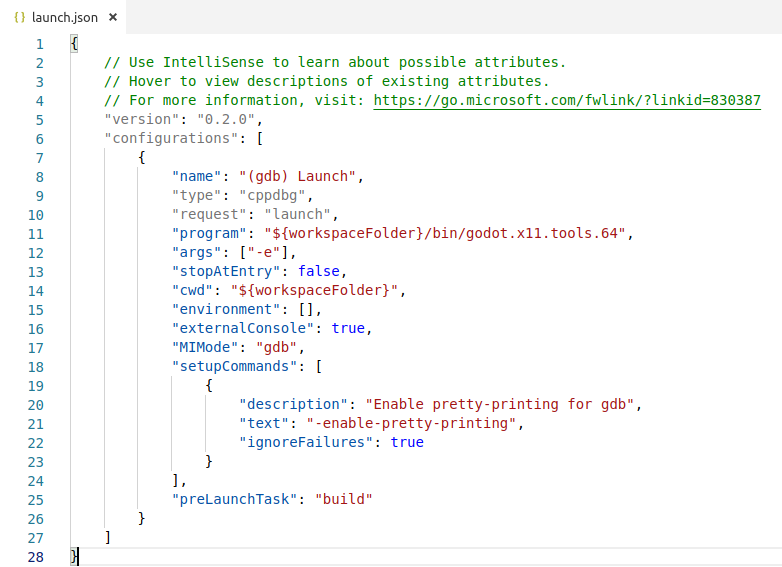
(Note that godot.x11.tools.64 in “program” value might be differently called on macOS or Windows)
- Create tasks.json by starting Debug process (F5). VS Code will show dialog with Configure Task button. Tap it and select Create tasks.json file from template, then select Others
- Update tasks.json to match:
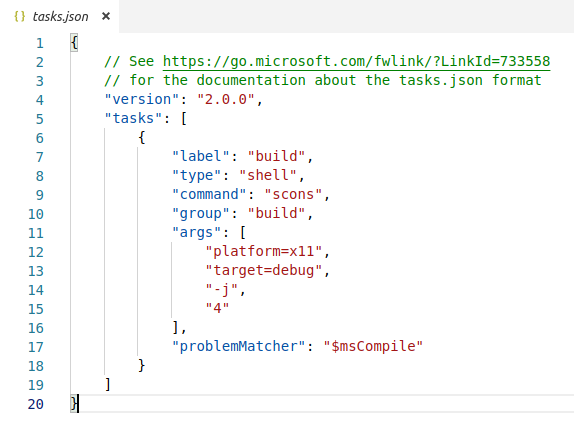
(Note that platform=x11 will be different for macOX and Windows)
- You can now start Debug process again to test that everything works.
- If the build phase fails, check the console for hints. On Linux it’s most likely that some dependencies are missing. Check Compiling for X11 (Linux, *BSD)