Shader materials
Introduction
For the most common cases, Godot provides ready to use materials for most types of shaders, such as SpatialMaterial, CanvasItemMaterial and ParticlesMaterial. They are flexible implementations that cover most use cases.
Shader materials allow writing a custom shader directly, for maximum flexibility. Examples of this are:
- Create procedural textures.
- Create complex texture blending effects.
- Create animated materials, or materials that change over time.
- Create refractive effects or other advanced effects.
- Create special lighting shaders for more exotic materials.
- Animate vertices, like tree leaves or grass.
- Create custom particle code.
- And much more!
Godot provides built in functionality to make frequent operations easier. Additionally, Godot’s shader editor will detect errors as you type, so you can see your edited shaders in real-time. It is also possible to edit shaders using a visual, node-based graph editor.
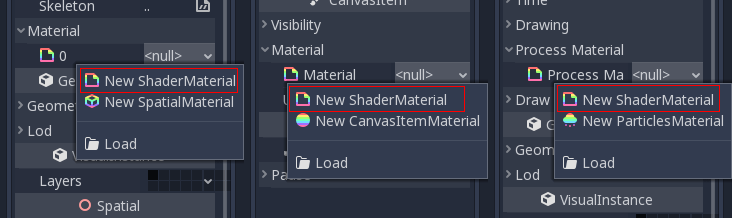
Creating a ShaderMaterial
Create a new ShaderMaterial in some object of your choice. Go to the “Material” property and create a ShaderMaterial.
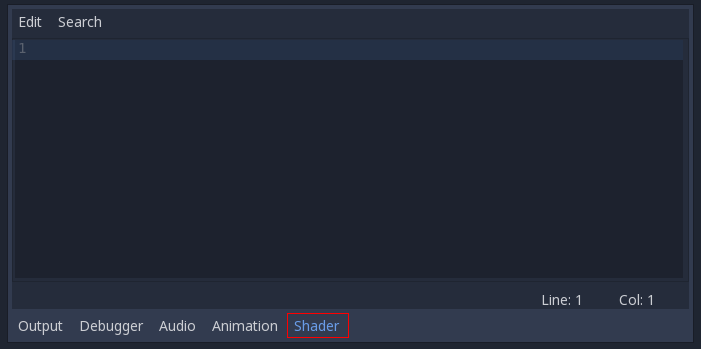
Edit the newly created shader, and the shader editor will open:
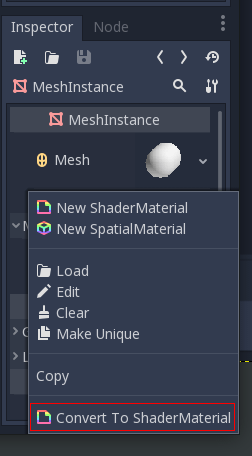
Converting to ShaderMaterial
It is possible to convert from SpatialMaterial, CanvasItemMaterial and ParticlesMaterial to ShaderMaterial. To do so, go to the material properties and select the convert option.