Submitting to the Asset Library
Introduction
This tutorial aims to serve as a guide on how you can submit your own assets to the Godot Asset Library and share them with the Godot community.
As mentioned in the Using the AssetLib document, in order to be able to submit assets to the AssetLib, you need to have a registered account, and be logged in.
Submitting
Once you are logged in, you will be able to head over to the “Submit Assets” page of the AssetLib, which will look like this:
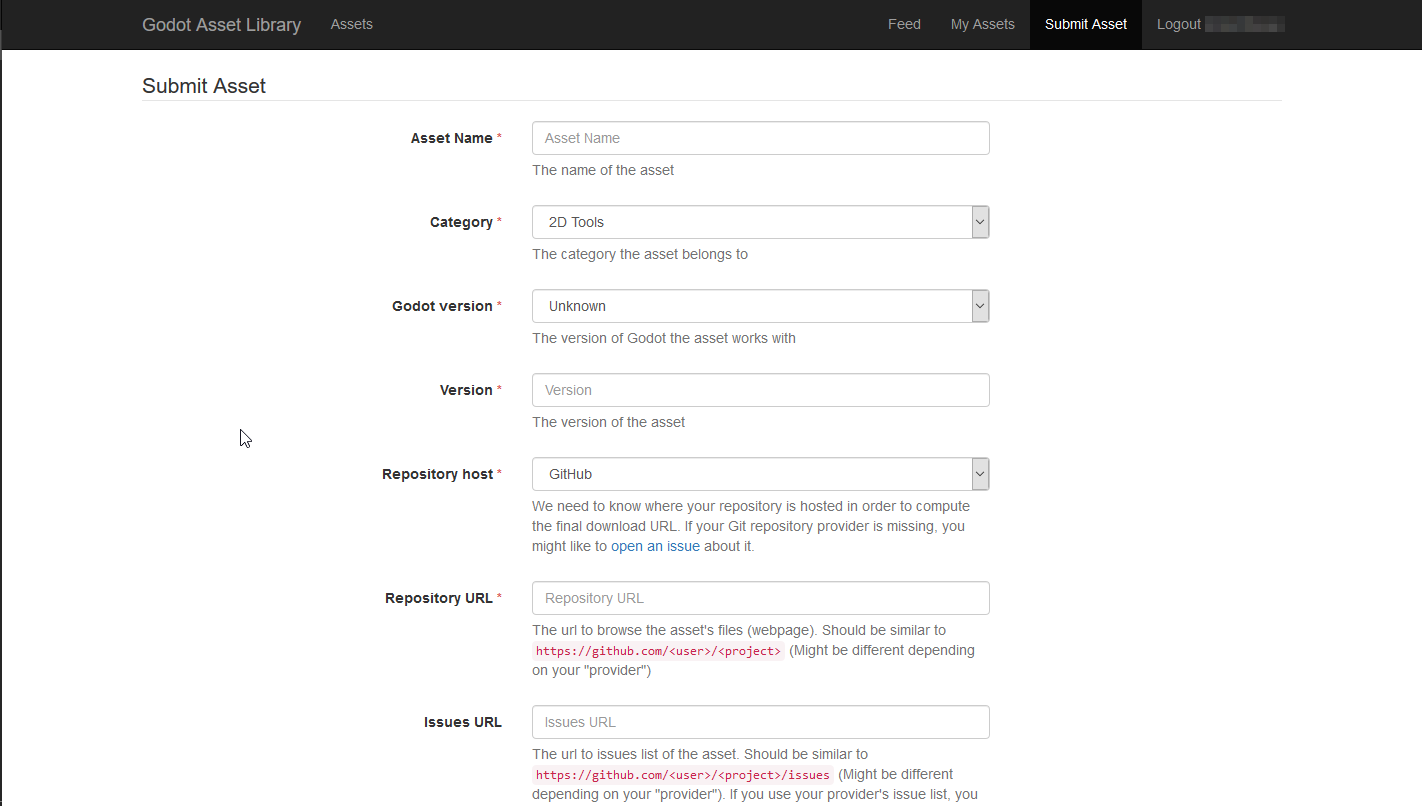
While it may look like a lot (and there is more as you scroll down), each field is described in terms of what you should put in. We will nonetheless go over what is required in the submission form here as well.
- Asset Name:
- The name of your asset. Should be a unique, descriptive title of what your asset is.
- Category:
- The category that your asset belongs to, and will be shown in search results. The category is split into Addons and Projects. In-editor, assets of the Project type (Templates, Demos, Projects) only show up when viewing the AssetLib from the Project Manager, while assets of the Addon type will only be visible from inside a project.
- Godot version:
- The version of the engine that the asset works with. Currently, it’s not possible to have a single asset entry contain downloads for multiple engine versions, so you may need to re-submit the asset multiple times, with an entry for each Godot version it supports. This is particularly important when dealing with major versions of the engine, such as Godot 2.x and Godot 3.x.
- Version:
- The version number of the asset. While you are free to choose and use any versioning scheme that you like, you may want to look into something such as SemVer if you want your asset’s versioning scheme to be clear and consistent. Note that there is also an internal version number, incremented every time the asset download URL is changed or updated.
- Repository host:
- Assets uploaded to the AssetLib are not hosted on it directly. Instead, they point to repositories hosted on third-party Git providers, such as GitHub, GitLab or Bitbucket. This is where you choose which provider your asset uses, so the site can compute the final download link.
- Repository URL:
- The URL to your asset’s files/webpage. This will vary based on your choice of provider, but it should look similar to https://github.com/<user>/<project>.
- Issues URL:
- The URL to your asset’s issue tracker. Again, this will differ from repository host to repository host, but will likely look similar to https://github.com/<user>/<project>/issues. You may leave this field empty if you use your provider’s issue tracker, and it’s part of the same repository.
- Download Commit/Tag:
- The commit or tag of the asset. For example, b1d3172f89b86e52465a74f63a74ac84c491d3e1 or v1.0. The site computes the actual download URL from this.
- Icon URL:
- The URL to your asset’s icon (which will be used as a thumbnail in the AssetLib search results and on the asset’s page). Should be an image in either the PNG or JPG format.
- License:
- The license under which you are distributing the asset. The list includes a variety of free and open-source software licenses, such as GPL (v2 and v3), MIT, BSD and Boost Software License. You can visit OpenSource.org for a detailed description of each of the listed licenses.
- Description:
- Finally, you can use the Description field for a textual overview of your asset, its features and behavior, a changelog, et cetera. In the future, formatting with Markdown will be supported, but currently, your only option is plain text.
You may also include up to three video and/or image previews, which will be shown at the bottom of the asset page. Use the “Enable” checkbox on each of the preview submission boxes to enable them.
- Type:
- Either an image, or a video.
- Image/YouTube URL:
- Either a link to the image, or to a video, hosted on YouTube.
- Thumbnail URL:
- A URL to an image that will be used as a thumbnail for the preview. This option will be removed eventually, and thumbnails will be automatically computed instead.
Once you are done, hit Submit. Your asset will be entered into the pending queue, which you can visit on the AssetLib here . The approval process is manual and may take up to a few days for your addon to be accepted (or rejected), so please be patient! You will be informed when your asset is reviewed. If it was rejected, you will be told why that may have been, and you will be able to submit it again with the appropriate changes. You may have some luck accelerating the approval process by messaging the moderators/assetlib reviewers on IRC (the #godotengine-atelier channel on Freenode), or the official Discord server.
Submission guidelines
[TODO]