Part 2
Part overview
In this part we will be giving our player weapons to play with.
By the end of this part, you will have a player that can fire a pistol, rifle, and attack using a knife. The player will also now have animations with transitions, and the weapons will interact with objects in the environment.
Note
You are assumed to have finished Part 1 before moving on to this part of the tutorial. The finished project from Part 1 will be the starting project for part 2
Let’s get started!
Making a system to handle animations
First we need a way to handle changing animations. Open up Player.tscn and select the AnimationPlayer
Node (Player -> Rotation_Helper -> Model -> Animation_Player).
Create a new script called AnimationPlayer_Manager.gd and attach that to the AnimationPlayer.
Add the following code to AnimationPlayer_Manager.gd:
extends AnimationPlayer

# Structure -> Animation name :[Connecting Animation states]
var states = {
    "Idle_unarmed":["Knife_equip", "Pistol_equip", "Rifle_equip", "Idle_unarmed"],

    "Pistol_equip":["Pistol_idle"],
    "Pistol_fire":["Pistol_idle"],
    "Pistol_idle":["Pistol_fire", "Pistol_reload", "Pistol_unequip", "Pistol_idle"],
    "Pistol_reload":["Pistol_idle"],
    "Pistol_unequip":["Idle_unarmed"],

    "Rifle_equip":["Rifle_idle"],
    "Rifle_fire":["Rifle_idle"],
    "Rifle_idle":["Rifle_fire", "Rifle_reload", "Rifle_unequip", "Rifle_idle"],
    "Rifle_reload":["Rifle_idle"],
    "Rifle_unequip":["Idle_unarmed"],

    "Knife_equip":["Knife_idle"],
    "Knife_fire":["Knife_idle"],
    "Knife_idle":["Knife_fire", "Knife_unequip", "Knife_idle"],
    "Knife_unequip":["Idle_unarmed"],
}

var animation_speeds = {
    "Idle_unarmed":1,

    "Pistol_equip":1.4,
    "Pistol_fire":1.8,
    "Pistol_idle":1,
    "Pistol_reload":1,
    "Pistol_unequip":1.4,

    "Rifle_equip":2,
    "Rifle_fire":6,
    "Rifle_idle":1,
    "Rifle_reload":1.45,
    "Rifle_unequip":2,

    "Knife_equip":1,
    "Knife_fire":1.35,
    "Knife_idle":1,
    "Knife_unequip":1,
}

var current_state = null
var callback_function = null

func _ready():
    set_animation("Idle_unarmed")
    connect("animation_finished", self, "animation_ended")

func set_animation(animation_name):
    if animation_name == current_state:
        print ("AnimationPlayer_Manager.gd -- WARNING: animation is already ", animation_name)
        return true


    if has_animation(animation_name):
        if current_state != null:
            var possible_animations = states[current_state]
            if animation_name in possible_animations:
                current_state = animation_name
                play(animation_name, -1, animation_speeds[animation_name])
                return true
            else:
                print ("AnimationPlayer_Manager.gd -- WARNING: Cannot change to ", animation_name, " from ", current_state)
                return false
        else:
            current_state = animation_name
            play(animation_name, -1, animation_speeds[animation_name])
            return true
    return false


func animation_ended(anim_name):

    # UNARMED transitions
    if current_state == "Idle_unarmed":
        pass
    # KNIFE transitions
    elif current_state == "Knife_equip":
        set_animation("Knife_idle")
    elif current_state == "Knife_idle":
        pass
    elif current_state == "Knife_fire":
        set_animation("Knife_idle")
    elif current_state == "Knife_unequip":
        set_animation("Idle_unarmed")
    # PISTOL transitions
    elif current_state == "Pistol_equip":
        set_animation("Pistol_idle")
    elif current_state == "Pistol_idle":
        pass
    elif current_state == "Pistol_fire":
        set_animation("Pistol_idle")
    elif current_state == "Pistol_unequip":
        set_animation("Idle_unarmed")
    elif current_state == "Pistol_reload":
        set_animation("Pistol_idle")
    # RIFLE transitions
    elif current_state == "Rifle_equip":
        set_animation("Rifle_idle")
    elif current_state == "Rifle_idle":
        pass;
    elif current_state == "Rifle_fire":
        set_animation("Rifle_idle")
    elif current_state == "Rifle_unequip":
        set_animation("Idle_unarmed")
    elif current_state == "Rifle_reload":
        set_animation("Rifle_idle")

func animation_callback():
    if callback_function == null:
        print ("AnimationPlayer_Manager.gd -- WARNING: No callback function for the animation to call!")
    else:
        callback_function.call_func()
Lets go over what this script is doing:
Lets start with this script’s class variables:
states: A dictionary for holding our animation states. (Further explanation below)animation_speeds: A dictionary for holding all the speeds at which we want to play our animations.current_state: A variable for holding the name of the animation state we are currently in.callback_function: A variable for holding the callback function. (Further explanation below)
If you are familiar with state machines, then you may have noticed that states is structured
like a basic state machine. Here is roughly how states is set up:
states is a dictionary with the key being the name of the current state, and the value being
an array holding all the animations (states) we can transition to. For example, if we are currently in the
Idle_unarmed state, we can only transition to Knife_equip, Pistol_equip, Rifle_equip, and
Idle_unarmed.
If we try to transition to a state that is not included in the possible transitions states for the state we are in,
then we get a warning message and the animation does not change. We can also automatically
transition from some states into others, as will be explained further below in animation_ended
Note
For the sake of keeping this tutorial simple, we are not using a ‘proper’ state machine. If you are interested to know more about state machines, see the following articles:
animation_speeds is how fast each animation will play. Some of the animations are a little slow
and in an effort to make everything look smooth, we need to play them at faster speeds.
Tip
Notice that all of the firing animations are faster than their normal speed. Remember this for later!
current_state will hold the name of the animation state we are currently in.
Finally, callback_function will be a FuncRef passed in by the player for spawning bullets
at the proper frame of animation. A FuncRef allows us to pass in a function as an argument,
effectively allowing us to call a function from another script, which is how we will use it later.
Now let’s look at _ready.
First we are setting our animation to Idle_unarmed using the set_animation function,
so we for sure start in that animation.
Next we connect the animation_finished signal to this script and assign it to call animation_ended.
This means whenever an animation is finished, animation_ended will be called.
Lets look at set_animation next.
set_animation changes the animation to the animation named animation_name
if we can transition to it. In other words, if the animation state we are currently in
has the passed in animation state name in states, then we will change to that animation.
Firstly, we check if the passed in animation name is the same name as the animation currently playing.
If they are the same, then we write a warning to the console and return true.
Secondly, we see if AnimationPlayer has the animation with the name animation_name using has_animation.
If it does not, we return false.
Thirdly, we check whether current_state is set. If current_state is not currently set, then we
set current_state to the passed in animation name and tell AnimationPlayer to start playing the animation with
a blend time of -1 at the speed set in animation_speeds and then we return true.
Note
Blend time is how long to blend/mix the two animations together.
By putting in a value of -1, the new animation instantly plays, overriding whatever animation is already playing.
If you put in a value of 1, for one second the new animation will play with increasing strength, blending the two animations together for one second
before playing only the new animation. This leads to a smooth transition between animations, which looks great when you are changing from
a walking animation to a running animation.
We set the blend time to -1 because we want to instantly change animations.
If we have a state in current_state, then we get all the possible states we can transition to.
If the animation name is in the list of possible transitions, we set current_state to the passed
in animation (animation_name), tell AnimationPlayer to play the animation with a blend time of -1 at the speed set in
animation_speeds and return true.
Now lets look at animation_ended.
animation_ended is the function that will be called by AnimationPlayer when it’s done playing an animation.
For certain animation states, we may need to transition into another state when it’s finished. To handle this, we check for every possible animation state. If we need to, we will transition into another state.
Warning
If you are using your own animated models, make sure that none of the animations are set
to loop. Looping animations do not send the animation_finished signal when they reach
the end of the animation and are about to loop again.
Note
The transitions in animation_ended would ideally be part of the data in states, but in
an effort to make the tutorial easier to understand, we’ll hard code each state transition
in animation_ended.
Finally, there is animation_callback. This function will be called by a call method track in our animations.
If we have a FuncRef assigned to callback_function, then we call that passed in function. If we do not
have a FuncRef assigned to callback_function, we print out a warning to the console.
Tip
Try running Testing_Area.tscn to make sure there are no runtime issues. If the game runs but nothing
seems to have changed, then everything is working correctly.
Getting the animations ready
Now that we have a working animation manager, we need to call it from our player script. Before that, though, we need to set some animation callback tracks in our firing animations.
Open up Player.tscn if you don’t have it open and navigate to the AnimationPlayer node
(Player -> Rotation_Helper -> Model -> Animation_Player).
We need to attach a call method track to three of our animations: The firing animation for the pistol, rifle, and knife. Let’s start with the pistol. Click the animation drop down list and select “Pistol_fire”.
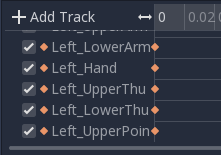
Now scroll down to the bottom of the list of animation tracks. The final item in the list should read
Armature/Skeleton:Left_UpperPointer. Now above the list, click the “Add track” button, to the left of the time line
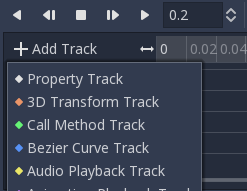
This will bring up a window with a few choices. We want to add a call method track, so click the option that reads “Call Method Track”. This will open a window showing the entire node tree. Navigate to the AnimationPlayer node, select it, and press OK.
Now at the bottom of list of animation tracks you will have a green track that reads “AnimationPlayer”. Now we need to add the point where we want to call our callback function. Scrub the timeline until you reach the point where the muzzle starts to flash.
Note
The timeline is the window where all the points in our animation are stored. Each of the little points represents a point of animation data.
Scrubbing the timeline means moving ourselves through the animation. So when we say “scrub the timeline until you reach a point”, what we mean is move through the animation window until you reach the point on the timeline.
Also, the muzzle of a gun is the end point where the bullet comes out. The muzzle flash is the flash of light that escapes the muzzle when a bullet is fired. The muzzle is also sometimes referred to as the barrel of the gun.
Tip
For finer control when scrubbing the timeline, press control and scroll forward with the mouse wheel to zoom in.
Scrolling backwards will zoom out.
You can also change how the timeline scrubbing snaps by changing the value in Step (s) to a lower/higher value.
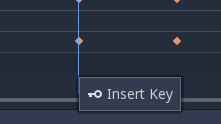
Once you get to a point you like, right click on the row for “Animation Player” and press insert key.
In the empty name field, enter animation_callback and press enter.
Now when we are playing this animation the call method track will be triggered at that specific point of the animation.
Let’s repeat the process for the rifle and knife firing animations!
Note
Because the process is exactly the same as the pistol, the process is going to explained in a little less depth. Follow the steps from above if you get lost! It is exactly the same, just on a different animation.
Go to the “Rifle_fire” animation from the animation drop down. Add the call method track once you reach the bottom of the
animation track list by clicking the “Add Track” button above the list. Find the point where the muzzle starts
to flash and right click and press Insert Key to add a call method track point at that position on the track.
Type “animation_callback” into the name field of the pop up which opened and press enter.
Now we need to apply the callback method track to the knife animation. Select the “Knife_fire” animation and scroll to the bottom of the animation tracks. Click the “Add Track” button above the list and add a method track. Next find a point around the first third of the animation to place the animation callback method point at.
Note
We will not actually be firing the knife, and the animation is a stabbing animation rather than a firing one. For this tutorial we are reusing the gun firing logic for our knife, so the animation has been named in a style that is consistent with the other animations.
From there right click on the timeline and click “Insert Key”. Put “animation_callback” into the name field and press enter.
Tip
Be sure to save your work!
With that done, we are almost ready to start adding the ability to fire to our player script! We need to set up one last scene: The scene for our bullet object.
Creating the bullet scene
There are several ways to handle a gun’s bullets in video games. In this tutorial series, we will be exploring two of the more common ways: Objects, and raycasts.
One of the two ways is using a bullet object. This will be an object that travels through the world and handles its own collision code. In this method we create/spawn a bullet object in the direction our gun is facing, and then it travels forward.
There are several advantages to this method. The first being we do not have to store the bullets in our player. We can simply create the bullet and then move on, and the bullet itself with handle checking for collisions, sending the proper signal(s) to the object it collides with, and destroying itself.
Another advantage is we can have more complex bullet movement. If we want to make the bullet fall ever so slightly as time goes on, we can make the bullet controlling script slowly push the bullet towards the ground. Using an object also makes the bullet take time to reach its target, it doesn’t instantly hit whatever it’s pointed at. This feels more realistic because nothing in real life moves instantly from one point to another.
One of the huge disadvantages is performance. While having each bullet calculate their own paths and handle their own collision allows for a lot of flexibility, it comes at the cost of performance. With this method we are calculating every bullet’s movement every step, and while this may not be a problem for a few dozen bullets, it can become a huge problem when you potentially have several hundred bullets.
Despite the performance hit, many first person shooters include some form of object bullets. Rocket launchers are a prime example because in many first person shooters, rockets do not just instantly explode at their target position. You can also find bullets as objects many times with grenades because they generally bounce around the world before exploding.
Note
While I cannot say for sure this is the case, these games probably use bullet objects in some form or another: (These are entirely from my observations. They may be entirely wrong. I have never worked on any of the following games)
- Halo (Rocket launchers, fragmentation grenades, sniper rifles, brute shot, and more)
- Destiny (Rocket launchers, grenades, fusion rifles, sniper rifles, super moves, and more)
- Call of Duty (Rocket launchers, grenades, ballistic knives, crossbows, and more)
- Battlefield (Rocket launchers, grenades, claymores, mortars, and more)
Another disadvantage with bullet objects is networking. Bullet objects have to sync the positions (at least) with all the clients that are connected to the server.
While we are not implementing any form of networking (as that would be in its own entire tutorial series), it is a consideration to keep in mind when creating your first person shooter, especially if you plan on adding some form of networking in the future.
The other way of handling bullet collisions we will be looking at is raycasting.
This method is extremely common in guns that have fast moving bullets that rarely change trajectory over time.
Instead of creating a bullet object and sending it through space, we instead send a ray starting from the barrel/muzzle of the gun forwards. We set the raycast’s origin to the starting position of the bullet, and based on the length we can adjust how far the bullet ‘travels’ through space.
Note
While I cannot say for sure this is the case, these games probably use raycasts in some form or another: (These are entirely from my observations. They may be entirely wrong. I have never worked on any of the following games)
- Halo (Assault rifles, DMRs, battle rifles, covenant carbine, spartan laser, and more)
- Destiny (Auto rifles, pulse rifles, scout rifles, hand cannons, machine guns, and more)
- Call of Duty (Assault rifles, light machine guns, sub machine guns, pistols, and more)
- Battlefield (Assault rifles, SMGs, carbines, pistols, and more)
One huge advantage of this method is that it’s light on performance. Sending a couple hundred rays through space is much easier for the computer to calculate than sending a couple hundred bullet objects.
Another advantage is we can instantly know if we’ve hit something or not exactly when we call for it. For networking this is important because we do not need to sync the bullet movements over the Internet, we only need to send whether or not the raycast hit.
Raycasting does have some disadvantages, though. One major disadvantage is we cannot easily cast a ray in anything but a linear line. This means we can only fire in a straight line for however long our ray length is. You can create the illusion of bullet movement by casting multiple rays at different positions, but not only is this hard to implement in code, it is also heavier on performance.
Another disadvantage is we cannot see the bullet. With bullet objects we can actually see the bullet travel through space if we attach a mesh to it, but because raycasts happen instantly, we do not have a decent way of showing the bullets. You could draw a line from the origin of the raycast to the point where the raycast collided, and that is one popular way of showing raycasts. Another way is simply not drawing the raycast at all, because theoretically the bullets move so fast our eyes could not see it anyway.
Let’s get the bullet object set up. This is what our pistol will create when the “Pistol_fire” animation callback function is called.
Open up Bullet_Scene.tscn. The scene contains Spatial node called bullet, with a MeshInstance
and an Area with a CollisionShape children to it.
Create a new script called Bullet_script.gd and attach it to the Bullet Spatial.
We are going to move the entire bullet object at the root (Bullet). We will be using the Area to check whether or not we’ve collided with something
Note
Why are we using an Area and not a RigidBody? The main reason we’re not using a RigidBody is because we do not want the bullet to interact with other RigidBody nodes. By using an Area we are ensuring that none of the other RigidBody nodes, including other bullets, will be effected.
Another reason is simply because it is easier to detect collisions with an Area!
Here’s the script that will control our bullet:
extends Spatial

var BULLET_SPEED = 70
var BULLET_DAMAGE = 15

const KILL_TIMER = 4
var timer = 0

var hit_something = false

func _ready():
    $Area.connect("body_entered", self, "collided")


func _physics_process(delta):
    var forward_dir = global_transform.basis.z.normalized()
    global_translate(forward_dir * BULLET_SPEED * delta)

    timer += delta
    if timer >= KILL_TIMER:
        queue_free()


func collided(body):
    if hit_something == false:
        if body.has_method("bullet_hit"):
            body.bullet_hit(BULLET_DAMAGE, global_transform)

    hit_something = true
    queue_free()
Let’s go through the script:
First we define a few class variables:
BULLET_SPEED: The speed at which the bullet travels.BULLET_DAMAGE: The damage the bullet will cause to anything with which it collides.KILL_TIMER: How long the bullet can last without hitting anything.timer: A float for tracking how long the bullet has been alive.hit_something: A boolean for tracking whether or not we’ve hit something.
With the exception of timer and hit_something, all of these variables
change how the bullet interacts with the world.
Note
The reason we are using a kill timer is so we do not have a case where we get a bullet travelling forever. By using a kill timer, we can ensure that no bullets will travel forever and consume resources.
Tip
As in Part 1, we have a couple all uppercase class variables. The reason behind this is the same as the reason given in Part 1: We want to treat these variables like constants, but we want to be able to change them. In this case we will later need to change the damage and speed of these bullets, so we need them to be variables and not constants.
In _ready we set the area’s body_entered signal to ourself so that it calls
the collided function when a body enters the area.
_physics_process gets the bullet’s local Z axis. If you look at the scene
in local mode, you will find that the bullet faces the positive local Z axis.
Next we translate the entire bullet by that forward direction, multiplying in our speed and delta time.
After that we add delta time to our timer and check whether the timer has reached a value as big or greater
than our KILL_TIME constant. If it has, we use queue_free to free the bullet.
In collided we check whether we’ve hit something yet.
Remember that collided is only called when a body has entered the Area node.
If the bullet has not already collided with something, we then proceed to check if the body the bullet has collided
with has a function/method called bullet_hit. If it does, we call it and pass in the bullet’s damage and the bullet’s global transform
so we can get the bullet’s rotation and position.
Note
in collided, the passed in body can be a StaticBody,
RigidBody, or KinematicBody
We set the Bullet’s hit_something variable to true because regardless of whether or not the body that
the bullet collided with has the bullet_hit function/method, it has hit something and so we need to make sure the bullet does not hit anything else.
Then we free the bullet using queue_free.
Tip
You may be wondering why we even have a hit_something variable if we
free the bullet using queue_free as soon as it hits something.
The reason we need to track whether we’ve hit something or not is because queue_free
does not immediately free the node, so the bullet could collide with another body
before Godot has a chance to free it. By tracking whether the bullet has hit something,
we can make sure that the bullet will only hit one object.
Before we start programming the player again, let’s take a quick look at Player.tscn.
Open up Player.tscn again.
Expand Rotation_Helper and notice how it has two nodes: Gun_Fire_Points and
Gun_Aim_Point.
Gun_aim_point is the point that the bullets will be aiming at. Notice how it
is lined up with the center of the screen and pulled a distance forward on the Z
axis. Gun_aim_point will serve as the point where the bullets will for sure collide
with as it goes along.
Note
There is a invisible mesh instance for debugging purposes. The mesh is a small sphere that visually shows at which target the bullets will be aiming.
Open up Gun_Fire_Points and you’ll find three more Spatial nodes, one for each
weapon.
Open up Rifle_Point and you’ll find a Raycast node. This is where
we will be sending the raycasts for our rifle’s bullets.
The length of the raycast will dictate how far our bullets will travel.
We are using a Raycast node to handle the rifle’s bullet because we want to fire lots of bullets quickly. If we use bullet objects, it is quite possible we could run into performance issues on older machines.
Note
If you are wondering from where the positions of the points came, they
are the rough positions of the ends of each weapon. You can see this by
going to AnimationPlayer, selecting one of the firing animations
and scrubbing through the timeline. The point for each weapon should mostly line
up with the end of each weapon.
Open up Knife_Point and you’ll find an Area node. We are using an Area for the knife
because we only care for all the bodies close to us, and because our knife does
not fire into space. If we were making a throwing knife, we would likely spawn a bullet
object that looks like a knife.
Finally, we have Pistol_Point. This is the point where we will be creating/instancing
our bullet objects. We do not need any additional nodes here, as the bullet handles all
of its own collision detection.
Now that we’ve seen how we will handle our other weapons, and where we will spawn the bullets, let’s start working on making them work.
Note
You can also look at the HUD nodes if you want. There is nothing fancy there and other than using a single Label, we will not be touching any of those nodes. Check Design interfaces with the Control nodes for a tutorial on using GUI nodes.
Creating the first weapon
Lets write the code for each of our weapons, starting with the pistol.
Select Pistol_Point (Player -> Rotation_Helper -> Gun_Fire_Points -> Pistol_Point) and create a new script called Weapon_Pistol.gd.
Add the following code to Weapon_Pistol.gd:
extends Spatial

const DAMAGE = 15

const IDLE_ANIM_NAME = "Pistol_idle"
const FIRE_ANIM_NAME = "Pistol_fire"

var is_weapon_enabled = false

var bullet_scene = preload("Bullet_Scene.tscn")

var player_node = null

func _ready():
    pass

func fire_weapon():
    var clone = bullet_scene.instance()
    var scene_root = get_tree().root.get_children()[0]
    scene_root.add_child(clone)

    clone.global_transform = self.global_transform
    clone.scale = Vector3(4, 4, 4)
    clone.BULLET_DAMAGE = DAMAGE

func equip_weapon():
    if player_node.animation_manager.current_state == IDLE_ANIM_NAME:
        is_weapon_enabled = true
        return true

    if player_node.animation_manager.current_state == "Idle_unarmed":
        player_node.animation_manager.set_animation("Pistol_equip")

    return false

func unequip_weapon():
    if player_node.animation_manager.current_state == IDLE_ANIM_NAME:
        if player_node.animation_manager.current_state != "Pistol_unequip":
            player_node.animation_manager.set_animation("Pistol_unequip")

    if player_node.animation_manager.current_state == "Idle_unarmed":
        is_weapon_enabled = false
        return true
    else:
        return false
Let’s go over how the script works.
First we define some class variables we’ll need in the script:
DAMAGE: The amount of damage a single bullet does.IDLE_ANIM_NAME: The name of the pistol’s idle animation.FIRE_ANIM_NAME: The name of the pistol’s fire animation.is_weapon_enabled: A variable for checking whether this weapon is in use/enabled.bullet_scene: The bullet scene we worked on earlier.player_node: A variable to holdPlayer.gd.
The reason we define most of these variables is so we can use them in Player.gd.
Each of the weapons we’ll make will have all these variables (minus bullet_scene) so we have
a consistent interface to interact with in Player.gd. By using the same variables/functions in each
weapon, we can interact with them without having to know which weapon we are using, which makes our code
much more modular because we can add weapons without having to change much of the code in Player.gd and it will just work.
We could write all the code in Player.gd, but then Player.gd will get increasingly harder to manage as we add weapons.
By using a modular design with a consistent interface, we can keep Player.gd nice and neat, while also making it easier to add/remove/modify weapons.
In _ready we simply pass over it.
There is one thing of note though, an assumption that we’ll fill in Player.gd at some point.
We are going to assume that Player.gd will pass themselves in before calling any of the functions in Weapon_Pistol.gd.
While this can lead to situations where the player does not pass themselves in (because we forget), we would have to have a long string
of get_parent calls to traverse up the scene tree to retrieve the player. This does not look pretty (get_parent().get_parent().get_parent() and so on)
and it is relatively safe to assume we will remember to pass ourselves to each weapon in Player.gd.
Next let’s look at fire_weapon:
The first thing we do is instance the bullet scene we made earlier.
Tip
By instancing the scene, we are creating a new node holding all the node(s) in the scene we instanced, effectively cloning that scene.
Then we add a clone to the first child node of the root of the scene we are currently in. By doing this, we’re making it a child of the root node of the currently loaded scene.
In other words, we are adding a clone as a child of the first node (whatever is at the top of the scene tree) in the currently loaded/opened scene.
If the currently loaded/open scene is Testing_Area.tscn, we’d be adding our clone as a child of Testing_Area, the root node in that scene.
Warning
As mentioned later below in the section on adding sounds, this method makes an assumption. This will be explained later in the section on adding sounds in Part 3
Next we set the global transform of the clone to the Pistol_Aim_Point’s global transform. The reason we do this is so the bullet is spawned at the end of the pistol.
You can see that Pistol_Aim_Point is positioned right at the end of the pistol by clicking the AnimationPlayer and
scrolling through Pistol_fire. You’ll find the position is more or less at the end of the pistol when it fires.
Next we scale it up by a factor of 4 because the bullet scene is a little too small by default.
Then we set the bullet’s damage (BULLET_DAMAGE) to the amount of damage a single pistol bullet does (DAMAGE).
Now let’s look at equip_weapon:
The first thing we do is check to see whether the animation manager is in the pistol’s idle animation.
If we are in the pistol’s idle animation, we set is_weapon_enabled to true and return true because the pistol has successfully
been equipped.
Because we know our pistol’s equip animation automatically transitions to the pistol’s idle animation, if we are in the pistol’s
idle animation the pistol must have finished playing the equip animation.
Note
We know these animations will transition because we wrote the code to make them transition in Animation_Manager.gd
Next we check to see if the player is in the Idle_unarmed animation state. Because all unequipping animations go to this state, and because any
weapon can be equipped from this state, we change animations to Pistol_equip if the player is in the Idle_unarmed state.
Since we know Pistol_equip will transition to Pistol_idle, we do not need to do any more additional processing for equipping weapons,
but since we were not able to equip the pistol yet, we return false.
Finally, let’s look at unequip_weapon:
unequip_weapon is similar to equip_weapon, but instead we’re checking things in reverse.
First we check to see whether the player is in the idle animation state. Then we check to make sure the player is not in the Pistol_unequip animation.
If the player is not in the Pistol_unequip animation, we want to play the pistol_unequip animation.
Note
You may be wondering why we are checking to see whether the player is in the pistol’s idle animation, and then making sure the player is not unequipping right after.
The reason behind the additional check is because we could (in rare cases) call unequip_weapon twice before we’ve had a chance to process set_animation,
so we add this additional check to make sure the unequip animation plays.
Next we check to see whether the player is in Idle_unarmed, which is the animation state we will transition into from Pistol_unequip. If the player is in Idle_unarmed, then we set
is_weapon_enabled to false since we are no longer using this weapon, and return true because we have successfully unequipped the pistol.
If the player is not in Idle_unarmed, we return false because we have not yet successfully unequipped the pistol.
Creating the other two weapons
Now that we have all the code we’ll need for the pistol, let’s add the code for the rifle and knife next.
Select Rifle_Point (Player -> Rotation_Helper -> Gun_Fire_Points -> Rifle_Point) and create a new script called Weapon_Rifle.gd,
then add the following:
extends Spatial

const DAMAGE = 4

const IDLE_ANIM_NAME = "Rifle_idle"
const FIRE_ANIM_NAME = "Rifle_fire"

var is_weapon_enabled = false

var player_node = null

func _ready():
    pass

func fire_weapon():
    var ray = $Ray_Cast
    ray.force_raycast_update()

    if ray.is_colliding():
        var body = ray.get_collider()

        if body == player_node:
            pass
        elif body.has_method("bullet_hit"):
            body.bullet_hit(DAMAGE, ray.global_transform)

func equip_weapon():
    if player_node.animation_manager.current_state == IDLE_ANIM_NAME:
        is_weapon_enabled = true
        return true

    if player_node.animation_manager.current_state == "Idle_unarmed":
        player_node.animation_manager.set_animation("Rifle_equip")

    return false

func unequip_weapon():

    if player_node.animation_manager.current_state == IDLE_ANIM_NAME:
        if player_node.animation_manager.current_state != "Rifle_unequip":
            player_node.animation_manager.set_animation("Rifle_unequip")

    if player_node.animation_manager.current_state == "Idle_unarmed":
        is_weapon_enabled = false
        return true

    return false
Most of this is exactly the same as Weapon_Pistol.gd, so we’re only going to look at what’s changed: fire_weapon.
The first thing we do is get the Raycast node, which is a child of Rifle_Point.
Next we force the Raycast to update using force_raycast_update. This will force the Raycast to detect collisions when we call it, meaning
we get a frame perfect collision check with the 3D physics world.
Then we check to see if the Raycast collided with something.
If the Raycast has collided with something, we first get the collision body it collided with. This can be a StaticBody, RigidBody, or a KinematicBody.
Next we want to make sure the body we’ve collided with is not the player, since we (probably) do not want to give the player the ability to shoot themselves in the foot.
If the body is not the player, we then check to see if it has a function/method called bullet_hit. If it does, we call it and pass in the amount of
damage this bullet does (DAMAGE), and the global transform of the Raycast so we can tell from which direction the bullet came.
Now all we need to do is write the code for the knife.
Select Knife_Point (Player -> Rotation_Helper -> Gun_Fire_Points -> Knife_Point) and create a new script called Weapon_Knife.gd,
then add the following:
extends Spatial

const DAMAGE = 40

const IDLE_ANIM_NAME = "Knife_idle"
const FIRE_ANIM_NAME = "Knife_fire"

var is_weapon_enabled = false

var player_node = null

func _ready():
    pass

func fire_weapon():
    var area = $Area
    var bodies = area.get_overlapping_bodies()

    for body in bodies:
        if body == player_node:
            continue

        if body.has_method("bullet_hit"):
            body.bullet_hit(DAMAGE, area.global_transform)

func equip_weapon():
    if player_node.animation_manager.current_state == IDLE_ANIM_NAME:
        is_weapon_enabled = true
        return true

    if player_node.animation_manager.current_state == "Idle_unarmed":
        player_node.animation_manager.set_animation("Knife_equip")

    return false

func unequip_weapon():

    if player_node.animation_manager.current_state == IDLE_ANIM_NAME:
        player_node.animation_manager.set_animation("Knife_unequip")

    if player_node.animation_manager.current_state == "Idle_unarmed":
        is_weapon_enabled = false
        return true

    return false
As with Weapon_Rifle.gd, the only differences are in fire_weapon, so let’s look at that:
The first thing we do is get the Area child node of Knife_Point.
Next we want to get all the collision bodies inside the Area using get_overlapping_bodies. This will return a
list of every body that touches the Area.
We next want to go through each of those bodies.
First we check to make sure the body is not the player, because we do not want to let the player be able to stab themselves. If the body is the player,
we use continue so we jump and look at the next body in bodies.
If we have not jumped to the next body, we then check to see if the body has the bullet_hit function/method. If it does,
we call it, passing in the amount of damage a single knife swipe does (DAMAGE) and the global transform of the Area.
Note
While we could attempt to calculate a rough location for where the knife hit exactly, we are not going to because using the Area’s position works well enough and the extra time needed to calculate a rough position for each body is not worth the effort.
Making the weapons work
Let’s start making the weapons work in Player.gd.
First let’s start by adding some class variables we’ll need for the weapons:
# Place before _ready
var animation_manager

var current_weapon_name = "UNARMED"
var weapons = {"UNARMED":null, "KNIFE":null, "PISTOL":null, "RIFLE":null}
const WEAPON_NUMBER_TO_NAME = {0:"UNARMED", 1:"KNIFE", 2:"PISTOL", 3:"RIFLE"}
const WEAPON_NAME_TO_NUMBER = {"UNARMED":0, "KNIFE":1, "PISTOL":2, "RIFLE":3}
var changing_weapon = false
var changing_weapon_name = "UNARMED"

var health = 100

var UI_status_label
Let’s go over what these new variables will do:
animation_manager: This will hold the AnimationPlayer node and its script, which we wrote previously.current_weapon_name: The name of the weapon we are currently using. It has four possible values:UNARMED,KNIFE,PISTOL, andRIFLE.weapons: A dictionary that will hold all the weapon nodes.WEAPON_NUMBER_TO_NAME: A dictionary allowing us to convert from a weapon’s number to its name. We’ll use this for changing weapons.WEAPON_NAME_TO_NUMBER: A dictionary allowing us to convert from a weapon’s name to its number. We’ll use this for changing weapons.changing_weapon: A boolean to track whether or not we are changing guns/weapons.changing_weapon_name: The name of the weapon we want to change to.health: How much health our player has. In this part of the tutorial we will not be using it.UI_status_label: A label to show how much health we have, and how much ammo we have both in our gun and in reserve.
Next we need to add a few things in _ready. Here’s the new _ready function:
func _ready():
    camera = $Rotation_Helper/Camera
    rotation_helper = $Rotation_Helper

    animation_manager = $Rotation_Helper/Model/Animation_Player
    animation_manager.callback_function = funcref(self, "fire_bullet")

    Input.set_mouse_mode(Input.MOUSE_MODE_CAPTURED)

    weapons["KNIFE"] = $Rotation_Helper/Gun_Fire_Points/Knife_Point
    weapons["PISTOL"] = $Rotation_Helper/Gun_Fire_Points/Pistol_Point
    weapons["RIFLE"] = $Rotation_Helper/Gun_Fire_Points/Rifle_Point

    var gun_aim_point_pos = $Rotation_Helper/Gun_Aim_Point.global_transform.origin

    for weapon in weapons:
        var weapon_node = weapons[weapon]
        if weapon_node != null:
            weapon_node.player_node = self
            weapon_node.look_at(gun_aim_point_pos, Vector3(0, 1, 0))
            weapon_node.rotate_object_local(Vector3(0, 1, 0), deg2rad(180))

    current_weapon_name = "UNARMED"
    changing_weapon_name = "UNARMED"

    UI_status_label = $HUD/Panel/Gun_label
    flashlight = $Rotation_Helper/Flashlight
Let’s go over what’s changed.
First we get the AnimationPlayer node and assign it to the animation_manager variable. Then we set the callback function
to a FuncRef that will call the player’s fire_bullet function. Right now we haven’t written the fire_bullet function,
but we’ll get there soon.
Next we get all the weapon nodes and assign them to weapons. This will allow us to access the weapon nodes only with their name
(KNIFE, PISTOL, or RIFLE).
We then get Gun_Aim_Point’s global position so we can rotate the player’s weapons to aim at it.
Then we go through each weapon in weapons.
We first get the weapon node. If the weapon node is not null, we then set its player_node variable to this script (Player.gd).
Then we have it look at gun_aim_point_pos using the look_at function, and then rotate it by 180 degrees on the Y axis.
Note
We rotate all of those weapon points by 180 degrees on their Y axis because our camera is pointing backwards.
If we did not rotate all of these weapon points by 180 degrees, all of the weapons would fire backwards.
Then we set current_weapon_name and changing_weapon_name to UNARMED.
Finally, we get the UI Label from our HUD.
Let’s add a new function call to _physics_process so we can change weapons. Here’s the new code:
func _physics_process(delta):
    process_input(delta)
    process_movement(delta)
    process_changing_weapons(delta)
Now we will call process_changing_weapons.
Now let’s add all the player input code for the weapons in process_input. Add the following code:
# ----------------------------------
# Changing weapons.
var weapon_change_number = WEAPON_NAME_TO_NUMBER[current_weapon_name]

if Input.is_key_pressed(KEY_1):
    weapon_change_number = 0
if Input.is_key_pressed(KEY_2):
    weapon_change_number = 1
if Input.is_key_pressed(KEY_3):
    weapon_change_number = 2
if Input.is_key_pressed(KEY_4):
    weapon_change_number = 3

if Input.is_action_just_pressed("shift_weapon_positive"):
    weapon_change_number += 1
if Input.is_action_just_pressed("shift_weapon_negative"):
    weapon_change_number -= 1

weapon_change_number = clamp(weapon_change_number, 0, WEAPON_NUMBER_TO_NAME.size() - 1)

if changing_weapon == false:
    if WEAPON_NUMBER_TO_NAME[weapon_change_number] != current_weapon_name:
        changing_weapon_name = WEAPON_NUMBER_TO_NAME[weapon_change_number]
        changing_weapon = true
# ----------------------------------

# ----------------------------------
# Firing the weapons
if Input.is_action_pressed("fire"):
    if changing_weapon == false:
        var current_weapon = weapons[current_weapon_name]
        if current_weapon != null:
            if animation_manager.current_state == current_weapon.IDLE_ANIM_NAME:
                animation_manager.set_animation(current_weapon.FIRE_ANIM_NAME)
# ----------------------------------
Let’s go over the additions, starting with how we’re changing weapons.
First we get the current weapon’s number and assign it to weapon_change_number.
Then we check to see if any of the number keys (keys 1-4) are pressed. If they are, we set
weapon_change_number to the value mapped at that key.
Note
The reason key 1 is mapped to 0 is because the first element in a list is mapped to zero, not one. Most list/array accessors
in most programming languages start at 0 instead of 1. See https://en.wikipedia.org/wiki/Zero-based_numbering for more information.
Next we check to see if shift_weapon_positive or shift_weapon_negative is pressed. If one of them is, we add/subtract 1 from
weapon_change_number.
Because the player may have shifted weapon_change_number outside of the number of weapons the player has, we clamp it so it cannot exceed the maximum number of weapons
the player has and it ensures weapon_change_number is 0 or more.
Then we check to make sure the player is not already changing weapons. If the player is not, we then check to see if the weapon the player wants to change to
is a new weapon and not the weapon the player is currently using. If the weapon the player is wanting to change to is a new weapon, we then set changing_weapon_name to
the weapon at weapon_change_number and set changing_weapon to true.
For firing the weapon we first check to see if the fire action is pressed.
Then we check to make sure the player is not changing weapons.
Next we get the weapon node for the current weapon.
If the current weapon node does not equal null, and the player is in its IDLE_ANIM_NAME state, we set the player’s animation
to the current weapon’s FIRE_ANIM_NAME.
Let’s add process_changing_weapons next.
Add the following code:
func process_changing_weapons(delta):
    if changing_weapon == true:

        var weapon_unequipped = false
        var current_weapon = weapons[current_weapon_name]

        if current_weapon == null:
            weapon_unequipped = true
        else:
            if current_weapon.is_weapon_enabled == true:
                weapon_unequipped = current_weapon.unequip_weapon()
            else:
                weapon_unequipped = true

        if weapon_unequipped == true:

            var weapon_equipped = false
            var weapon_to_equip = weapons[changing_weapon_name]

            if weapon_to_equip == null:
                weapon_equipped = true
            else:
                if weapon_to_equip.is_weapon_enabled == false:
                    weapon_equipped = weapon_to_equip.equip_weapon()
                else:
                    weapon_equipped = true

            if weapon_equipped == true:
                changing_weapon = false
                current_weapon_name = changing_weapon_name
                changing_weapon_name = ""
Let’s go over what’s happening here:
The first thing we do is make sure we’ve received input to change weapons. We do this by making sure changing_weapons is true.
Next we define a variable (weapon_unequipped) so we can check whether the current weapon has been successfully unequipped or not.
Then we get the current weapon from weapons.
If the current weapon is not null, then we need to check whether the weapon is enabled. If the weapon is enabled, we call its unequip_weapon function
so it will start the unequip animation. If the weapon is not enabled, we set weapon_unequipped to true because the weapon has successfully been unequipped.
If the current weapon is null, then we can simply set weapon_unequipped to true. The reason we do this check is because there is no weapon script/node for
UNARMED, but there is also no animations for UNARMED, so we can just start equipping the weapon the player wants to change to.
If the player has successfully unequipped the current weapon (weapon_unequipped == true), we need to equip the new weapon.
First we define a new variable (weapon_equipped) for tracking whether the player has successfully equipped the new weapon or not.
Then we get the weapon the player wants to change to. If the weapon the player wants to change to is not null, we then check to see whether it’s enabled or not.
If it is not enabled, we call its equip_weapon function so it starts to equip the weapon. If the weapon is enabled, we set weapon_equipped to true.
If the weapon the player wants to change to is null, we simply set weapon_equipped to true because we do not have any node/script for UNARMED,
nor do we have any animations.
Finally, we check to see whether the player has successfully equipped the new weapon. If (s)he has done so, we set changing_weapon to false because the player is no
longer changing weapons.
We also set current_weapon_name to changing_weapon_name since the current weapon has changed, and then we set changing_weapon_name to an empty string.
Now, we need to add one more function to the player, and then the player is ready to start firing the weapons!
We need to add fire_bullet, which will be called by the AnimationPlayer at those
points we set earlier in the AnimationPlayer function track:
func fire_bullet():
    if changing_weapon == true:
        return

    weapons[current_weapon_name].fire_weapon()
Let’s go over what this function does:
First we check to see whether the player is changing weapons. If the player is changing weapons, we do not want shoot, so we return.
Tip
Calling return stops the rest of the function from being called. In this case, we are not returning a variable
because we are only interested in not running the rest of the code, and because we are not looking for a returned
variable either when we call this function.
Then we tell the current weapon the player is using to fire by calling its fire_weapon function.
Tip
Remember how we mentioned the speed of the animations for firing was faster than the other animations? By changing the firing animation speeds, you can change how fast the weapon fires bullets!
Before we are ready to test our new weapons, we still have a little bit of work to do.
Creating some test subjects
Create a new script by going to the scripting window, clicking “file”, and selecting new.
Name this script RigidBody_hit_test and make sure it extends RigidBody.
Now we need to add this code:
extends RigidBody

const BASE_BULLET_BOOST = 9;

func _ready():
    pass

func bullet_hit(damage, bullet_global_trans):
    var direction_vect = bullet_global_trans.basis.z.normalized() * BASE_BULLET_BOOST;

    apply_impulse((bullet_global_trans.origin - global_transform.origin).normalized(), direction_vect * damage)
Let’s go over how bullet_hit works:
First we get the bullet’s forward directional vector. This is so we can tell from which direction the bullet will hit the RigidBody. We will use this to push the RigidBody in the same direction as the bullet.
Note
We need to boost the directional vector by BASE_BULLET_BOOST so the bullets pack a bit more of a punch
and move the RigidBody nodes in a visible way. You can just set BASE_BULLET_BOOST to lower or higher values if you want
less or more of a reaction when the bullets collide with the RigidBody.
Then we apply an impulse using apply_impulse.
First, we need to calculate the position for the impulse.
Because apply_impulse takes a vector relative to the RigidBody, we need to calculate the distance from
the RigidBody to the bullet. We do this by subtracting the RigidBody’s global origin/position from the bullet’s global origin/position.
This gets us the distance from the RigidBody to the bullet. We normalize this vector so the size of the collider does not effect how much
the bullets move the RigidBody.
Finally, we need to calculate the force for the impulse. For this, we use the direction the bullet is facing and multiply it by the bullet’s damage. This gives a nice result and for stronger bullets, we get a stronger result.
Now we need to attach this script to all of the RigidBody nodes we want to affect.
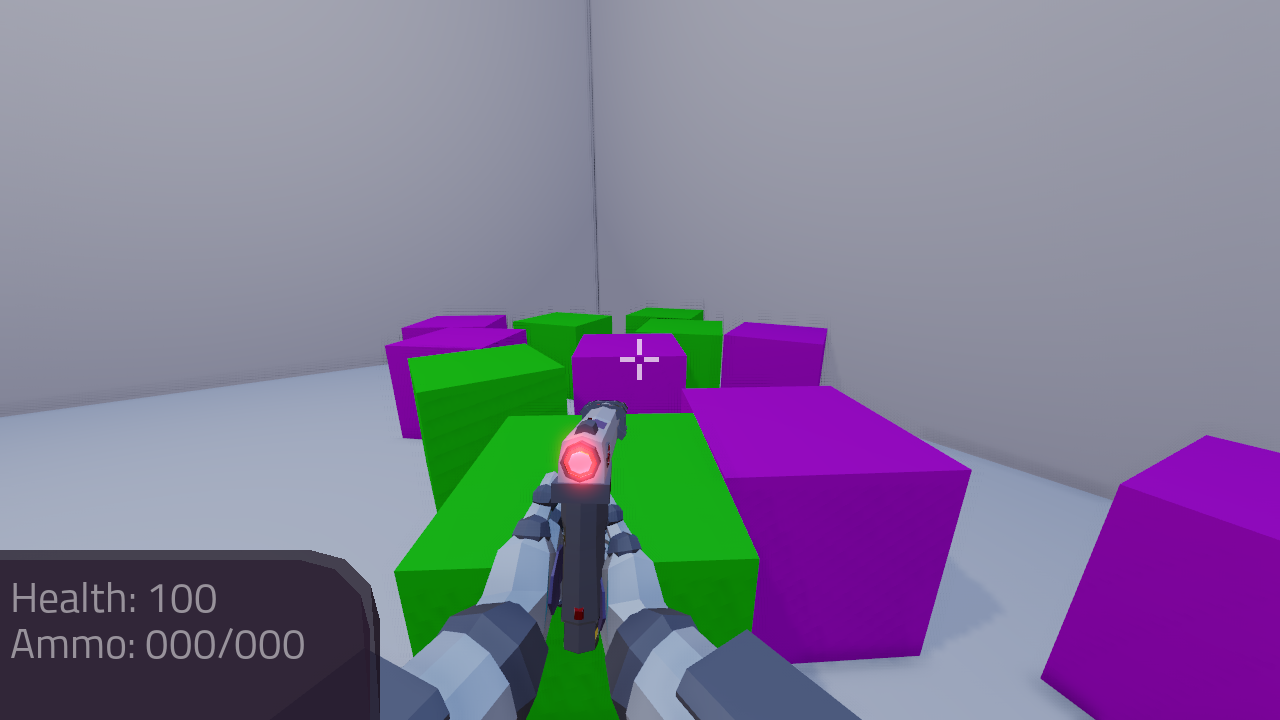
Open up Testing_Area.tscn and select all the cubes parented to the Cubes node.
Tip
If you select the top cube, and then hold down shift and select the last cube, Godot will
select all the cubes in-between!
Once you have all the cubes selected, scroll down in the inspector until you get to
the “scripts” section. Click the drop down and select “Load”. Open your newly created RigidBody_hit_test.gd script.
Final notes
That was a lot of code! But now, with all that done, you can go and give your weapons a test!
You should now be able to fire as many bullets as you want at the cubes and they will move in response to the bullets colliding with them.
In Part 3, we will add ammo to the weapons, as well as some sounds!
Warning
If you ever get lost, be sure to read over the code again!
You can download the finished project for this part here: Godot_FPS_Part_2.zip