VR starter tutorial
Introduction
This tutorial will show you how to make a beginner VR game project in Godot.
Keep in mind, one of the most important things when making VR content is getting the scale of your assets correct! It can take lots of practice and iterations to get this right, but there are a few things you can do to make it easier:
- In VR, 1 unit is typically considered 1 meter. If you design your assets around that standard, you can save yourself a lot of headache.
- In your 3D modeling program, see if there is a way to measure and use real world distances. In Blender, you can use the MeasureIt add-on; in Maya, you can use the Measure Tool.
- You can make rough models using a tool like Google Blocks, and then refine in another 3D modelling program.
- Test often, as the assets can look dramatically different in VR than on a flat screen!
Throughout the course of this tutorial, we will cover:
- How to tell Godot to run in VR.
- How to make a teleportation system for moving the player.
- How to make a directional movement system (locomotion) for moving the player.
- How to make a RigidBody-based pick up and drop system.
- How to make various items that can be used in VR.
Note
While this tutorial can be completed by beginners, it is highly advised to complete Your first game, if you are new to Godot and/or game development and have some experience with making 3D games before going through this tutorial series.
This tutorial assumes you have experience working with the Godot editor, have basic programming experience in GDScript, and have basic 3D game development experience.
Also, it is assumed you have both an OpenVR-ready headset and two OpenVR-ready controllers! This tutorial was written using a Windows Mixed Reality headset on Windows 10, so the tutorial is written to work on that headset. It has also been tested on the HTC Vive. You may need to adjust the code to work with other VR headsets, such as the Oculus Rift.
You can find the start assets for this tutorial here: VR_Starter_Tutorial_Start.zip
The provided starter assets contain some 3D models, sounds, and a few scenes already set up and configured for this tutorial.
Feel free to use these assets however you want! All original assets belong to the Godot community, with the other assets belonging to those listed below:
Note
The sky panorama was created by CGTuts (original source).
The font used is Titillium-Regular, and is licensed under the SIL Open Font License, Version 1.1.
The audio used are from several different sources, all downloaded from the Sonnis #GameAudioGDC Bundle (license in PDF format). The folders where the audio files are stored have the same name as folders in the bundle.
The OpenVR addon was created by Bastiaan Olij and is released under the MIT license. It can be found both on the Asset Library and on GitHub.
Everything else is original and created solely for this tutorial by TwistedTwigleg. They are released under the MIT license, so feel free to use them however you see fit!
Tip
You can find the finished project at the bottom of this page.
Getting everything ready
Launch Godot and open up the project included in the starter assets.
Note
While these assets are not necessarily required to use the scripts provided in this tutorial, they will make the tutorial much easier to follow, as there are several premade scenes we will be using throughout the tutorial series.
First, you may notice there is already quite a bit set up. This includes a pre-built level, several instanced scenes placed around, some background music, and several GUI-related MeshInstances nodes.
You may also notice that the GUI-related meshes already have a script attached to them. This is used to show whatever is inside the Viewport on the mesh. Feel free to take a look if you want, but this tutorial will not be going over how to use the Viewport nodes for making 3D GUI MeshInstance nodes.
The other thing to notice, before we jump into writing the code, is how the ARVROrigin node works. How it works is kind of hard to explain, especially if you have never used VR before, but here is the gist of it: The ARVROrigin node is the center point of the room. If there is no room-scale tracking, then the ARVROrigin will be directly below the player, but if there is room-scale tracking, then the ARVROrigin will be the center of the tracked room.
Note
This is a bit of a simplification, and honestly, I do not know enough about the various different VR headsets and how they work to give a more detailed and complete explanation. Consider it like this: The ARVROrigin is the center of the VR world. If there is room tracking, the player can move away from the center point, the ARVROrigin node, but only as far as the room scaling tracks.
If you select the ARVROrigin node, you may notice that the world scale is set to 1.4. This is because I originally made the world too big,
and so I needed to scale the VR player slightly so they better fit the world. As mentioned earlier, keeping the scale relatively constant is very important!
Another thing to notice here is how we have everything set up under the ARVROrigin node. The player camera is an ARVRCamera that represents the player’s head in the game. The ARVRCamera will be offset by the player’s height, and if there is room tracking, then the camera can move around 3D space as well, relative to the ARVROrigin. This is important to note, especially for later when we add teleporting.
Notice how there is a ColorRect node called Movement_Vignette. This will be a vignette shader that will only be visible when the player is moving.
We are going to use the vignette shader to help reduce motion sickness while moving in VR.
The reason it is a child of ARVROrigin is because we want it to easily access the VR controllers.
The final thing to note is that there are two ARVRController nodes, and these will represent the left and right controllers in 3D space. An ARVRController with an ID of 1 is the left hand, while an ARVRController with an ID of 2 is the right hand.
Starting VR
First, let’s get the VR up and going! While Game.tscn is open, select the Game node and make a new script called Game.gd. Add the following code:
extends Spatial

func _ready():
    var VR = ARVRServer.find_interface("OpenVR")
    if VR and VR.initialize():
        get_viewport().arvr = true
        get_viewport().hdr = false

        OS.vsync_enabled = false
        Engine.target_fps = 90
        # Also, the physics FPS in the project settings is also 90 FPS. This makes the physics
        # run at the same frame rate as the display, which makes things look smoother in VR!
using Godot;
using System;

public class Game : Spatial
{
    public override void _Ready()
    {
        var vr = ARVRServer.FindInterface("OpenVR");
        if (vr != null && vr.Initialize())
        {
            GetViewport().Arvr = true;
            GetViewport().Hdr = false;

            OS.VsyncEnabled = false;
            Engine.TargetFps = 90;
            // Also, the physics FPS in the project settings is also 90 FPS. This makes the physics
            // run at the same frame rate as the display, which makes things look smoother in VR!
        }
    }
}
For this to work, you will need to have the OpenVR asset from the Asset Library. The OpenVR asset is included in the starter assets, but there may be newer
versions that work better, so I would highly suggest deleting the addons folder, then going to the Asset Library and downloading the newest
version.
With that done, let’s quickly go over what this script does.
First, we find a VR interface from the ARVR server. We do this because by default Godot does not include any VR interfaces, but rather exposes an API so anyone can make AR/VR interfaces with GDNative/C++. Next, we check to see if an OpenVR interface was found, and then we initialize it.
Assuming nothing went wrong with initializing, we then turn the main Viewport into an AR/VR viewport, by setting arvr to true.
We also set HDR to false, since you cannot use HDR in OpenVR.
Then, we disable V-Sync and set the target FPS to 90 frames per second. Most VR headsets run at 90 Hz, and since the game will display on both the VR headset and the computer’s monitor, we want to disable V-Sync and set the target FPS manually, so the computer’s monitor does not drag the VR display down to 60 FPS.
Note
One thing to notice as well is that the physics FPS is also set to 90! This makes the physics run at the same frame rate as the display, which makes things look smoother in VR.
With that done, go ahead and give the game a try! If everything goes well, you will now be able to look around the world! If you have a VR headset with room tracking, you will be able to move around as far as the room tracking allows.
Coding the controllers
While perhaps interesting if we were making a VR film, we really want to do more than stand around and look. Currently, we cannot move outside of the room tracking boundaries (assuming your VR headset has room tracking) and we cannot interact with anything! Let’s change that!
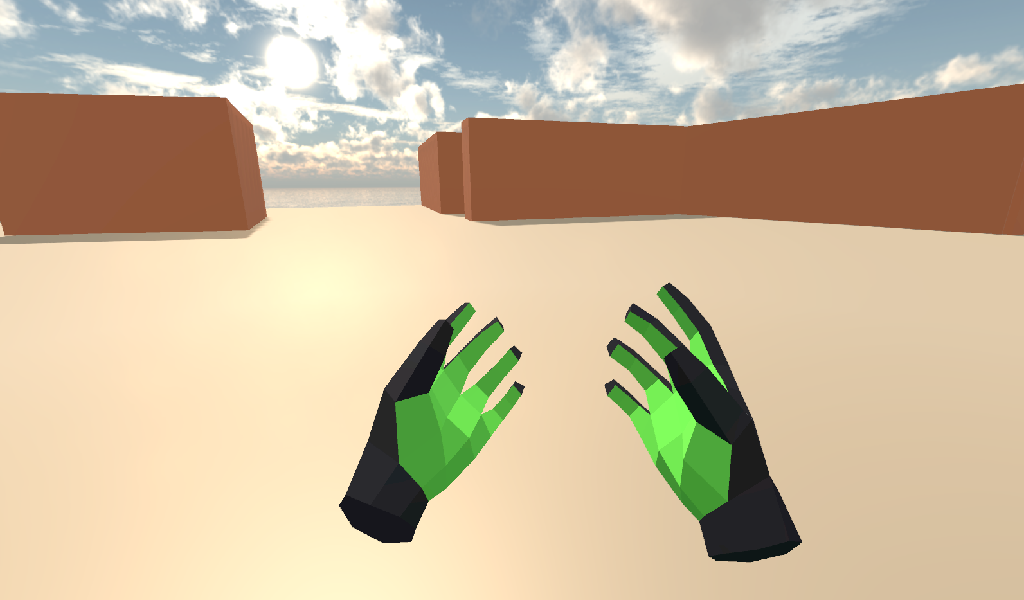
You may have noticed that you have a pair of green and black hands following the controllers. Let’s write the code for those controllers, which will allow the player to teleport around the world and allow the player to grab and release RigidBody nodes.
Open either Left_Controller.tscn or Right_Controller.tscn. Feel free to look at how the scene is set up; there are only a couple things of note to point out.
First, notice how there are a couple Raycast nodes. We will be using one Raycast to teleport around the game world (Raycast) and
we will use the other for picking up objects (GrabCast) if the player is using Raycast nodes to pick up objects.
The other thing to note is how there is an Area called Area, that is a small sphere in the palm of the hand. This will be used to detect
objects the player can pick up with that hand if the player is using Area nodes to pick up objects.
We also have a larger Area called Sleep_Area, which will be used to wake RigidBody nodes when the hands get close.
Select the root node, either Left_Controller or Right_Controller depending on which scene you chose, and create a new script called VR_Controller.gd.
Add the following to VR_Controller.gd:
extends ARVRController

onready var grab_area = $Area
onready var grab_raycast = $GrabCast
onready var grab_pos_node = $Grab_Pos
onready var hand_mesh = $Hand
onready var teleport_raycast = $RayCast

var controller_velocity = Vector3(0, 0, 0)
var prior_controller_position = Vector3(0, 0, 0)
var prior_controller_velocities = []

var held_object = null
var held_object_data = {"mode":RigidBody.MODE_RIGID, "layer":1, "mask":1}

var grab_mode = "AREA"
var teleport_pos
var teleport_mesh
var teleport_button_down

const CONTROLLER_DEADZONE = 0.65

const MOVEMENT_SPEED = 1.5

var directional_movement = false

func _ready():
    teleport_mesh = get_tree().root.get_node("Game/Teleport_Mesh")
    teleport_button_down = false

    grab_mode = "AREA"
    get_node("Sleep_Area").connect("body_entered", self, "sleep_area_entered")
    get_node("Sleep_Area").connect("body_exited", self, "sleep_area_exited")

    connect("button_pressed", self, "button_pressed")
    connect("button_release", self, "button_released")


func _physics_process(delta):

    if teleport_button_down:
        teleport_raycast.force_raycast_update()
        if teleport_raycast.is_colliding():
            if teleport_raycast.get_collider() is StaticBody:
                if teleport_raycast.get_collision_normal().y >= 0.85:
                    teleport_pos = teleport_raycast.get_collision_point()
                    teleport_mesh.global_transform.origin = teleport_pos


    # Controller velocity
    # --------------------
    if get_is_active():
        controller_velocity = Vector3(0, 0, 0)

        if prior_controller_velocities.size() > 0:
            for vel in prior_controller_velocities:
                controller_velocity += vel

            # Get the average velocity, instead of just adding them together.
            controller_velocity = controller_velocity / prior_controller_velocities.size()

        prior_controller_velocities.append((global_transform.origin - prior_controller_position) / delta)

        controller_velocity += (global_transform.origin - prior_controller_position) / delta
        prior_controller_position = global_transform.origin

        if prior_controller_velocities.size() > 30:
            prior_controller_velocities.remove(0)

    # --------------------

    if held_object:
        var held_scale = held_object.scale
        held_object.global_transform = grab_pos_node.global_transform
        held_object.scale = held_scale


    # Directional movement
    # --------------------
    # NOTE: you may need to change this depending on which VR controllers
    # you are using and which OS you are on.
    var trackpad_vector = Vector2(-get_joystick_axis(1), get_joystick_axis(0))
    var joystick_vector = Vector2(-get_joystick_axis(5), get_joystick_axis(4))

    if trackpad_vector.length() < CONTROLLER_DEADZONE:
        trackpad_vector = Vector2(0, 0)
    else:
        trackpad_vector = trackpad_vector.normalized() * ((trackpad_vector.length() - CONTROLLER_DEADZONE) / (1 - CONTROLLER_DEADZONE))

    if joystick_vector.length() < CONTROLLER_DEADZONE:
        joystick_vector = Vector2(0, 0)
    else:
        joystick_vector = joystick_vector.normalized() * ((joystick_vector.length() - CONTROLLER_DEADZONE) / (1 - CONTROLLER_DEADZONE))

    var forward_direction = get_parent().get_node("Player_Camera").global_transform.basis.z.normalized()
    var right_direction = get_parent().get_node("Player_Camera").global_transform.basis.x.normalized()

    var movement_vector = (trackpad_vector + joystick_vector).normalized()

    var movement_forward = forward_direction * movement_vector.x * delta * MOVEMENT_SPEED
    var movement_right = right_direction * movement_vector.y * delta * MOVEMENT_SPEED

    movement_forward.y = 0
    movement_right.y = 0

    if movement_right.length() > 0 or movement_forward.length() > 0:
        get_parent().translate(movement_right + movement_forward)
        directional_movement = true
    else:
        directional_movement = false
    # --------------------


func button_pressed(button_index):

    # If the trigger is pressed...
    if button_index == 15:
        if held_object:
            if held_object.has_method("interact"):
                held_object.interact()

        else:
            if not teleport_mesh.visible and not held_object:
                teleport_button_down = true
                teleport_mesh.visible = true
                teleport_raycast.visible = true


    # If the grab button is pressed...
    if button_index == 2:
        if teleport_button_down:
            return

        if not held_object:

            var rigid_body = null

            if grab_mode == "AREA":
                var bodies = grab_area.get_overlapping_bodies()
                if len(bodies) > 0:
                    for body in bodies:
                        if body is RigidBody:
                            if not "NO_PICKUP" in body:
                                rigid_body = body
                                break

            elif grab_mode == "RAYCAST":
                grab_raycast.force_raycast_update()
                if grab_raycast.is_colliding():
                    if grab_raycast.get_collider() is RigidBody and not "NO_PICKUP" in grab_raycast.get_collider():
                        rigid_body = grab_raycast.get_collider()


            if rigid_body:

                held_object = rigid_body

                held_object_data["mode"] = held_object.mode
                held_object_data["layer"] = held_object.collision_layer
                held_object_data["mask"] = held_object.collision_mask

                held_object.mode = RigidBody.MODE_STATIC
                held_object.collision_layer = 0
                held_object.collision_mask = 0

                hand_mesh.visible = false
                grab_raycast.visible = false

                if held_object.has_method("picked_up"):
                    held_object.picked_up()
                if "controller" in held_object:
                    held_object.controller = self


        else:

            held_object.mode = held_object_data["mode"]
            held_object.collision_layer = held_object_data["layer"]
            held_object.collision_mask = held_object_data["mask"]

            held_object.apply_impulse(Vector3(0, 0, 0), controller_velocity)

            if held_object.has_method("dropped"):
                held_object.dropped()

            if "controller" in held_object:
                held_object.controller = null

            held_object = null
            hand_mesh.visible = true

            if grab_mode == "RAYCAST":
                grab_raycast.visible = true


        get_node("AudioStreamPlayer3D").play(0)


    # If the menu button is pressed...
    if button_index == 1:
        if grab_mode == "AREA":
            grab_mode = "RAYCAST"

            if not held_object:
                grab_raycast.visible = true
        elif grab_mode == "RAYCAST":
            grab_mode = "AREA"
            grab_raycast.visible = false


func button_released(button_index):

    # If the trigger button is released...
    if button_index == 15:

        if teleport_button_down:

            if teleport_pos and teleport_mesh.visible:
                var camera_offset = get_parent().get_node("Player_Camera").global_transform.origin - get_parent().global_transform.origin
                camera_offset.y = 0

                get_parent().global_transform.origin = teleport_pos - camera_offset

            teleport_button_down = false
            teleport_mesh.visible = false
            teleport_raycast.visible = false
            teleport_pos = null


func sleep_area_entered(body):
    if "can_sleep" in body:
        body.can_sleep = false
        body.sleeping = false

func sleep_area_exited(body):
    if "can_sleep" in body:
        body.can_sleep = true
This is quite a bit of code to go through, so let’s break it down bit by bit. Let’s start with the class variables, which are variables outside of any/all functions.
controller_velocity: The velocity the controller is moving at. We will calculate this by changes in position every physics frame.prior_controller_position: The controller’s previous position. We will use this to calculate the controller’s velocity.prior_controller_velocities: The last 30 calculated velocities (1/3 of a second worth of velocities, assuming the game is running at 90 FPS).held_object: The currently-held object, a RigidBody, if there is one.held_object_data: The data of the currently-held object, used to reset the object when it is no longer being held.grab_area: The Area node used to grab objects.grab_pos_node: The position where held objects stay.hand_mesh: The hand mesh, used to represent the player’s hand when they are not holding anything.teleport_pos: The position at which the teleport Raycast is aimed.teleport_mesh: The mesh used to represent the teleport position.teleport_button_down: A variable for tracking whether the teleport button is being held down or not.teleport_raycast: The teleport Raycast node, used for calculating the teleportation position.CONTROLLER_DEADZONE: The dead zone for both the trackpad and the joystick.MOVEMENT_SPEED: The speed the player moves at when moving using the trackpad and/or the joystick.directional_movement: A boolean to track whether the player is moving using this controller.
Next, let’s go through _ready.
Firstly, we get the teleport Raycast node and assign it to teleport_raycast.
Next, we get the teleport mesh; notice how we are getting it from Game/Teleport_Mesh using get_tree().root. This is because we need the teleport mesh
to be separate from the controller, so moving and rotating the controller does not affect the position and rotation of the teleportation mesh.
Then we get the grab area, grab Raycast, and position node and assign them to the proper variables.
We set the default grab mode to AREA so it uses the Area node to grab objects by default.
Then we connect the body_entered and body_exited signals from the sleep area node, we get the hand mesh and assign it the proper variable, and finally
we connect the button_pressed and button_released signals from the ARVRController.
Now let’s go through _physics_process.
Firstly, we check to see if the teleportation button is down or not. If the teleportation button is down, we then force the teleportation Raycast to update, which will give us frame perfect collision detection. We then check to see if the Raycast is colliding with anything.
Next, we check to see if the collision body the Raycast is colliding with is a StaticBody. We do this to ensure the player
can only teleport on StaticBody nodes. We then check to see if the Y value returned by the Raycast’s
get_collision_normal function is more than 0.85, which is mostly pointing straight up. This allows the player only to teleport on fairly flat faces pointing upwards.
If all those checks for the teleport Raycast return true, we then set teleport_pos to the collision point, and we move the teleportation
mesh to teleport_pos.
The next thing we check is to see if the ARVRController is active or not. If the ARVRController is active, then
that means there is a controller and it is being tracked. If the controller is active, we then reset controller_velocity to an empty Vector3.
We then add all of the prior velocity calculations in prior_controller_velocities to controller_velocity. By using the prior calculations, we get a smoother
throwing/catching experience, although it is not perfect. We want to get the average of these velocities, as otherwise we’d get crazy high velocity numbers that are not realistic.
Next, we calculate the velocity from the position where the controller is currently, from the position the controller was at. We can use this difference in position to help track the controller’s velocity.
We then add the velocity from the controller this physics frame and the last physics frame to controller_velocity. We then update prior_controller_position to the
current position, so we can use it in the calculations in the velocity next physics frame.
Note
The way we are calculating velocity is not perfect by any means, since it relies on a consistent amount of frames per second. Ideally, we would be able to find the velocity directly from the VR controller, but currently in OpenVR, there is no way to access the controller’s velocity. We can get pretty close to the real velocity by comparing positions between frames though, and this will work just fine for this project.
Then, we check to see if we have more than 30 stored velocities (more than a third of a second). If there are more than 30, we remove the oldest velocity
from prior_controller_velocities.
Next, we check to see whether there is a held object. If there is, we update the position and rotation of the held object to the
position and rotation of grab_pos_node. Because of how scale works, we need to temporarily store the scale and then reset the scale once we have updated the transform;
otherwise, the scale would always be the same as the controller, which would ruin immersion if the player grabbed a scaled object.
The last thing we are going to do in _physics_process is move the player if they are moving the trackpad/joystick on the VR controller.
Firstly, we convert the axis values into Vector2 variables, so we can process them. We invert the X axis, so moving the trackpad/joystick left will move the player left.
Note
Depending on your VR controller and OS, you may need to change the code so it gets the proper axis values!
Next, we account for dead zones on both the trackpad and the joystick. The code for doing this is adapted from the link below, and I would highly recommend looking at it.
Tip
You can find a great article explaining joystick dead zones on Third Helix.
One thing to note is how large we are making the dead zones. The reason we are using such large dead zones is so the player cannot move themselves accidentally by placing their finger on the center of the touchpad/joystick, which can make players experience motion sickness if they are not expecting it.
Next, we get the forward and right directional vectors from the VR camera. We need these so we can move the player forward/backwards and right/left based on where they are currently looking.
Then, we calculate how much the player will be moving by adding both the trackpad and the joystick vectors together and normalizing them.
Next, we calculate how far the player will go forwards/backwards and right/left by multiplying the VR camera’s directional vectors by the combined trackpad/joystick vector.
We then remove movement on the Y axis so the player cannot fly/fall by moving using the trackpad/joystick.
And finally, we move the player if there is any movement forwards/backwards or right/left. If we are moving the player, we set directional_movement accordingly.
Now, let’s look at button_pressed.
If the button pressed is button 15, which for the Windows Mixed Reality controllers is the trigger button, we will interact with the held object assuming the controller is holding one, and if the player is not holding an object, we will try to start teleporting.
If the controller is holding an object, and the held object has a method/function called interact, we call the interact function
on the held object.
If the controller is not holding an object, we then check to make sure the teleportation mesh is not visible. This check ensures the player cannot teleport with
both hands/controllers at the same time. If the teleportation mesh is not visible, we set teleport_button_down to true, make teleport_mesh visible,
and make the teleportation raycast visible. This makes it where the teleportation mesh will follow the Raycast coming from the pointer
finger of the hand.
If the button pressed is button 2, which, for the Windows Mixed Reality controllers, is the grab/grip button, we will grab/throw an object.
Firstly, we make sure the player is not trying to teleport, as we do not want the player to be able to grab something while in the middle of trying to teleport.
Then, we check to see whether the controller is already holding a object or not.
If the controller is not holding an object, we check to see which grab mode the player is using.
If the player is using the AREA grab mode, we then get all the bodies overlapping the grab Area. We go through all the bodies in the
grab Area and see if there is a RigidBody. We also check to make sure any RigidBody nodes in
the Area do not have a variable called NO_PICKUP, since we do not want to be able to pick up nodes with that variable.
Assuming there is a RigidBody node inside the grab Area that does not have a variable called NO_PICKUP,
we assign it to rigid_body for additional processing.
If the player is using the RAYCAST grab mode, we first force the Raycast to update. We then check to see whether the Raycast
is colliding with something.
If the Raycast is colliding with something, we then check to see if what it is colliding with is a RigidBody, and that it does not have
a variable called NO_PICKUP. If the Raycast is colliding with a RigidBody, and it does not have a
variable called NO_PICKUP, we assign it to rigid_body for additional processing.
If rigid_body is not null, meaning we found a RigidBody in the grab Area, we assign held_object to it.
Then we store the now held RigidBody’s information in held_object_data. We are storing the RigidBody mode, layer,
and mask so later, when we drop it, we can reset all those variables back to what they were before we picked up the RigidBody.
We then set the held object’s RigidBody mode to MODE_STATIC and set the collision layer and mask to 0 so it cannot collide with any
other physic bodies.
We make the hand mesh invisible so it does not get in the way of the object we are holding (and also because I did not feel like animating the hand). We also make the grab Raycast invisible so the mesh used for showing the Raycast is no longer visible.
If the RigidBody we picked up has the picked_up method/function, we call it. If the RigidBody we picked up has a
variable called controller, we set it to this controller.
If the controller is not holding an object, and the button pressed is 2, we want to drop/throw the held object.
Firstly, we set the held RigidBody’s mode, layer, and mask back to what they were when we picked the object up. We then apply an impulse to the held object, using the controller’s velocity as the force.
If the previously held RigidBody has a function called dropped, we call it. If the RigidBody has a variable
called controller, we set it to null.
Then, we set held_object to null, since we are no longer holding any objects, and we make the hand mesh visible again.
If we are using the RAYCAST grab mode, we make the Raycast visible so we can see the mesh used for showing the grab Raycast.
Finally, regardless of whether we are grabbing an object or releasing it, we play the sound loaded into AudioStreamPlayer3D, which is a pick-up/drop noise.
The last thing we are doing in button_pressed is checking to see if the button pressed is 1, which, for the Windows Mixed Reality controllers, is the menu button.
If the menu button is pressed, we change grab modes, and set the visibility of the grab Raycast so it is only visible when using RAYCAST as the grab mode.
Let’s look at button_released next.
If the button released is button 15, the trigger, then we potentially want to teleport.
Firstly, we check to see whether teleport_button_down is true. If it is, that means the player is intending to teleport, while if it is false, the player
has released the trigger while holding an object.
We then check to see if this controller has a teleport position, and we check to make sure the teleport mesh is visible.
If both of those conditions are true, we then calculate the offset the ARVRCamera has from the ARVROrigin. We do this
because of how ARVRCamera and ARVROrigin work with room-scale tracking.
Because we want to teleport the player in their current position to the teleport position, and remember, because of room-scale tracking, their current position can be offset from the origin, we have to figure out that offset so when we teleport, we can remove it so that player’s current position is teleported to the teleport position.
We set the Y value of the camera_offset to zero because we do not want to account for offsets in the player’s height.
Then, we teleport the ARVROrigin to the teleport position, applying the camera offset.
Regardless of whether we teleported or not, we reset all the teleport-related variables so the controller has to get new ones before teleporting again.
Finally, let’s look at sleep_area_entered and sleep_area_exited.
When a body enters or exists the sleep area, we check whether it has a variable called can_sleep. If it does, we then set it to false and wake the body if it has entered
the sleep area, while if it has exited, we set it to true so the RigidBody nodes can sleep (which can decrease CPU usage).
Okay, whew! That was a lot of code! Add the same script, VR_Controller.gd to the other controller so both controllers have the same script.
Now go ahead and try the game again, and you should find you can teleport around by pressing the touch pad, and can grab and throw objects using the grab/grip buttons.
Now, you may want to try moving using the trackpads and/or joysticks, but it may make you motion sick!
One of the main reasons this can make you feel motion sick is because your vision tells you that you are moving, while your body is not moving. This conflict of signals makes the body feel sick, so let’s fix it!
Reducing motion sickness
Note
There are plenty of ways to reduce motion sickness in VR, and there is no one perfect way to reduce motion sickness. See this page on the Oculus Developer Center for more information on how to implement locomotion and reducing motion sickness.
To help reduce motion sickness while moving, we are going to add a vignette effect that will only be visible while the player moves.
Open up Movement_Vignette.tscn, which you can find in the Scenes folder. Notice how it is just a ColorRect node with a custom
shader. Feel free to look at the custom shader if you want, it is just a slightly modified version of the vignette shader you can find in the Godot demo repository.
With Movement_Vignette selected, make a new script called Movement_Vignette.gd. Add the following code to Movement_Vignette.gd:
extends ColorRect

var controller_one
var controller_two

func _ready():
    yield(get_tree(), "idle_frame")
    yield(get_tree(), "idle_frame")
    yield(get_tree(), "idle_frame")
    yield(get_tree(), "idle_frame")

    var interface = ARVRServer.get_primary_interface()

    rect_size = interface.get_render_targetsize()
    rect_position = Vector2(0, 0)

    controller_one = get_parent().get_node("Left_Controller")
    controller_two = get_parent().get_node("Right_Controller")

    visible = false


func _process(delta):

    if not controller_one or not controller_two:
        return

    if controller_one.directional_movement or controller_two.directional_movement:
        visible = true
    else:
        visible = false
Because this script is fairly brief, let’s quickly go over what it does.
In _ready, we wait for four frames. We do this to ensure the VR interface is ready and going.
Next, we get the current VR interface, and resize the ColorRect node’s size and position so that it covers the entire view in VR.
Then, we get the left and right controllers, assigning them to controller_one and controller_two.
We then make the vignette invisible by default.
In _process, we check to see if either of the controllers are moving the player by checking directional_movement. If either controller is moving the player,
we make the vignette visible, while if neither controller is moving the player, we make the vignette invisible.
With that done, go ahead and try moving around with the joystick and/or the trackpad. You should find it is much less motion sickness-inducing than before!
Let’s add some special RigidBody nodes we can interact with next.
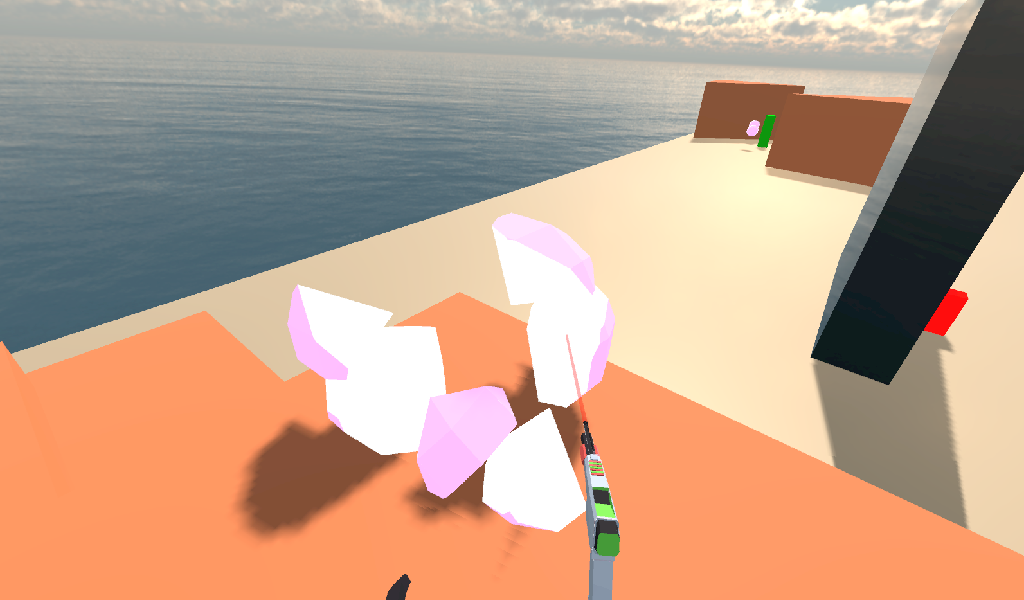
Adding destroyable targets
Firstly, let’s start by making some targets we will destroy in various ways with various special RigidBody nodes.
Open up Sphere_Target.tscn, which you can find in the Scenes folder. Sphere.tscn is just a StaticBody
with a CollisionShape, a mesh, and a audio player.
Select the Sphere_Target root node, the StaticBody node, and make a new script called Sphere_Target.gd. Add the following
to Sphere_Target.gd:
extends StaticBody

var destroyed = false
var destroyed_timer = 0
const DESTROY_WAIT_TIME = 80

var health = 80

const RIGID_BODY_TARGET = preload("res://Assets/RigidBody_Sphere.scn")

func _ready():
    set_physics_process(false)

func _physics_process(delta):
    destroyed_timer += delta
    if destroyed_timer >= DESTROY_WAIT_TIME:
        queue_free()


func damage(bullet_global_transform, damage):

    if destroyed:
        return

    health -= damage

    if health <= 0:

        $CollisionShape.disabled = true
        $Sphere_Target.visible = false

        var clone = RIGID_BODY_TARGET.instance()
        add_child(clone)
        clone.global_transform = global_transform

        destroyed = true
        set_physics_process(true)

        $AudioStreamPlayer.play()
        get_tree().root.get_node("Game").remove_sphere()
Let’s go over how this script works, starting with the class variables.
destroyed: A variable to track whether this target is destroyed or not.destroyed_timer: A variable to track how long the target has been destroyed.DESTROY_WAIT_TIME: A constant to tell the sphere target how long to wait before destroying/deleting itself.health: The amount of health the target has.RIGID_BODY_TARGET: The target broken into several smaller RigidBody nodes.
Let’s go over _ready.
All we are doing in _ready is setting _physics_process to false. This is because we will only use _physics_process
for destroying the target, so we do not want to call it until the target is broken.
Next, let’s go over _physics_process.
Firstly, we add time to destroyed_timer. Then we check to see whether enough time has passed and we can destroy the target. If enough time has
passed, we free/destroy the target using queue_free.
Finally, let’s go over damage.
Firstly, we check to make sure the target has not already been destroyed.
Then, we remove however much damage the target has taken from the target’s health.
If the target has zero or less health, then it has taken enough damage to break.
Firstly, we disable the collision shape and make the whole target mesh invisible. Next, we spawn/instance the RigidBody version of the target, and instance it at this target’s position.
Then, we set destroyed to true and start processing _physics_process.
Finally, we play a sound, and remove a sphere from Game.gd by calling remove_sphere.
Now, you may have noticed we are calling a function in Game.gd we have not made yet, so let’s fix that!
Firstly, open up Game.gd and add the following additional class variables:
var spheres_left = 10
var sphere_ui = null
spheres_left: The amount of sphere targets left in the game world.sphere_ui: A reference to the sphere UI. We will use this later!
Next, we need to add the remove_sphere function. Add the following to Game.gd:
func remove_sphere():
    spheres_left -= 1

    if sphere_ui:
        sphere_ui.update_ui(spheres_left)
What this function does is it subtracts one from spheres_left.
Then, it checks to see whether sphere_ui is not null, and if it is not, then it calls its update_ui function, passing in the amount of spheres left.
We’ll add the UI code later in this part.
Now that we have destroyable targets, we need a way to destroy them!
Adding a pistol
Okay, let’s add a pistol. Open up Pistol.tscn, which you will find in the Scenes folder.
There are a few things to note here. The first thing to note is how everything is rotated. This is to make the pistol rotate correctly when the player grabs it. The other thing to notice is how there is a laser sight mesh, and a flash mesh; both of these do what you’d expect: act as a laser pointer and muzzle flash, respectively.
The other thing to notice is how there is a Raycast node at the end of the pistol. This is what we will be using to calculate where the bullets impact.
Now that we have looked at the scene, let’s write the code. Select the Pistol root node, the RigidBody node, and make a new
script called Pistol.gd. Add the following code to Pistol.gd:
extends RigidBody

onready var flash_mesh = $Pistol_Flash
onready var laser_sight_mesh = $LaserSight
onready var raycast = $RayCast

const FLASH_TIME = 0.25
var flash_timer = 0

var BULLET_DAMAGE = 20

func _ready():
    flash_mesh.visible = false
    laser_sight_mesh.visible = false

func _physics_process(delta):
    if flash_timer > 0:
        flash_timer -= delta
        # If the flash has been visible enough, then make the flash mesh invisible.
        if flash_timer <= 0:
            flash_mesh.visible = false


# Called when the interact button is pressed while the object is held.
func interact():

    if flash_timer <= 0:

        flash_timer = FLASH_TIME
        flash_mesh.visible = true

        raycast.force_raycast_update()
        if raycast.is_colliding():

            var body = raycast.get_collider()

            if body.has_method("damage"):
                body.damage(raycast.global_transform, BULLET_DAMAGE)
            elif body.has_method("apply_impulse"):
                var direction_vector = raycast.global_transform.basis.z.normalized()
                body.apply_impulse((raycast.global_transform.origin - body.global_transform.origin).normalized(), direction_vector * 1.2)

        $AudioStreamPlayer3D.play()


# Called when the object is picked up.
func picked_up():
    laser_sight_mesh.visible = true


# Called when the object is dropped.
func dropped():
    laser_sight_mesh.visible = false
Let’s go over what this script does, starting with the class variables:
flash_mesh: The mesh used to make the muzzle flash.FLASH_TIME: The length of time the muzzle flash is visible.flash_timer: A variable to track how long the muzzle flash has been visible.laser_sight_mesh: A long rectangular mesh used for the laser sight.raycast: The raycast node used for the pistol firing.BULLET_DAMAGE: The amount of damage a single bullet does.
Let’s go over _ready.
All we are doing here is getting the nodes and assigning them to the proper variables. We also make sure the flash and laser sight meshes are invisible.
Next, let’s look at _physics_process.
Firstly, we check to see if the flash is visible. We do this by checking to see if flash_timer is more than zero. This is because flash_timer will be an inverted timer,
a timer that counts down instead of counting up.
If flash_timer is more than zero, we subtract delta from it and check to see whether it is equal to zero or less.
If it is, we make the flash mesh invisible.
This makes it where the flash mesh becomes invisible after FLASH_TIME many seconds have gone by.
Now, let’s look at interact, which is called when the trigger button on the VR controller is pressed and the pistol is being held.
Firstly, we check to see if the flash timer is less than or equal to zero. This check makes it where we cannot fire when the flash is visible, limiting how often the pistol can fire.
If we can fire, we reset flash_timer by setting it to FLASH_TIME, and we make the flash mesh visible.
We then update the Raycast and check to see if it is colliding with anything.
If the Raycast is colliding with something, we get the collider. We check to see if the collider has the damage function, and if it does, we call it.
If it does not, we then check to see if the collider has the apply_impulse function, and if it does, we call it after calculating the direction from the
Raycast to the collider.
Finally, regardless of whether the pistol hit something or not, we play the pistol firing sound.
Finally, let’s look at picked_up and dropped, which are called when the pistol is picked up and dropped, respectively.
All we are doing in these functions is making the laser pointer visible when the pistol is picked up, and making it invisible when the pistol is dropped.
With that done, go ahead and give the game a try! If you climb up the stairs and grab the pistols, you should be able to fire at the spheres and they will break!
Adding a shotgun
Let’s add a different type of weapon RigidBody: a shotgun. This is fairly straightforward, as almost everything is the same as the pistol.
Open up Shotgun.tscn, which you can find in Scenes. Notice how everything is more or less the same, but instead of a single Raycast,
there are five, and there is no laser pointer.
This is because a shotgun generally fires in a cone shape, and so we are going to emulate that by having several Raycast nodes, all rotated randomly
in a cone shape, and I removed the laser pointer so the player has to aim without knowing for sure where the shotgun is pointing.
Alright, select the Shotgun root node, the RigidBody and make a new script called Shotgun.gd. Add the following to Shotgun.gd:
extends RigidBody

onready var flash_mesh = $Shotgun_Flash
onready var raycasts = $Raycasts

const FLASH_TIME = 0.25
var flash_timer = 0

var BULLET_DAMAGE = 30

func _ready():
    flash_mesh.visible = false

func _physics_process(delta):
    if flash_timer > 0:
        flash_timer -= delta
        if flash_timer <= 0:
            flash_mesh.visible = false


# Called when the interact button is pressed while the object is held.
func interact():

    if flash_timer <= 0:

        flash_timer = FLASH_TIME
        flash_mesh.visible = true

        for raycast in raycasts.get_children():

            raycast.rotation_degrees = Vector3(90 + rand_range(10, -10), 0, rand_range(10, -10))

            raycast.force_raycast_update()
            if raycast.is_colliding():

                var body = raycast.get_collider()

                # If the body has the damage method, then use that; otherwise, use apply_impulse.
                if body.has_method("damage"):
                    body.damage(raycast.global_transform, BULLET_DAMAGE)
                elif body.has_method("apply_impulse"):
                    var direction_vector = raycast.global_transform.basis.z.normalized()
                    body.apply_impulse((raycast.global_transform.origin - body.global_transform.origin).normalized(), direction_vector * 4)

        $AudioStreamPlayer3D.play()


func picked_up():
    pass


func dropped():
    pass
You may have noticed this is almost exactly the same as the pistol, and indeed it is, so let’s only go over what has changed.
raycasts: The node that holds all of the five Raycast nodes used for the shotgun’s firing.
In _ready, we get the Raycasts node, instead of just a single Raycast.
The only other change, besides there being nothing in picked_up and dropped, is in interact.
Now we go through each Raycast in raycasts. We then rotate it on the X and Z axes, making within a 10 to -10 cone.
From there, we process each Raycast like we did the single Raycast in the pistol, nothing changed at all,
we are just doing it five times, once for each Raycast in raycasts.
Now you can find and fire the shotgun too! The shotgun is located around the back behind one of the walls (not in the building though!).
Adding a bomb
While both of those are well and good, let’s add something we can throw next — a bomb!
Open up Bomb.tscn, which you will find in the Scenes folder.
First, notice how there is a rather large Area node. This is the explosion radius for the bomb. Anything within this Area will be effected by the explosion when the bomb explodes.
The other thing to note is how there are two sets of Particles: one for smoke coming out of the fuse, and another for the explosion itself. Feel free to take a look at the Particles nodes if you want!
The only thing to notice is how long the explosion Particles node will last, their lifetime, which is 0.75 seconds. We need to know this so we can time the removal of the bomb with the end of the explosion Particles.
Alright, now let’s write the code for the bomb. Select the Bomb RigidBody node and make a new script called Bomb.gd. Add the following code to
Bomb.gd:
extends RigidBody

onready var bomb_mesh = $Bomb
onready var explosion_area = $Area
onready var fuse_particles = $Fuse_Particles
onready var explosion_particles = $Explosion_Particles

const FUSE_TIME = 4
var fuse_timer = 0

var EXPLOSION_DAMAGE = 100
var EXPLOSION_TIME = 0.75
var explosion_timer = 0
var explode = false
var controller = null

func _ready():
    set_physics_process(false)

func _physics_process(delta):

    if fuse_timer < FUSE_TIME:

        fuse_timer += delta

        if fuse_timer >= FUSE_TIME:

            fuse_particles.emitting = false
            explosion_particles.one_shot = true
            explosion_particles.emitting = true
            bomb_mesh.visible = false

            collision_layer = 0
            collision_mask = 0
            mode = RigidBody.MODE_STATIC

            for body in explosion_area.get_overlapping_bodies():
                if body == self:
                    pass
                else:
                    if body.has_method("damage"):
                        body.damage(global_transform.looking_at(body.global_transform.origin, Vector3(0, 1, 0)), EXPLOSION_DAMAGE)
                    elif body.has_method("apply_impulse"):
                        var direction_vector = body.global_transform.origin - global_transform.origin
                        body.apply_impulse(direction_vector.normalized(), direction_vector.normalized() * 1.8)

            explode = true
            $AudioStreamPlayer3D.play()


    if explode:

        explosion_timer += delta
        if explosion_timer >= EXPLOSION_TIME:

            explosion_area.monitoring = false

            if controller:
                controller.held_object = null
                controller.hand_mesh.visible = true

                if controller.grab_mode == "RAYCAST":
                    controller.grab_raycast.visible = true

            queue_free()


func interact():
    set_physics_process(true)
    fuse_particles.emitting = true


func picked_up():
    pass

func dropped():
    pass
Let’s go through what this script does, starting with the class variables:
bomb_mesh: The MeshInstance used for the bomb mesh.FUSE_TIME: The length of time for which the fuse burns.fuse_timer: A variable for tracking how long the fuse has been burning.explosion_area: The Area node used for detecting what nodes are inside the explosion.EXPLOSION_DAMAGE: The amount of damage the explosion does.EXPLOSION_TIME: The length of time the explosion Particles take (you can calculate this number by multiplying the particleslifetimeby itsspeed scale)explosion_timer: A variable for tracking how long the explosion has lasted.explode: A boolean for tracking whether the bomb has exploded.fuse_particles: The fuse Particles node.explosion_particles: The explosion Particles node.controller: The controller that is currently holding the bomb, if there is one. This is set by the controller, so we do not need to check anything outside of checking if it isnull.
Let’s go through _ready.
Firstly, we get all the nodes and assign them to the proper variables for later use.
Then, we make sure _physics_process is not going to be called. We do this since we will be using _physics_process only for the fuse and
for destroying the bomb, so we do not want to trigger that early, we only want the fuse to start when the player interacts while holding a bomb.
Now, let’s look at _physics_process.
Firstly we check to see whether fuse_timer is less than FUSE_TIME. If fuse_timer is less than FUSE_TIME, then the bomb must be burning down the fuse.
We then add time to fuse_timer, and check to see whether the bomb has waited long enough and has burned through the entire fuse.
If the bomb has waited long enough, then we need to explode the bomb. We do this first by stopping the smoke Particles from emitting, and making the explosion Particles emit. We also hide the bomb mesh so it is no longer visible.
Next, we make the set the collision layer and mask to zero, and set the RigidBody mode to static. This makes it where the now exploded bomb cannot interact with the physics world, and so it will stay in place.
Then, we go through everything inside the explosion Area. We make sure the bodies inside the explosion Area are not the bomb itself, since we
do not want to explode the bomb with itself. We then check to see whether the bodies have the damage method/function, and if it does, we call that, while if it does not, we check to
see if it has the apply_impulse method/function, and call that instead.
Then, we set explode to true since the bomb has exploded, and we play a sound.
Next, we check to see if the bomb has exploded, as we need to wait until the explosion Particles are done.
If the bomb has exploded, we add time to explosion_timer. We then check to see if the explosion Particles are done. If they are, we set the explosion
Area’s monitoring property to false to ensure we do not get any bugs in the debugger, we make the controller drop the bomb if it is holding onto it,
we make the grab Raycast visible if the grab mode is RAYCAST, and we free/destroy the bomb using queue_free.
Finally, let’s look at interact.
All we are doing here is making it where _physics_process will be called, which will start the fuse.
We also make the fuse Particles start emitting, so smoke comes out the top of the bomb.
With that done, the bombs are ready to go! You can find them in the orange building. Because of how we are calculating velocity, it is easiest to throw bombs in a trusting-like motion as opposed to a more natural throwing like motion. The smooth curve of a throwing-like motion is harder to track, and the because of how we are tracking velocity, it does not always work.
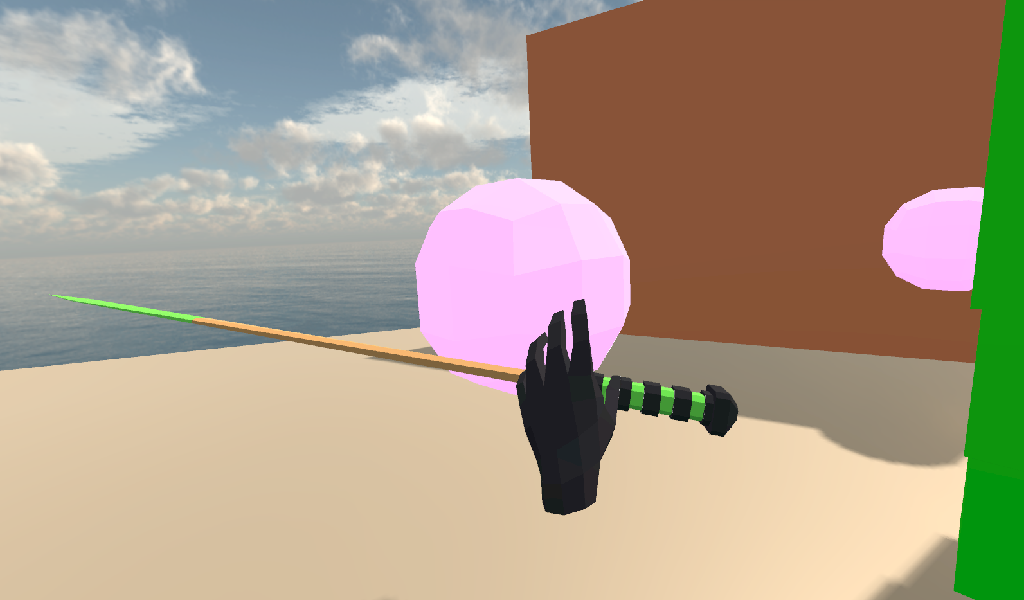
Adding a sword
Finally, let’s add a sword so we can slice through things!
Open up Sword.tscn, which you will find in Scenes.
There is not a whole lot to note here, but there is just one thing, and that is how the length of the blade of the sword is broken into several small Area nodes. This is because we need to roughly know where on the blade the sword collided, and this is the easiest (and only) way I could figure out how to do this.
Tip
If you know how to find the point where an Area and a CollisionObject meet, please let me know and/or make a PR on the Godot documentation! This method of using several small Area nodes works okay, but it is not ideal.
Other than that, there really is not much of note, so let’s write the code. Select the Sword root node, the RigidBody and make a new script called
Sword.gd. Add the following code to Sword.gd:
extends RigidBody

const SWORD_DAMAGE = 20

var controller

func _ready():
    $Damage_Area_01.connect("body_entered", self, "body_entered_sword", ["01"])
    $Damage_Area_02.connect("body_entered", self, "body_entered_sword", ["02"])
    $Damage_Area_03.connect("body_entered", self, "body_entered_sword", ["03"])
    $Damage_Area_04.connect("body_entered", self, "body_entered_sword", ["04"])


# Called when the interact button is pressed while the object is held.
func interact():
    pass


# Called when the object is picked up.
func picked_up():
    pass


# Called when the object is dropped.
func dropped():
    pass


func body_entered_sword(body, number):
    if body == self:
        pass
    else:

        var sword_part = null
        if number == "01":
            sword_part = get_node("Damage_Area_01")
        elif number == "02":
            sword_part = get_node("Damage_Area_02")
        elif number == "03":
            sword_part = get_node("Damage_Area_03")
        elif number == "04":
            sword_part = get_node("Damage_Area_04")

        if body.has_method("damage"):
            body.damage(sword_part.global_transform.looking_at(body.global_transform.origin, Vector3(0, 1, 0)), SWORD_DAMAGE)

            get_node("AudioStreamPlayer3D").play()

       elif body.has_method("apply_impulse"):

            var direction_vector = sword_part.global_transform.origin - body.global_transform.origin

            if not controller:
                body.apply_impulse(direction_vector.normalized(), direction_vector.normalized() * self.linear_velocity)
            else:
                body.apply_impulse(direction_vector.normalized(), direction_vector.normalized() * controller.controller_velocity)

            $AudioStreamPlayer3D.play()
Let’s go over what this script does, starting with the two class variables:
SWORD_DAMAGE: The amount of damage a single sword slice does.controller: The controller that is holding the sword, if there is one. This is set by the controller, so we do not need to set it here, inSword.gd.
Let’s go over _ready next.
All we are doing here is connecting each of the Area nodes body_entered signal to the body_entered_sword function, passing in an additional argument,
which will be the number of the damage Area, so we can figure out where on the sword the body collided.
Now let’s go over body_entered_sword.
Firstly, we make sure the body the sword has collided with is not itself.
Then we figure out which part of the sword the body collided with, using the passed-in number.
Next, we check to see whether the body the sword collided with has the damage function, and if it does, we call it and play a sound.
If it does not have the damage function, we then check to see whether it has the apply_impulse function. If it does, we then calculate the direction from the sword part the
body collided with to the body. We then check to see whether the sword is being held or not.
If the sword is not being held, we use the RigidBody’s velocity as the force in apply_impulse, while if the sword is being held, we use the
controller’s velocity as the force in the impulse.
Finally, we play a sound.
With that done, you can now slice through the targets! You can find the sword in the corner in between the shotgun and the pistol.
Updating the target UI
Okay, let’s update the UI as the sphere targets are destroyed.
Open up Game.tscn and then expand the GUI MeshInstance. From there, expand the GUI Viewport node
and then select the Base_Control node. Add a new script called Base_Control, and add the following:
extends Control

var sphere_count_label = $Label_Sphere_Count

func _ready():
    get_tree().root.get_node("Game").sphere_ui = self

func update_ui(sphere_count):
    if sphere_count > 0:
        sphere_count_label.text = str(sphere_count) + " Spheres remaining"
    else:
        sphere_count_label.text = "No spheres remaining! Good job!"
Let’s go over what this script does.
First, in _ready, we get the Label that shows how many spheres are left and assign it to the sphere_count_label class variable.
Next, we get Game.gd by using get_tree().root and assign sphere_ui to this script.
In update_ui, we change the sphere Label’s text. If there is at least one sphere remaining, we change the text to show how many spheres are still
left in the world. If there are no more spheres remaining, we change the text and congratulate the player.
Adding the final special RigidBody
Finally, before we finish this tutorial, let’s add a way to reset the game while in VR.
Open up Reset_Box.tscn, which you will find in Scenes. Select the Reset_Box RigidBody node and make a new script called Reset_Box.gd.
Add the following code to Reset_Box.gd:
extends RigidBody

var start_transform

var reset_timer = 0
const RESET_TIME = 120


func _ready():
    start_transform = global_transform


func _physics_process(delta):
    reset_timer += delta
    if reset_timer >= RESET_TIME:
        global_transform = start_transform
        reset_timer = 0


# Called when the interact button is pressed while the object is held.
func interact():
    get_tree().change_scene("res://Game.tscn")


# Called when the object is picked up.
func picked_up():
    pass


# Called when the object is dropped.
func dropped():
    global_transform = start_transform
    reset_timer = 0
Let’s go over what this does.
First, we get the starting global Transform in _ready, and assign it to start_transform. We will use this to reset the position of the reset box every so often.
In _physics_process, we check to see if enough time has passed to reset. If it has, we reset the box’s Transform and then reset the timer.
If the player interacts while holding the reset box, we reset the scene by calling get_tree().change_scene and passing in the path to the current scene. This resets/restarts
the scene completely.
When the reset box is dropped, we reset the Transform and timer.
With that done, when you grab and interact with the reset box, the entire scene will reset/restart and you can destroy all the targets again!
Final notes
Whew! That was a lot of work. Now you have a VR project!
Warning
If you ever get lost, be sure to read over the code again!
You can download the finished project for this part here: VR_Starter_Tutorial_Complete.zip
This will hopefully serve as an introduction to making fully-featured VR games in Godot! The code written here can be expanded to make puzzle games, action games, story-based games, and more!