Attention: Here be dragons
This is the latest
(unstable) version of this documentation, which may document features
not available in or compatible with released stable versions of Godot.
Checking the stable version of the documentation...
Singletons (Autoload)
Úvod
Systém scén enginu Godot je sice výkonný a flexibilní, ale jednu nevýhodu má: neexistuje žádný způsob ukládání informací (např. hráčova skóre nebo inventáře) potřebných pro více než jednu scénu.
Je možné to řešit pomocí některých krkolomějších řešení, ale ta sebou nesou svá vlastní omezení:
Můžete použít "hlavní" scénu, která načítá a uvolňuje ostatní scény jako své potomky. To však znamená, že tyto scény již nemůžete spouštět samostatně a očekávat, že pak budou fungovat korektně.
Informace lze ukládat na disk do adresáře
user://a poté je načítat ve scénách, které je vyžadují, ale časté ukládání a načítání dat je těžkopádné a může být pomalé.
Vzor Singleton je užitečným nástrojem pro řešení běžného scénáře, kdy je třeba ukládat informace sdílené mezi vícero scénami. V našem případě je možné opakovaně použít stejnou scénu nebo třídu pro více singletonů, pokud mají různá jména.
Pomocí tohoto konceptu můžete vytvářet objekty, které:
Jsou vždy načteny, bez ohledu na to, která scéna právě běží.
Může ukládat globální proměnné, například informace o hráči.
Zvládne přepínání scén a přechody mezi scénami.
Chovat se jako singleton, protože GDScript z podstaty věci nepodporuje globální proměnné.
Automatické načtení uzlů a skriptů nám může tyto vlastnosti poskytnout.
Poznámka
Godot won't make an Autoload a "true" singleton as per the singleton design pattern. It may still be instanced more than once by the user if desired.
Tip
If you're creating an autoload as part of an editor plugin, consider registering it automatically in the Project Settings when the plugin is enabled.
Autoload
You can create an Autoload to load a scene or a script that inherits from Node.
Poznámka
Při automatickém načítání skriptu se vytvoří Node a skript se k němu připojí. Tento uzel bude přidán do kořenového výřezu před načtením jakýchkoli jiných scén.
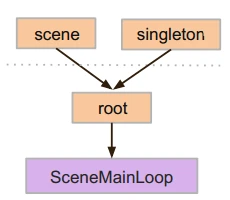
To autoload a scene or script, start from the menu and navigate to Project > Project Settings > Globals > Autoload.
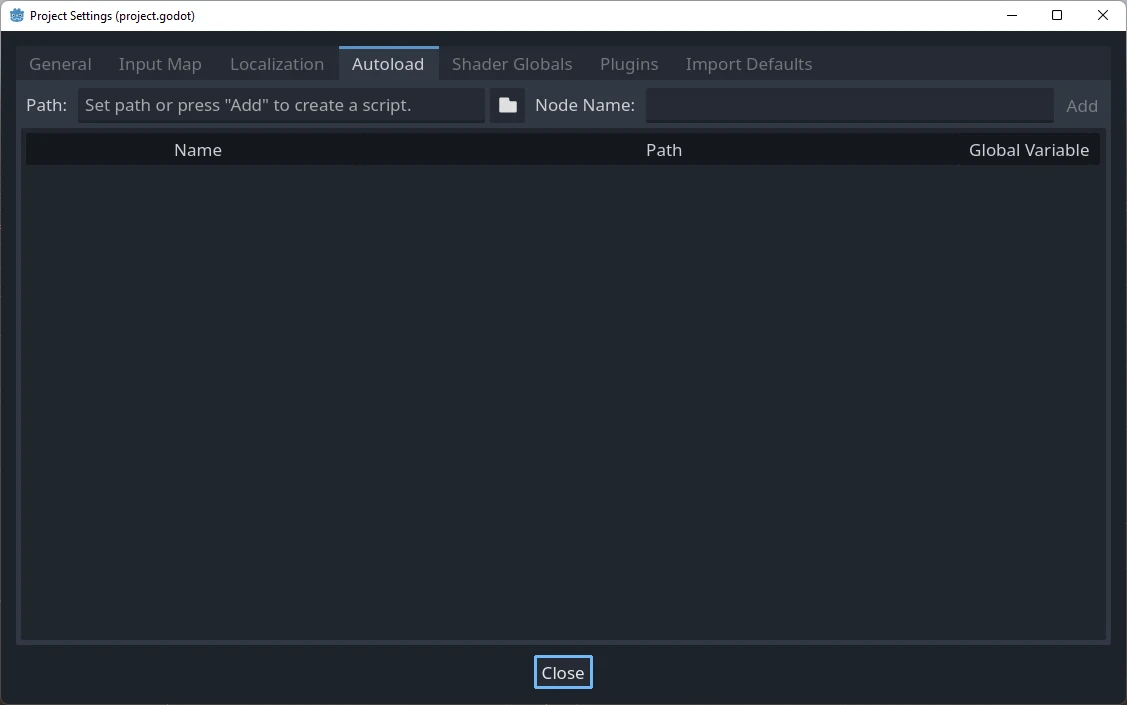
Zde můžete přidat libovolný počet scén nebo skriptů. Každá položka v seznamu vyžaduje jméno, které je uzlu přiřazeno jako vlastnost name. Pořadí položek při jejich přidávání do globálního stromu scén lze měnit pomocí kláves se šipkami nahoru/dolů.
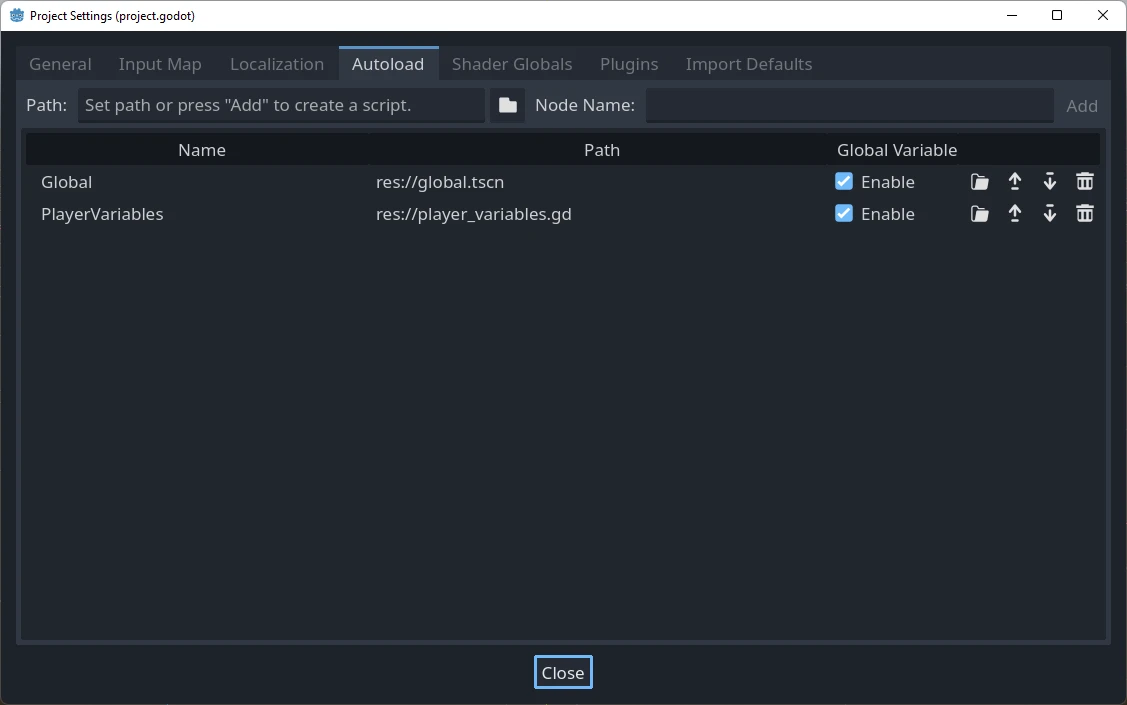
If the Enable column is checked (which is the default), then the singleton can be accessed directly in GDScript:
PlayerVariables.health -= 10
The Enable column has no effect in C# code. However, if the singleton is a
C# script, a similar effect can be achieved by including a static property
called Instance and assigning it in _Ready():
public partial class PlayerVariables : Node
{
    public static PlayerVariables Instance { get; private set; }

    public int Health { get; set; }

    public override void _Ready()
    {
        Instance = this;
    }
}
This allows the singleton to be accessed from C# code without GetNode() and
without a typecast:
PlayerVariables.Instance.Health -= 10;
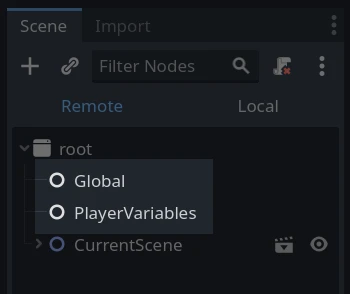
Všimněte si, že k objektům automatického načítání (skriptům a/nebo scénám) se přistupuje stejně jako k jakémukoli jinému uzlu ve stromu scény. Ve skutečnosti, pokud se podíváte na strom spuštěné scény, uvidíte, že se tu objevují automaticky načtené uzly:
Varování
Autoloads must not be removed using free() or queue_free() at
runtime, or the engine will crash.
Vlastní přepínač scén
This tutorial will demonstrate building a scene switcher using autoloads. For basic scene switching, you can use the SceneTree.change_scene_to_file() method (see Použití SceneTree for details). However, if you need more complex behavior when changing scenes, this method provides more functionality.
To begin, download the template from here: singleton_autoload_starter.zip and open it in Godot.
Může se objevit okno s upozorněním, že projekt byl naposledy otevřen ve starší verzi Godotu. To není problém, jednoduše otevřete projekt kliknutím na OK.
The project contains two scenes: scene_1.tscn and scene_2.tscn. Each
scene contains a label displaying the scene name and a button with its
pressed() signal connected. When you run the project, it starts in
scene_1.tscn. However, pressing the button does nothing.
Creating the script
Open the Script window and create a new script called global.gd.
Make sure it inherits from Node:
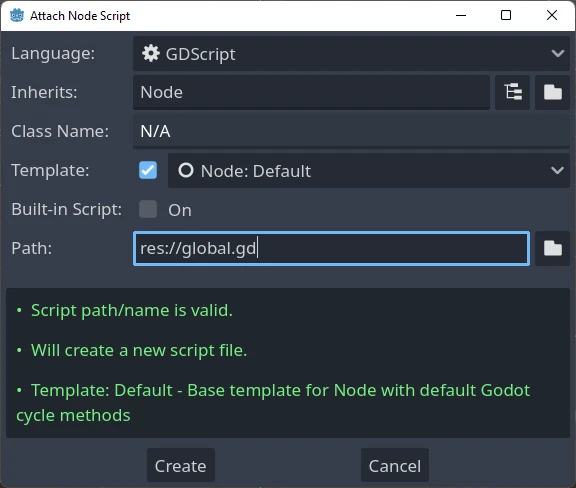
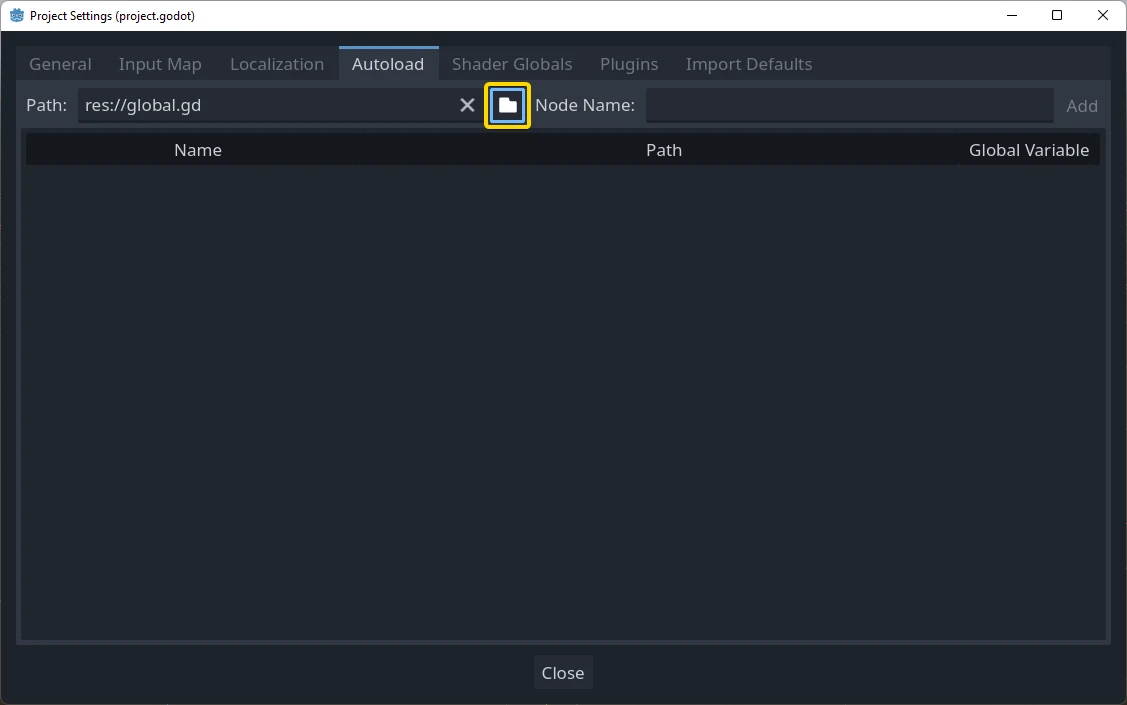
The next step is to add this script to the autoload list.
Starting from the menu, open
Project > Project Settings > Globals > Autoload and
select the script by clicking the browse button or typing its path:
res://global.gd. Press Add to add it to the autoload list
and name it "Global", which is required for scripts to access it
by the name "Global":
Kdykoli nyní spustíme libovolnou scénu tohoto projektu, vždy bude načten tento skript.
Returning to the script, it needs to fetch the current scene in the
_ready() function. Both the current scene (the one with the button) and
global.gd are children of root, but autoloaded nodes are always first. This
means that the last child of root is always the loaded scene.
extends Node

var current_scene = null

func _ready():
    var root = get_tree().root
    # Using a negative index counts from the end, so this gets the last child node of `root`.
    current_scene = root.get_child(-1)
using Godot;

public partial class Global : Node
{
    public Node CurrentScene { get; set; }

    public override void _Ready()
    {
        Viewport root = GetTree().Root;
        // Using a negative index counts from the end, so this gets the last child node of `root`.
        CurrentScene = root.GetChild(-1);
    }
}
Nyní potřebujeme funkci pro změnu scény. Tato funkce musí uvolnit aktuální scénu a nahradit ji scénou požadovanou.
func goto_scene(path):
    # This function will usually be called from a signal callback,
    # or some other function in the current scene.
    # Deleting the current scene at this point is
    # a bad idea, because it may still be executing code.
    # This will result in a crash or unexpected behavior.

    # The solution is to defer the load to a later time, when
    # we can be sure that no code from the current scene is running:

    _deferred_goto_scene.call_deferred(path)


func _deferred_goto_scene(path):
    # It is now safe to remove the current scene.
    current_scene.free()

    # Load the new scene.
    var s = ResourceLoader.load(path)

    # Instance the new scene.
    current_scene = s.instantiate()

    # Add it to the active scene, as child of root.
    get_tree().root.add_child(current_scene)

    # Optionally, to make it compatible with the SceneTree.change_scene_to_file() API.
    get_tree().current_scene = current_scene
public void GotoScene(string path)
{
    // This function will usually be called from a signal callback,
    // or some other function from the current scene.
    // Deleting the current scene at this point is
    // a bad idea, because it may still be executing code.
    // This will result in a crash or unexpected behavior.

    // The solution is to defer the load to a later time, when
    // we can be sure that no code from the current scene is running:

    CallDeferred(MethodName.DeferredGotoScene, path);
}

public void DeferredGotoScene(string path)
{
    // It is now safe to remove the current scene.
    CurrentScene.Free();

    // Load a new scene.
    var nextScene = GD.Load<PackedScene>(path);

    // Instance the new scene.
    CurrentScene = nextScene.Instantiate();

    // Add it to the active scene, as child of root.
    GetTree().Root.AddChild(CurrentScene);

    // Optionally, to make it compatible with the SceneTree.change_scene_to_file() API.
    GetTree().CurrentScene = CurrentScene;
}
Při použití Object.call_deferred() se druhá funkce spustí až po dokončení veškerého kódu z aktuální scény. Aktuální scéna tedy nebude odstraněna, dokud je používána (tj. její kód stále běží).
Nakonec musíme doplinit prázcdné funkce pro obsluhu signálu v obou scénách:
# Add to 'scene_1.gd'.

func _on_button_pressed():
    Global.goto_scene("res://scene_2.tscn")
// Add to 'Scene1.cs'.

private void OnButtonPressed()
{
    var global = GetNode<Global>("/root/Global");
    global.GotoScene("res://Scene2.tscn");
}
a
# Add to 'scene_2.gd'.

func _on_button_pressed():
    Global.goto_scene("res://scene_1.tscn")
// Add to 'Scene2.cs'.

private void OnButtonPressed()
{
    var global = GetNode<Global>("/root/Global");
    global.GotoScene("res://Scene1.tscn");
}
Spusťte projekt a vyzkoušejte, zda můžete přepínat mezi scénami stisknutím tlačítka.
Poznámka
Když jsou scény jednoduché, je přechod okamžitý. Pokud jsou však scény složitější, může jejich zobrazení trvat znatelně déle. Jak se s tím vypořádat, se dozvíte v dalším tutoriálu: Background loading.
Pokud je doba načítání relativně krátká (méně než 3 sekundy), můžete také zobrazit "načítací tabulku", a to tak, že těsně před změnou scény zobrazíte nějaký 2D prvek. Ten pak můžete skrýt těsně po změně scény. Hráči tak naznačíte, že se načítá scéna.