Work in progress
The content of this page was not yet updated for Godot
4.1
and may be outdated. If you know how to improve this page or you can confirm
that it's up to date, feel free to open a pull request.
2D particle systems
Intro
Particle systems are used to simulate complex physical effects, such as sparks, fire, magic particles, smoke, mist, etc.
The idea is that a "particle" is emitted at a fixed interval and with a fixed lifetime. During its lifetime, every particle will have the same base behavior. What makes each particle different from the rest and provides a more organic look is the "randomness" associated with each parameter. In essence, creating a particle system means setting base physics parameters and then adding randomness to them.
Particle nodes
Godot provides two different nodes for 2D particles, GPUParticles2D and CPUParticles2D. GPUParticles2D is more advanced and uses the GPU to process particle effects. CPUParticles2D is a CPU-driven option with near-feature parity with GPUParticles2D, but lower performance when using large amounts of particles. On the other hand, CPUParticles2D may perform better on low-end systems or in GPU-bottlenecked situations.
While GPUParticles2D is configured via a ParticleProcessMaterial (and optionally with a custom shader), the matching options are provided via node properties in CPUParticles2D (with the exception of the trail settings).
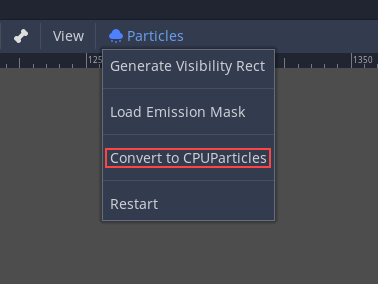
You can convert a GPUParticles2D node into a CPUParticles2D node by clicking on the node in the inspector, and selecting Particles > Convert to CPUParticles2D in the toolbar at the top of the 3D editor viewport.
The rest of this tutorial is going to use the GPUParticles2D node. First, add a GPUParticles2D node to your scene. After creating that node you will notice that only a white dot was created, and that there is a warning icon next to your GPUParticles2D node in the scene dock. This is because the node needs a ParticleProcessMaterial to function.
ParticleProcessMaterial
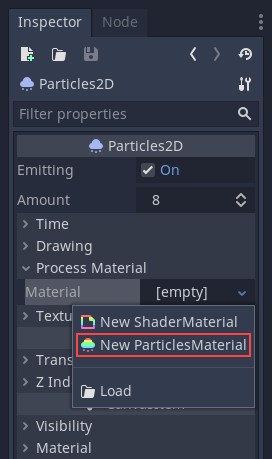
To add a process material to your particles node, go to Process Material in
your inspector panel. Click on the box next to Material, and from the dropdown
menu select New ParticleProcessMaterial.
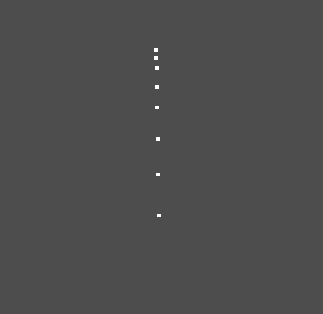
Your GPUParticles2D node should now be emitting white points downward.
Texture
A particle system can use a single texture or an animation flipbook. A flipbook is a texture that contains several frames of animation that can be played back, or chosen at random during emission. This is equivalent to a spritesheet for particles.
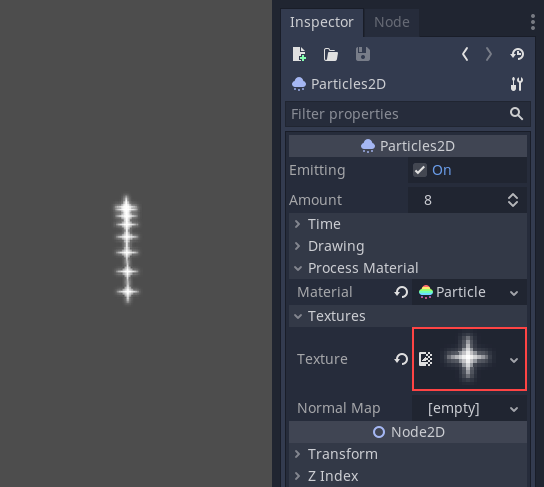
The texture is set via the Texture property:
Using an animation flipbook
Particle flipbooks are suited to reproduce complex effects such as smoke, fire, explosions. They can also be used to introduce random texture variation, by making every particle use a different texture. You can find existing particle flipbook images online, or pre-render them using external tools such as Blender or EmberGen.
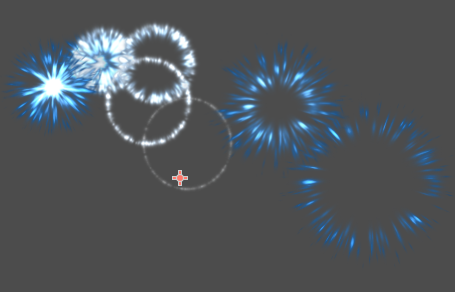
Example of a particle system that uses a flipbook texture
Using an animation flipbook requires additional configuration compared to a single texture. For demonstration purposes, we'll use this texture with 5 columns and 7 rows (right-click and choose Save as…):
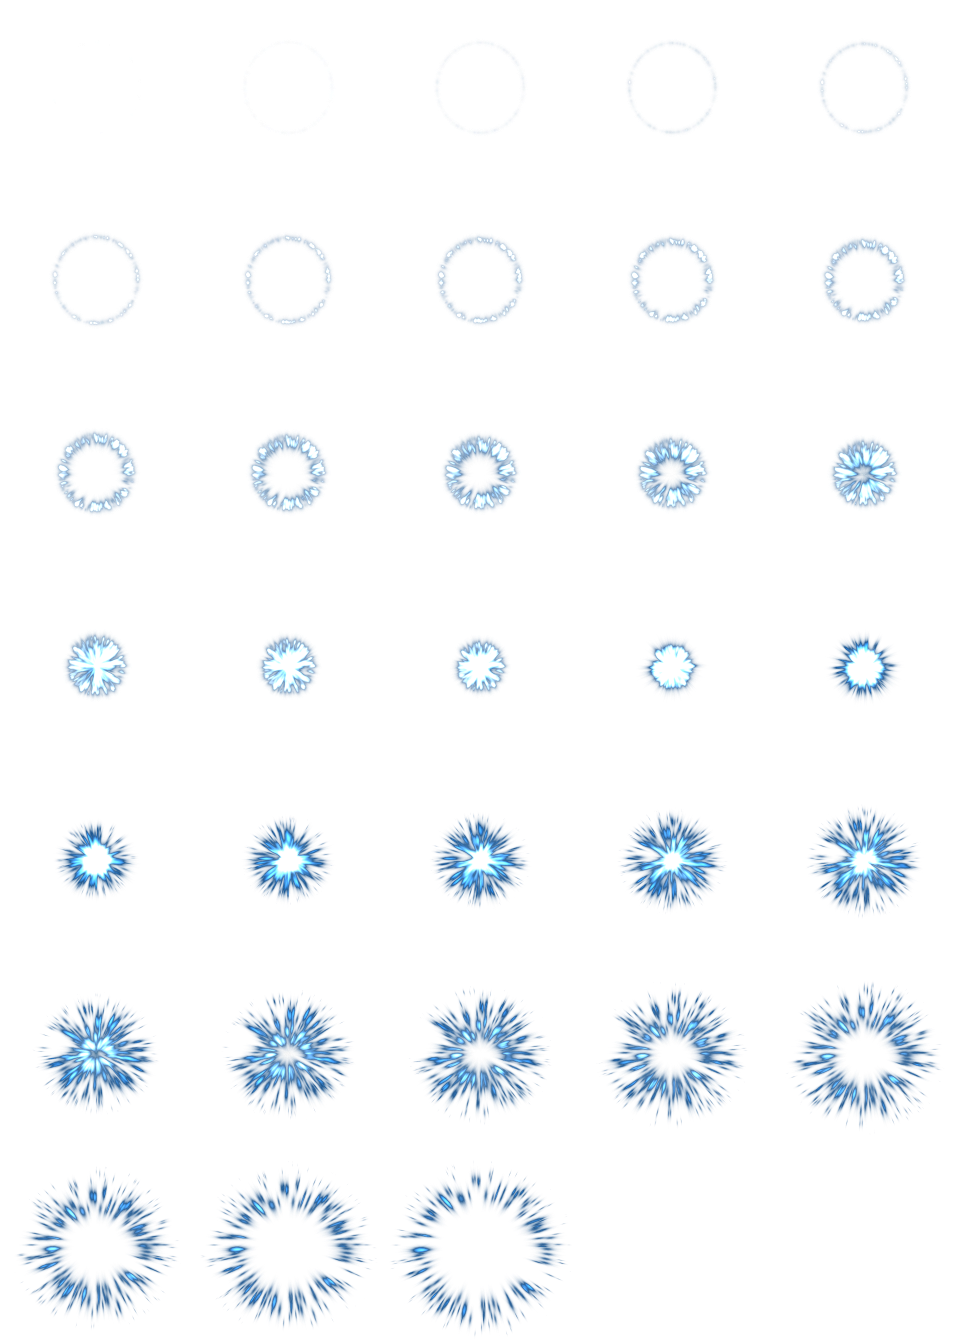
Credit: JoesAlotofthings (CC BY 4.0)
To use an animation flipbook, you must create a new CanvasItemMaterial in the Material section of the GPUParticles2D (or CPUParticles2D) node:
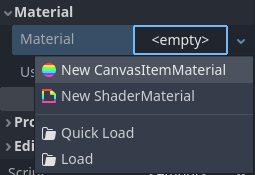
Creating a CanvasItemMaterial at the bottom of the particles node inspector
In this CanvasItemMaterial, enable Particle Animation and set H Frames and V Frames to the number of columns and rows present in your flipbook texture:
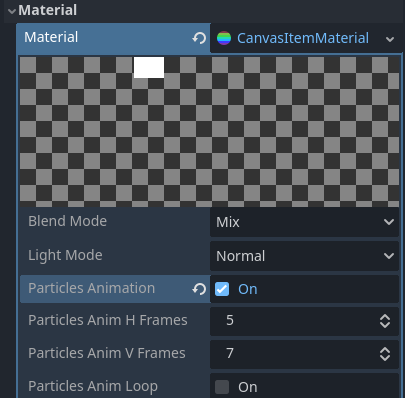
Configuring the CanvasItemMaterial for the example flipbook texture
Once this is done, the Animation section in ParticleProcessMaterial (for GPUParticles2D) or in the CPUParticles2D inspector will be effective.
Tip
If your flipbook texture has a black background instead of a transparent background, you will also need to set the blend mode to Add instead of Mix for correct display. Alternatively, you can modify the texture to have a transparent background in an image editor. In GIMP, this can be done using the Color > Color to Alpha menu.
Time parameters
Lifetime
The time in seconds that every particle will stay alive. When lifetime ends, a new particle is created to replace it.
Lifetime: 0.5
Lifetime: 4.0
One Shot
When enabled, a GPUParticles2D node will emit all of its particles once and then never again.
Preprocess
Particle systems begin with zero particles emitted, then start emitting. This can be an inconvenience when loading a scene and systems like a torch, mist, etc. begin emitting the moment you enter. Preprocess is used to let the system process a given number of seconds before it is actually drawn the first time.
Speed Scale
The speed scale has a default value of 1 and is used to adjust the
speed of a particle system. Lowering the value will make the particles
slower while increasing the value will make the particles much faster.
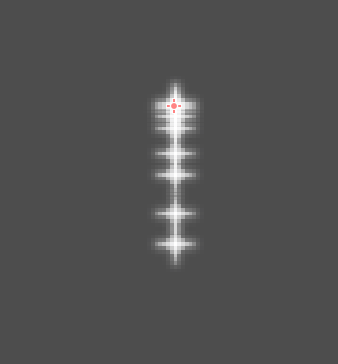
Explosiveness
If lifetime is 1 and there are 10 particles, it means a particle
will be emitted every 0.1 seconds. The explosiveness parameter changes
this, and forces particles to be emitted all together. Ranges are:
0: Emit particles at regular intervals (default value).
1: Emit all particles simultaneously.
Values in the middle are also allowed. This feature is useful for creating explosions or sudden bursts of particles:
Randomness
All physics parameters can be randomized. Random values range from 0 to
1. The formula to randomize a parameter is:
initial_value = param_value + param_value * randomness
Fixed FPS
This setting can be used to set the particle system to render at a fixed
FPS. For instance, changing the value to 2 will make the particles render
at 2 frames per second. Note this does not slow down the particle system itself.
Fract Delta
This can be used to turn Fract Delta on or off.
Drawing parameters
Visibility Rect
The visibility rectangle controls the visibility of the particles on screen. If this rectangle is outside of the viewport, the engine will not render the particles on screen.
The rectangle's W and H properties respectively control its Width and its Height.
The X and Y properties control the position of the upper-left
corner of the rectangle, relative to the particle emitter.
You can have Godot generate a Visibility Rect automatically using the toolbar above the 2d view. To do so, select the GPUParticles2D node and Click Particles > Generate Visibility Rect. Godot will simulate the Particles2D node emitting particles for a few seconds and set the rectangle to fit the surface the particles take.
You can control the emit duration with the Generation Time (sec) option. The maximum value is 25 seconds. If you need more time for your particles to move around, you can temporarily change the preprocess duration on the Particles2D node.
Local Coords
By default this option is on, and it means that the space that particles are emitted to is relative to the node. If the node is moved, all particles are moved with it:
If disabled, particles will emit to global space, meaning that if the node is moved, already emitted particles are not affected:
Draw Order
This controls the order in which individual particles are drawn. Index
means particles are drawn according to their emission order (default).
Lifetime means they are drawn in order of remaining lifetime.
ParticleProcessMaterial settings
Direction
This is the base direction at which particles emit. The default is
Vector3(1, 0, 0) which makes particles emit to the right. However,
with the default gravity settings, particles will go straight down.
For this property to be noticeable, you need an initial velocity greater than 0. Here, we set the initial velocity to 40. You'll notice that particles emit toward the right, then go down because of gravity.
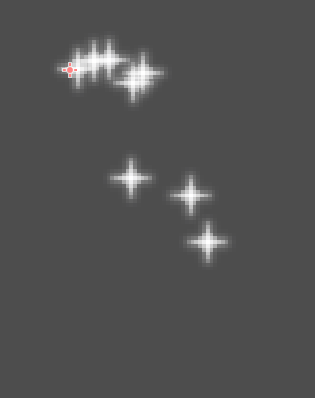
Spread
This parameter is the angle in degrees which will be randomly added in
either direction to the base Direction. A spread of 180 will emit
in all directions (+/- 180). For spread to do anything the "Initial Velocity"
parameter must be greater than 0.
Flatness
This property is only useful for 3D particles.
Gravity
The gravity applied to every particle.
Initial Velocity
Initial velocity is the speed at which particles will be emitted (in pixels/sec). Speed might later be modified by gravity or other accelerations (as described further below).
Angular Velocity
Angular velocity is the initial angular velocity applied to particles.
Spin Velocity
Spin velocity is the speed at which particles turn around their center (in degrees/sec).
Orbit Velocity
Orbit velocity is used to make particles turn around their center.
Linear Acceleration
The linear acceleration applied to each particle.
Radial Acceleration
If this acceleration is positive, particles are accelerated away from the center. If negative, they are absorbed towards it.
Tangential Acceleration
This acceleration will use the tangent vector to the center. Combining with radial acceleration can do nice effects.
Damping
Damping applies friction to the particles, forcing them to stop. It is especially useful for sparks or explosions, which usually begin with a high linear velocity and then stop as they fade.
Angle
Determines the initial angle of the particle (in degrees). This parameter is mostly useful randomized.
Scale
Determines the initial scale of the particles.
Color
Used to change the color of the particles being emitted.
Hue Variation
The Variation value sets the initial hue variation applied to each
particle. The Variation Random value controls the hue variation
randomness ratio.
Animation
Note
Particle flipbook animation is only effective if the CanvasItemMaterial used on the GPUParticles2D or CPUParticles2D node has been configured accordingly.
To set up the particle flipbook for linear playback, set the Speed Min and Speed Max values to 1:
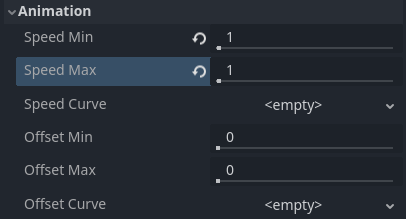
Setting up particle animation for playback during the particle's lifetime
By default, looping is disabled. If the particle is done playing before its lifetime ends, the particle will keep using the flipbook's last frame (which may be fully transparent depending on how the flipbook texture is designed). If looping is enabled, the animation will loop back to the first frame and resume playing.
Depending on how many images your sprite sheet contains and for how long your particle is alive, the animation might not look smooth. The relationship between particle lifetime, animation speed, and number of images in the sprite sheet is this:
Note
At an animation speed of 1.0, the animation will reach the last image
in the sequence just as the particle's lifetime ends.
If you wish the particle flipbook to be used as a source of random particle textures for every particle, keep the speed values at 0 and set Offset Max to 1 instead:
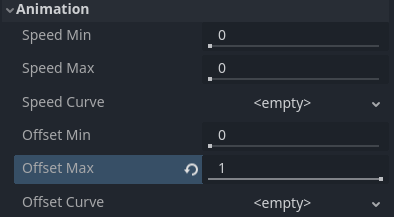
Setting up particle animation for random offset on emission
Note that the GPUParticles2D node's Fixed FPS also affects animation playback. For smooth animation playback, it's recommended to set it to 0 so that the particle is simulated on every rendered frame. If this is not an option for your use case, set Fixed FPS to be equal to the effective framerate used by the flipbook animation (see above for the formula).
Emission Shapes
ParticleProcessMaterials allow you to set an Emission Mask, which dictates the area and direction in which particles are emitted. These can be generated from textures in your project.
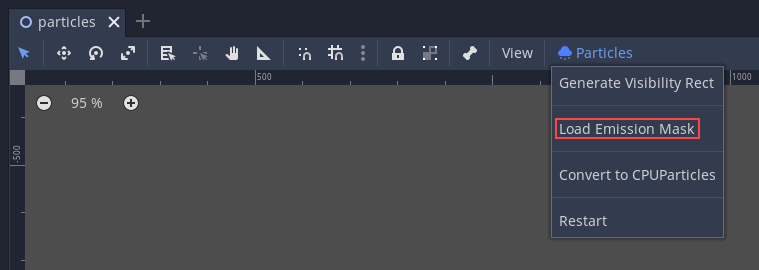
Ensure that a ParticleProcessMaterial is set, and the GPUParticles2D node is selected. A "Particles" menu should appear in the Toolbar:

Open it and select "Load Emission Mask":
Then select which texture you want to use as your mask:
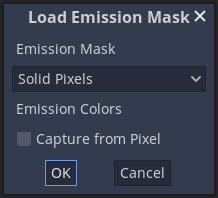
A dialog box with several settings will appear.
Emission Mask
Three types of emission masks can be generated from a texture:
Solid Pixels: Particles will spawn from any area of the texture, excluding transparent areas.
Border Pixels: Particles will spawn from the outer edges of the texture.
Directed Border Pixels: Similar to Border Pixels, but adds extra information to the mask to give particles the ability to emit away from the borders. Note that an
Initial Velocitywill need to be set in order to utilize this.
Emission Colors
Capture from Pixel will cause the particles to inherit the color of the mask at their spawn points.
Once you click "OK", the mask will be generated and set to the ParticleProcessMaterial, under the Emission Shape section:
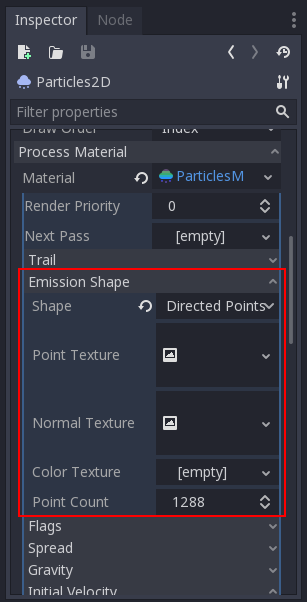
All of the values within this section have been automatically generated by the "Load Emission Mask" menu, so they should generally be left alone.
Note
An image should not be added to Point Texture or Color Texture directly.
The "Load Emission Mask" menu should always be used instead.