Attention: Here be dragons
This is the latest
(unstable) version of this documentation, which may document features
not available in or compatible with released stable versions of Godot.
Checking the stable version of the documentation...
Erstellen von IOS-Plugins
Auf dieser Seite wird erklärt, was iOS-Plugins für Sie tun können, wie Sie ein vorhandenes Plugin verwenden und wie Sie ein neues programmieren können.
iOS Plugins erlauben die Nutzung von Drittanbieterbibliotheken, sowie iOS spezifische Features wie In-App Einkäufe, GameCenter-Integration, ARKit Unterstützung und mehr.
Laden und Verwenden eines vorhandenen Plugins
Ein iOS-Plugin benötigt eine .gdip-Konfigurationsdatei, eine Binärdatei, die entweder eine statische .a-Bibliothek oder eine .xcframework mit statischen .a-Bibliotheken sein kann, und möglicherweise weitere Abhängigkeiten. Um sie zu benutzen, müssen Sie:
Die Dateien des Plugins in das Verzeichnis
res://ios/pluginsIhres Godot-Projekts kopieren. Sie können die Dateien auch in einem Unterverzeichnis gruppieren, z. B.res://ios/plugins/my_plugin.Der Godot-Editor erkennt und importiert automatisch die
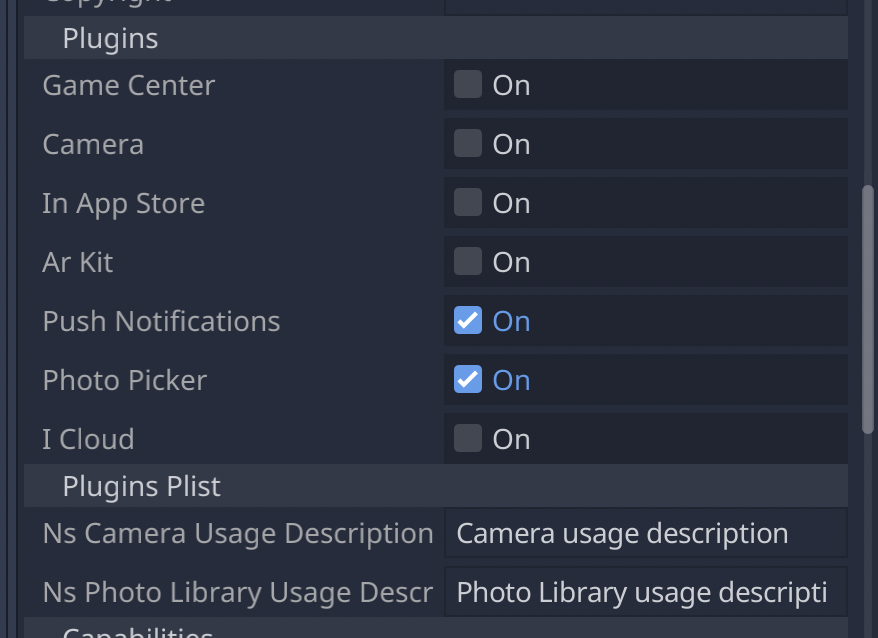
.gdip-Dateien inres://ios/pluginsund seinen Unterverzeichnissen.Sie können erkannte Plugins finden und aktivieren, indem Sie zu Projekt -> Exportieren... -> iOS gehen und auf dem Optionen-Tab zum Abschnitt Plugins scrollen.
When a plugin is active, you can access it in your code using Engine.get_singleton():
if Engine.has_singleton("MyPlugin"):
    var singleton = Engine.get_singleton("MyPlugin")
    print(singleton.foo())
Bemerkung
Die Dateien des Plugins müssen sich im Verzeichnis res://ios/plugins/ oder einem Unterverzeichnis befinden, da der Godot-Editor sie sonst nicht automatisch erkennt.
Erstellen eines iOS-Plugins
Im Kern ist ein Godot-iOS-Plugin eine iOS-Bibliothek (.a-Archivdatei oder .xcframework mit statischen Bibliotheken) mit den folgenden Anforderungen:
Die Bibliothek muss eine Abhängigkeit von den Headern der Godot-Engine haben.
Die Bibliothek muss eine
.gdip-Konfigurationsdatei enthalten.
Ein iOS-Plugin kann die gleiche Funktionalität wie ein Godot-Modul haben, bietet aber mehr Flexibilität und erfordert keinen Rebuild der Engine.
Hier sind die Schritte, um mit der Entwicklung eines Plugins zu beginnen. Wir empfehlen die Verwendung der Entwicklungsumgebung Xcode.
Siehe auch
Die Godot iOS Plugins.
Die Godot iOS Plugin-Vorlage bietet Ihnen alle notwendigen Grundlagen, um Ihr iOS-Plugin zu starten.
Um ein iOS-Plugin zu erstellen:
Erstellen Sie eine statische Objective-C-Bibliothek für Ihr Plugin in Xcode.
Fügen Sie die Godot-Engine-Header-Dateien als Abhängigkeit für Ihre Plugin-Bibliothek in
HEADER_SEARCH_PATHShinzu. Sie finden diese Einstellung auf der RegisterkarteBuild Settings:Laden Sie den Quellcode der Godot-Engine von der Godot GitHub-Seite herunter.
Starten Sie SCons, um Header zu erzeugen. Sie können den Prozess lernen, indem Sie Kompilieren für iOS lesen. Sie müssen nicht warten, bis die Kompilierung abgeschlossen ist, um weiterzumachen, da die Header generiert werden, bevor die Engine mit der Kompilierung beginnt.
Sie sollten die gleichen Header-Dateien für iOS-Plugins und für die iOS-Exportvorlage verwenden.
Geben Sie auf dem
Build Settings-Tab unterOTHER_CFLAGSdie Kompilierungsflags für Ihre statische Bibliothek an. Die wichtigsten sind-fcxx-modules,-fmodules, und-DDEBUG, wenn Sie Debug-Unterstützung benötigen. Andere Flags sollten die gleichen sein, die Sie zum Kompilieren von Godot verwenden. Zum Beispiel:
-DPTRCALL_ENABLED -DDEBUG_ENABLED -DDEBUG_MEMORY_ALLOC -DDISABLE_FORCED_INLINE -DTYPED_METHOD_BIND
Fügen Sie die erforderliche Logik für Ihr Plugin hinzu und erstellen Sie Ihre Bibliothek, um eine
.a-Datei zu erzeugen. Wahrscheinlich müssen Sie.aDateien für dasdebugundrelease-Target erstellen. Abhängig von Ihren Bedürfnissen, wählen Sie eine oder beide. Wenn Sie sowohl Debug- als auch Release-.aDateien benötigen, sollte ihr Name folgendem Muster entsprechen:[PluginName].[TargetType].a. Sie können die statische Bibliothek auch mit Ihrer SCons-Konfiguration erstellen.Das iOS-Plugin-System unterstützt auch
.xcframework-Dateien. Um eine solche zu erzeugen, können Sie einen Befehl wie den folgenden verwenden:
xcodebuild -create-xcframework -library [DeviceLibrary].a -library [SimulatorLibrary].a -output [PluginName].xcframework
Erstellen Sie eine Godot iOS Plugin-Konfigurationsdatei, damit das System Ihr Plugin erkennen und laden kann:
Die Erweiterung der Konfigurationsdatei muss
gdiplauten (z.B.:MyPlugin.gdip).The configuration file format is as follow:
[config]
name="MyPlugin"
binary="MyPlugin.a"

initialization="init_my_plugin"
deinitialization="deinit_my_plugin"

[dependencies]
linked=[]
embedded=[]
system=["Foundation.framework"]

capabilities=["arkit", "metal"]

files=["data.json"]

linker_flags=["-ObjC"]

[plist]
PlistKeyWithDefaultType="Some Info.plist key you might need"
StringPlistKey:string="String value"
IntegerPlistKey:integer=42
BooleanPlistKey:boolean=true
RawPlistKey:raw="
<array>
    <string>UIInterfaceOrientationPortrait</string>
</array>
"
StringPlistKeyToInput:string_input="Type something"
The config section and fields are required and defined as follow:
name: name of the plugin
binary: this should be the filepath of the plugin library (
aorxcframework) file.
The filepath can be relative (e.g.:
MyPlugin.a,MyPlugin.xcframework) in which case it's relative to the directory where thegdipfile is located.The filepath can be absolute:
res://some_path/MyPlugin.aorres://some_path/MyPlugin.xcframework.In case you need multitarget library usage, the filename should be
MyPlugin.aand.afiles should be named asMyPlugin.release.aandMyPlugin.debug.a.In case you use multitarget
xcframeworklibraries, their filename in the configuration should beMyPlugin.xcframework. The.xcframeworkfiles should be named asMyPlugin.release.xcframeworkandMyPlugin.debug.xcframework.
The dependencies and plist sections are optional and defined as follow:
dependencies:
linked: contains a list of iOS frameworks that the iOS application should be linked with.
embedded: contains a list of iOS frameworks or libraries that should be both linked and embedded into the resulting iOS application.
system: contains a list of iOS system frameworks that are required for plugin.
capabilities: contains a list of iOS capabilities that is required for plugin. A list of available capabilities can be found at Apple UIRequiredDeviceCapabilities documentation page.
files: contains a list of files that should be copied on export. This is useful for data files or images.
linker_flags: contains a list of linker flags to add to the Xcode project when exporting the plugin.
plist: should have keys and values that should be present in
Info.plistfile.
Each line should follow pattern:
KeyName:KeyType=KeyValueSupported values for
KeyTypearestring,integer,boolean,raw,string_inputIf no type is used (e.g.:
KeyName="KeyValue")stringtype will be used.If
rawtype is used value for corresponding key will be stored inInfo.plistas is.If
string_inputtype is used you will be able to modify value in Export window.