Cutout animation
What is it?
Cut-out is a technique of animating in 2D where pieces of paper (or similar material) are cut in special shapes and laid one over the other. The papers are animated and photographed, frame by frame using a stop motion technique (more info here).
With the advent of the digital age, this technique became possible using computers, which resulted in an increased amount of animation TV shows using digital Cut-out. Notable examples are South Park or Jake and the Never Land Pirates .
In video games, this technique has also become popular. Examples of this are Paper Mario or Rayman Origins .
Cutout in Godot
Godot provides a few tools for working with these kind of assets, but its overall design makes it ideal for the workflow. The reason is that, unlike other tools meant for this, Godot has the following advantages:
- The animation system is fully integrated with the engine: This means, animations can control much more than just motion of objects, such as textures, sprite sizes, pivots, opacity, color modulation, etc. Everything can be animated and blended.
- Mix with Traditional: AnimatedSprite allows traditional animation to be mixed, useful for complex objects, such as shape of hands and foot, changing facial expression, etc.
- Custom Shaped Elements: Can be created with Polygon2D allowing the mixing of UV animation, deformations, etc.
- Particle Systems: Can also be mixed with the traditional animation hierarchy, useful for magic effects, jetpacks, etc.
- Custom Colliders: Set colliders and influence areas in different parts of the skeletons, great for bosses, fighting games, etc.
- Animation Tree: Allows complex combinations and blendings of several animations, the same way it works in 3D.
And much more!
Making of GBot!
For this tutorial, we will use as demo content the pieces of the GBot character, created by Andreas Esau.

Get your assets: gbot_resources.zip.
Setting up the rig
Create an empty Node2D as root of the scene, we will work under it:
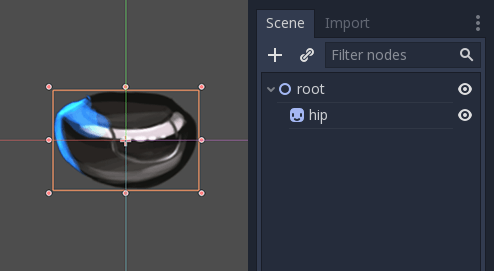
OK, the first node of the model that we will create will be the hip. Generally, both in 2D and 3D, the hip is the root of the skeleton. This makes it easier to animate:
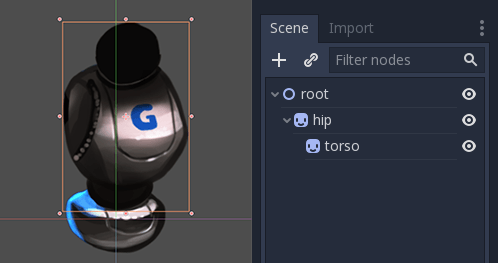
Next will be the torso. The torso needs to be a child of the hip, so create a child sprite and load the torso, later accommodate it properly:
This looks good. Let’s see if our hierarchy works as a skeleton by
rotating the torso. We can do this be pressing E to enter rotate mode,
and dragging with the left mouse button. To exit rotate mode hit ESC.

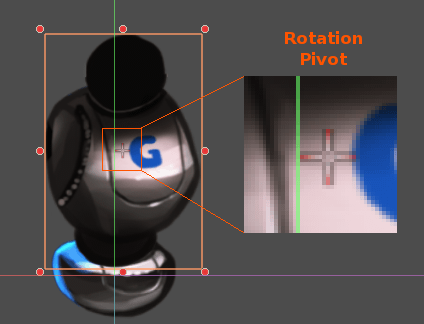
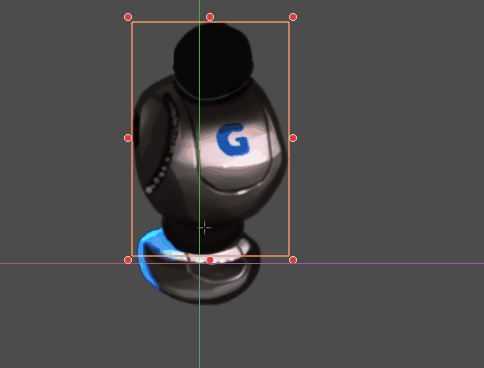
Ouch, that doesn’t look good! The rotation pivot is wrong, this means it needs to be adjusted.
This small little cross in the middle of the Sprite is the rotation pivot:
Adjusting the pivot
The pivot can be adjusted by changing the offset property in the Sprite:
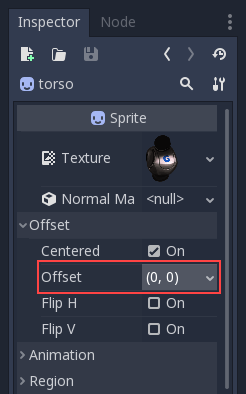
However, there is a way to do it more visually. While hovering over the desired pivot point, simply press the “v” key to move the pivot there for the selected Sprite. Alternately, there is a tool in the tool bar that has a similar function.
Now it looks good! Let’s continue adding body pieces, starting by the right arm. Make sure to put the sprites in hierarchy, so their rotations and translations are relative to the parent:
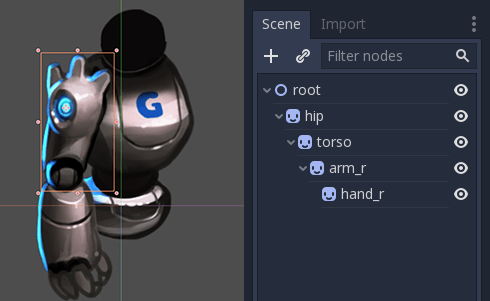
This seems easy, so continue with the left arm. The rest should be simple! Or maybe not:
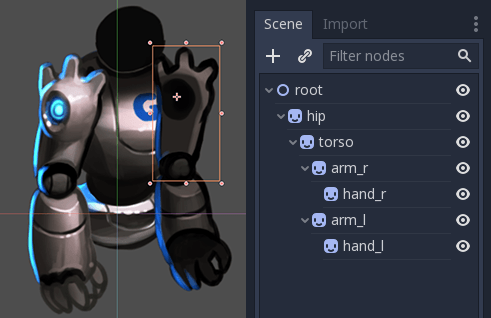
Right. In 2D, parent nodes appear below children nodes. Well, this sucks. But how can this problem be solved? We want the left arm to appear behind the hip and the torso. For this, we can move the nodes behind the hip (note that you can bypass this by setting the Node2D Z property, but then you won’t learn about all this!):

But then, we lose the hierarchy layout, which allows to control the skeleton like.. a skeleton. Is there any hope?.. Of Course!
RemoteTransform2D node
Godot provides a special node, RemoteTransform2D. This node will transform nodes that are sitting somewhere else in the hierarchy, by applying the transform to the remote nodes.
This enables to have a visibility order independent from the hierarchy.
Simply create two more nodes as children from torso, remote_arm_l and remote_hand_l and link them to the actual sprites:
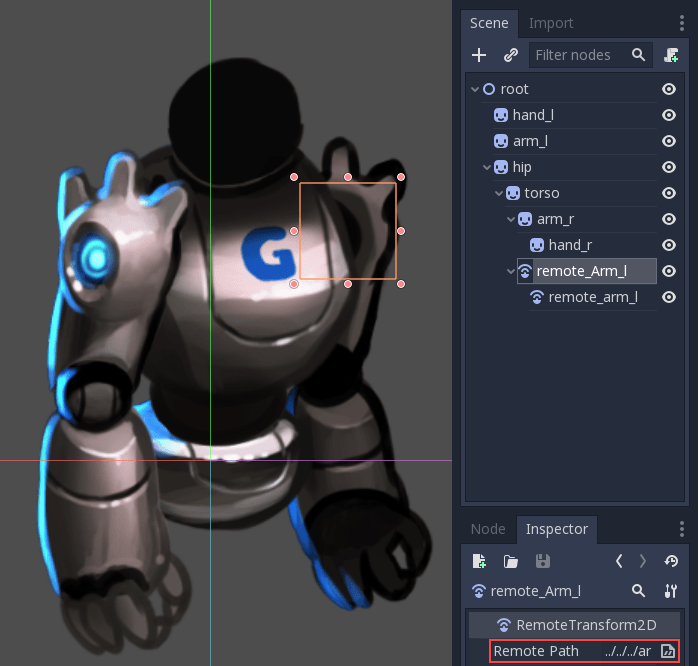
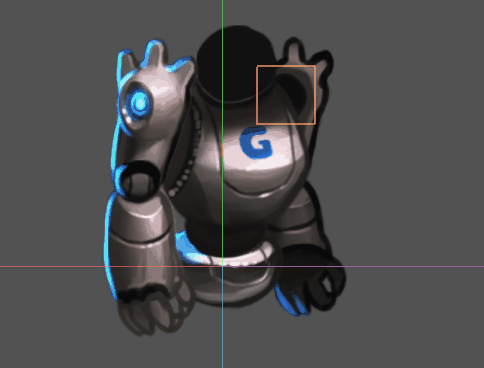
Moving the remote transform nodes will move the sprites, allowing you to easily animate and pose the character:
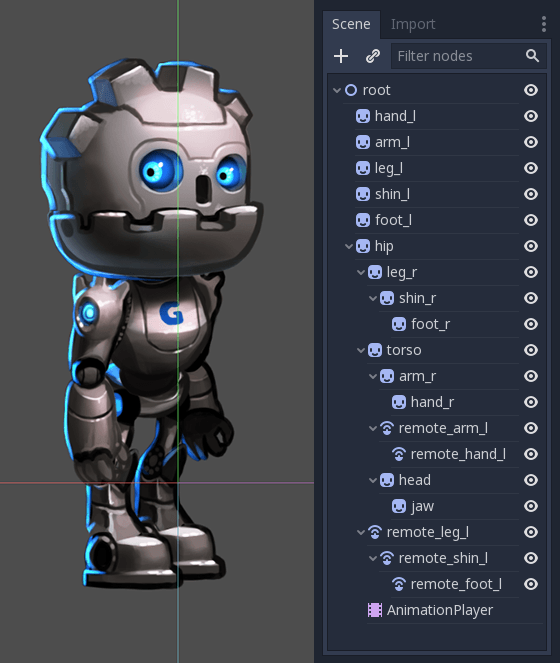
Completing the skeleton
Complete the skeleton by following the same steps for the rest of the parts. The resulting scene should look similar to this:
The resulting rig will be easy to animate. By selecting the nodes and rotating them you can animate forward kinematics (FK) efficiently.
For simple objects and rigs this is fine, however the following problems are common:
- Selecting sprites can become difficult for complex rigs, and the scene tree ends being used due to the difficulty of clicking over the proper sprite.
- Inverse Kinematics is often desired for extremities.
To solve these problems, Godot supports a simple method of skeletons.
Skeletons
Godot doesn’t actually support true Skeketons, but it does feature a helper to create “bones” between nodes. This is enough for most cases, but the way it works is not completely obvious.
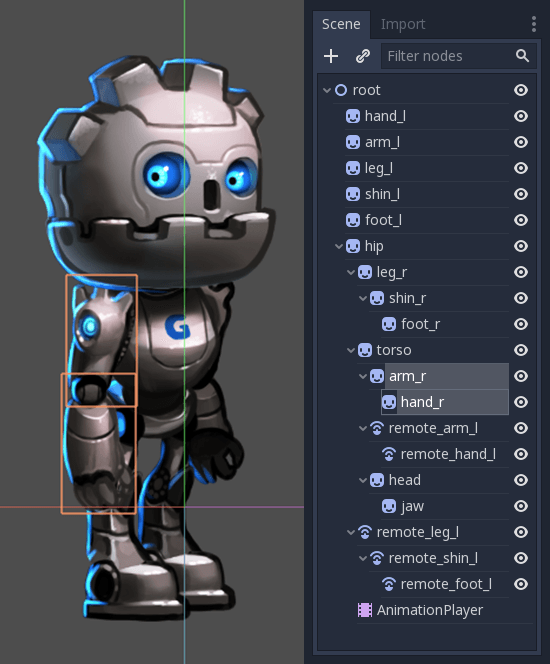
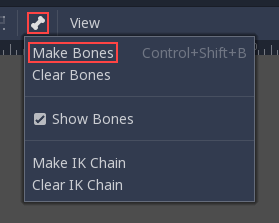
As an example, let’s turn the right arm into a skeleton. To create skeletons, a chain of nodes must be selected from top to bottom:
Then, click on the Skeleton menu and select Make Bones.
This will add bones covering the arm, but the result is not quite what is expected.
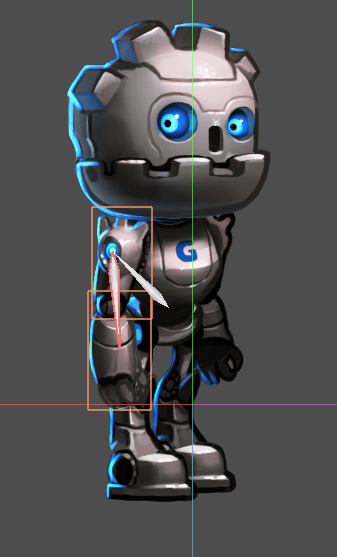
It looks like the bones are shifted up in the hierarchy. The hand connects to the arm, and the arm to the body. So the question is:
- Why does the hand lack a bone?
- Why does the arm connect to the body?
This might seem strange at first, but will make sense later on. In traditional skeleton systems, bones have a position, an orientation and a length. In Godot, bones are mostly helpers so they connect the current node with the parent. Because of this, toggling a node as a bone will just connect it to the parent.
So, with this knowledge. Let’s do the same again so we have an actual, useful skeleton.
The first step is creating an endpoint node. Any kind of node will do, but Position2D is preferred because it’s visible in the editor. The endpoint node will ensure that the last bone has orientation.
Now select the whole chain, from the endpoint to the arm and create bones:
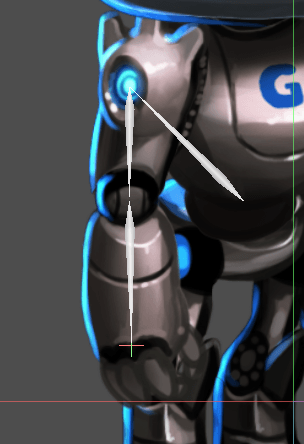
The result resembles a skeleton a lot more, and now the arm and forearm can be selected and animated.
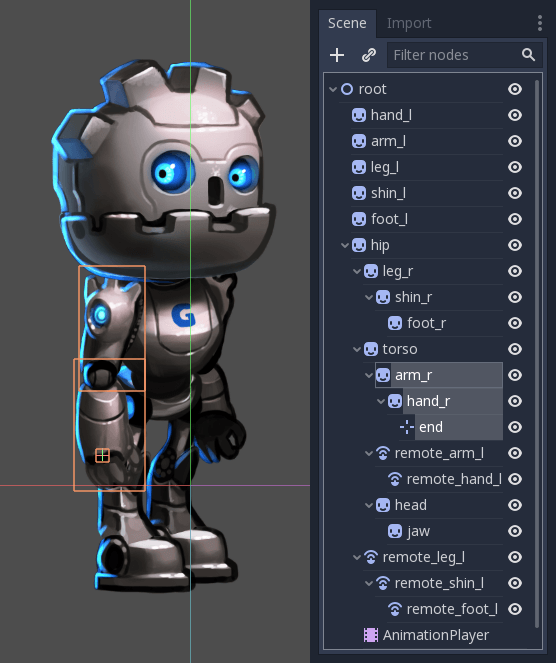
Finally, create endpoints in all meaningful extremities and connect the whole skeleton with bones up to the hip.
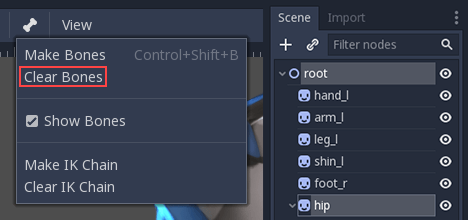
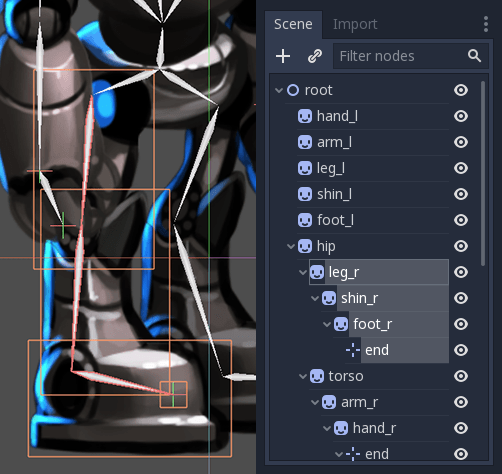
You may notice when connecting the hip and torso, that an extra bone is created.
To fix this, select the root and hip node, open the Skeleton menu, click clear bones.
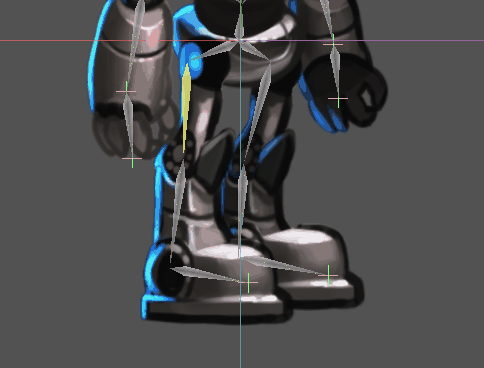
After fixing that your final skeleton should look something like this:
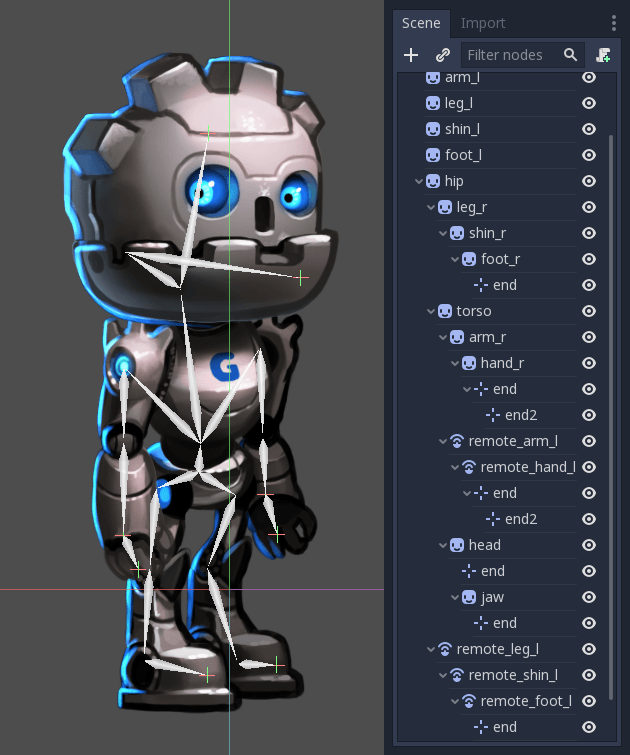
Finally! the whole skeleton is rigged! On close look, it is noticeable that there is a second set of endpoints in the hands. This will make sense soon.
Now that a whole skeleton is rigged, the next step is setting up the IK chains. IK chains allow for more natural control of extremities.
IK chains
IK chains are a powerful animation tool. Imagine you want to pose a character’s foot in a specific position on the ground. Without IK chains, each motion of the foot would require rotating and positioning several other bones. This would be quite complex and lead to imprecise results.
What if we could move the foot and let the rest of the leg self-adjust?
This type of posing is called IK (Inverse Kinematic).
To create an IK chain, simply select a chain of bones from endpoint to the base for the chain. For example, to create an IK chain for the right leg, select the following:
Then enable this chain for IK. Go to Edit > Make IK Chain.
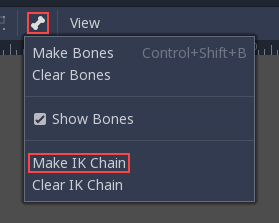
As a result, the base of the chain will turn Yellow.
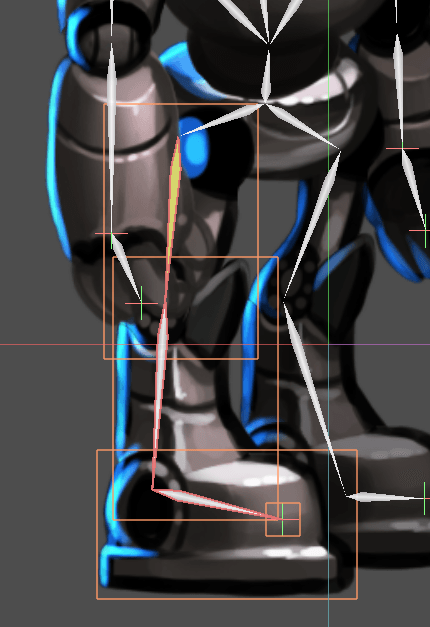
Once the IK chain is set-up, simply grab any of the bones in the extremity, any child or grand-child of the base of the chain and try to grab it and move it. Result will be pleasant, satisfaction warranted!
Animation
The following section will be a collection of tips for creating animation for your rigs. If unsure about how the animation system in Godot works, refresh it by checking again the Animations.
2D animation
When doing animation in 2D, a helper will be present in the top menu. This helper only appears when the animation editor window is opened:
The key button will insert location/rotation/scale keyframes to the selected objects or bones. This depends on the mask enabled. Green items will insert keys while red ones will not, so modify the key insertion mask to your preference.
Rest pose
These kind of rigs do not have a “rest” pose, so it’s recommended to create a reference rest pose in one of the animations.
Simply do the following steps:
- Make sure the rig is in “rest” (not doing any specific pose).
- Create a new animation, rename it to “rest”.
- Select all nodes (box selection should work fine).
- Select “loc” and “rot” on the top menu.
- Push the key button. Keys will be inserted for everything, creating a default pose.

Rotation
Animating these models means only modifying the rotation of the nodes. Location and scale are rarely used, with the only exception of moving the entire rig from the hip (which is the root node).
As a result, when inserting keys, only the “rot” button needs to be pressed most of the time:

This will avoid the creation of extra animation tracks for the position that will remain unused.
Keyframing IK
When editing IK chains, it is not necessary to select the whole chain to add keyframes. Selecting the endpoint of the chain and inserting a keyframe will automatically insert keyframes until the chain base too. This makes the task of animating extremities much simpler.
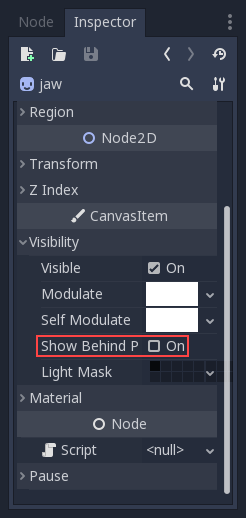
Moving sprites above and behind others.
RemoteTransform2D works in most cases, but sometimes it is necessary to have a node above and below others during an animation. To aid on this the “Behind Parent” property exists on any Node2D:
Batch setting transition curves
When creating complex animations and inserting many keyframes, editing the individual keyframe curves for each can become an endless task. For this, the Animation Editor has a small menu where changing animation curves is easy. First select the appropriate keys. Next click on the pencil icon in the bottom right of the animation panel, this will open the transition editor. Now click on one of the curve options most appropriate for your animation.
