Viewports
Introduction
Think of Viewports as a screen that the game is projected onto. In order to see the game we need to have a surface to draw it on, this surface is the Root Viewport.
Viewports can also be added to the scene so that there are multiple surfaces to draw on. When we are drawing to a Viewport that is not the Root we call it a render target. We can access the contents of a render target by accessing its corresponding texture. By using a Viewport as a render target we can either render multiple scenes simultaneously or we can render to a texture which is applied to an object in the scene, for example a dynamic skybox.
Viewports have a variety of use cases including:
- Rendering 3d objects within a 2d game
- Rendering 2d elements in a 3d game
- Rendering dynamic textures
- Generating procedural textures at runtime
- Rendering multiple cameras in the same scene
What all these use cases have in common is that you are given the ability to draw objects to a texture as if it were another screen and then you can choose what to do with the resulting texture.
Input
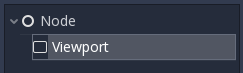
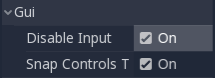
Viewports are also responsible for delivering properly adjusted and scaled input events to all their children nodes. Typically input is received by the nearest Viewport in the tree, but you can set Viewports to not recieve input by checking ‘Disable Input’ to ‘on’, this will allow the next nearest Viewport in the tree to capture the input.
For more information on how Godot handles input please read the Input Event Tutorial.
Listener
Godot supports 3D sound (in both 2D and 3D nodes), more on this can be found in the Audio Streams Tutorial. For this type of sound to be audible, the Viewport needs to be enabled as a listener (for 2D or 3D). If you are using a custom Viewport to display your World, don’t forget to enable this!
Cameras (2D & 3D)
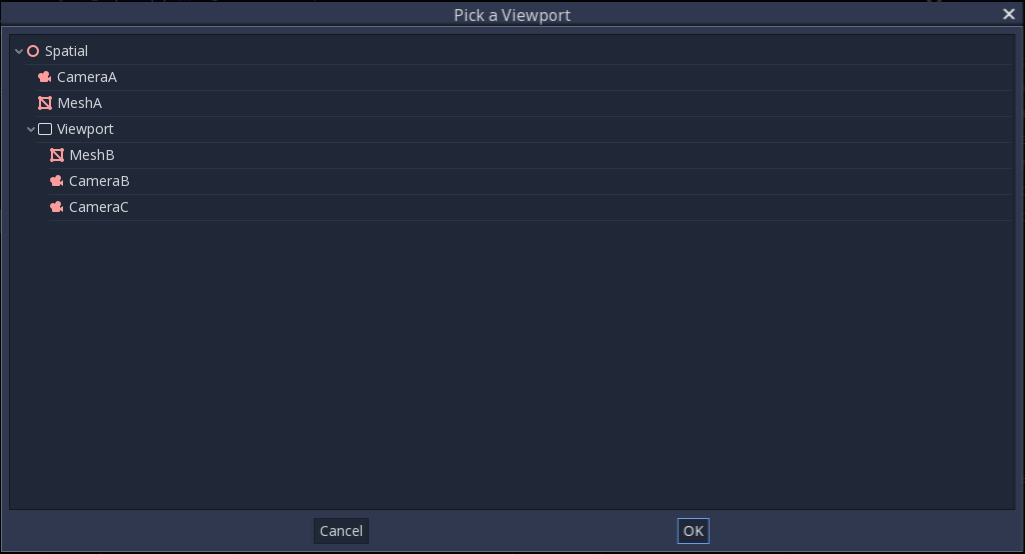
When using a Camera / Camera2D, cameras will always display on the closest parent Viewport (going towards the root). For example, in the following hierarchy:
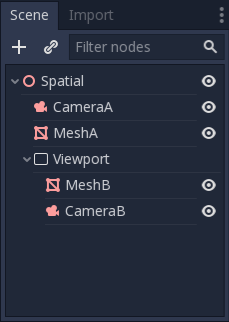
CameraA will display on the Root Viewport and it will draw MeshA. CameraB will be captured by the Viewport Node along with MeshB. Even though MeshB is in the scene heirarchy, it will still not be drawn to the Root Viewport. Similarly MeshA will not be visible from the Viewport node becuase Viewport nodes only capture nodes below them in the heirarchy.
There can only be one active camera per Viewport, so if there is more than one, make sure that the desired one has the “current” property set, or make it the current camera by calling:
camera.make_current()
Scale & stretching
Viewports have a “size” property which represents the size of the Viewport in pixels. For Viewports which are children of ViewportContainers, these values are overridden, but for all others this sets their resolution.
It is also possible to scale the 2D content and make the Viewport resolution different than the one specified in size, by calling:
viewport.set_size_override(w, h) # custom size for 2D
viewport.set_size_override_stretch(true) # enable stretch for custom size
The root Viewport uses this for the stretch options in the project settings. For more information on scaling and stretching visit the Multiple Resolutions Tutorial
Worlds
For 3D, a Viewport will contain a World. This is basically the universe that links physics and rendering together. Spatial-base nodes will register using the World of the closest Viewport. By default, newly created Viewports do not contain a World but use the same as their parent Viewport (root Viewport always contains a World, which is the one objects are rendered to by default). A World can be set in a Viewport using the “world” property, and that will separate all children nodes of that Viewport from interacting with the parent Viewport’s World. This is especially useful in scenarios where, for example, you might want to show a separate character in 3D imposed over the game (like in Starcraft).
As a helper for situations where you want to create Viewports that display single objects and don’t want to create a World, Viewport has the option to use its own World. This is useful when you want to instance 3D characters or objects in a 2D World.
For 2D, each Viewport always contains its own World2D. This suffices in most cases, but in case sharing them may be desired, it is possible to do so by setting the Viewport’s World2D manually.
For an example of how this works see the demo projects 3D in 2D and 2D in 3D respectively.
Capture
It is possible to query a capture of the Viewport contents. For the root Viewport this is effectively a screen capture. This is done with the following code:
# Retrieve the captured Image using get_data()
var img = get_viewport().get_texture().get_data()
# Flip on the y axis
# You can also set "V Flip" to true if not on the Root Viewport
img.flip_y()
# Convert Image to ImageTexture
var tex = ImageTexture.new()
tex.create_from_image(img)
# Set Sprite Texture
$sprite.texture = tex
But if you use this in _ready() or from the first frame of the Viewport’s initialization you will get an empty texture cause there is nothing to get as texture. You can deal with it using (for example):
# Let two frames pass to make sure the screen can be captured
yield(get_tree(), "idle_frame")
yield(get_tree(), "idle_frame")
# You can get the image after this
If the returned image is empty, capture still didn’t happen, wait a little more, as Godot’s rendering API is asynchronous. For a working example of this check out the Screen Capture example in the demo projects
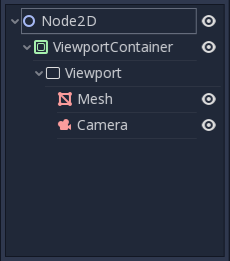
Viewport Container
If the Viewport is a child of a ViewportContainer, it will become active and display anything it has inside. The layout looks like this:
The Viewport will cover the area of its parent ViewportContainer completely if stretch is set to true in ViewportContainer. Note: The size of the ViewportContainer cannot be smaller than the size of the Viewport.
Rendering
Due to the fact that the Viewport is an entryway into another rendering surface, it exposes a few rendering properties that can be different from the project settings. The first is MSAA, you can choose to use a different level of MSAA for each Viewport, the default behavior is DISABLED. You can also set the Viewport to use HDR, HDR is very useful for when you want to store values in the texture that are outside the range 0.0 - 1.0.
If you know how the Viewport is going to be used, you can set its Usage to either 3D or 2D. Godot will then restrict how the Viewport is drawn to in accordance with your choice, default is 3D.
Godot also provides a way of customizing how everything is drawn inside Viewports using “Debug Draw”. Debug Draw allows you to specify one of four options for how the Viewport will display things drawn inside it. Debug Draw is disabled by default.
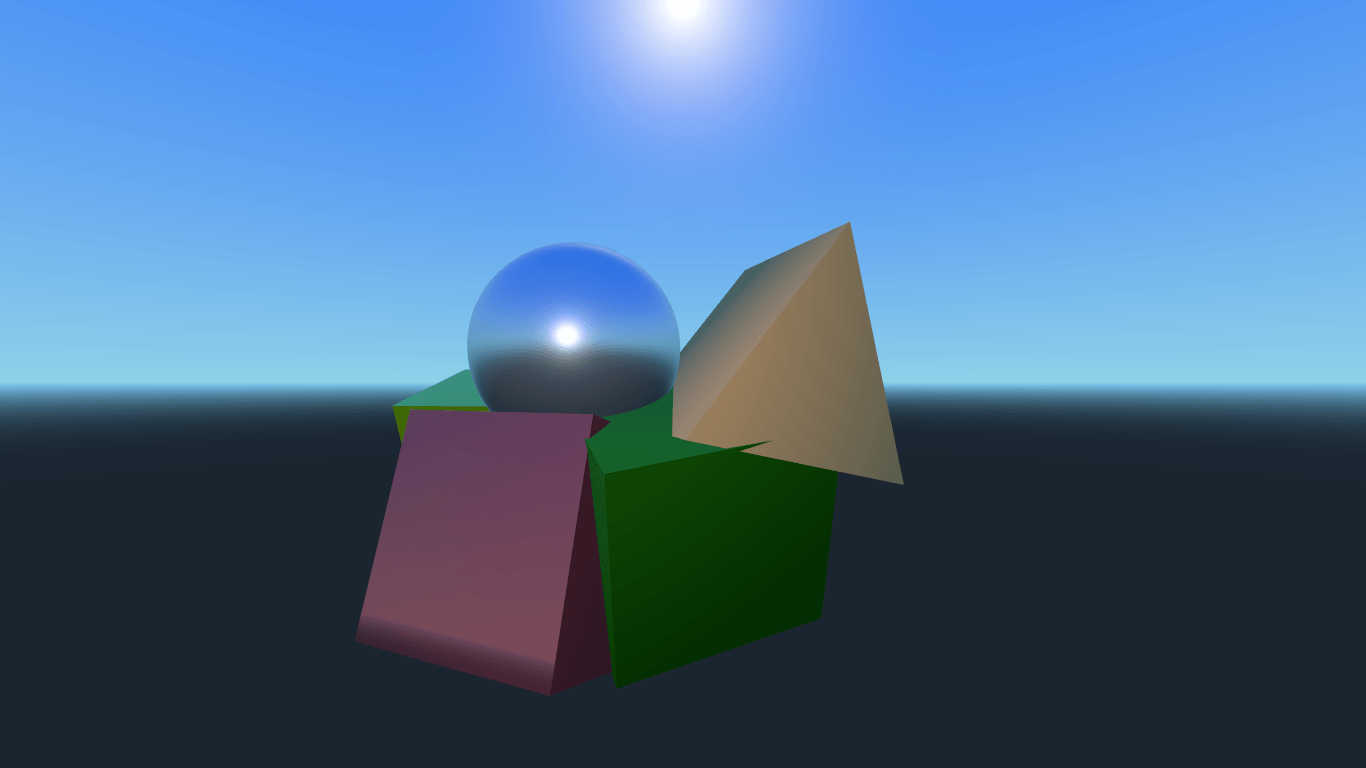
A scene drawn with Debug Draw disabled
The other three options are Unshaded, Overdraw, and Wireframe. Unshaded draws the scene without using lighting information so all the objects appear flatly colored the color of their albedo.
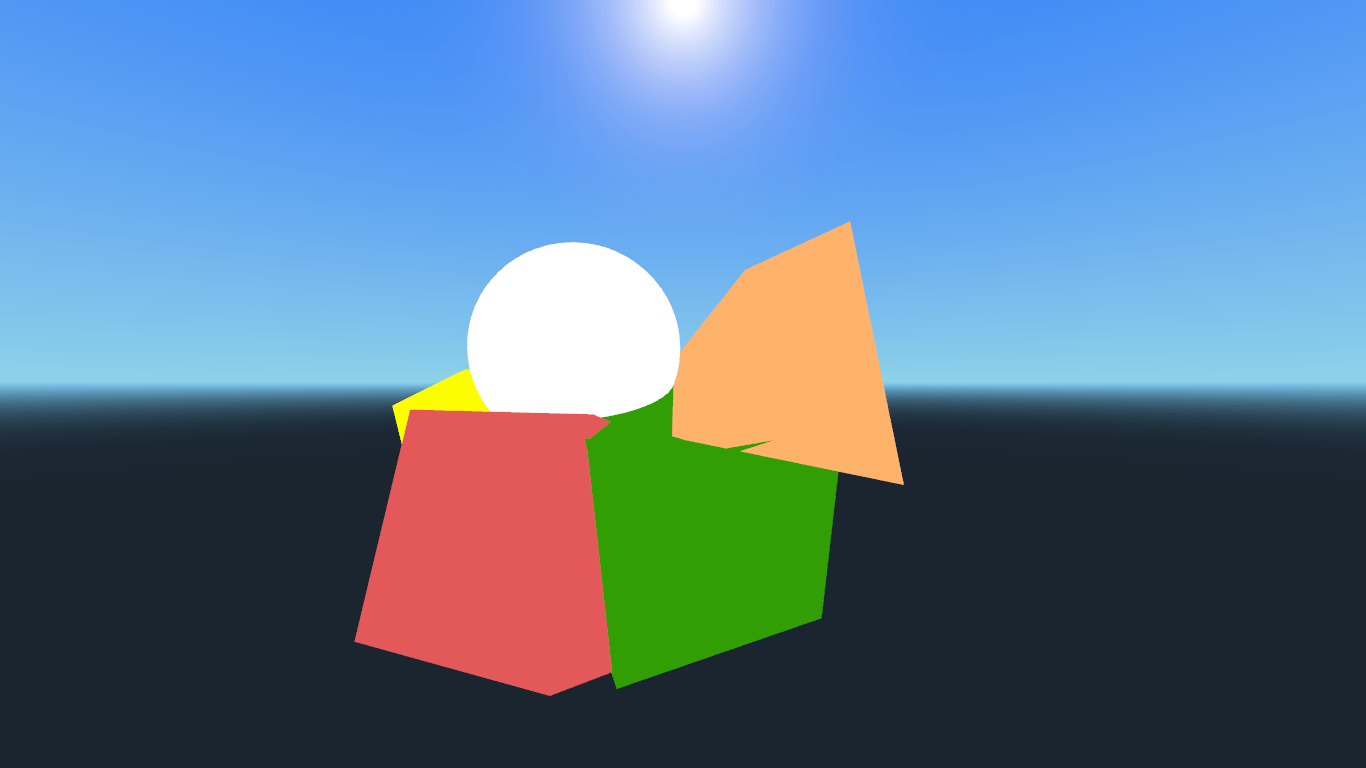
The same scene with Debug Draw set to Unshaded
Overdraw draws the meshes semi-transparent with an additive blend so you can see how the meshes overlap.

The same scene with Debug Draw set to Overdraw
Lastly, Wireframe draws the scene using only the edges of triangles in the meshes. NOTE: as of the writting of this (v3.0.2) wireframe is broken and currently just renders the scene normally.
Render target
When rendering to a Viewport whatever is inside will not be visible in the scene editor. To display the contents, you have to draw the Viewport’s ViewportTexture somewhere. This can be requested via code using (for example):
#This gets us the  ViewportTexture
var rtt = viewport.get_texture()
sprite.texture = rtt
Or it can be assigned in the editor by selecting “New ViewportTexture”
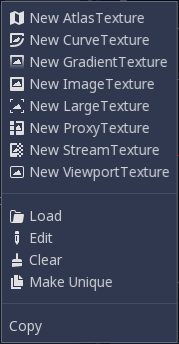
and then selecting the Viewport you want to use.
Every frame the Viewport’s texture is cleared away with the default clear color (or a transparent color if Transparent BG is set to true). This can be changed by setting Clear Mode to Never or Next Frame. As the name implies, Never means the texture will never be cleared while next frame will clear the texture on the next frame and then set itself to Never.
By default, re-rendering of the Viewport happens when the Viewport’s ViewportTexture has been drawn in a frame. If visible, it will be rendered, otherwise it will not. This behavior can be changed to manual rendering (once), or always render, no matter if visible or not. This flexibility allows users to render an image once and then use the texture without incurring the cost of rendering every frame.
Make sure to check the Viewport demos! Viewport folder in the demos archive available to download, or https://github.com/godotengine/godot-demo-projects/tree/master/viewport