Attention: Here be dragons
This is the latest
(unstable) version of this documentation, which may document features
not available in or compatible with released stable versions of Godot.
Checking the stable version of the documentation...
Singletons (Autoload)
Introdução
O sistema de cenas de Godot, embora poderoso e flexível, tem uma desvantagem: não existe um método para armazenar informações (por exemplo, pontuação ou inventário de um jogador) que seja necessário em mais de uma cena.
É possível resolver isso com algumas soluções alternativas, mas elas vêm com suas próprias limitações:
Embora seja possível que uma cena carregue e descarregue outras cenas como seus filhos para armazenar informações comuns a essas cenas filhas, não será mais possível executar essas cenas sozinhas e esperar que elas funcionem corretamente.
Information can be stored to disk in
user://and then loaded by scenes that require it, but frequently saving and loading data is cumbersome and may be slow.
O padrão Singleton é uma ferramenta útil para se usar quando é necessário armazenar informações entre cenas. No nosso caso é possível reusar a mesma cena ou classe para múltiplos singletons, contanto que eles tenham diferentes nomes.
Usando esse conceito, você pode criar objetos que:
São sempre carregados, independentemente da cena em execução.
Pode armazenar variáveis globais, como informações do jogador.
Pode lidar com troca de cenas e transições entre cenas.
Atua como um singleton, já que o GDScript não suporta variáveis globais por projeto.
Carregamento automático de nós e scripts atendem a essa necessidade.
Nota
Godot won't make an Autoload a "true" singleton as per the singleton design pattern. It may still be instanced more than once by the user if desired.
Dica
If you're creating an autoload as part of an editor plugin, consider registering it automatically in the Project Settings when the plugin is enabled.
Autoload
You can create an Autoload to load a scene or a script that inherits from Node.
Nota
When autoloading a script, a Node will be created and the script will be attached to it. This node will be added to the root viewport before any other scenes are loaded.
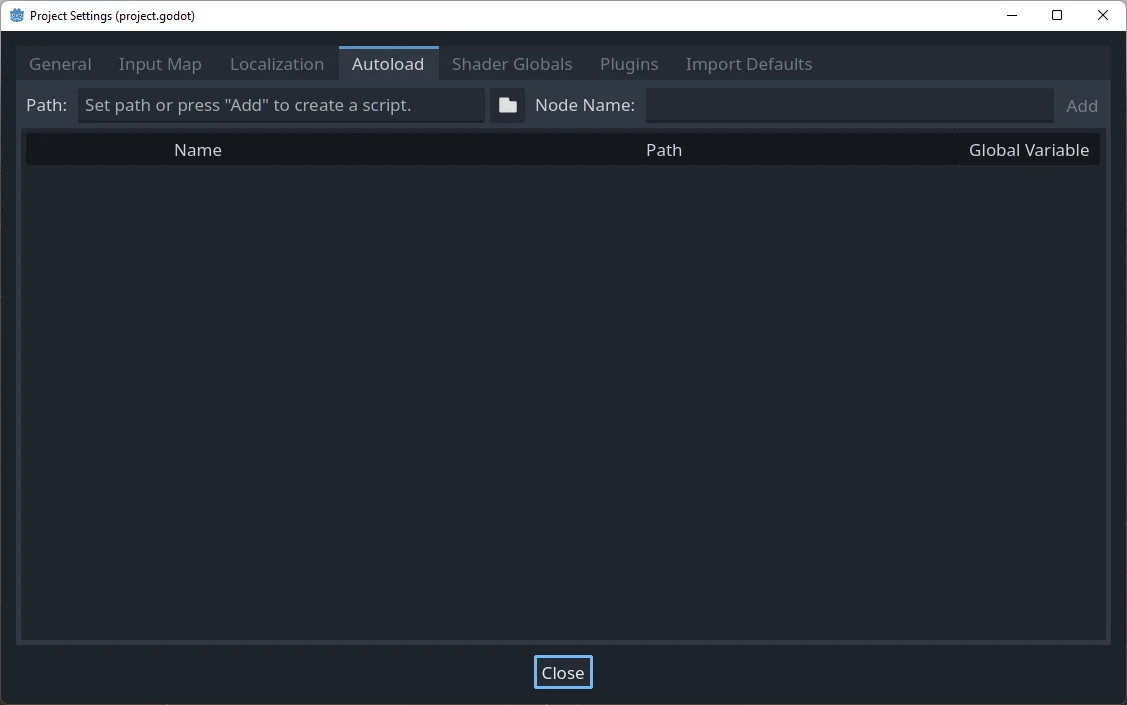
To autoload a scene or script, start from the menu and navigate to Project > Project Settings > Globals > Autoload.
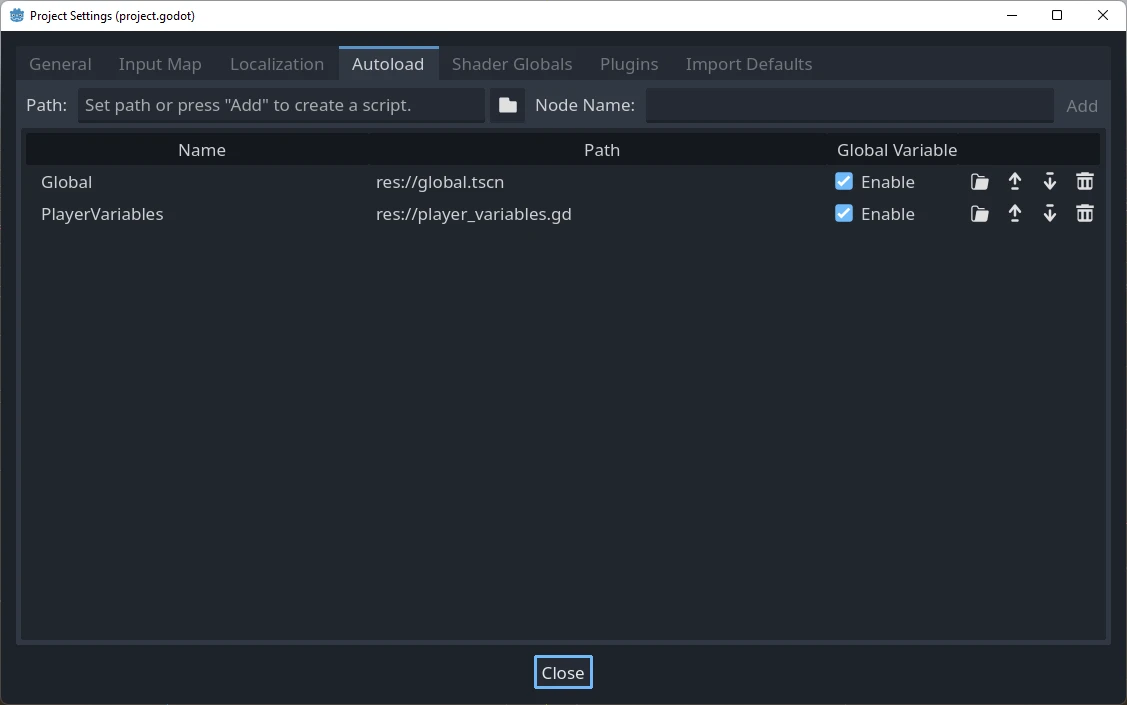
Aqui você pode adicionar qualquer número de cenas ou roteiros. Cada entrada na lista requer um nome, que é atribuído como propriedade do nó name. A ordem das entradas à medida que são adicionadas à árvore de cena global pode ser manipulada utilizando as teclas de seta para cima/baixo. Como nas cenas normais, o engine lerá estes nós em ordem de cima para baixo.
If the Enable column is checked (which is the default), then the singleton can be accessed directly in GDScript:
PlayerVariables.health -= 10
The Enable column has no effect in C# code. However, if the singleton is a
C# script, a similar effect can be achieved by including a static property
called Instance and assigning it in _Ready():
public partial class PlayerVariables : Node
{
    public static PlayerVariables Instance { get; private set; }

    public int Health { get; set; }

    public override void _Ready()
    {
        Instance = this;
    }
}
This allows the singleton to be accessed from C# code without GetNode() and
without a typecast:
PlayerVariables.Instance.Health -= 10;
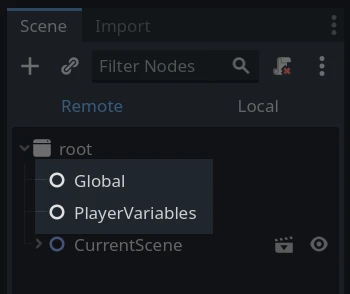
Note que objetos carregados automaticamente (scripts e/ou cenas) são acessadas como qualquer outro nó na árvore de cenas. Se você olhar numa cena executando, você verá os nós carregados automaticamente aparecerem:
Aviso
Autoloads must not be removed using free() or queue_free() at
runtime, or the engine will crash.
Comutador de cena personalizado
This tutorial will demonstrate building a scene switcher using autoloads. For basic scene switching, you can use the SceneTree.change_scene_to_file() method (see Usando Árvore de cena for details). However, if you need more complex behavior when changing scenes, this method provides more functionality.
To begin, download the template from here: singleton_autoload_starter.zip and open it in Godot.
Uma janela notificando que o projeto foi aberto pela última vez em uma versão anterior do Godot pode aparecer — isso não é um problema. Clique em Ok para abrir o projeto.
The project contains two scenes: scene_1.tscn and scene_2.tscn. Each
scene contains a label displaying the scene name and a button with its
pressed() signal connected. When you run the project, it starts in
scene_1.tscn. However, pressing the button does nothing.
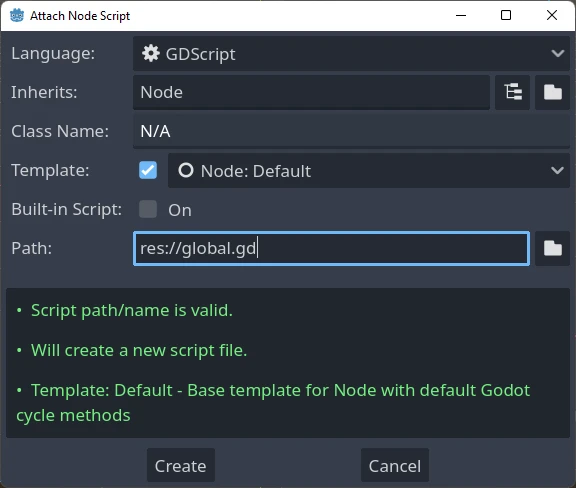
Creating the script
Open the Script window and create a new script called global.gd.
Make sure it inherits from Node:
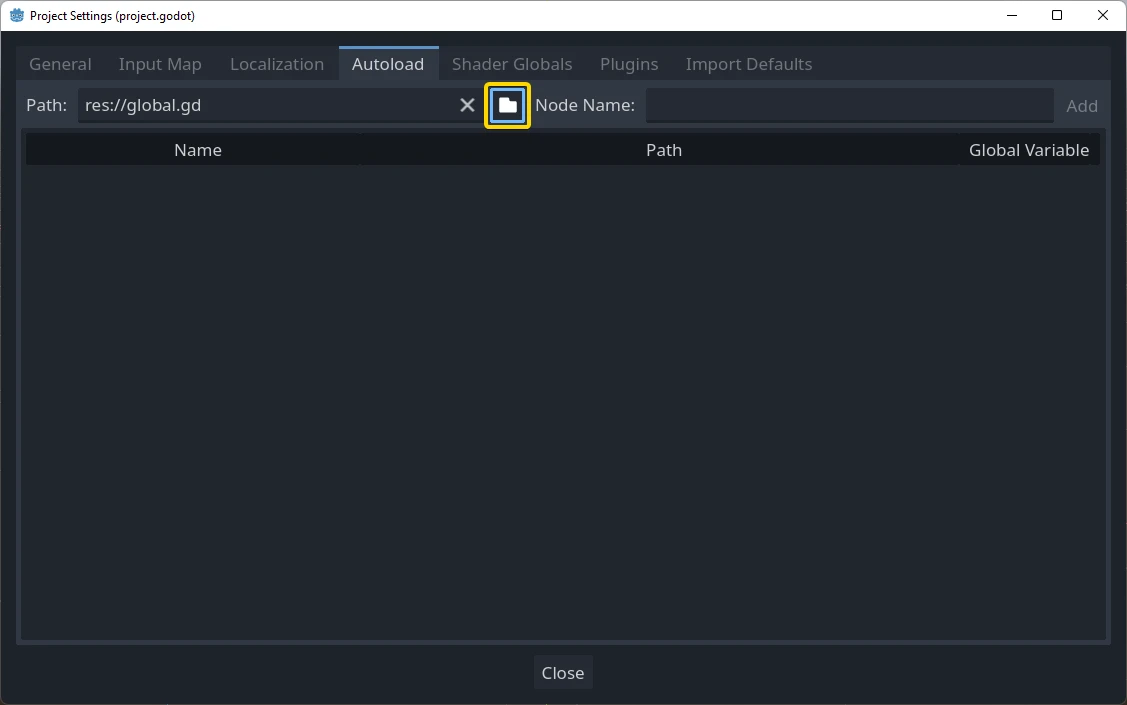
The next step is to add this script to the autoload list.
Starting from the menu, open
Project > Project Settings > Globals > Autoload and
select the script by clicking the browse button or typing its path:
res://global.gd. Press Add to add it to the autoload list
and name it "Global", which is required for scripts to access it
by the name "Global":
Agora, todas as vezes que você executar qualquer uma das suas cenas, o script sempre será carregado.
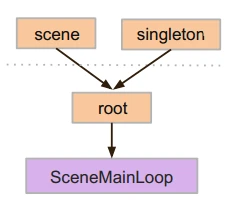
Returning to the script, it needs to fetch the current scene in the
_ready() function. Both the current scene (the one with the button) and
global.gd are children of root, but autoloaded nodes are always first. This
means that the last child of root is always the loaded scene.
extends Node

var current_scene = null

func _ready():
    var root = get_tree().root
    # Using a negative index counts from the end, so this gets the last child node of `root`.
    current_scene = root.get_child(-1)
using Godot;

public partial class Global : Node
{
    public Node CurrentScene { get; set; }

    public override void _Ready()
    {
        Viewport root = GetTree().Root;
        // Using a negative index counts from the end, so this gets the last child node of `root`.
        CurrentScene = root.GetChild(-1);
    }
}
Em seguida vem a função para trocar de cena. Esta função libera a cena atual e a substitui pela cena requisitada.
func goto_scene(path):
    # This function will usually be called from a signal callback,
    # or some other function in the current scene.
    # Deleting the current scene at this point is
    # a bad idea, because it may still be executing code.
    # This will result in a crash or unexpected behavior.

    # The solution is to defer the load to a later time, when
    # we can be sure that no code from the current scene is running:

    _deferred_goto_scene.call_deferred(path)


func _deferred_goto_scene(path):
    # It is now safe to remove the current scene.
    current_scene.free()

    # Load the new scene.
    var s = ResourceLoader.load(path)

    # Instance the new scene.
    current_scene = s.instantiate()

    # Add it to the active scene, as child of root.
    get_tree().root.add_child(current_scene)

    # Optionally, to make it compatible with the SceneTree.change_scene_to_file() API.
    get_tree().current_scene = current_scene
public void GotoScene(string path)
{
    // This function will usually be called from a signal callback,
    // or some other function from the current scene.
    // Deleting the current scene at this point is
    // a bad idea, because it may still be executing code.
    // This will result in a crash or unexpected behavior.

    // The solution is to defer the load to a later time, when
    // we can be sure that no code from the current scene is running:

    CallDeferred(MethodName.DeferredGotoScene, path);
}

public void DeferredGotoScene(string path)
{
    // It is now safe to remove the current scene.
    CurrentScene.Free();

    // Load a new scene.
    var nextScene = GD.Load<PackedScene>(path);

    // Instance the new scene.
    CurrentScene = nextScene.Instantiate();

    // Add it to the active scene, as child of root.
    GetTree().Root.AddChild(CurrentScene);

    // Optionally, to make it compatible with the SceneTree.change_scene_to_file() API.
    GetTree().CurrentScene = CurrentScene;
}
Usando Object.call_deferred(), a segunda função irá somente rodar uma vez que todo o código dessa cena has completed. Thus, the current scene will not be removed while it is still being used (i.e. its code is still running).
Finalmente, tudo que resta é completar as funções vazias nas duas cenas:
# Add to 'scene_1.gd'.

func _on_button_pressed():
    Global.goto_scene("res://scene_2.tscn")
// Add to 'Scene1.cs'.

private void OnButtonPressed()
{
    var global = GetNode<Global>("/root/Global");
    global.GotoScene("res://Scene2.tscn");
}
e
# Add to 'scene_2.gd'.

func _on_button_pressed():
    Global.goto_scene("res://scene_1.tscn")
// Add to 'Scene2.cs'.

private void OnButtonPressed()
{
    var global = GetNode<Global>("/root/Global");
    global.GotoScene("res://Scene1.tscn");
}
Rode o projeto e veja se você consegue trocar de cena apertando o botão.
Nota
Quando as cenas são pequenas, a transição é instantânea. No entanto, se suas cenas forem mais complexas, elas podem demorar um pouco para aparecer. Para aprender como lidar com isso, veja o próximo tutorial: Carregamento em segundo plano.
Alternativamente, se o tempo de carregamento é relativamente curto (menos que 3 segundos ou por aí), você pode exibir uma "placa de carregamento" mostrando algum tipo de elemento 2D logo antes de trocar a cena. Você pode, então, escondê-lo logo após a cena ser trocada. Isto pode ser usado para indicar ao jogador que uma cena está sendo carregada.