Attention: Here be dragons
This is the latest
(unstable) version of this documentation, which may document features
not available in or compatible with released stable versions of Godot.
Checking the stable version of the documentation...
プログラムでプレイヤーを動かす
いよいよコーディングです。前編で作成した入力アクションを使って、キャラクターを動かしていきます。
注釈
このプロジェクトでは、Godotの命名規則に従います。
GDScript: クラス(ノード)はPascalCaseを使用し、変数と関数はsnake_caseを使用し、定数はALL_CAPSを使用します(GDScriptスタイルガイドを参照)。
C#: クラス、export変数、メソッドはPascalCaseを使用し、プライベートフィールドは _camelCase を使用し、ローカル変数とパラメーターは camelCase を使用します(C# スタイルガイドを参照)。シグナルを接続するときは、メソッド名を正確に入力してください。
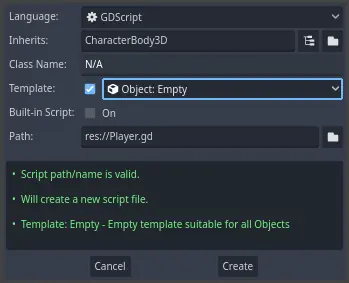
新しいスクリプトを追加するために、 Player ノードを右クリックし、 スクリプトをアタッチ… (Attach Script)を選択します。「ノードにスクリプトをアタッチする」ポップアップ画面で、 テンプレート (Template)横のチェックボックスをオフにし、テンプレートを 空 (Empty)にセットしてから 作成 (Create)ボタンを押してください。
まず、このクラスのプロパティから始めましょう。移動速度(speed)、重力を表す落下加速度(gravity)、そしてキャラクターを移動させるのに使う速度(velocity)を定義していきます。
extends CharacterBody3D

# How fast the player moves in meters per second.
@export var speed = 14
# The downward acceleration when in the air, in meters per second squared.
@export var fall_acceleration = 75

var target_velocity = Vector3.ZERO
using Godot;

public partial class Player : CharacterBody3D
{
    // Don't forget to rebuild the project so the editor knows about the new export variable.

    // How fast the player moves in meters per second.
    [Export]
    public int Speed { get; set; } = 14;
    // The downward acceleration when in the air, in meters per second squared.
    [Export]
    public int FallAcceleration { get; set; } = 75;

    private Vector3 _targetVelocity = Vector3.Zero;
}
これらは移動する物体に共通するプロパティです。 target_velocity は、速度と方向を組み合わせた 3Dベクトル です。ここでは、フレーム間で値を更新して再利用したいので、プロパティとして定義しています。
注釈
距離はメートル単位なので、2D コードとは値がかなり異なります。2D では、1000単位(ピクセル)は画面の幅の半分にしか相当しませんが、3D では 1km になります。
それでは、移動をコーディングしていきましょう。まず、グローバルな Input オブジェクトを使って、 _physics_process() 内で入力方向ベクトルを計算するところから始めます。
func _physics_process(delta):
    # We create a local variable to store the input direction.
    var direction = Vector3.ZERO

    # We check for each move input and update the direction accordingly.
    if Input.is_action_pressed("move_right"):
        direction.x += 1
    if Input.is_action_pressed("move_left"):
        direction.x -= 1
    if Input.is_action_pressed("move_back"):
        # Notice how we are working with the vector's x and z axes.
        # In 3D, the XZ plane is the ground plane.
        direction.z += 1
    if Input.is_action_pressed("move_forward"):
        direction.z -= 1
public override void _PhysicsProcess(double delta)
{
    // We create a local variable to store the input direction.
    var direction = Vector3.Zero;

    // We check for each move input and update the direction accordingly.
    if (Input.IsActionPressed("move_right"))
    {
        direction.X += 1.0f;
    }
    if (Input.IsActionPressed("move_left"))
    {
        direction.X -= 1.0f;
    }
    if (Input.IsActionPressed("move_back"))
    {
        // Notice how we are working with the vector's X and Z axes.
        // In 3D, the XZ plane is the ground plane.
        direction.Z += 1.0f;
    }
    if (Input.IsActionPressed("move_forward"))
    {
        direction.Z -= 1.0f;
    }
}
ここでは _process() の代わりに _physics_process() を使用してすべての計算を行います。これは運動学や剛体の移動などの物理関連のコード専用に設計されています。これは一定の時間間隔でノードを更新します。
参考
_process()と_physics_process()の違いについては、 アイドル処理と物理処理 を参照してください。
まず、direction変数を Vector3.ZEROに初期化することからはじめます。次に、プレイヤーがmove_*の入力を一つ以上押しているかどうかを確認し、ベクトルのx、z成分を適宜に更新します。これらの成分は地平面の軸に相当します。
この4つの条件は8つの可能性そして8つの可能な方向を与えます。
たとえば、プレイヤーが W と D の両方を同時に押した場合、ベクトルの長さは1.4程度になります。しかし、1 つのキーを押した場合は、1の長さになります。ベクトルの長さが一定であるようにしたいので、そのためにnormalized()メソッドを呼び出します。
func _physics_process(delta):
    #...

    if direction != Vector3.ZERO:
        direction = direction.normalized()
        # Setting the basis property will affect the rotation of the node.
        $Pivot.basis = Basis.looking_at(direction)
public override void _PhysicsProcess(double delta)
{
    // ...

    if (direction != Vector3.Zero)
    {
        direction = direction.Normalized();
        // Setting the basis property will affect the rotation of the node.
        GetNode<Node3D>("Pivot").Basis = Basis.LookingAt(direction);
    }
}
ここでは、方向が0より大きい長さを持つ場合、つまりプレイヤーが方向キーを押している場合にのみ、このベクトルを正規化(normalize)します。
$Pivot が向いている方向を、 direction 方向を向く Basis を生成することで計算します。
次に、速度(velocity)を更新します。地面での速度と落下速度を別々に計算する必要があります。字下げを1タブ戻し、プログラム行が_physics_process()関数の中にありつつ、上で書いた条件文の外にあるようにしてください。
func _physics_process(delta):
    #...
    if direction != Vector3.ZERO:
        #...

    # Ground Velocity
    target_velocity.x = direction.x * speed
    target_velocity.z = direction.z * speed

    # Vertical Velocity
    if not is_on_floor(): # If in the air, fall towards the floor. Literally gravity
        target_velocity.y = target_velocity.y - (fall_acceleration * delta)

    # Moving the Character
    velocity = target_velocity
    move_and_slide()
public override void _PhysicsProcess(double delta)
{
    // ...
    if (direction != Vector3.Zero)
    {
        // ...
    }

    // Ground velocity
    _targetVelocity.X = direction.X * Speed;
    _targetVelocity.Z = direction.Z * Speed;

    // Vertical velocity
    if (!IsOnFloor()) // If in the air, fall towards the floor. Literally gravity
    {
        _targetVelocity.Y -= FallAcceleration * (float)delta;
    }

    // Moving the character
    Velocity = _targetVelocity;
    MoveAndSlide();
}
CharacterBody3D.is_on_floor() 関数はオブジェクトが床と接触しているフレームで true の値を返します。そのため、 Player が空中にいる間だけ重力を適用すればよいのです。
垂直方向の速度については、毎フレーム落下加速度にデルタタイムを掛けたものを引きます。このコード行でキャラクターは床に乗るか接触していない間は毎フレーム落下するようになります。
物理エンジンは、移動および衝突が起こった場合にのみ、特定のフレームにおける壁、床、または他の物体との相互作用を検出することができます。 後でこのプロパティを使ってジャンプをコーディングします。
最後の行でCharacterBody3D.move_and_slide()を呼び出しています。これはCharacterBody3Dクラスの強力なメソッドで、キャラクターをスムーズに動かすことができます。動きの途中で壁にぶつかっても、エンジンがスムーズな動きにしようとします。これはCharacterBody3Dのvelocityの値を使用します
そして、これが床の上でキャラクターを動かすために必要なコードのすべてです。
参考までに、 player.gd の全体のコードを以下に示します。
extends CharacterBody3D

# How fast the player moves in meters per second.
@export var speed = 14
# The downward acceleration when in the air, in meters per second squared.
@export var fall_acceleration = 75

var target_velocity = Vector3.ZERO


func _physics_process(delta):
    var direction = Vector3.ZERO

    if Input.is_action_pressed("move_right"):
        direction.x += 1
    if Input.is_action_pressed("move_left"):
        direction.x -= 1
    if Input.is_action_pressed("move_back"):
        direction.z += 1
    if Input.is_action_pressed("move_forward"):
        direction.z -= 1

    if direction != Vector3.ZERO:
        direction = direction.normalized()
        # Setting the basis property will affect the rotation of the node.
        $Pivot.basis = Basis.looking_at(direction)

    # Ground Velocity
    target_velocity.x = direction.x * speed
    target_velocity.z = direction.z * speed

    # Vertical Velocity
    if not is_on_floor(): # If in the air, fall towards the floor. Literally gravity
        target_velocity.y = target_velocity.y - (fall_acceleration * delta)

    # Moving the Character
    velocity = target_velocity
    move_and_slide()
using Godot;

public partial class Player : CharacterBody3D
{
    // How fast the player moves in meters per second.
    [Export]
    public int Speed { get; set; } = 14;
    // The downward acceleration when in the air, in meters per second squared.
    [Export]
    public int FallAcceleration { get; set; } = 75;

    private Vector3 _targetVelocity = Vector3.Zero;

    public override void _PhysicsProcess(double delta)
    {
        var direction = Vector3.Zero;

        if (Input.IsActionPressed("move_right"))
        {
            direction.X += 1.0f;
        }
        if (Input.IsActionPressed("move_left"))
        {
            direction.X -= 1.0f;
        }
        if (Input.IsActionPressed("move_back"))
        {
            direction.Z += 1.0f;
        }
        if (Input.IsActionPressed("move_forward"))
        {
            direction.Z -= 1.0f;
        }

        if (direction != Vector3.Zero)
        {
            direction = direction.Normalized();
            // Setting the basis property will affect the rotation of the node.
            GetNode<Node3D>("Pivot").Basis = Basis.LookingAt(direction);
        }

        // Ground velocity
        _targetVelocity.X = direction.X * Speed;
        _targetVelocity.Z = direction.Z * Speed;

        // Vertical velocity
        if (!IsOnFloor()) // If in the air, fall towards the floor. Literally gravity
        {
            _targetVelocity.Y -= FallAcceleration * (float)delta;
        }

        // Moving the character
        Velocity = _targetVelocity;
        MoveAndSlide();
    }
}
プレイヤーの動きをテストする
これから、 Main のシーンにプレーヤーを置いてテストしてみましょう。そのためには、プレーヤーをインスタンス化し、カメラを追加する必要があります。2D とは異なり、3D では、ビューポートにカメラがない場合は何も見えません。
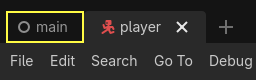
Player のシーンを保存し、 Main のシーンを開いてみてください。エディタ上部のMainタブをクリックすると開けます。
シーンを閉じていた場合は、ファイルシステム(FileSystem)ドックで、main.tscnをダブルクリックして再び開いてください。
Player をインスタンス化するには、 Main ノードを右クリックして、 子シーンをインスタンス化… (Instantiate Child Scene)を選択してください。
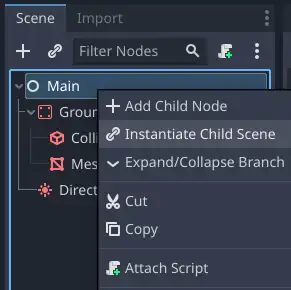
ポップアップウィンドウの中の、 Player.tscn をダブルクリックします。キャラクターがビューポートの中央に表示されるはずです。
カメラを追加する
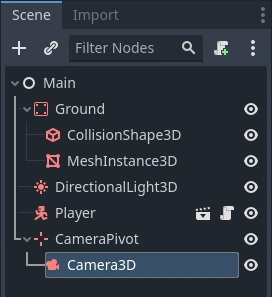
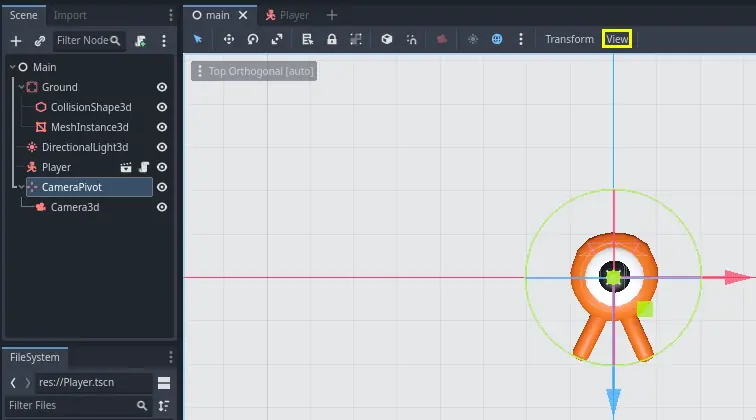
次にカメラを追加しましょう。PlayerのPivotで行ったように、基本的なリグを作成することにします。 Main ノードをもう一度右クリックし、今度は子ノードを追加(Add Child Node)を選択します。新しい Marker3D を作成し、それを CameraPivot と名づけてください。 CameraPivot を選択し、 Camera3D を子ノードとして追加してください。シーン ツリーは、次のようになります。
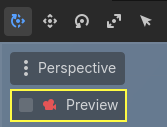
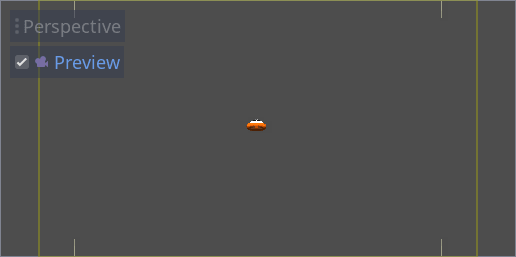
Cameraを選択しているとき3Dビューの左上に表示される プレビュー(Preview)チェック ボックスに注目してください。これをクリックすると、ゲーム内のカメラの投影をプレビューすることができます。
ここでは、Pivotを使用して、クレーンに乗っているかのようにカメラを回転させることにします。まず、3D ビューを分割して、シーンを自由に移動できるようにし、カメラが見ているものを確認できるようにしましょう。
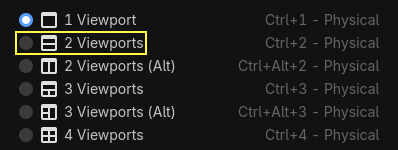
ビューポートのすぐ上のツールバーで、ビュー(View)、そして2 ビューポート(2 Viewports)をクリックしてください。また、Ctrl + 2 (macOSは Cmd + 2 )を押すことも可能です。
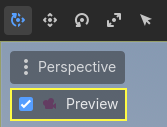
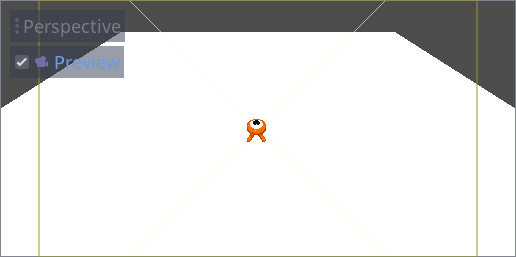
下部のビューで Camera3D を選択し、プレビューのチェックボックスをクリックしてカメラプレビューをオンにします。
上部のビューで、 Camera3D が選択されていることを確認し、カメラをZ軸方向に19ユニットほど移動させます(青い矢印をドラッグします)。
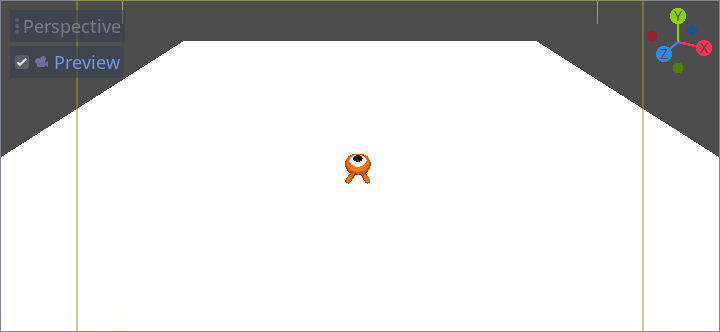
ここでマジックが起こります。CameraPivotを選択し、X 軸の周りで(赤い円を使用して)-45度回転させます。カメラがクレーンに取り付けられているように動くのがわかると思います。
You can run the scene by pressing F6 (Cmd + R on macOS) and press the arrow keys to move the character.
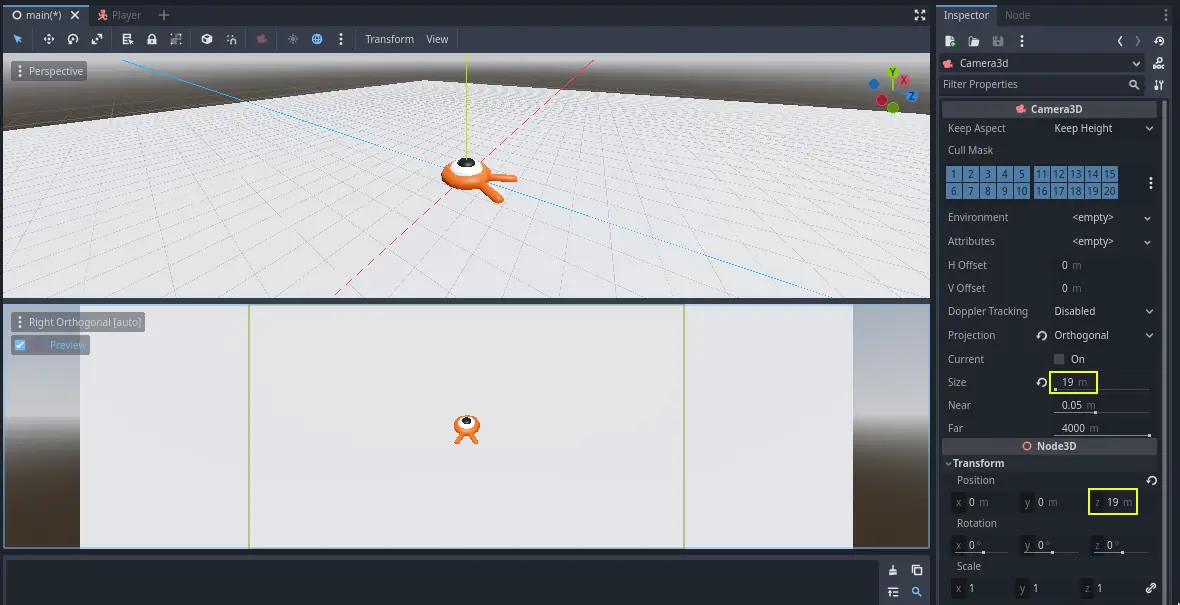
透視投影(Perspective)を使用しているため、キャラクターの周囲の何もない空間が見えています。このゲームでは、ゲームプレイエリアをより適切に枠に収め、プレイヤーが距離を読みやすくするために、代わりに平行投影(Orthographic)を使用することにします。
再びCameraを選択し、インスペクター(Inspector)で、Projectionを Orthogonalに、Sizeを19に設定します。これで、キャラクターはより平坦に見え、地面が背景を埋めるようになるはずです。
注釈
Godot 4 でオルソグラフィックカメラ(平行に投影するカメラ)を使用する場合、ディレクショナルライト(ライト1灯でシーン全体を照らすライト)のシャドウの品質はカメラの Far 値に依存します。 Far 値が高いほど、カメラはより遠くを見ることができます。ただし、 Far 値が高いほど、影のレンダリングがより長い距離をカバーする必要があるため、(カメラに近いシャドウマップのピクセルが拡大されてしまい)影の品質も低下します。
平行投影に切り替えた後、ディレクショナルシャドウがぼやけて見える場合は、カメラの Far プロパティを 100 などの低い値に下げてください。 Far プロパティを小さくしすぎないように注意してください。この Far プロパティの値を下げすぎると、遠くのオブジェクトが表示されなくなります。
シーンを実行してみましょう。8方向全てに移動ができ、床をすり抜けないことが確認できるはずです!
最終的に、プレイヤーの動きとビューの両方が整いました。次は、モンスターを作成していきます。