Attention: Here be dragons
This is the latest
(unstable) version of this documentation, which may document features
not available in or compatible with released stable versions of Godot.
Checking the stable version of the documentation...
MultiMeshInstance3D で千単位の魚をアニメーション化する
このチュートリアルでは、頂点アニメーションと静的メッシュインスタンス化を使用して何千もの魚をレンダリングおよびアニメーション化するために、ゲーム ABZU で使用されている手法について説明します。
Godot ではカスタム Shader と MultiMeshInstance3D を使用してこれを実現できます。次の手法を使用すると、ローエンドのハードウェアでも何千ものアニメーションオブジェクトをレンダリングできます。
まず、1匹の魚をアニメーション化することから始めます。次に、そのアニメーションを何千もの魚に拡張する方法を見ていきます。
1匹の魚のアニメーション
まずは1匹の魚から始めましょう。魚のモデルを MeshInstance3D に読み込み、新しい ShaderMaterial を追加します。
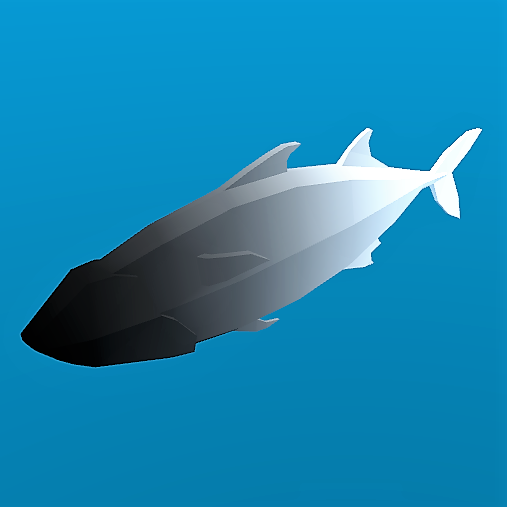
これがサンプル画像に使用する魚です。好きな魚モデルを使用できます。
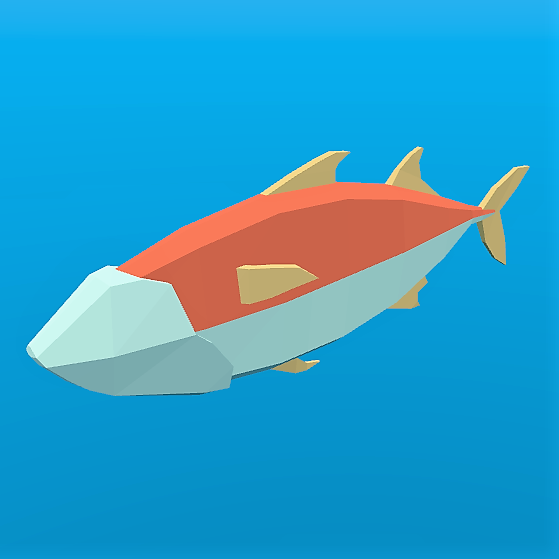
注釈
このチュートリアルの魚のモデルは QuaterniusDev によって作成され、クリエイティブコモンズ ライセンスで共有されています。CC0 1.0 ユニバーサル (CC0 1.0) パブリックドメイン提供 https://creativecommons.org/publicdomain/zero/1.0/
一般的にオブジェクトをアニメーションさせるには、ボーンと Skeleton3D を使用します。ただし、ボーンは CPU 上でアニメーションされるため、フレームごとに何千もの計算を行う必要があり、何千ものオブジェクトを持つことは難しくなります。代わりに頂点シェーダーでボーンを使用せずに頂点アニメーションすると、数行のコードでアニメーションを完全に GPU 上で計算することができます。
アニメーションは、4つのキーモーションで構成されます:
左右の動き
魚の中心の周を旋回する動き
揺ら揺らした波状の動き
揺ら揺らした捻る動き
アニメーションのすべてのコードは、モーションの量を制御するuniformを持つ頂点シェーダーにあります。uniformを使用してモーションの強さを制御するため、エディタでアニメーションを微調整し、シェーダーを再コンパイルせずにリアルタイムで結果を確認できます。
すべての動きは、モデル空間の VERTEX に適用されるコサイン波を使用して行われます。頂点がモデル空間にあるようにして、動きが常に魚の方向と相対的になるようにします。たとえば左右の動きは、魚をワールド方向の x 軸上ではなく、常に左から右の方向に動かします。
アニメーションの速度を制御するために、TIME を使用して独自の時間変数を定義することから始めます。
//time_scale is a uniform float
float time = TIME * time_scale;
実装する最初のモーションは、左右のモーションです。これは、VERTEX.x を TIME の cos でオフセットすることで作成できます。メッシュがレンダリングされるたびに、すべての頂点が cos(time) の量だけ横に移動します。
//side_to_side is a uniform float
VERTEX.x += cos(time) * side_to_side;
結果のアニメーションは次のようになります:
次に、ピボットを追加します。魚の中心は (0, 0) なので、魚の中心の周りを回転させるために、VERTEX に回転行列を掛けるだけで済みます。
次のような回転行列を作成します:
//angle is scaled by 0.1 so that the fish only pivots and doesn't rotate all the way around
//pivot is a uniform float
float pivot_angle = cos(time) * 0.1 * pivot;
mat2 rotation_matrix = mat2(vec2(cos(pivot_angle), -sin(pivot_angle)), vec2(sin(pivot_angle), cos(pivot_angle)));
そして、それを VERTEX.xz に乗算して x および z 軸に回転を適用します。
VERTEX.xz = rotation_matrix * VERTEX.xz;
ピボットのみを適用すると、次のように表示されます:
次の2つの動きは、魚の背骨をパンダウンする必要があります。そのためには、新しい変数 body が必要です。 body は、魚の尾が 0 、頭に 1 のfloatです。
float body = (VERTEX.z + 1.0) / 2.0; //for a fish centered at (0, 0) with a length of 2
次の動きは、魚の長さを下るコサイン波です。それを魚の背骨に沿って移動させるために、背骨に沿った位置で cos への入力をオフセットします。これは上で定義した変数 body です。
//wave is a uniform float
VERTEX.x += cos(time + body) * wave;
これは上で定義した左右の動きに非常に似ていますが、この例では、body を使用して cos をオフセットすることにより、脊椎に沿った各頂点が波の中で異なる位置を持ち、波は魚に沿って動いているように見えます。
最後の動きは捻りです。これは脊椎に沿ったパンロールです。ピボットと同様に、最初に回転行列を作成します。
//twist is a uniform float
float twist_angle = cos(time + body) * 0.3 * twist;
mat2 twist_matrix = mat2(vec2(cos(twist_angle), -sin(twist_angle)), vec2(sin(twist_angle), cos(twist_angle)));
魚が脊椎の周りを回転するように見えるように、 xy 軸に回転を適用します。これが機能するには、魚の脊椎を z 軸の中心に置く必要があります。
VERTEX.xy = twist_matrix * VERTEX.xy;
捻りが適用された魚は次のとおりです:
これらすべての動きを次々に適用すると、滑らかなゼリーのような動きが得られます。
通常の魚は主に体の後ろ半分で泳ぎます。したがって、パンの動きを魚の後ろ半分に制限する必要があります。これを行うために、新しい変数 mask を作成します。
mask は魚の頭の 0 から尾びれの先の 1 までのfloatです。 smoothstep を使用して 0 から 1 へ移行が起こるポイントを制御します。
//mask_black and mask_white are uniforms
float mask = smoothstep(mask_black, mask_white, 1.0 - body);
以下は mask を COLOR として使用した魚の画像です:
波については、動きに mask を掛けて、後ろ半分に制限します。
//wave motion with mask
VERTEX.x += cos(time + body) * mask * wave;
マスクを捻りに適用するには、 mix を使用します。 mix を使用すると、完全に回転した頂点と回転していない頂点の間で頂点の位置を混合できます。mask を回転した VERTEX で乗算するのではなく、 mix を使用する必要があります。これは VERTEX にモーションを追加しているのではなく、 VERTEX を回転バージョンで置き換えているからです。これを mask で乗算すると、魚が小さくなります。
//twist motion with mask
VERTEX.xy = mix(VERTEX.xy, twist_matrix * VERTEX.xy, mask);
4つのモーションを組み合わせると、最終的なアニメーションが作成されます。
さあ、魚の泳ぎ方を変えるためにunifomで遊んでください。これらの4つのモーションを使用して、さまざまな遊泳スタイルを作成できることがわかります。
魚の群れを作る
Godotでは MultiMeshInstance3D ノードを使用して、何千もの同じオブジェクトを簡単にレンダリングできます。
MultiMeshInstance3D ノードは、MeshInstance3D ノードを作成するのと同じ方法で作成および使用されます。このチュートリアルでは、魚の群れが含まれているため、MultiMeshInstance3D ノードに School という名前を付けます。
MultiMeshInstance3D を取得したら、 MultiMesh を追加し、その MultiMesh に上記のシェーダーを使用して Mesh を追加します。
MultiMeshは、インスタンスごとの3つの追加プロパティでメッシュを描画します: 幾何学変換(回転、移動、スケール)、色、およびカスタム。カスタムは、Color を使用して4つの多目的変数を渡すために使用されます。
instance_count は、描画するメッシュのインスタンスの数を指定します。とりあえず、instance_count が 0 より大きい間は他のパラメーターを変更できないため、instance_count を 0 のままにします。後でGDScriptで instance_count を設定します。
transform_format は、使用される変換が 3D か 2D かを指定します。このチュートリアルでは、3D を選択します。
color_format と custom_data_format の両方について、None、Byte、および Float から選択できます。None は、そのデータ (インスタンスごとの COLOR 変数または INSTANCE_CUSTOM のいずれか)をシェーダーに渡さないことを意味します。Byte は、渡す色を構成する各数値が8ビットで格納されることを意味し、Float は、各数値が浮動小数点数(32ビット)で格納されることを意味します。Float は低速ですが、より正確です。Byte はより少ないメモリで高速になりますが、視覚的なアーティファクトが見られることがあります。
さて、instance_count を持ちたい魚の数に設定してください。
次に、インスタンスごとのtransformを設定する必要があります。
MultiMesh のインスタンスごとの変換を設定する方法は 2 つあります。1 つ目は完全にエディター内で行う方法で、 MultiMeshInstance3D チュートリアル で説明されています。
2つ目は、すべてのインスタンスをループ処理し、コード内でそれらのtansformを設定することです。以下では、GDScriptを使用してすべてのインスタンスをループし、それらの変換をランダムな位置に設定します。
for i in range($School.multimesh.instance_count):
  var position = Transform3D()
  position = position.translated(Vector3(randf() * 100 - 50, randf() * 50 - 25, randf() * 50 - 25))
  $School.multimesh.set_instance_transform(i, position)
このスクリプトを実行すると、MultiMeshInstance3D の位置を囲むボックス内のランダムな位置に魚が配置されます。
注釈
パフォーマンスが問題になる場合は、魚の数を減らしてシーンを実行してみてください。
魚が泳ぐサイクルの中ですべて同じ位置にいるのに気づきましたか? まるでロボットのように見えます。次のステップでは、魚ごとに泳ぐサイクルの中で異なる位置を与えて、群れ全体がより有機的に見えるようにします。
魚の群れをアニメーションさせる
cos 関数を使用して魚をアニメーションさせる利点の1つは、1つのパラメーター time だけで可能だということです。それぞれの魚に遊泳サイクルのユニークな位置を与えるためには time をオフセットさせます。
インスタンスごとのカスタム値 INSTANCE_CUSTOM を time に加算することでそれを実現します。
float time = (TIME * time_scale) + (6.28318 * INSTANCE_CUSTOM.x);
次に、値を INSTANCE_CUSTOM に渡す必要があります。そのためには、上から for ループに1行追加します。for ループでは、各インスタンスに使用する4つのランダムフロートのセットを割り当てます。
$School.multimesh.set_instance_custom_data(i, Color(randf(), randf(), randf(), randf()))
今、魚はすべて遊泳サイクルでユニークな位置を持っています。INSTANCE_CUSTOM を使用して、TIME を掛けることでより速くまたは遅く泳ぐことで、彼らにもう少し個性を与えることができます。
//set speed from 50% - 150% of regular speed
float time = (TIME * (0.5 + INSTANCE_CUSTOM.y) * time_scale) + (6.28318 * INSTANCE_CUSTOM.x);
インスタンスごとのカスタム値を変更したのと同じ方法で、インスタンスごとの色の変更を試すこともできます。
この時点で遭遇する問題の1つは、魚はアニメーションされていますが、移動はしていないことです。フレームごとに各魚のインスタンスごとのtransformを更新することにより移動はできます。これを行うと、フレームごとに数千の MeshInstance3D を移動するよりは高速ですが、それでも遅くなる可能性があります。
次のチュートリアルでは、インスタンス化の利点を享受しながら、GPU を活用してそれぞれの魚を個別に移動させるために、GPUParticles3D を使用する方法について説明します。