Attention: Here be dragons
This is the latest
(unstable) version of this documentation, which may document features
not available in or compatible with released stable versions of Godot.
Checking the stable version of the documentation...
スコアとリプレイ
このパートでは、スコア表示、音楽再生、リプレイの機能を追加していきます。
現在のスコアを変数に記録し、最小限のインターフェイスで画面に表示する必要があります。そのためにテキストラベルを使うことにします。
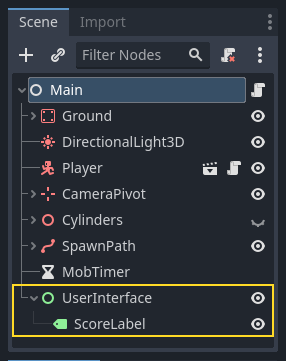
メインシーンで、新しい子ノードとして Control を Main に追加し、名前を UserInterface とします。UIを編集できる 2D の画面を表示していることを確認してください。
Label ノードを追加して、名前を ScoreLabel にします
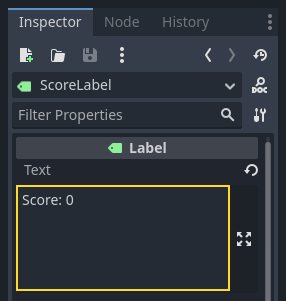
インスペクター (Inspector) で、 Label の Text に "Score: 0" というプレースホルダーを設定してください。
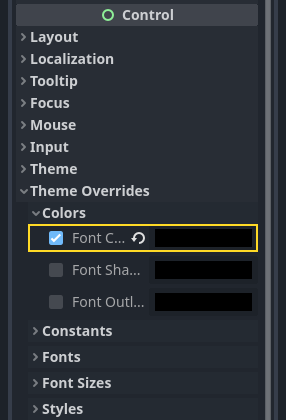
また、テキストはデフォルトではゲームの背景と同じ白です。ゲームを実行した時にテキストが見えるように、色を変更する必要があります。
Theme Overrides までスクロールダウンし、 Colors を展開し、 Font Color チェックボックスを有効にして、テキストを黒に設定しましょう(これで白い3Dシーンとのコントラストがハッキリしました)
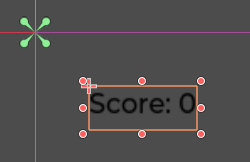
最後に、ビューポート内のテキストをクリック&ドラッグして、左上隅から離します。
UserInterface ノードを使うと、UIを シーン の中で1つのツリー状にまとめることができ、テーマリソースを使うことができます。この UserInterface ノードを使用して、ゲームのフォントを設定します。
UIテーマの作成
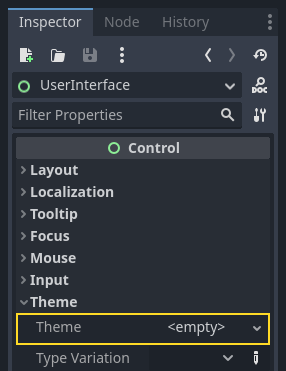
もう一度、 UserInterface ノードを選択してください。 インスペクター (Inspector)で、 Theme 項目を開き、 Theme 横の <空> (empty)をクリックして 新規Theme を選択して新しいテーマ・リソースを作成します。
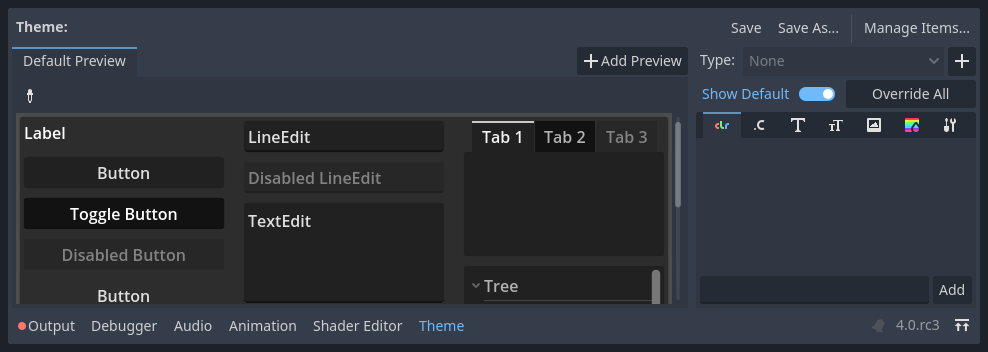
Theme をクリックすると、Godotの下のパネルにある テーマ というエディタが開きます(※ 開かない場合には、インスペクター内で先ほど追加した Theme 横のプルダウンから 編集 をクリックしても開きます)。 デフォルトのプレビュー 内では、既に用意されている全てのUIウィジェットがテーマリソースでどのように見えるか、プレビューを確認できます。
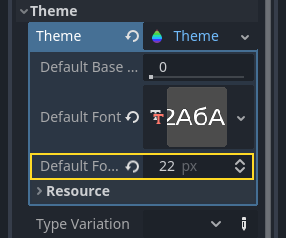
デフォルトでは、テーマにはプロパティが少ししかありません(『インスペクター』内をご覧ください): Default Base Scale (デフォルトのベーススケール)、 Default Font (デフォルトのフォント)、 Default Font Size (デフォルトのフォントサイズ)です。
参考
テーマリソースにさらにプロパティを追加して複雑なユーザーインターフェースを設計することもできますが、それはこのチュートリアルでは扱いません。テーマの作成と編集について詳しく知るには、 Introduction to GUI skinning を参照してください。
デフォルトフォント は、お使いのコンピュータに既にあるようなフォントファイルを想定しています。一般的なフォントファイルの形式は次の2種類あります。TrueTypeフォント(TTF)とOpenTypeフォント(OTF)です。
左下の ファイルシステム (FileSystem)ドックで fonts ディレクトリを展開し、プロジェクトに含まれている Montserrat-Medium.ttf ファイルを インスペクター ドックの Theme 内の Default Font の上までドラッグします。画面下の テーマ ドックの デフォルトのプレビュー 内のフォントが更新されます。
このままだと文字が少し小さいので、 Default Font Size (デフォルトのフォントサイズ) を 22 ピクセルに設定して、文字のサイズを大きくしてください。
スコアの記録
次にスコア表示に取りかかりましょう。新しいスクリプトを ScoreLabel にアタッチし、 score という変数を定義してください。
extends Label

var score = 0
using Godot;

public partial class ScoreLabel : Label
{
    private int _score = 0;
}
敵モンスターを踏んで倒すたびにスコアが 1 ずつ増えるように作ります。倒したイベントは squashed シグナルを使って検知できます。しかし、プログラムコードからモンスターをインスタンス化しているので、エディターを使ってモブキャラクターが送るシグナルを ScoreLabel に接続することはできません。
その代わりに、モンスターを出現させるたびにコードから接続する必要があります。
main.gd のスクリプトを開いてください。もしスクリプトファイルを開いたままでしたら、スクリプトエディタの左の列でファイル名をクリックして開くこともできます。
あるいは、 ファイルシステム (FileSystem)ドックにある main.gd ファイルをダブルクリックして開くこともできます。
そして _on_mob_timer_timeout() 関数の末尾に以下の行を追加してください:
func _on_mob_timer_timeout():
    #...
    # We connect the mob to the score label to update the score upon squashing one.
    mob.squashed.connect($UserInterface/ScoreLabel._on_mob_squashed.bind())
private void OnMobTimerTimeout()
{
    // ...
    // We connect the mob to the score label to update the score upon squashing one.
    mob.Squashed += GetNode<ScoreLabel>("UserInterface/ScoreLabel").OnMobSquashed;
}
この処理は、モブキャラクターが squashed シグナルを出力すると、 ScoreLabel ノードがそれを受け取り、 _on_mob_squashed() 関数を呼び出すという処理です。
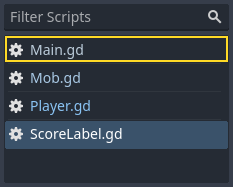
score_label.gd のスクリプトを再度開いて、呼び出される _on_mob_squashed() 関数を定義しましょう。
ここでスコアの得点を追加し、表示されているテキストを更新します。
func _on_mob_squashed():
    score += 1
    text = "Score: %s" % score
public void OnMobSquashed()
{
    _score += 1;
    Text = $"Score: {_score}";
}
2行目の処理( text = ... )は score 変数の値を使って %s の部分を置き換えています。この機能を使用すると、Godot は自動的に値を文字列型に変換するので、ラベルにテキストを出力するときや print() 関数を使用するときに便利です。
参考
文字列のフォーマットについてはこちら( GDScriptフォーマット文字列)で詳しく説明されています。C#では、 "$"を使った文字列補間 を参照してください。
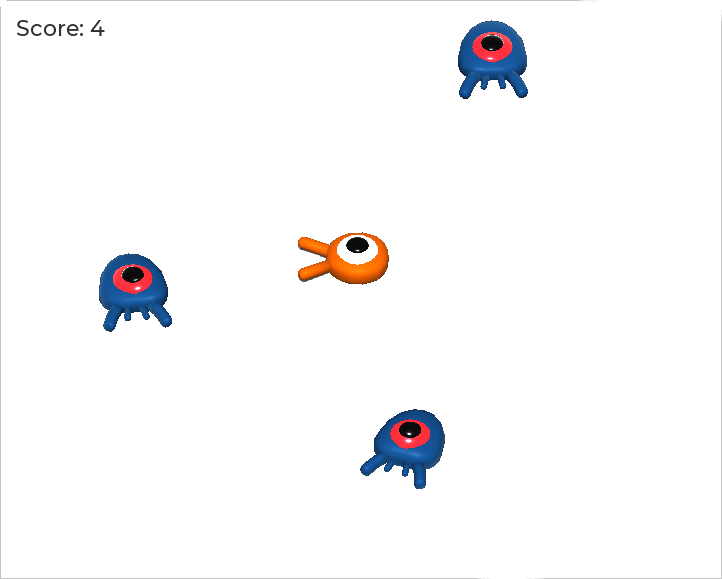
これでゲームをプレイすると、敵を踏んで倒すたびにスコアが増えていくのを確認できるようになりました。
注釈
複雑なゲームでは、ユーザーインターフェイスをゲームの世界から完全に切り離したい場合があります。そのような場合、ラベルにスコアを表示させることもなくなるかもしれません。その代わりに、スコアを別の専用オブジェクトに格納することもできます。しかし、試作品のゲームやシンプルなプロジェクトの場合には、コードをシンプルなままにしておくのも良いでしょう。プログラミングは、常にバランスを取って進めることが大切です。
ゲームをリトライする
ゲームオーバーになった後にリトライできる機能を追加します。プレイヤーがゲームオーバーになった場合、画面にメッセージを表示して入力を待つ機能を作ります。
main.tscn シーンに戻り、 UserInterface ノードを選択し、子ノードとして ColorRect を追加し、名前を Retry とします。このノードは長方形を単色で塗りつぶし、画面を暗くするオーバーレイとして機能します。
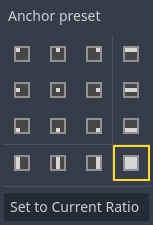
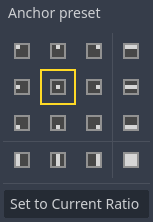
ビューポート全体を覆うようにするには、ツールバーの Anchor Preset (アンカーのプリセット)メニューを使用します。

メニューを開いて、 Rect全面 (Full Rect)を適用します。
まだ何も起こっていません。少なくとも、ほとんど何も起こっていません。緑色の4本のピンが選択中のボックスの隅に移動するだけです。
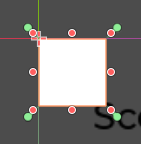
これは、UIノード(緑色のアイコンが付いているものすべて)が、親ノードに紐づく長方形を起点にして、相対的なアンカーと余白で動作するためです。ここでは、 UserInterface ノードのサイズが小さいので、子ノードである Retry ノードのサイズが制限されています。
UserInterface を選択し、インスペクターから Layout -> Anchors Preset -> Rect全面 (Full Rect)を適用します。これで Retry ノードがビューポート全体に広がるはずです。
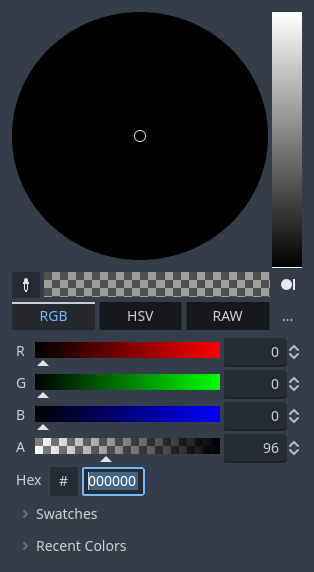
その色を変えて、ゲームエリアを暗くしましょう。 Retry を選択し、 インスペクター (Inspector)ドックで Color を暗くて透明なものに設定します。これを行うには、カラーピッカー内で A スライダーを左にドラッグします。このスライダーは色のアルファ値、つまり不透明度/透明度をコントロールするスライダーです。
次に、 Label を Retry の子ノードとして追加し、インスペクター内の Text の項目に "Press Enter to retry." と入力します。この Label を動かして画面の中央に固定するには、 Anchors Preset の項目を 中央 (Center)に設定してください。
リトライの機能をコーディングする
プレイヤーがゲームオーバーになってリトライするときに Retry ノードを表示したり隠したりするコードにもう一度、取りかかりましょう。
main.gd のスクリプトを開いてください。まず、ゲーム開始時点ではリトライするオーバーレイを隠しておく必要があります。そこで次の行を _ready() 関数に追加してください。
func _ready():
    $UserInterface/Retry.hide()
public override void _Ready()
{
    GetNode<Control>("UserInterface/Retry").Hide();
}
そして、プレイヤーが敵から攻撃を受けた時にオーバーレイを表示します。
func _on_player_hit():
    #...
    $UserInterface/Retry.show()
private void OnPlayerHit()
{
    //...
    GetNode<Control>("UserInterface/Retry").Show();
}
最後に、 Retry ノードが表示されたら、プレイヤーの入力待ち状態にして、プレイヤーがエンターキーを押したらゲームをリスタートする必要があります。これを行うにはGodotに既に用意されている _unhandled_input() コールバック関数を使用します。この関数はプレイヤーがどんなキーを押しても動作する関数です。
プレイヤーが ui_accept としてあらかじめ設定しておいた入力を行い、その時に Retry オーバーレイが表示されている場合、現在のシーンをリロードします。
func _unhandled_input(event):
    if event.is_action_pressed("ui_accept") and $UserInterface/Retry.visible:
        # This restarts the current scene.
        get_tree().reload_current_scene()
public override void _UnhandledInput(InputEvent @event)
{
    if (@event.IsActionPressed("ui_accept") && GetNode<Control>("UserInterface/Retry").Visible)
    {
        // This restarts the current scene.
        GetTree().ReloadCurrentScene();
    }
}
get_tree() は、グローバルな SceneTree オブジェクトにアクセスできる関数です。そのため、この関数は現在のシーンをリロード、リスタートさせることができます。
音楽を追加する
バックグラウンドで繰り返し再生される音楽を追加するには、Godot の別の機能である autoloads を使用します。
オーディオを再生するには、シーンに AudioStreamPlayer ノードを追加し、オーディオファイルを添付するだけで再生できるようになります。シーンを開始すると、自動的にオーディオが再生されます。しかし、シーンをリロードする(ゲームをリプレイしたりするときのように)と、オーディオノードもリセットされ、音楽は最初から始まります。
オートロード機能を使えば、ゲーム開始時に現在のシーン以外のノードやシーンをGodot に自動的にロードさせることができます。また、グローバルにアクセス可能なオブジェクトを作成する場合にも使用できます。
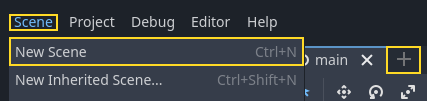
左上の シーン (Scene)メニューから 新規シーン (New Scene)をクリックし、新しいシーンを作成します。または現在開いているシーンのタブの横にある + のアイコンを押して新しいシーンを作成することもできます。
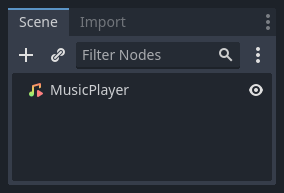
その他のノード (Other Node)ボタンをクリックして AudioStreamPlayer を作成し、名前を MusicPlayer に変更します。
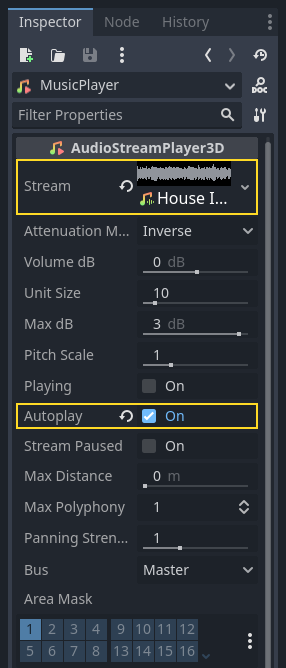
art/ ディレクトリに House In a Forest Loop.ogg というサウンドトラックがあります。これをクリックして、 インスペクター (Inspector)の Stream プロパティにドラッグしてください。また、 Autoplay のチェックボックスをオンにして、ゲーム開始時に自動的に音楽が再生されるようにしてみましょう。
シーンを music_player.tscn などの名前で保存します。
これを自動ロードとして登録する必要があります。 プロジェクト -> プロジェクト設定… メニューに移動し、 グローバル -> 自動読み込み タブをクリックします。
パス (Path)フィールドにシーンへのパスを入力します。フォルダアイコンをクリックしてファイルブラウザを開き、 music_player.tscn をダブルクリックします。次に、 パス の右側にある 追加 (Add)ボタンをクリックしてノードを登録します。

music_player.tscn がどのシーンでもロードされるようになりました。そのため、この状態でゲームを実行すると、どのシーンでも音楽が自動的に再生されます。
このレッスンを終える前に、ゲームの中でどのように処理が動いているのか簡単に見てみましょう。ゲームを実行すると、 シーン (Scene)ドックが2つのタブに変わります: リモート (Remote)と ローカル (Local)です。
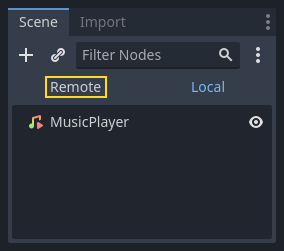
リモート (Remote)タブでは、実行中のゲームのノードツリーを視覚化することができます。そこでは、 Main ノードとシーンに含まれるすべてのもの、そしてインスタンス化されたモブキャラクターのノードが一番下に表示されます。
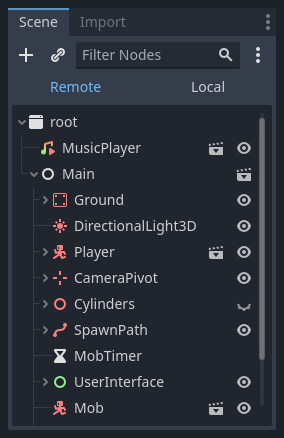
一番上にはオートロード(自動読み込み)された MusicPlayer と、その上に root ノードがあります。 root ノードはゲームのビューポートになります。
今回のレッスンはここまでです。次のパートでは、アニメーションを追加して、ゲームの見た目とゲーム体験の両方をより良くしていきましょう。
参考までに、 main.gd のスクリプト全体は次のようになります。
extends Node

@export var mob_scene: PackedScene

func _ready():
    $UserInterface/Retry.hide()


func _on_mob_timer_timeout():
    # Create a new instance of the Mob scene.
    var mob = mob_scene.instantiate()

    # Choose a random location on the SpawnPath.
    # We store the reference to the SpawnLocation node.
    var mob_spawn_location = get_node("SpawnPath/SpawnLocation")
    # And give it a random offset.
    mob_spawn_location.progress_ratio = randf()

    var player_position = $Player.position
    mob.initialize(mob_spawn_location.position, player_position)

    # Spawn the mob by adding it to the Main scene.
    add_child(mob)

    # We connect the mob to the score label to update the score upon squashing one.
    mob.squashed.connect($UserInterface/ScoreLabel._on_mob_squashed.bind())

func _on_player_hit():
    $MobTimer.stop()
    $UserInterface/Retry.show()

func _unhandled_input(event):
    if event.is_action_pressed("ui_accept") and $UserInterface/Retry.visible:
        # This restarts the current scene.
        get_tree().reload_current_scene()
using Godot;

public partial class Main : Node
{
    [Export]
    public PackedScene MobScene { get; set; }

    public override void _Ready()
    {
        GetNode<Control>("UserInterface/Retry").Hide();
    }

    public override void _UnhandledInput(InputEvent @event)
    {
        if (@event.IsActionPressed("ui_accept") && GetNode<Control>("UserInterface/Retry").Visible)
        {
            // This restarts the current scene.
            GetTree().ReloadCurrentScene();
        }
    }

    private void OnMobTimerTimeout()
    {
        // Create a new instance of the Mob scene.
        Mob mob = MobScene.Instantiate<Mob>();

        // Choose a random location on the SpawnPath.
        // We store the reference to the SpawnLocation node.
        var mobSpawnLocation = GetNode<PathFollow3D>("SpawnPath/SpawnLocation");
        // And give it a random offset.
        mobSpawnLocation.ProgressRatio = GD.Randf();

        Vector3 playerPosition = GetNode<Player>("Player").position;
        mob.Initialize(mobSpawnLocation.Position, playerPosition);

        // Spawn the mob by adding it to the Main scene.
        AddChild(mob);

        // We connect the mob to the score label to update the score upon squashing one.
        mob.Squashed += GetNode<ScoreLabel>("UserInterface/ScoreLabel").OnMobSquashed;
    }

    private void OnPlayerHit()
    {
        GetNode<Timer>("MobTimer").Stop();
        GetNode<Control>("UserInterface/Retry").Show();
    }
}