Attention: Here be dragons
This is the latest
(unstable) version of this documentation, which may document features
not available in or compatible with released stable versions of Godot.
Checking the stable version of the documentation...
シングルトン (自動読み込み)
はじめに
Godotのシーンシステムは、強力で柔軟性がある一方で欠点もあります。たとえば複数のシーンで必要とされる情報を保持する為の方法が存在しません (プレイヤーのスコアやインベントリを保持すること等)。
それに対応するにはいくつかの代替方法がありますが制限も伴います:
"master"シーンを用意して、子供として各シーンをロードもしくはアンロードします。しかし、この方法では各シーンを個別に期待したように正しく動作させる事が難しいという事です。
シーン間の情報をディスクの
user://にセーブして、各シーンが必要なときにロードします。しかし、この方法はシーン切り替えで頻繁にセーブとロードを行う事になり、実装が面倒でさらに動作が遅くなります。
シングルトンパターンは、複数のシーン間で永続的な情報を保持する必要がある一般的なケースを解決するための便利なツールです。同じシーンもしくはクラスを複数のシングルトンにて再利用する事は、それらシングルトンの名前が異なる限り可能です。
このコンセプトを使うと、オブジェクトを以下のように作る事が出来ます:
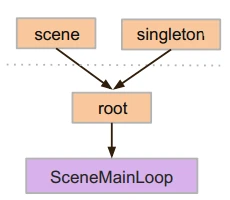
どのシーンが現在実行されているかに関係なく、常にロードされます。
プレイヤー情報のようなグローバル変数を保管できます。
シーンの切り替えやシーン間の遷移を処理できます。
シングルトンのように*動作*します、GDScript は設計上、グローバル変数をサポートしません。
自動読み込みされたノードとスクリプトは我々にこれらの特徴を与えます。
注釈
Godotは自動読み込みをシングルトンデザインパターンのような「真の」シングルトンにはしていません。必要に応じてユーザーが複数回インスタンス化することもできます。
Tip
エディタプラグインの一部として自動読み込みクラスを作成している場合は、プラグインが有効になったタイミングで プロジェクト設定 に自動読み込みクラスを登録することを検討してください。
自動読み込み
自動読み込みを設定すると、 Node を継承したシーンやスクリプトをロードすることができます。
注釈
スクリプトを自動読み込みする時、Nodeが作られそれにスクリプトがアタッチされます。このノードは他のシーンがロードされる前にルートビューポートに追加されます。
シーンもしくはスクリプトを自動読み込みするには、メニューから **プロジェクト > プロジェクト設定 -> グローバル -> 自動読み込み**に移動します。
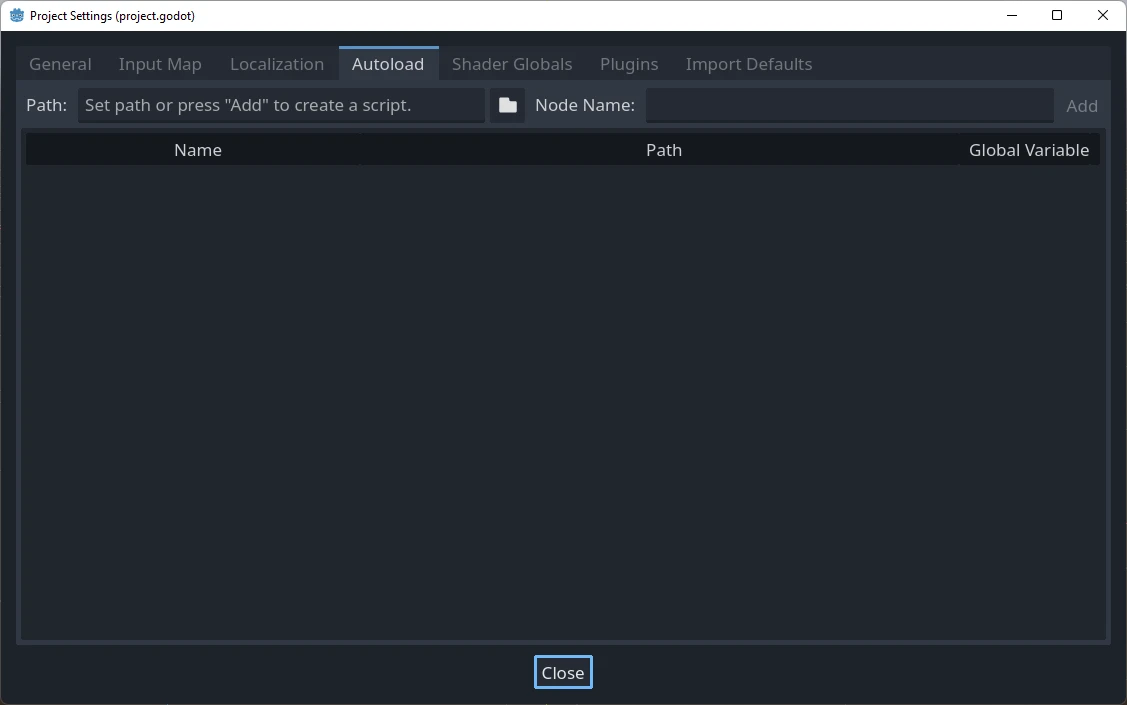
ここに任意の数のシーンまたはスクリプトを追加できます。リスト内の各エントリには名前が必要で、その名前はノードの name プロパティとして割り当てられます。グローバルシーンツリーに追加されるエントリの順序は、上下の矢印キーを使用して操作できます。通常のシーンと同様にエンジンはこれらのノードを上から下の順序で読み取ります。
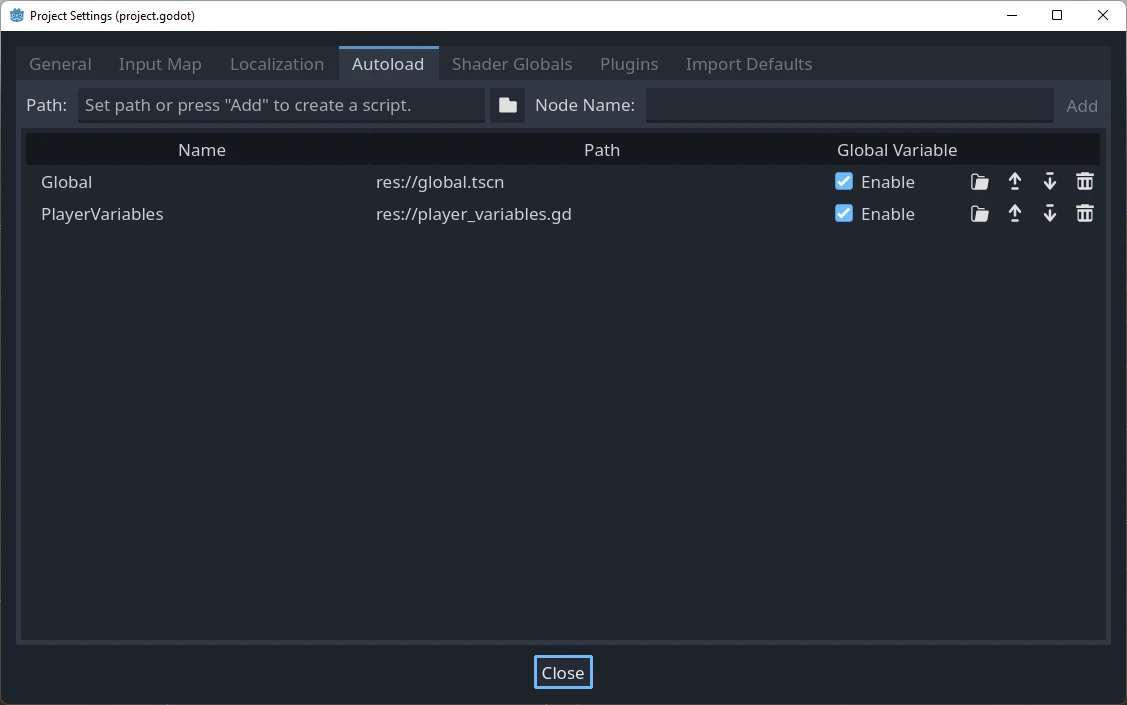
**有効**列がチェックされている場合 (デフォルトでオン)、GDScriptでシングルトンに直接アクセスできます。
PlayerVariables.health -= 10
有効 列は C# コードでは効果がありません。ただしシングルトンが C# スクリプトの場合は、 Instance という静的プロパティを組み込み、それを _Ready() に割り当てることで、同様の効果を実現できます。
public partial class PlayerVariables : Node
{
    public static PlayerVariables Instance { get; private set; }

    public int Health { get; set; }

    public override void _Ready()
    {
        Instance = this;
    }
}
これにより GetNode() やタイプキャストを使用せずに C# コードからシングルトンにアクセスできるようになります。
PlayerVariables.Instance.Health -= 10;
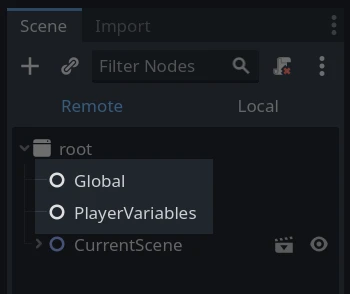
自動読み込みオブジェクトはちょうどシーンツリーの中の他のノードの様にアクセスされる事を心に留めて下さい。実際には、もし実行中のシーンツリーを見たら、自動読み込みされたノードが現れるでしょう:
警告
実行時に free() または queue_free() を使用して自動読み込みされたインスタンスを**削除してはいけません**。スクリプトから削除するとエンジンがクラッシュします。
カスタムシーン・スイッチャー
このチュートリアルは自動読み込みを使ったシーンスイッチャーの構築する方法を説明します。基本的なシーンの切り替えをする為に SceneTree.change_scene_to_file() メソッドを使う事が出来ます(詳細はシーンツリーの使用を見てください)。しかしシーンを変更する際より複雑な動作が必要な場合は、このメソッドは多くの機能が提供されます。
はじめに、こちら singleton_autoload_starter.zip からテンプレートをダウンロードしGodotで開いて下さい。
プロジェクトが古いGodotバージョンで最後に開かれたことを通知するウィンドウが表示される場合がありますが、それは問題ではありません。プロジェクトを開くには「OK」をクリックしてください。
プロジェクトには scene_1.tscn と scene_2.tscn という 2 つのシーンが含まれています。それぞれのシーンはラベル表示されたシーンの名前と pressed() シグナルを接続されたボタンを含みます。プロジェクトを実行すると、 scene_1.tscn から始まります。ただしボタンを押しても何も起こりません。
スクリプトを変更する
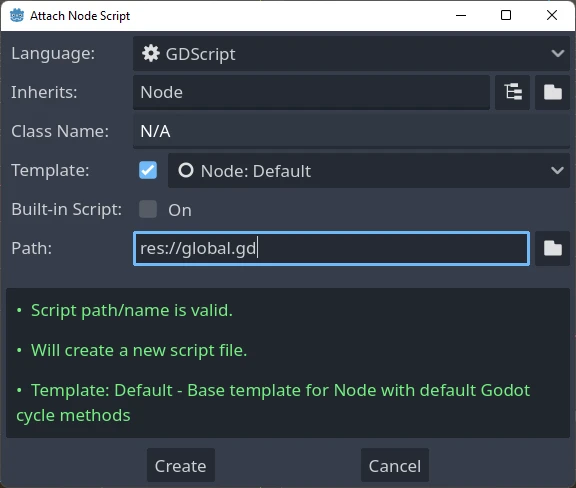
スクリプト ウィンドウを開き、 global.gd という名前の新しいスクリプトを作成します。 Node から継承するようにしてください。
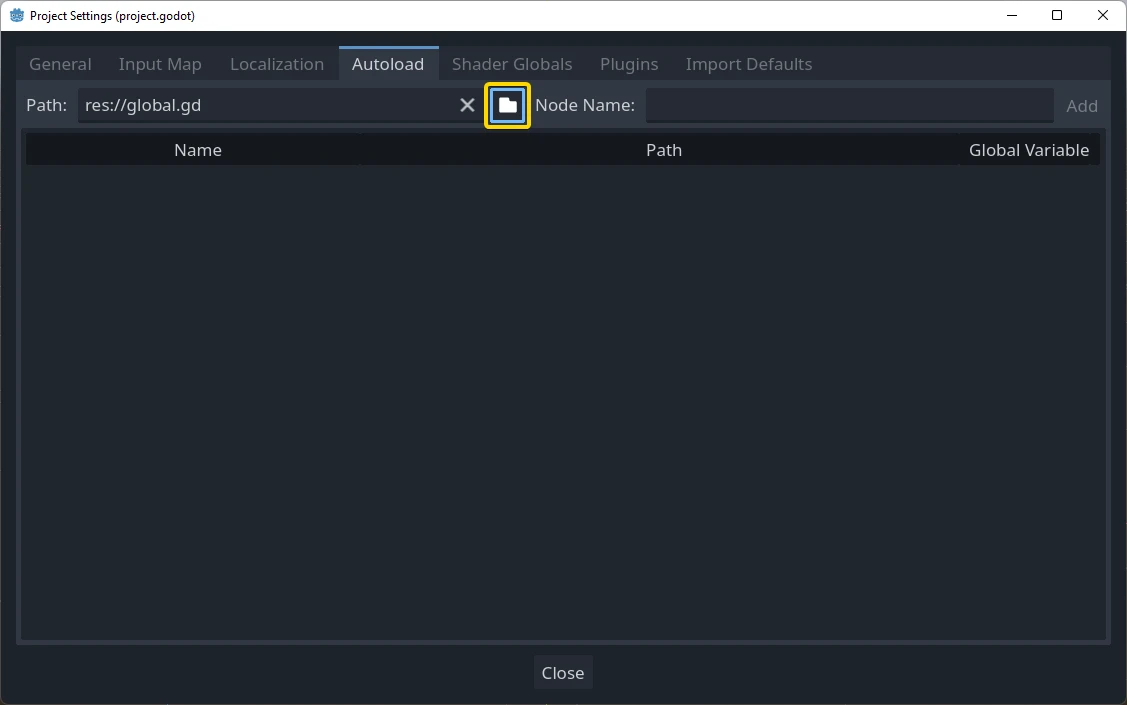
The next step is to add this script to the autoload list.
Starting from the menu, open
Project > Project Settings > Globals > Autoload and
select the script by clicking the browse button or typing its path:
res://global.gd. Press Add to add it to the autoload list
and name it "Global", which is required for scripts to access it
by the name "Global":
これでスクリプトはプロジェクトのシーンを実行する時は、毎回ロードされる様になりました。
スクリプトに戻り、 _ready() 関数内で現在のシーンを持って来る必要があります。現在のシーン(ボタンのあるシーン)と global.gd は両方ともルートの子供ですが、自動読み込みされたノードが常に最初になります。これはルートの最後の子が常にロードされたシーンであることを意味します。
extends Node

var current_scene = null

func _ready():
    var root = get_tree().root
    # Using a negative index counts from the end, so this gets the last child node of `root`.
    current_scene = root.get_child(-1)
using Godot;

public partial class Global : Node
{
    public Node CurrentScene { get; set; }

    public override void _Ready()
    {
        Viewport root = GetTree().Root;
        // Using a negative index counts from the end, so this gets the last child node of `root`.
        CurrentScene = root.GetChild(-1);
    }
}
今、我々はシーンを遷移させる為の関数を必要としています。この関数はカレントシーンを開放し、要求されたものに置き換える必要があります。
func goto_scene(path):
    # This function will usually be called from a signal callback,
    # or some other function in the current scene.
    # Deleting the current scene at this point is
    # a bad idea, because it may still be executing code.
    # This will result in a crash or unexpected behavior.

    # The solution is to defer the load to a later time, when
    # we can be sure that no code from the current scene is running:

    _deferred_goto_scene.call_deferred(path)


func _deferred_goto_scene(path):
    # It is now safe to remove the current scene.
    current_scene.free()

    # Load the new scene.
    var s = ResourceLoader.load(path)

    # Instance the new scene.
    current_scene = s.instantiate()

    # Add it to the active scene, as child of root.
    get_tree().root.add_child(current_scene)

    # Optionally, to make it compatible with the SceneTree.change_scene_to_file() API.
    get_tree().current_scene = current_scene
public void GotoScene(string path)
{
    // This function will usually be called from a signal callback,
    // or some other function from the current scene.
    // Deleting the current scene at this point is
    // a bad idea, because it may still be executing code.
    // This will result in a crash or unexpected behavior.

    // The solution is to defer the load to a later time, when
    // we can be sure that no code from the current scene is running:

    CallDeferred(MethodName.DeferredGotoScene, path);
}

public void DeferredGotoScene(string path)
{
    // It is now safe to remove the current scene.
    CurrentScene.Free();

    // Load a new scene.
    var nextScene = GD.Load<PackedScene>(path);

    // Instance the new scene.
    CurrentScene = nextScene.Instantiate();

    // Add it to the active scene, as child of root.
    GetTree().Root.AddChild(CurrentScene);

    // Optionally, to make it compatible with the SceneTree.change_scene_to_file() API.
    GetTree().CurrentScene = CurrentScene;
}
Object.call_deferred()の使用時は、カレントシーンが完了してから、2つ目の関数のすべてのコードが1回だけ実行されます。従って、カレントシーンは使用されている間には削除されません (すなわち、カレントシーンのコードはまだ実行中です)。
最後に、2つのシーンの空のコールバック関数を満たさなければなりません。
# Add to 'scene_1.gd'.

func _on_button_pressed():
    Global.goto_scene("res://scene_2.tscn")
// Add to 'Scene1.cs'.

private void OnButtonPressed()
{
    var global = GetNode<Global>("/root/Global");
    global.GotoScene("res://Scene2.tscn");
}
そして
# Add to 'scene_2.gd'.

func _on_button_pressed():
    Global.goto_scene("res://scene_1.tscn")
// Add to 'Scene2.cs'.

private void OnButtonPressed()
{
    var global = GetNode<Global>("/root/Global");
    global.GotoScene("res://Scene1.tscn");
}
プロジェクトの実行とテストをするとボタンを押す事によりシーンの間を切り替えられます。
注釈
シーンが小さい時にはこの遷移は瞬時に行われます。しかし、シーンがより複雑な場合、表示されるのに大量の時間がかかります。これの操作を学ぶには、次のチュートリアルを見て下さい:バックグラウンド読み込み。
また、読み込み時間が比較的短い場合 (3秒以下など) は、シーンが変わる直前に何らかの2D要素を表示して「ローディング中」画面を表示することもできます。そして、シーンが切り替わった直後にそれを隠すことができます。これは、シーンがロード中であることをプレイヤーに示すために使用できます。