Attention: Here be dragons
This is the latest
(unstable) version of this documentation, which may document features
not available in or compatible with released stable versions of Godot.
Checking the stable version of the documentation...
カスタムポストプロセッシング
はじめに
Godotは、ブルーム、DOF、SSAOを含む多くのポストプロセッシング効果をすぐに利用できます。これらについては 環境とポストプロセッシング で説明されています。でも時々、独自のカスタム効果を作成したい場合もあります。この記事では独自のカスタムエフェクトを作成する方法について説明します。
カスタムのポストプロセッシングシェーダーを実装する最も簡単な方法は、Godotの組み込み機能を使用して画面テクスチャから読み取ることです。これに慣れていない場合は、最初に Screen Reading Shaders Tutorial を読む必要があります。
シングルパス・ポストプロセッシング
Post-processing effects are shaders applied to a frame after Godot has rendered
it. To apply a shader to a frame, create a CanvasLayer, and give it a ColorRect. Assign a
new ShaderMaterial to the newly created
ColorRect, and set the ColorRect's anchor preset to Full Rect:

Setting the anchor preset to Full Rect on the ColorRect node
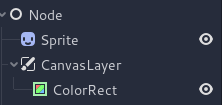
シーンツリーは次のようになります。
注釈
もう1つのより効率的な方法は、 BackBufferCopy を使用して画面の領域をバッファにコピーし、 hint_screen_texture を使用して sampler2D を介してシェーダー内でそれにアクセスすることです。
注釈
この記事の執筆時点では、Godotは複数のバッファへの同時レンダリングをサポートしていません。ポストプロセッシングシェーダーは、Godotによって公開されていない他のレンダー パスやバッファ (深度や法線、ラフネスなど) にアクセスできません。 Godotによってサンプラーとして公開されるレンダリングされたフレームとバッファーにのみアクセスできます。
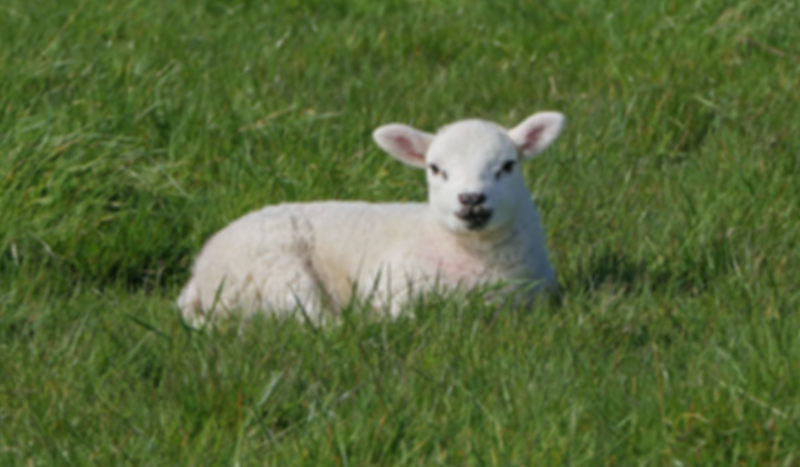
このデモでは、羊の画像の スプライト を使用します。
Assign a new Shader to the ColorRect's
ShaderMaterial. You can access the frame's texture and UV with a
sampler2D using hint_screen_texture and the built-in SCREEN_UV
uniforms.
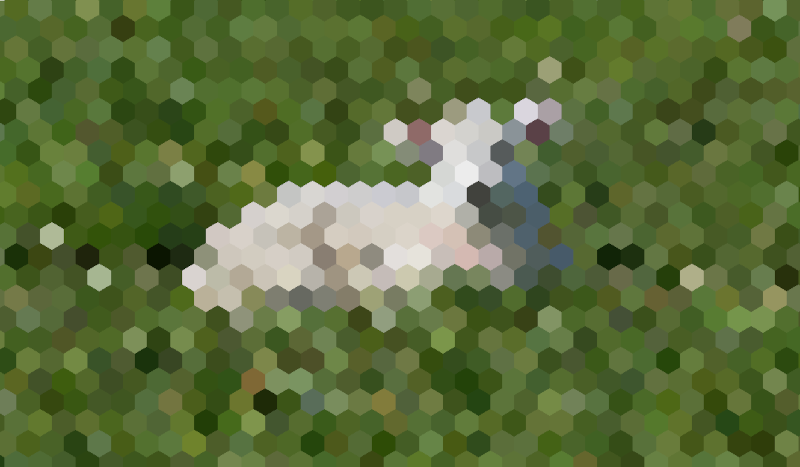
次のコードをシェーダーにコピーします。以下のコードは、arlez80 による六角形化シェーダーです,
shader_type canvas_item;

uniform vec2 size = vec2(32.0, 28.0);
// If you intend to read from mipmaps with `textureLod()` LOD values greater than `0.0`,
// use `filter_nearest_mipmap` instead. This shader doesn't require it.
uniform sampler2D screen_texture : hint_screen_texture, repeat_disable, filter_nearest;

void fragment() {
        vec2 norm_size = size * SCREEN_PIXEL_SIZE;
        bool less_than_half = mod(SCREEN_UV.y / 2.0, norm_size.y) / norm_size.y < 0.5;
        vec2 uv = SCREEN_UV + vec2(norm_size.x * 0.5 * float(less_than_half), 0.0);
        vec2 center_uv = floor(uv / norm_size) * norm_size;
        vec2 norm_uv = mod(uv, norm_size) / norm_size;
        center_uv += mix(vec2(0.0, 0.0),
                         mix(mix(vec2(norm_size.x, -norm_size.y),
                                 vec2(0.0, -norm_size.y),
                                 float(norm_uv.x < 0.5)),
                             mix(vec2(0.0, -norm_size.y),
                                 vec2(-norm_size.x, -norm_size.y),
                                 float(norm_uv.x < 0.5)),
                             float(less_than_half)),
                         float(norm_uv.y < 0.3333333) * float(norm_uv.y / 0.3333333 < (abs(norm_uv.x - 0.5) * 2.0)));

        COLOR = textureLod(screen_texture, center_uv, 0.0);
}
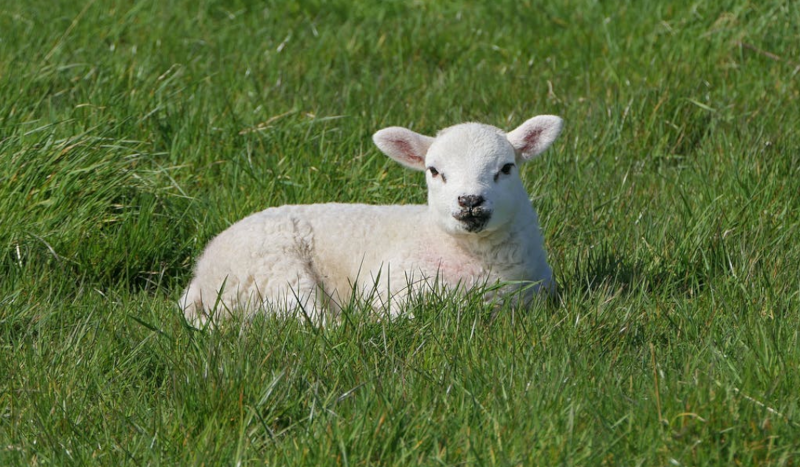
羊の画像は次のようになります。
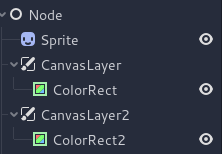
マルチパス・ポストプロセッシング
ブラーなどのポストプロセッシングエフェクトの中には、リソースを大量に消費するものがあります。ただし複数のパスに分割するとより速く実行できます。マルチパスのマテリアルでは、各パスが前のパスの結果を入力として受け取り、それを処理します。
マルチパスのポストプロセッシングシェーダーを生成するには、 CanvasLayer ノードと ColorRect ノードをスタックします。上の例では CanvasLayer オブジェクトを使用して、下のレイヤ上のフレームを使用してシェーダをレンダリングします。ノード構造を除けば、手順はシングルパス・ポストプロセッシングシェーダーの場合と同じです。
シーンツリーは次のようになります。
例として、次のコードを各 ColorRect ノードにアタッチすることで、全画面のガウスブラーエフェクトを作成できます。シェーダーを適用する順序は、シーン ツリー内の CanvasLayer の位置によって異なります。高いほど早く適用されることを意味します。このブラーシェーダの場合、順序は重要ではありません。
shader_type canvas_item;

uniform sampler2D screen_texture : hint_screen_texture, repeat_disable, filter_nearest;

// Blurs the screen in the X-direction.
void fragment() {
    vec3 col = texture(screen_texture, SCREEN_UV).xyz * 0.16;
    col += texture(screen_texture, SCREEN_UV + vec2(SCREEN_PIXEL_SIZE.x, 0.0)).xyz * 0.15;
    col += texture(screen_texture, SCREEN_UV + vec2(-SCREEN_PIXEL_SIZE.x, 0.0)).xyz * 0.15;
    col += texture(screen_texture, SCREEN_UV + vec2(2.0 * SCREEN_PIXEL_SIZE.x, 0.0)).xyz * 0.12;
    col += texture(screen_texture, SCREEN_UV + vec2(2.0 * -SCREEN_PIXEL_SIZE.x, 0.0)).xyz * 0.12;
    col += texture(screen_texture, SCREEN_UV + vec2(3.0 * SCREEN_PIXEL_SIZE.x, 0.0)).xyz * 0.09;
    col += texture(screen_texture, SCREEN_UV + vec2(3.0 * -SCREEN_PIXEL_SIZE.x, 0.0)).xyz * 0.09;
    col += texture(screen_texture, SCREEN_UV + vec2(4.0 * SCREEN_PIXEL_SIZE.x, 0.0)).xyz * 0.05;
    col += texture(screen_texture, SCREEN_UV + vec2(4.0 * -SCREEN_PIXEL_SIZE.x, 0.0)).xyz * 0.05;
    COLOR.xyz = col;
}
shader_type canvas_item;

uniform sampler2D screen_texture : hint_screen_texture, repeat_disable, filter_nearest;

// Blurs the screen in the Y-direction.
void fragment() {
    vec3 col = texture(screen_texture, SCREEN_UV).xyz * 0.16;
    col += texture(screen_texture, SCREEN_UV + vec2(0.0, SCREEN_PIXEL_SIZE.y)).xyz * 0.15;
    col += texture(screen_texture, SCREEN_UV + vec2(0.0, -SCREEN_PIXEL_SIZE.y)).xyz * 0.15;
    col += texture(screen_texture, SCREEN_UV + vec2(0.0, 2.0 * SCREEN_PIXEL_SIZE.y)).xyz * 0.12;
    col += texture(screen_texture, SCREEN_UV + vec2(0.0, 2.0 * -SCREEN_PIXEL_SIZE.y)).xyz * 0.12;
    col += texture(screen_texture, SCREEN_UV + vec2(0.0, 3.0 * SCREEN_PIXEL_SIZE.y)).xyz * 0.09;
    col += texture(screen_texture, SCREEN_UV + vec2(0.0, 3.0 * -SCREEN_PIXEL_SIZE.y)).xyz * 0.09;
    col += texture(screen_texture, SCREEN_UV + vec2(0.0, 4.0 * SCREEN_PIXEL_SIZE.y)).xyz * 0.05;
    col += texture(screen_texture, SCREEN_UV + vec2(0.0, 4.0 * -SCREEN_PIXEL_SIZE.y)).xyz * 0.05;
    COLOR.xyz = col;
}
上記のコードを使用すると、次のような全画面ブラーエフェクトが得られます。