Attention: Here be dragons
This is the latest
(unstable) version of this documentation, which may document features
not available in or compatible with released stable versions of Godot.
Checking the stable version of the documentation...
シグナルの使用
このレッスンでは、シグナルを見ていきます。これらは、ボタンが押された、など特定のことが起こったときにノードが発信するメッセージです。他のノードはシグナルに接続し、イベントが発生したときに関数を呼び出すことができます。
シグナルはGodotに組み込まれた委任メカニズムで、あるゲームオブジェクトが別のゲームオブジェクトの変更に反応する際に、それらを相互参照させることなく反応できるようにするものです。シグナルを使うと、 結合度 を制限し、コードの柔軟性を保つことができます。
例えば、画面上にプレイヤーの体力を表すライフバーがあるとします。プレイヤーがダメージを受けたり、回復薬を使ったりした場合には、その変化をバーに反映されるようにしたいとします。これを実現するために、Godotではシグナルを使用します。
メソッド ( Callable ) と同様に、シグナルは Godot 4.0 以降の最重要な型です。つまり、文字列として渡す必要がなく、メソッドの引数として直接渡すことができるという意味であり、オートコンプリートの向上と、エラーの抑制につながります。 Signal 型で直接できることのリストについては、クラス リファレンス Signal を参照してください。
参考
概要で述べたように、シグナルはGodotバージョンのobserverパターンです。詳しくは 次を参照ください Game Programming Patterns。
今度はシグナルを使って、前パート ( プレイヤーの入力に対応する ) で作ったGodotのアイコンがボタンを押すことで動いたり止まったりするようにします。
注釈
このプロジェクトでは、Godotの命名規則に従います。
GDScript: クラス(ノード)はPascalCaseを使用し、変数と関数はsnake_caseを使用し、定数はALL_CAPSを使用します(GDScriptスタイルガイドを参照)。
C#: クラス、export変数、メソッドはPascalCaseを使用し、プライベートフィールドは _camelCase を使用し、ローカル変数とパラメーターは camelCase を使用します(C# スタイルガイドを参照)。シグナルを接続するときは、メソッド名を正確に入力してください。
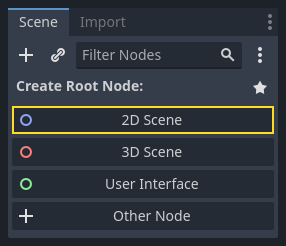
シーンの設定
ゲームにボタンを追加するために、 Button と 初めてのスクリプト作成 レッスンで作成した sprite_2d.tscn シーンの両方を含む新しいシーンを作成します。
Create a new scene by going to the menu .

In the Scene dock, click the button. This will add a Node2D as our root.
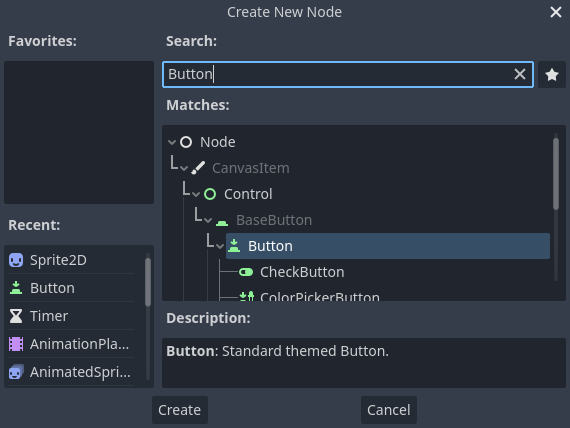
ファイルシステムドック内で、先に保存した sprite_2d.tscn ファイルをクリックして、Node2Dの上にドロップしインスタンス化します。

We want to add another node as a sibling of the Sprite2D. To do so, right-click on Node2D and select .
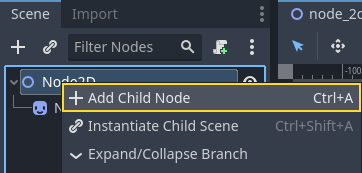
Button ノードを検索して追加します。
デフォルトではノードは小さく作成されます。ハンドルの右下をクリック&ドラッグし、サイズを変更します。
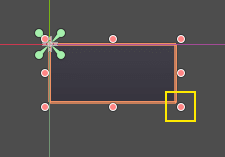
ハンドルが表示されない場合は、ツールバー上で選択ツールが選択されていることを確認してください。
ボタンをクリック&ドラッグし、Spriteの近くへ動かします。
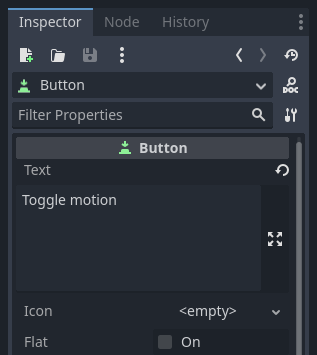
You can also write a label on the Button by editing its Text property
in the Inspector. Enter Toggle motion.
シーンツリーとビューポートは次のようになります。

新たに作成したシーンについて、もしまだであれば node_2d.tscn として保存しましょう。 F6 (macOSでは:kbd:Cmd + R)で実行できます。この時点では、ボタンは表示されますが、押しても何も起こりません。
エディタ内でシグナルを接続する
ここでは、Button の "pressed" シグナルを Sprite2D に接続し、その動きのオン・オフを切り替える新しい関数を呼び出しましょう。前のレッスンで行ったように、Sprite2Dノードにスクリプトをアタッチする必要があります。
You can connect signals in the Signals dock. Select the Button node and, on the right side of the editor, click on the tab named Signals next to the Inspector.
選択したノードで利用可能なシグナルが表示されます。
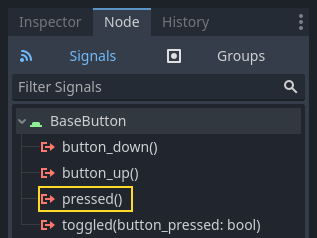
"pressed"シグナルをダブルクリックし、ノード接続ウィンドウを開きます。

そこで、Sprite2Dノードにシグナルを接続できます。ノードはreceiverメソッドを必要とします。これは、Buttonがシグナルを発信したときにGodotが呼び出す関数です。エディタはこの関数を自動生成します。規約として、これらのコールバック関数は"_on_ノード名_シグナル名"と命名されます。ここでの場合は、"_on_button_pressed"となります。
注釈
When connecting signals via the editor's Signals dock, you can use two modes. The simple one only allows you to connect to nodes that have a script attached to them and creates a new callback function on them.

The advanced view lets you connect to any node and any built-in function, add arguments to the callback, and set options. You can toggle the mode in the window's bottom-right by clicking the button.
注釈
外部エディター (VS Code など) を使用している場合、この自動コード生成は機能しない可能性があります。この場合、次のセクションで説明するように、コードを介して信号を接続する必要があります。
Click the button to complete the signal connection and jump to the Script workspace. You should see the new method with a connection icon in the left margin.
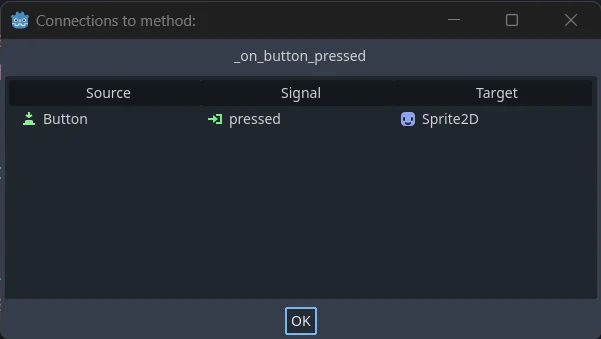
このアイコンをクリックすると、ウィンドウがポップアップし、接続に関する情報が表示されます。この機能は、エディターでノードを接続する場合のみ有効です。
passキーワードの行を、ノードの動きを切り替えるコードに置き換えましょう。
Sprite2Dが動くのは、_process()関数内のコードのおかげです。Godot は処理のオンとオフを切り替えるメソッド : Node.set_process() を提供しています。Nodeクラスの別のメソッドである is_processing() は、アイドル処理が有効であれば trueを返します。notキーワードで値を反転できます。
func _on_button_pressed():
    set_process(not is_processing())
// We also specified this function name in PascalCase in the editor's connection window.
private void OnButtonPressed()
{
    SetProcess(!IsProcessing());
}
この関数はボタンを押したときに、処理を切り替え、アイコンの動作のON/OFFを切り替えます。
ゲームを試す前に、 _process()関数を単純化して、ユーザー入力を待たずにノードを自動的に移動させる必要があります。次のコードに置き換えます (これは 2 つ前のレッスンで見ています)。
func _process(delta):
    rotation += angular_speed * delta
    var velocity = Vector2.UP.rotated(rotation) * speed
    position += velocity * delta
public override void _Process(double delta)
{
    Rotation += _angularSpeed * (float)delta;
    var velocity = Vector2.Up.Rotated(Rotation) * _speed;
    Position += velocity * (float)delta;
}
完成した sprite_2d.gdコードは次のようになります。
extends Sprite2D

var speed = 400
var angular_speed = PI


func _process(delta):
    rotation += angular_speed * delta
    var velocity = Vector2.UP.rotated(rotation) * speed
    position += velocity * delta


func _on_button_pressed():
    set_process(not is_processing())
using Godot;

public partial class MySprite2D : Sprite2D
{
    private float _speed = 400;
    private float _angularSpeed = Mathf.Pi;

    public override void _Process(double delta)
    {
        Rotation += _angularSpeed * (float)delta;
        var velocity = Vector2.Up.Rotated(Rotation) * _speed;
        Position += velocity * (float)delta;
    }

    // We also specified this function name in PascalCase in the editor's connection window.
    private void OnButtonPressed()
    {
        SetProcess(!IsProcessing());
    }
}
Run the current scene by pressing F6 (Cmd + R on macOS), and click the button to see the sprite start and stop.
コード経由でシグナルを接続する
エディタを使用する代わりに、コードを介してシグナルを接続することができます。これは、スクリプトの中でノードを作成したり、シーンをインスタンス化するときに必要です。
ここで、別のノードを使ってみましよう。Godot には Timer ノードがあり、スキルのクールダウン時間や武器のリロードなどを実装するのに便利です。
2Dワークスペースに戻りましょう。ウィンドウ上部の "2D" のテキストをクリックするか、 Ctrl + F1 (macOS では Ctrl + Cmd + 1) を押します。
シーンドックで、Sprite2D ノードを右クリックし、新しい子ノードを追加します。Timer を検索して、対応するノードを追加します。シーンは次のようになります。

With the Timer node selected, go to the Inspector and enable the Autostart property.

Sprite2Dの横にあるスクリプトアイコンをクリックして、スクリプトのワークスペースに戻ります。

ノードをコードで接続するには、2つの操作が必要です。
Sprite2D から Timer への参照を取得します。
Timer の"timeout"シグナルで、
connect()メソッドを呼び出します。
注釈
コードでシグナルに接続するには、シグナルを受信したいノードのconnect()メソッドを呼び出す必要があります。この場合、Timer の"timeout"シグナルを受信します。
シーンがインスタンス化されたときにシグナルを接続したいのですが、それには Node._ready() ビルトイン関数を使用して接続できます。この関数はノードが完全にインスタンス化されるとエンジンから自動的に呼び出されます 。
現在のノードに関連するノードの参照を取得するには、 Node.get_node() というメソッドを使用します。この参照は変数に格納することができます。
func _ready():
    var timer = get_node("Timer")
public override void _Ready()
{
    var timer = GetNode<Timer>("Timer");
}
関数 get_node()は Sprite2D の子を調べ、その名前によってノードを取得します。たとえば、エディタで Timer ノードの名前を "BlinkingTimer" に変更した場合、呼び出しをget_node("BlinkingTimer")に変更する必要があります。
これで、_ready()関数の中で Timer を Sprite2D に接続することができます。
func _ready():
    var timer = get_node("Timer")
    timer.timeout.connect(_on_timer_timeout)
public override void _Ready()
{
    var timer = GetNode<Timer>("Timer");
    timer.Timeout += OnTimerTimeout;
}
この行は次のようになります。Timer の "timeout" シグナルを、スクリプトが接続されているノードに接続します。Timer が "timeout" を発信したら、関数 _on_timer_timeout() を呼び出したいので、これを定義する必要があります。スクリプトの下部にこの関数を追加し、それを使用してスプライトの表示を切り替えましょう。
注釈
規約では、このようなコールバックメソッドはGDScriptでは"_on_node_name_signal_name"と命名されて、C#では "OnNodeNameSignalName" と命名されます。ここでは、GDScriptだと "_on_timer_timeout"、C#では OnTimerTimeout() となります。
func _on_timer_timeout():
    visible = not visible
private void OnTimerTimeout()
{
    Visible = !Visible;
}
visibleのプロパティはブール値で、ノードの可視性を制御します。visible = not visibleの行で値を反転します。visibleが trueなら、falseに、また逆の場合も同様です。
この2Dシーンを実行すると、スプライトが1秒間隔で点滅するのがわかるでしょう。
完全なスクリプト
これで、Godot アイコンが動いて点滅する、小さなデモを終了します!参考までに、以下がsprite_2d.gdの完全なファイルです。
extends Sprite2D

var speed = 400
var angular_speed = PI


func _ready():
    var timer = get_node("Timer")
    timer.timeout.connect(_on_timer_timeout)


func _process(delta):
    rotation += angular_speed * delta
    var velocity = Vector2.UP.rotated(rotation) * speed
    position += velocity * delta


func _on_button_pressed():
    set_process(not is_processing())


func _on_timer_timeout():
    visible = not visible
using Godot;

public partial class MySprite2D : Sprite2D
{
    private float _speed = 400;
    private float _angularSpeed = Mathf.Pi;

    public override void _Ready()
    {
        var timer = GetNode<Timer>("Timer");
        timer.Timeout += OnTimerTimeout;
    }

    public override void _Process(double delta)
    {
        Rotation += _angularSpeed * (float)delta;
        var velocity = Vector2.Up.Rotated(Rotation) * _speed;
        Position += velocity * (float)delta;
    }

    // We also specified this function name in PascalCase in the editor's connection window.
    private void OnButtonPressed()
    {
        SetProcess(!IsProcessing());
    }

    private void OnTimerTimeout()
    {
        Visible = !Visible;
    }
}
カスタムシグナル
注釈
このセクションは、独自のシグナルを定義して使用する方法についての参考であり、前のレッスンで作成したプロジェクトを使用するものではありません。
スクリプトでカスタムシグナルを定義することができます。例えば、プレイヤーの体力が0になったときにゲームオーバー画面を表示させたいとします。そのためには、体力が0になったときに、"died" (死亡)や "health_depleted"(体力の枯渇) という名前のシグナルを定義することができます。
extends Node2D

signal health_depleted

var health = 10
using Godot;

public partial class MyNode2D : Node2D
{
    [Signal]
    public delegate void HealthDepletedEventHandler();

    private int _health = 10;
}
注釈
シグナルは発生したばかりのイベントを表現するため、通常、動作を表す過去形の動詞をシグナルの名前に使用します。
Your signals work the same way as built-in ones: they appear in the Signals tab and you can connect to them like any other.

スクリプト内でシグナルを発信するには、emit()を呼び出します。
func take_damage(amount):
    health -= amount
    if health <= 0:
        health_depleted.emit()
public void TakeDamage(int amount)
{
    _health -= amount;

    if (_health <= 0)
    {
        EmitSignal(SignalName.HealthDepleted);
    }
}
シグナルは、オプションで1つ以上の引数を宣言できます。カッコの中に引数の名前を指定します:
extends Node2D

signal health_changed(old_value, new_value)

var health = 10
using Godot;

public partial class MyNode : Node
{
    [Signal]
    public delegate void HealthChangedEventHandler(int oldValue, int newValue);

    private int _health = 10;
}
注釈
The signal arguments show up in the editor's Signals dock, and Godot can use them to generate callback functions for you. However, you can still emit any number of arguments when you emit signals. So it's up to you to emit the correct values.
シグナルと一緒に値を出力するには、emit()関数に追加の引数として値を追加します。
func take_damage(amount):
    var old_health = health
    health -= amount
    health_changed.emit(old_health, health)
public void TakeDamage(int amount)
{
    int oldHealth = _health;
    _health -= amount;
    EmitSignal(SignalName.HealthChanged, oldHealth, _health);
}
要約
Godot ではどのノードも、ボタンが押されるなど、何か特定のことが起こるとシグナルを発し ます。他のノードは個々のシグナルに接続し、選択されたイベントに反応することができます。
シグナルには多くの用途があります。これらを使用すると、ゲームワールドに出入りするノード、衝突、領域に出入りするキャラクター、サイズが変化するインターフェイスの要素など、多くのことに反応できます。
たとえば、コインの見た目をした Area2D は、プレイヤーの物理ボディが衝突形状(コリジョンシェイプ)に入るたびに body_enteredシグナルを発し、プレイヤーがそれを収集したタイミングを知ることができます。
次のセクション、 最初の2Dゲーム では、完全な2Dゲームを作成し、これまでに学んだことを実践します。