Work in progress
The content of this page was not yet updated for Godot
4.2
and may be outdated. If you know how to improve this page or you can confirm
that it's up to date, feel free to open a pull request.
用 MultiMeshInstance3D 动画化数以千计条鱼
本教程探索了游戏 ABZU 中使用的一种技术, 该技术使用顶点动画和静态网格实例, 来渲染和制作成千上万的鱼动画.
In Godot, this can be accomplished with a custom Shader and a MultiMeshInstance3D. Using the following technique you can render thousands of animated objects, even on low end hardware.
我们将从一条鱼的动画开始. 然后, 我们将看到如何将该动画扩展到数千条鱼.
动画化一条鱼
We will start with a single fish. Load your fish model into a MeshInstance3D and add a new ShaderMaterial.
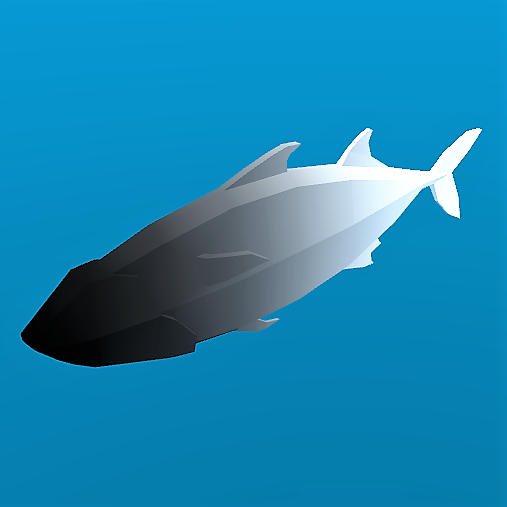
这是我们用于示例图像的鱼, 你可以使用任何你喜欢的鱼模型.
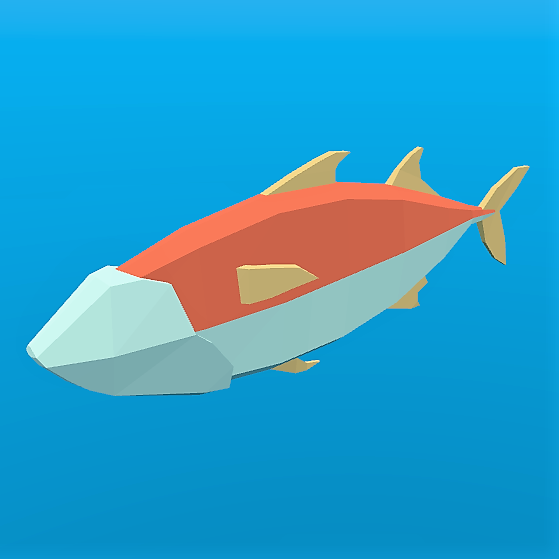
备注
The fish model in this tutorial is made by QuaterniusDev and is shared with a creative commons license. CC0 1.0 Universal (CC0 1.0) Public Domain Dedication https://creativecommons.org/publicdomain/zero/1.0/
Typically, you would use bones and a Skeleton3D to animate objects. However, bones are animated on the CPU and so you end having to calculate thousands of operations every frame and it becomes impossible to have thousands of objects. Using vertex animation in a vertex shader, you avoid using bones and can instead calculate the full animation in a few lines of code and completely on the GPU.
动画由四个关键帧动作组成:
从一边运动到另一边
绕着鱼的中心作旋转运动
平移波动运动
平移扭转运动
所有的动画代码都在顶点着色器中,并由 uniform 控制运动量。我们使用 uniform 来控制运动的强度,这样你就可以在编辑器中调整动画,并实时看到结果,而不用重新编译着色器。
所有的运动都将使用余弦波应用于模型空间中的 VERTEX . 我们希望顶点在模型空间中, 使运动总是相对于鱼的方向. 例如,side-to-side将始终使鱼在其左至右的方向上来回移动, 而不是在世界方向的 x 轴上.
为了控制动画的速度,我们将通过使用 TIME 定义自己的时间变量开始。
//time_scale is a uniform float
float time = TIME * time_scale;
我们将实施的第一项议案是左右运动. 它可以通过 TIME 的 cos 抵消 VERTEX.x 来制作. 每次渲染网格时, 所有顶点都会移动到 "cos(时间)" 的数量.
//side_to_side is a uniform float
VERTEX.x += cos(time) * side_to_side;
生成的动画看起来是这样的:
接下来,我们添加轴心点。因为鱼以 (0, 0) 为中心,我们所要做的只是将 VERTEX 乘以旋转矩阵,使其围绕鱼的中心旋转。
我们构造一个旋转矩阵, 如下所示:
//angle is scaled by 0.1 so that the fish only pivots and doesn't rotate all the way around
//pivot is a uniform float
float pivot_angle = cos(time) * 0.1 * pivot;
mat2 rotation_matrix = mat2(vec2(cos(pivot_angle), -sin(pivot_angle)), vec2(sin(pivot_angle), cos(pivot_angle)));
然后我们把它乘以 VERTEX.xz,应用到 x 和 z 轴上。
VERTEX.xz = rotation_matrix * VERTEX.xz;
在只应用轴心的情况下,你会看到这个:
接下来的两个动作需要沿着鱼的脊柱平移. 为此, 我们需要一个新的变量, body . body 是一个浮点数,在鱼的尾部是 0 ,在头部是 1 .
float body = (VERTEX.z + 1.0) / 2.0; //for a fish centered at (0, 0) with a length of 2
下一个运动是沿着鱼的长度向下移动的余弦波. 为了让它沿着鱼的脊柱移动, 我们用脊柱的位置来偏移输入到 cos 的位置, 也就是我们在上面定义的变量 body。
//wave is a uniform float
VERTEX.x += cos(time + body) * wave;
这看起来很像我们上面定义的左右运动, 但在这个例子中, 通过使用 body 来偏移 cos,沿着脊柱的每个顶点在波浪中都有不同的位置, 使它看起来像是沿着鱼移动的波浪.
最后一个动作是扭转,也就是沿着脊柱滚动。类似轴心运动,我们首先构造一个旋转矩阵。
//twist is a uniform float
float twist_angle = cos(time + body) * 0.3 * twist;
mat2 twist_matrix = mat2(vec2(cos(twist_angle), -sin(twist_angle)), vec2(sin(twist_angle), cos(twist_angle)));
我们在 xy 轴上应用旋转, 使鱼看起来绕着它的脊柱滚动. 要做到这一点, 鱼的脊柱需要以 z 轴为中心.
VERTEX.xy = twist_matrix * VERTEX.xy;
这是应用扭曲的鱼:
如果我们一个接一个地应用这些运动, 就得到一个类似液体凝胶似的运动.
通常鱼主要使用身体的后半部分游泳,所以我们需要将平移运动限制在鱼的后半部分。为此,我们创建一个新变量 mask (遮罩)。
mask 是个浮点数,从鱼头的 0 过渡到鱼尾的 1 ,我们用 smoothstep 来控制在哪里进行由 0 到 1 的过渡。
//mask_black and mask_white are uniforms
float mask = smoothstep(mask_black, mask_white, 1.0 - body);
下面是把 COLOR 设置成 mask 后这条鱼的样子:
我们在做波浪运动的地方乘以 mask 就可以把动作限制在后半部分。
//wave motion with mask
VERTEX.x += cos(time + body) * mask * wave;
为了将遮罩应用于扭曲, 我们使用 mix . mix 允许在完全旋转的顶点和未旋转的顶点之间混合顶点位置. 需要使用 mix 而不是将 mask 乘以旋转后的 VERTEX , 因为不是将运动加到 VERTEX 上, 而是用旋转后的版本替换 VERTEX . 如果把它乘以 mask , 就会把鱼缩小.
//twist motion with mask
VERTEX.xy = mix(VERTEX.xy, twist_matrix * VERTEX.xy, mask);
将四个动作组合在一起, 就得到了最终的动画效果.
继续发挥 uniform 的作用, 以改变鱼的游泳周期. 你会发现, 你可以用这四个动作创造出各种各样的游泳方式.
制作一群鱼
Godot makes it easy to render thousands of the same object using a MultiMeshInstance3D node.
A MultiMeshInstance3D node is created and used the same way you would make a MeshInstance3D node.
For this tutorial, we will name the MultiMeshInstance3D node School, because it will contain
a school of fish.
Once you have a MultiMeshInstance3D add a MultiMesh, and to that MultiMesh add your Mesh with the shader from above.
MultiMeshes 使用三个额外的实例属性来绘制 Mesh:变换(旋转、平移、缩放)、颜色和自定义。自定义用于使用 Color 传入 4 个多用途变量。
instance_count 指定要绘制的网格的实例数量。现在,将 instance_count 保留为 0,因为当 instance_count 大于 0 时,你不能更改任何其他参数。我们稍后将在 GDScript 中设置 instance_count。
transform_format 指定使用的变换是 3D 还是 2D。对于本教程,请选择 3D。
对于 color_format 和 custom_data_format,你可以在 None、Byte、Float 之间选择。None 意味着你不会将这些数据(无论是每个实例的 COLOR 变量还是 INSTANCE_CUSTOM)传递给着色器。Byte 意味着组成你传入的颜色的每一个数字将被存储为 8 位,而 Float 意味着每一个数字将被存储为浮点数(32 位)。Float 速度较慢但更精确,Byte 占用内存较少、速度较快,但你可能会看到一些视觉上的伪像。
现在,将 instance_count 设置为你想要的鱼的数量。
接下来, 我们需要设置每个实例的变换.
There are two ways to set per-instance transforms for MultiMeshes. The first is entirely in editor and is described in the MultiMeshInstance3D tutorial.
第二种方法是, 遍历所有实例, 并在代码中设置它们的变换. 下面, 我们使用GDScript遍历所有实例, 并将它们的变换设置为随机位置.
for i in range($School.multimesh.instance_count):
  var position = Transform3D()
  position = position.translated(Vector3(randf() * 100 - 50, randf() * 50 - 25, randf() * 50 - 25))
  $School.multimesh.set_instance_transform(i, position)
Running this script will place the fish in random positions in a box around the position of the MultiMeshInstance3D.
备注
If performance is an issue for you, try running the scene with fewer fish.
你应该已经注意到所有鱼的游泳动作都是同步的了吧?这样看上去非常机械。下一步我们要做的就是让每一条鱼都处于游泳周期的不同位置,这样整个鱼群看起来就会更自然。
动画鱼群
使用 cos 函数给鱼做动画的一个好处是,它们只需要一个 time 参数。为了让每条鱼在游泳周期中处于单独的位置,我们只需要偏移 time。
为此,我们将每个实例的自定义值 INSTANCE_CUSTOM 添加到 time 中。
float time = (TIME * time_scale) + (6.28318 * INSTANCE_CUSTOM.x);
接下来,我们需要向 INSTANCE_CUSTOM 传递一个值。通过在上面的 for 循环中添加一行来实现这一点。在 for 循环中,为每个实例分配一组四个随机浮点数来使用。
$School.multimesh.set_instance_custom_data(i, Color(randf(), randf(), randf(), randf()))
现在这些鱼在游泳周期中都有独特的位置。你可以通过使用 INSTANCE_CUSTOM 乘以 TIME 让它们游泳更快或更慢,从而让它们更个性化。
//set speed from 50% - 150% of regular speed
float time = (TIME * (0.5 + INSTANCE_CUSTOM.y) * time_scale) + (6.28318 * INSTANCE_CUSTOM.x);
甚至你还可以像更改每个实例的自定义值一样, 尝试更改每个实例的颜色.
One problem that you will run into at this point is that the fish are animated, but they are not moving. You can move them by updating the per-instance transform for each fish every frame. Although doing so will be faster than moving thousands of MeshInstance3Ds per frame, it'll still likely be slow.
In the next tutorial we will cover how to use GPUParticles3D to take advantage of the GPU and move each fish around individually while still receiving the benefits of instancing.