Up to date
This page is up to date for Godot 4.2.
If you still find outdated information, please open an issue.
使用主题编辑器
This article explains how to create and manage UI themes using the Godot editor and its theme editor tool. We recommend getting familiar with the basics behind GUI skinning/theming by reading GUI 皮肤简介 before starting.
主题编辑器是底部面板工具,当一个 Theme 资源被选中进行编辑时,面板会自动激活。面板包含了添加、删除和调整主题类型和主题项目的必要用户界面。面板有一个预览区,用于测试你做出的变化,以及一个窗口对话框,用于对主题项目进行批量操作。
创建主题
和其他任何资源一样,主题可以直接在文件系统面板中创建:右键,选择新建资源...,然后选择 Theme 并点击创建。用来创建项目范围的主题很方便。
也可以在任何控件节点中创建主题。在场景树中选择控件节点后,找到检查器中的 theme 熟悉。然后就可以选择新建 Theme。
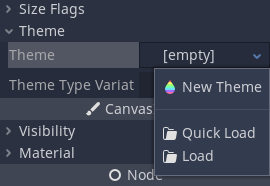
这样就会创建一个空主题,并且打开主题编辑器。请记住,这样创建的资源默认是和场景绑定的。可以使用上下文菜单将新建的主题保存为单独的文件。
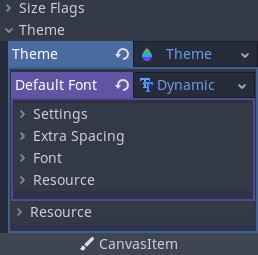
虽然主题编辑器提供了管理主题类型和项目的工具,主题也包括默认的备用字体,你只能使用检查器面板来编辑。这同样适用于复杂的资源类型的内容,如样式盒和图标——它们会在检查器中打开编辑。
主题编辑器概览
主题编辑器有两个主要部分。主要的主题编辑器位于Godot编辑器的底部,为用户提供了快速创建、编辑和删除主题项目和类型的工具。它提供了挑选和改变控件的可视化工具,抽象了底层的主题概念。另一方面,管理主题项目对话框,提供解决手动改变主题的需求。其对于创建新的编辑器主题时很有用。
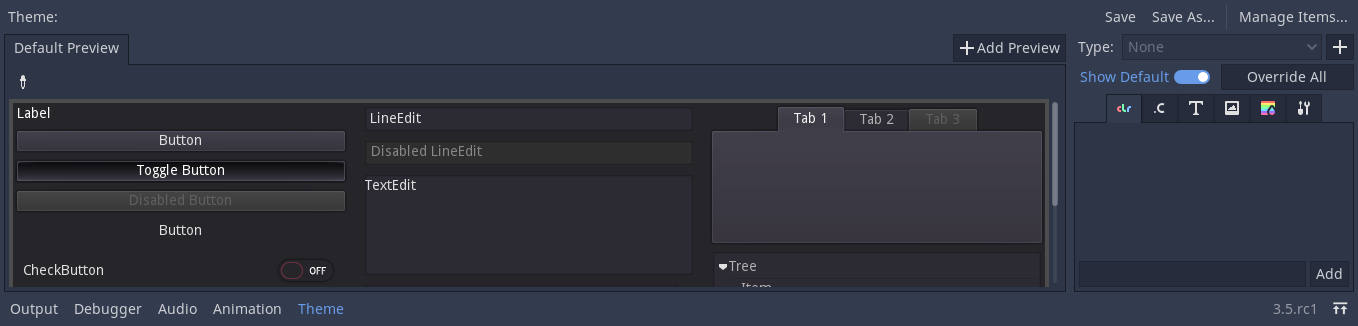
主题预览
主编辑器左侧的是一组预览选项卡。默认预览选项卡默认可见,里面有处于各种状态的大多数常用控件。预览是可交互的,所以也可以预览中间状态(比如鼠标悬停)。
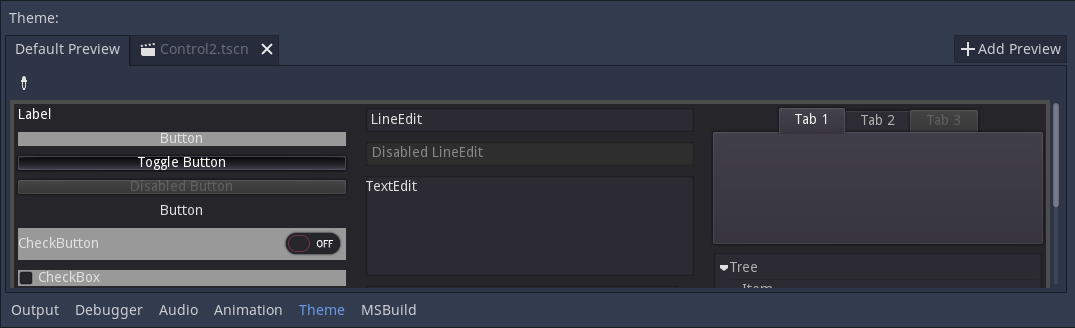
可以使用你自己项目中的任意场景创建更多的选项卡。场景的根节点必须是控件节点才能进行预览。点击添加预览按钮然后从文件系统中选择已保存的场景,就可以添加一个新的选项卡。

对场景的修改不会自动反映到预览中。更新预览需要点击工具栏上的重新加载按钮。
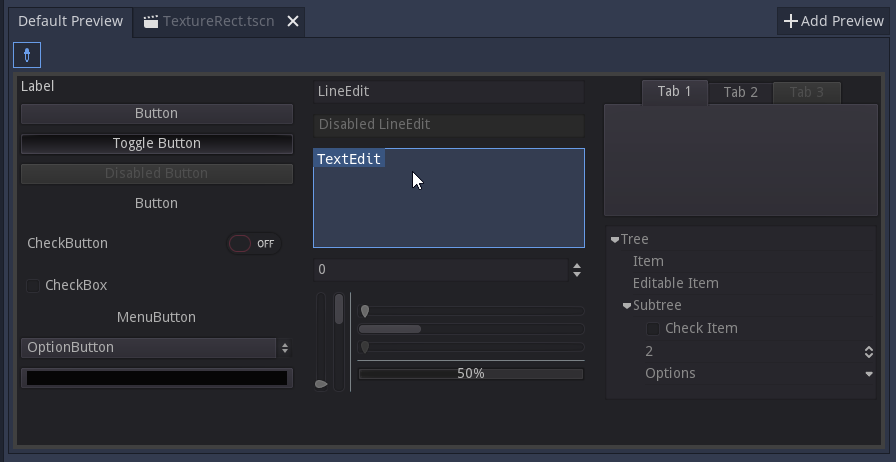
Previews can also be used to quickly select the theme type to edit. Select the picker tool from the toolbar and hover over the preview area to highlight control nodes. Highlighted control nodes display their class name, or type variation if available. Clicking on the highlighted control opens it for editing on the right-hand side.
主题类型与项目
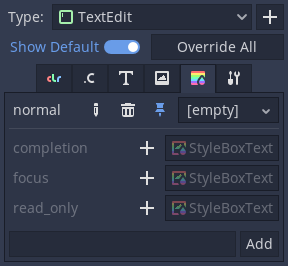
主题编辑器的右侧提供了编辑主题资源中可用的主题类型列表,以及所选类型的内容。类型的项目列表分为几个选项卡,对应于主题中可用的每种数据类型(颜色、常量、样式等)。如果启用了显示默认选项,则对于每个内置类型,其默认主题值都会显示为灰色。如果禁用该选项,则只显示编辑主题本身的可用项目。
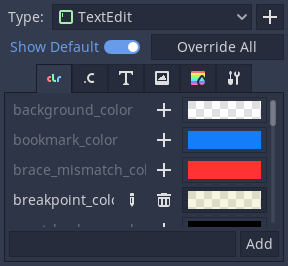
通过点击项目旁边的Override按钮,可以将默认主题中的个别项目添加到当前主题中。你也可以通过点击Override All按钮来覆盖所选主题类型的所有默认项目。然后可以用Remove Item按钮移除被覆盖的属性。属性也可以用Rename Item按钮重命名,完全自定义的属性可以用它下面的文本字段添加到列表中。
覆盖的主题项目可以直接在右侧面板中编辑,除非它们是资源。资源具有可用的基本控件,但必须在检查器栏中进行编辑。
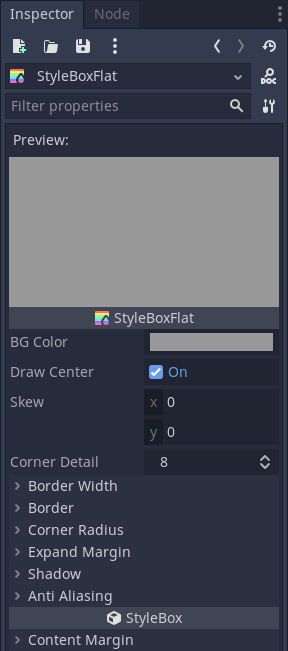
样式盒子有一个独特的功能,你可以在其中固定列表中的单个样式盒子。固定样式盒子就像包头一样,当你更改其属性时,所有相同类型的样式盒子都会随之更新。这允许你同时编辑多个样式盒子的属性。
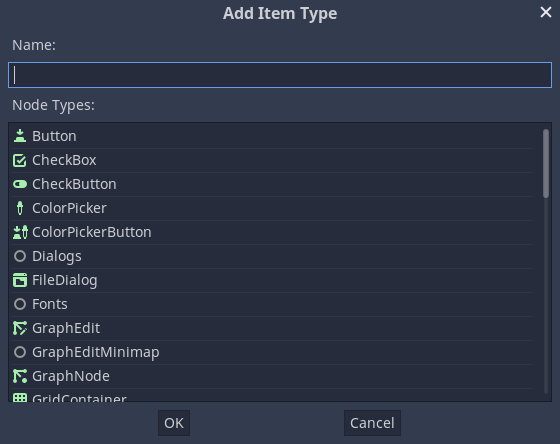
虽然可以从预览中选择主题类型,但也可以手动添加。单击类型列表旁边的加号按钮可以打开添加项目类型菜单。在菜单中,可以从列表中选择一种类型,也可以输入任意名称来创建自定义类型。文本字段过滤控件节点列表。
管理与导入项目
单击Manage Items按钮会打开Manage Theme Items对话框。在Edit Items选项卡中,你可以查看和添加主题类型,以及查看和编辑所选类型的主题项目。
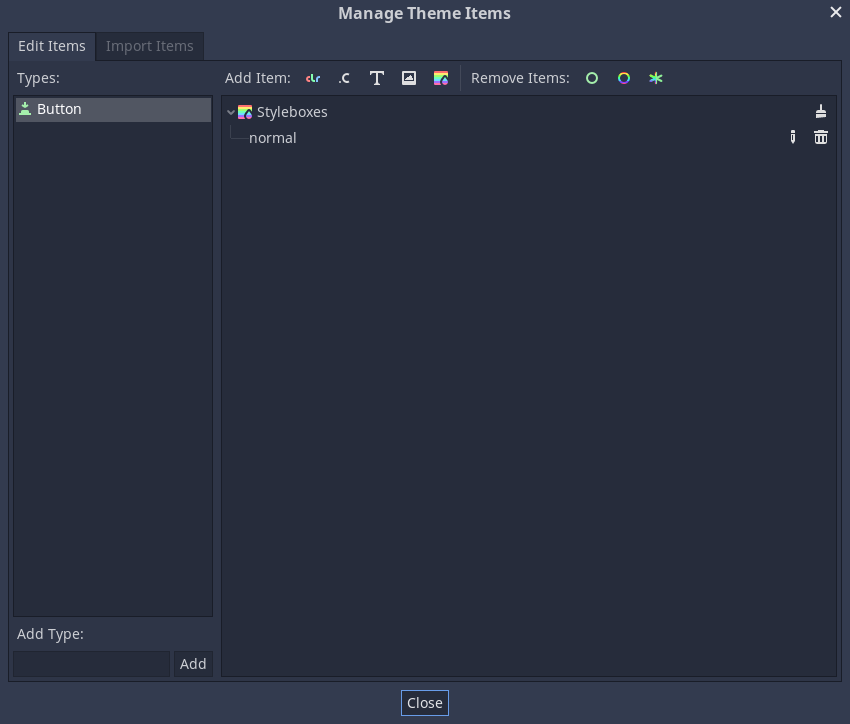
你可以通过点击相应的 Add X Item 并指定其名称,创建、重命名和删除单个主题项目。你也可以按数据类型(使用列表中的画笔图标)或按质量批量删除主题项。Remove Class Items将删除你为一个控制节点类型定制的所有内置主题项目。Remove Custom Items将删除所选类型的所有自定义主题项目。**Remove All Items**将删除该类型的所有项目。
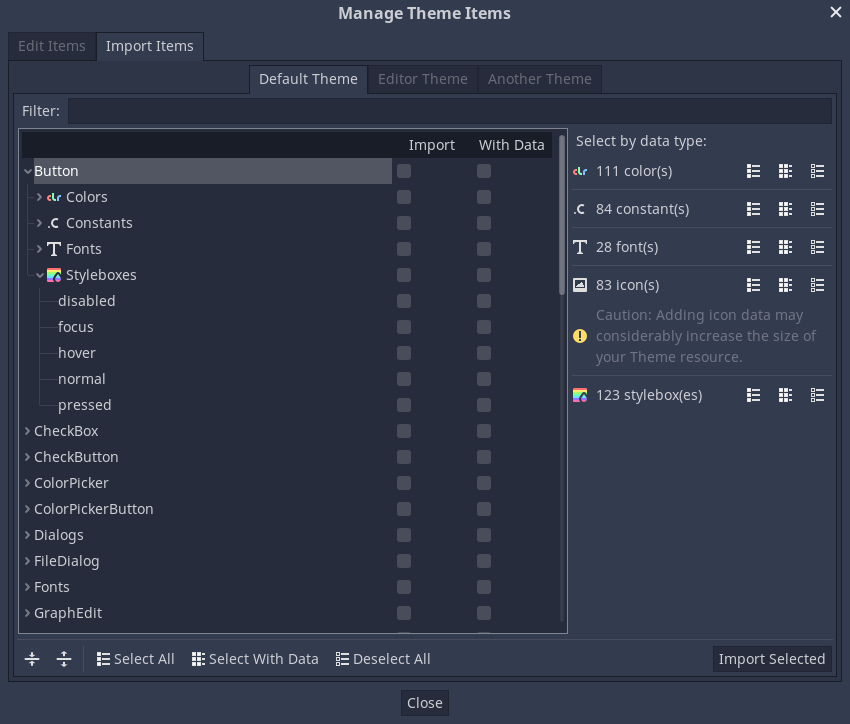
From the Import Items tab you can import theme items from other themes. You can import items from the default Godot theme, the Godot editor theme, or another custom theme. You can import individual or multiple items, and you can decide whether to copy or omit their data as well. There are several ways you can select and deselect the items, including by hand, by hierarchy, by data type, and everything. Opting to include the data will copy all theme items as they are to your theme. Omitting the data will create the items of the corresponding data type and name, but will leave them empty, creating a template of a theme in a way.