Creating the player scene
With the project settings in place, we can start working on the player-controlled character.
The first scene will define the Player object. One of the benefits of
creating a separate Player scene is that we can test it separately, even before
we've created other parts of the game.
Node structure
To begin, we need to choose a root node for the player object. As a general rule, a scene's root node should reflect the object's desired functionality - what the object is. Click the "Other Node" button and add an Area2D node to the scene.

Godot will display a warning icon next to the node in the scene tree. You can ignore it for now. We will address it later.
With Area2D we can detect objects that overlap or run into the player.
Change the node's name to Player by double-clicking on it. Now that we've
set the scene's root node, we can add additional nodes to give it more
functionality.
Before we add any children to the Player node, we want to make sure we don't
accidentally move or resize them by clicking on them. Select the node and click
the icon to the right of the lock; its tooltip says "Makes sure the object's
children are not selectable."

Save the scene. Click Scene -> Save, or press Ctrl + S on Windows/Linux or Cmd + S on macOS.
Note
For this project, we will be following the Godot naming conventions.
GDScript: Classes (nodes) use PascalCase, variables and functions use snake_case, and constants use ALL_CAPS (See GDScript style guide).
C#: Classes, export variables and methods use PascalCase, private fields use _camelCase, local variables and parameters use camelCase (See C# style guide). Be careful to type the method names precisely when connecting signals.
Sprite animation
Click on the Player node and add an AnimatedSprite node as a child. The AnimatedSprite will handle the
appearance and animations for our player. Notice that there is a warning symbol
next to the node. An AnimatedSprite requires a SpriteFrames resource, which is a list of the animations it can
display. To create one, find the Frames property in the Inspector and click
"[empty]" -> "New SpriteFrames". Click again to open the "SpriteFrames" panel:
On the left is a list of animations. Click the "default" one and rename it to
"walk". Then click the "New Animation" button to create a second animation named
"up". Find the player images in the "FileSystem" tab - they're in the art
folder you unzipped earlier. Drag the two images for each animation, named
playerGrey_up[1/2] and playerGrey_walk[1/2], into the "Animation Frames"
side of the panel for the corresponding animation:
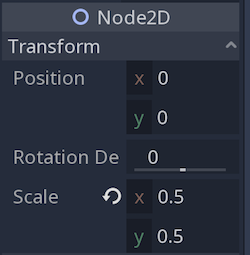
The player images are a bit too large for the game window, so we need to scale
them down. Click on the AnimatedSprite node and set the Scale property
to (0.5, 0.5). You can find it in the Inspector under the Node2D
heading.
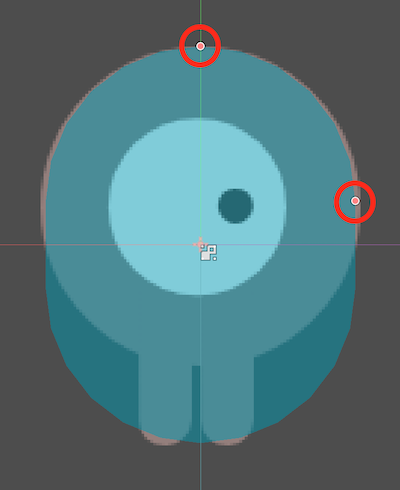
Finally, add a CollisionShape2D as a child of
Player. This will determine the player's "hitbox", or the bounds of its
collision area. For this character, a CapsuleShape2D node gives the best
fit, so next to "Shape" in the Inspector, click "[empty]"" -> "New
CapsuleShape2D". Using the two size handles, resize the shape to cover the
sprite:
When you're finished, your Player scene should look like this:
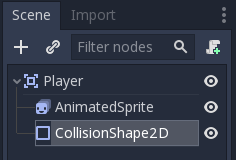
Make sure to save the scene again after these changes.
In the next part, we'll add a script to the player node to move and animate it. Then, we'll set up collision detection to know when the player got hit by something.