Developing for Oculus Quest
Introduction
This tutorial goes over how to get started developing for the Meta Quest with the Godot Oculus Mobile plugin.
Before starting, there are two things you need to do:
First you need to go through the steps on the Exporting for Android page. This leads you through installing the toolset that Godot needs to export to Android devices.
Next you need the Quest plugin. You can get it from the Asset Library or manually download it from here.
Setting Up Godot
To get started open Godot and create a new project.

Make sure to choose the GLES2 renderer. Due to the
Quest's GPU this backend is far better suited for the Quest.
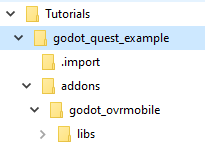
Copy the addons folder from the Oculus Mobile asset into your Godot project. Your project tree should look similar to this:
Now you can start building the main scene:
Add an ARVROrigin node first.
Then add three child nodes to the origin node, one ARVRCamera and two ARVRController nodes.
Assign controller ID 1 to the first ARVRController and rename that to
LeftHand.Assign controller ID 2 to the second ARVRController and rename that to
RightHand.Finally add a MeshInstance as a child node to our first ARVRController and create a box shape, resize the box so each side is set to 0.1. Now duplicate the MeshInstance and move it to the second ARVRController node. These will stand in for our controllers.

Now add a script to the main node and add the following code:
extends Spatial


var perform_runtime_config = false


onready var ovr_init_config = preload("res://addons/godot_ovrmobile/OvrInitConfig.gdns").new()
onready var ovr_performance = preload("res://addons/godot_ovrmobile/OvrPerformance.gdns").new()


func _ready():
    var interface = ARVRServer.find_interface("OVRMobile")
    if interface:
        ovr_init_config.set_render_target_size_multiplier(1)

        if interface.initialize():
            get_viewport().arvr = true


func _process(_delta):
    if not perform_runtime_config:
        ovr_performance.set_clock_levels(1, 1)
        ovr_performance.set_extra_latency_mode(1)
        perform_runtime_config = true
Before you can export this project to the Quest you need to do three more things.
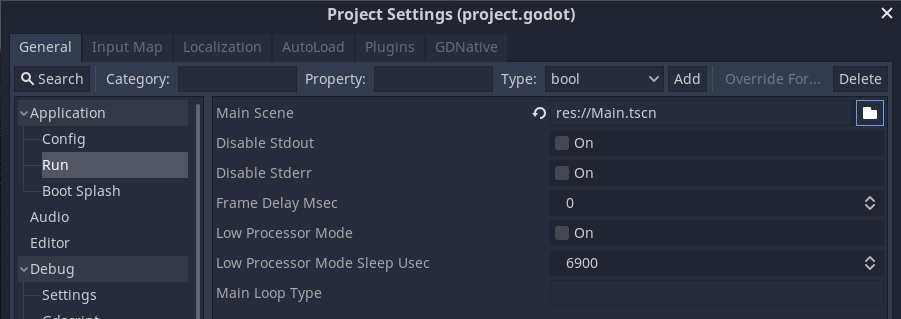
First go into the project settings and make sure that the main scene is the scene we run. Godot does not ask you to set this on export.
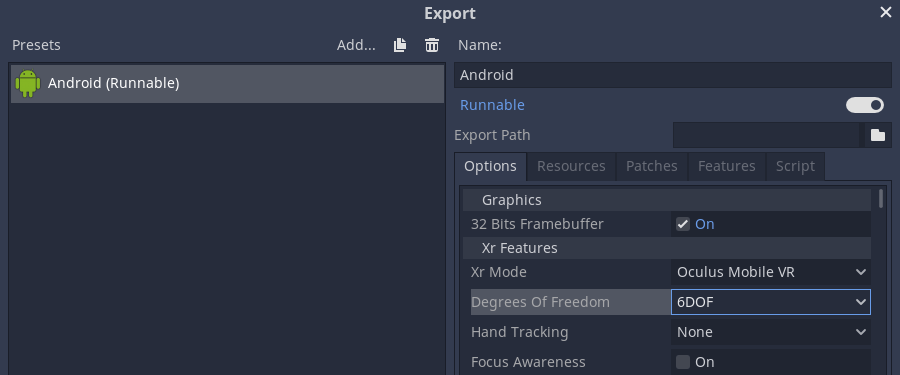
Then go into the export menu and configure a new Android export. If you still haven't gone through the Exporting for Android page do it now. If you didn't you'll have some red messages on this screen.
If you did you can forge ahead and make a few small changes to the
export settings. First change the XR Mode to Oculus Mobile VR.
Then change the Degrees of Freedom mode to 6DOF.
Now save and close the export window.
Setting Up Your Quest
Follow these instructions to setup your device for development.
Once your device is set up and connected, click the Android logo that should be visible in the top-right corner of the Godot editor. When clicked, it exports your project and runs it on the connected device. If you do not see this Android logo, make sure you have create an Android export preset and that the preset is marked as Runnable in the Export dialog.
The above does the bare minimum to get your project running on the Quest, it's not very exciting. Holger Dammertz has made a great toolkit for the quest that contains a lot of scenes to get help you on your way including really nice controller meshes.
You can find the toolkit here.
If you want to help out with improving the plugin please join us here.