Attention: Here be dragons
This is the latest
(unstable) version of this documentation, which may document features
not available in or compatible with released stable versions of Godot.
Checking the stable version of the documentation...
プラグインの作成
プラグインについて
プラグインは、便利なツールを使用してエディタを拡張する優れた方法です。エディタをリロードしなくても、GDScriptと標準シーンで完全に作成できます。モジュールとは異なり、C++コードを作成したり、エンジンを再コンパイルしたりする必要はありません。これによりプラグインのパワフルさが低下しますが、プラグインでできることはまだたくさんあります。プラグインは、エディタ機能を追加するスクリプトを使用して作成されることを除いて、すでに作成できるシーンに似ていることに注意してください。
This tutorial will guide you through the creation of two plugins so you can understand how they work and be able to develop your own. The first is a custom node that you can add to any scene in the project, and the other is a custom dock added to the editor.
プラグインの作成
開始する前に、必要な場所に新しい空のプロジェクトを作成します。これは、プラグインを開発およびテストするためのベースとして機能します。
エディタが新しいプラグインを識別するために最初に必要なことは、設定用の plugin.cfg と機能を備えたツールスクリプトの2つのファイルを作成することです。 プラグインには、プロジェクトフォルダ内に addons/plugin_name のような標準パスがあります。Godotは、これらのファイルを生成し、必要な場所に配置するためのダイアログを提供します。
In the main toolbar, click the Project dropdown. Then click
Project Settings.... Go to the Plugins tab and then click
on the button in the top-right.
次のようなダイアログが表示されます:
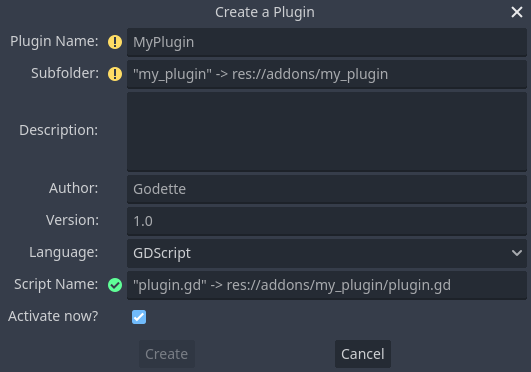
各フィールドのプレースホルダーテキストは、プラグインによるファイルの作成と構成ファイルの値にどのように影響するかを説明しています。
To continue with the example, use the following values:
Plugin Name: My Custom Node
Subfolder: my_custom_node
Description: A custom node made to extend the Godot Engine.
Author: Your Name Here
Version: 1.0.0
Language: GDScript
Script Name: custom_node.gd
Plugin Name: My Custom Node
Subfolder: MyCustomNode
Description: A custom node made to extend the Godot Engine.
Author: Your Name Here
Version: 1.0.0
Language: C#
Script Name: CustomNode.cs
警告
In C#, the EditorPlugin script needs to be compiled, which
requires building the project. After building the project the plugin can be
enabled in the Plugins tab of Project Settings.
次のようなディレクトリ構造になるはずです:

plugin.cfg is an INI file with metadata about your plugin.
The name and description help people understand what it does.
Your name helps you get properly credited for your work.
The version number helps others know if they have an outdated version;
if you are unsure on how to come up with the version number, check out Semantic Versioning.
The main script file will instruct Godot what your plugin does in the editor
once it is active.
スクリプトファイル
Upon creation of the plugin, the dialog will automatically open the
EditorPlugin script for you. The script has two requirements that you cannot
change: it must be a @tool script, or else it will not load properly in the
editor, and it must inherit from EditorPlugin.
警告
EditorPluginスクリプトの他にも、プラグインが使用する全てのGDScriptは必ず*toolでもある*必要があります。 @tool がない全てのGDScriptは、エディタから使われる際に空のファイルのようにふるまいます!
It's important to deal with initialization and clean-up of resources. A good practice is to use the virtual function _enter_tree() to initialize your plugin and _exit_tree() to clean it up. Thankfully, the dialog generates these callbacks for you. Your script should look something like this:
@tool
extends EditorPlugin


func _enter_tree():
    # Initialization of the plugin goes here.
    pass


func _exit_tree():
    # Clean-up of the plugin goes here.
    pass
#if TOOLS
using Godot;

[Tool]
public partial class CustomNode : EditorPlugin
{
    public override void _EnterTree()
    {
        // Initialization of the plugin goes here.
    }

    public override void _ExitTree()
    {
        // Clean-up of the plugin goes here.
    }
}
#endif
これは、新しいプラグインを作成するときに使用するのに適したテンプレートです。
カスタム ノード
再利用可能なカスタムシーンやコントロールなど、多くのノードで特定の動作が必要な場合があります。 インスタンス化は多くの場合に役立ちますが、多くのプロジェクトでインスタンス化を使用している場合は特に、面倒な場合があります。 これに対する適切な解決策は、カスタムの動作を持つノードを追加するプラグインを作成することです。
For this tutorial, we'll create a button that prints a message when clicked. For that, we'll need a script that extends from Button. It could also extend BaseButton if you prefer:
# Optional, add to execute in the editor.
@tool
# Icons are optional.
# Alternatively, you may use the UID of the icon or the absolute path.
@icon("icon.svg")
# Automatically register the node in the Create New Node dialog
# and make it available for use with other scripts.
class_name MyButton
extends Button
func _enter_tree():
pressed.connect(clicked)
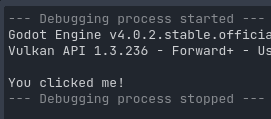
func clicked():
print("You clicked me!")
using Godot;

// Optional, add to execute in the editor.
[Tool]

// Icons are optional.
// Alternatively, you may use the UID of the icon or the absolute path.
[Icon("icon.svg")]

// Automatically register the node in the Create New Node dialog
// and make it available for use with other scripts.
[GlobalClass]
public partial class MyButton : Button
{
    public override void _EnterTree()
    {
        Pressed += Clicked;
    }

    public void Clicked()
    {
        GD.Print("You clicked me!");
    }
}
That's it for our basic button. You can save this as my_button.gd inside the
plugin folder. You may have a 16×16 icon to show in the scene tree. If you
don't have one, you can grab the default one from the engine and save it in your
addons/my_custom_node folder as icon.svg, or use the default Godot logo
(@icon("res://icon.svg")).
Tip
SVG images that are used as custom node icons should have the Editor > Scale With Editor Scale and Editor > Convert Colors With Editor Theme import options enabled. This allows icons to follow the editor's scale and theming settings if the icons are designed with the same color palette as Godot's own icons.
これが完了すると、プラグインは プロジェクト設定 のプラグインリストですでに使用可能になっているはずなので、Checking the results で説明されているようにアクティブにします。
次に、新しいノードを追加して試してください:
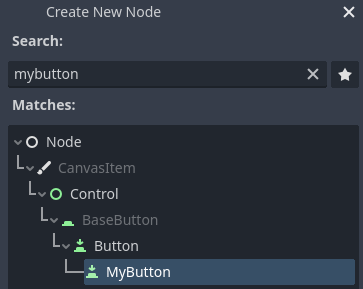
ノードを追加すると、作成したスクリプトが既に接続されていることがわかります。 ボタンにテキストを設定し、シーンを保存して実行します。 ボタンをクリックすると、コンソールにテキストが表示されます:
カスタムドック
場合によっては、エディタを拡張し、常に使用可能なツールを追加する必要があります。簡単な方法は、新しいドックにプラグインを追加することです。ドックはコントロールに基づいた単なるシーンであるため、通常のGUIシーンと同様の方法で作成されます。
カスタムドックの作成は、カスタムノードのように行われます。addons/my_custom_dock フォルダに新しい plugin.cfg ファイルを作成し、次のコンテンツを追加します:
[plugin]

name="My Custom Dock"
description="A custom dock made so I can learn how to make plugins."
author="Your Name Here"
version="1.0"
script="custom_dock.gd"
[plugin]

name="My Custom Dock"
description="A custom dock made so I can learn how to make plugins."
author="Your Name Here"
version="1.0"
script="CustomDock.cs"
に、同じフォルダにスクリプト custom_dock.gd を作成します。良いスタートを切るために、:ref:`前に見たテンプレート <doc_making_plugins_template_code> ` を入力してください。
新しいカスタムドックを追加しようとしているので、ドックのコンテンツを作成する必要があります。これは、標準のGodotシーンに他なりません。エディタで新しいシーンを作成し、編集するだけです。
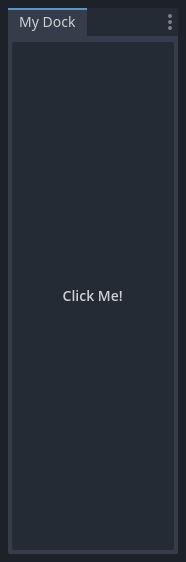
For an editor dock, the root node must be a Control or one of its child classes. For this tutorial, you can create a single button. Don't forget to add some text to your button.
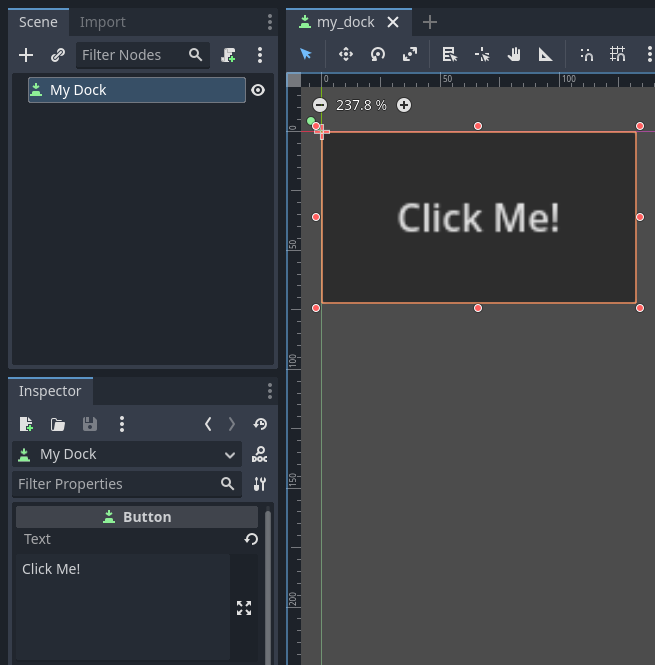
Save this scene as my_dock.tscn. Now, we need to grab the scene we created
then add it as a dock in the editor. For this, you can rely on the function
add_dock() from the
EditorPlugin class.
ドックの位置を選択し、追加するコントロール(作成したばかりのシーン)を定義する必要があります。プラグインが非アクティブになったら、ドックを削除する ことを忘れないでください。 スクリプトは次のようになります:
@tool
extends EditorPlugin


# A class member to hold the dock during the plugin life cycle.
var dock


func _enter_tree():
    # Initialization of the plugin goes here.
    # Load the dock scene and instantiate it.
    var dock_scene = preload("res://addons/my_custom_dock/my_dock.tscn").instantiate()

    # Create the dock and add the loaded scene to it.
    dock = EditorDock.new()
    dock.add_child(dock_scene)

    dock.title = "My Dock"

    # Note that LEFT_UL means the left of the editor, upper-left dock.
    dock.default_slot = DOCK_SLOT_LEFT_UL

    # Allow the dock to be on the left or right of the editor, and to be made floating.
    dock.available_layouts = EditorDock.DOCK_LAYOUT_VERTICAL | EditorDock.DOCK_LAYOUT_FLOATING

    add_dock(dock)


func _exit_tree():
    # Clean-up of the plugin goes here.
    # Remove the dock.
    remove_dock(dock)
    # Erase the control from the memory.
    dock.queue_free()
#if TOOLS
using Godot;

[Tool]
public partial class CustomDock : EditorPlugin
{
    private EditorDock _dock;

    public override void _EnterTree()
    {
        var _dock_scene = GD.Load<PackedScene>("res://addons/MyCustomDock/MyDock.tscn").Instantiate<Control>();

        // Create the dock and add the loaded scene to it.
        _dock = new EditorDock();
        _dock.AddChild(dock_scene);

        _dock.Title = "My Dock";

        // Note that LeftUl means the left of the editor, upper-left dock.
        _dock.DefaultSlot = DockSlot.LeftUl;

        // Allow the dock to be on the left or right of the editor, and to be made floating.
        _dock.AvailableLayouts = DockLayout.Horizontal | DockLayout.Floating;

        AddDock(_dock);
    }

    public override void _ExitTree()
    {
        // Clean-up of the plugin goes here.
        // Remove the dock.
        RemoveDock(_dock);
        // Erase the control from the memory.
        _dock.QueueFree();
    }
}
#endif
ドックは指定された位置に最初に表示されますが、ユーザーは自由に位置を変更し、結果のレイアウトを保存できることに注意してください。
結果の確認
It's now time to check the results of your work. Open the Project Settings and click on the Plugins tab. Your plugin should be the only one on the list.

You can see the plugin is not enabled. Click the Enable checkbox to activate the plugin. The dock should become visible before you even close the settings window. You should now have a custom dock:
Registering autoloads/singletons in plugins
It is possible for editor plugins to automatically register autoloads when the plugin is enabled. This also includes unregistering the autoload when the plugin is disabled.
This makes setting up plugins faster for users, as they no longer have to manually add autoloads to their project settings if your editor plugin requires the use of an autoload.
Use the following code to register a singleton from an editor plugin:
@tool
extends EditorPlugin

# Replace this value with a PascalCase autoload name, as per the GDScript style guide.
const AUTOLOAD_NAME = "SomeAutoload"


func _enable_plugin():
    # The autoload can be a scene or script file.
    add_autoload_singleton(AUTOLOAD_NAME, "res://addons/my_addon/some_autoload.tscn")


func _disable_plugin():
    remove_autoload_singleton(AUTOLOAD_NAME)
#if TOOLS
using Godot;

[Tool]
public partial class MyEditorPlugin : EditorPlugin
{
    // Replace this value with a PascalCase autoload name.
    private const string AutoloadName = "SomeAutoload";

    public override void _EnablePlugin()
    {
        // The autoload can be a scene or script file.
        AddAutoloadSingleton(AutoloadName, "res://addons/MyAddon/SomeAutoload.tscn");
    }

    public override void _DisablePlugin()
    {
        RemoveAutoloadSingleton(AutoloadName);
    }
}
#endif
Using sub-plugins
Often a plugin adds multiple things, for example a custom node and a panel. In those cases it might be easier to have a separate plugin script for each of those features. Sub-plugins can be used for this.
First create all plugins and sub plugins as normal plugins:

Then move the sub plugins into the main plugin folder:

Godot will hide sub-plugins from the plugin list, so that a user can't enable or disable them. Instead the main plugin script should enable and disable sub-plugins like this:
@tool
extends EditorPlugin

# The main plugin is located at res://addons/my_plugin/
const PLUGIN_NAME = "my_plugin"

func _enable_plugin():
    EditorInterface.set_plugin_enabled(PLUGIN_NAME + "/node", true)
    EditorInterface.set_plugin_enabled(PLUGIN_NAME + "/panel", true)

func _disable_plugin():
    EditorInterface.set_plugin_enabled(PLUGIN_NAME + "/node", false)
    EditorInterface.set_plugin_enabled(PLUGIN_NAME + "/panel", false)
今後の展開
基本的なプラグインの作成方法を学習したので、エディタをいくつかの方法で拡張できます。GDScriptを使用して、多くの機能をエディタに追加できます。これは、C++モジュールを詳しく掘り下げることなく、専用のエディタを作成するための強力な方法です。
自分でプラグインを作成して自分自身を助け、Asset Library で共有して、人々があなたの仕事から利益を得られるようにすることができます。