Attention: Here be dragons
This is the latest
(unstable) version of this documentation, which may document features
not available in or compatible with released stable versions of Godot.
Checking the stable version of the documentation...
3Dの概要
3Dゲームの作成は難しい場合があります。 Z 座標が追加されたことで、2Dゲームをシンプルにするのに役立った多くのテクニックが通用しなくなります。 この移行を支援するために、Godotは2Dおよび3Dで同様のAPIを使用していることに言及する価値があります。 ほとんどのノードは2Dバージョンと3Dバージョンの両方が存在します。 実際に3Dプラットフォーマーチュートリアルや、3Dキネマティックキャラクターチュートリアルを確認してみてください。
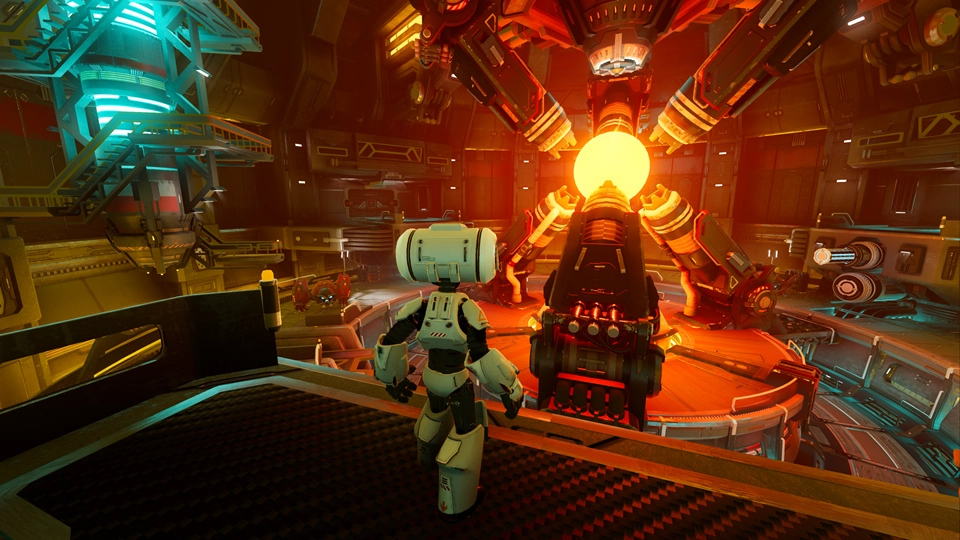
Godot Third Person Shooter (TPS) Demo, available on the Github repository or the Asset Library.
In 3D, math is a little more complex than in 2D. For an introduction to the relevant math written for game developers, not mathemeticians or engineers, check out ベクトル演算 and 3D変換を使用する.
3D workspace
Editing 3D scenes is done in the 3D workspace. This workspace can be selected manually, but it will be automatically selected when a Node3D node is selected.

Similar to 2D, the tabs below the workspace selector are used to change between currently opened scenes or create a new one using the plus (+) button. The left and right docks should be familiar from editor introduction.
Below the scene selector, the main toolbar is visible, and beneath the main toolbar is the 3D viewport.
Main toolbar
Some buttons in the main toolbar are the same as those in the 2D workspace. A brief explanation is given with the shortcut if the mouse cursor is hovered over a button for one second. Some buttons may have additional functionality if another keypress is performed. A recap of main functionality of each button with its default shortcut is provided below from left to right:

Transform Mode (Q): Enables a combined move + rotation mode for the selected nodes.
Move Mode (W): Enables move (or translate) mode for the selected nodes. See 空間と操作のギズモ for more details.
Rotate Mode (E): Enables rotation mode for the selected nodes. See 空間と操作のギズモ for more details.
Scale Mode (R): Enables scaling and displays scaling gizmos in different axes for the selected nodes. See 空間と操作のギズモ for more details.
Select Mode (Q): Allows selection of nodes in the viewport. Left clicking on a node to select one. Left clicking and dragging a rectangle selects all nodes within the rectangle's boundaries, once released. Holding Shift while selecting adds more nodes to the selection. Clicking on a selected node while holding Shift deselects the node. In this mode, you can use the gizmos to perform movement or rotation.
Show the list of selectable nodes at the clicked position: As the description suggests, this provides a list of selectable nodes at the clicked position as a context menu, if there is more than one node in the clicked area.
Lock (Ctrl + L) the selected nodes, preventing selection and movement in the viewport. Clicking the button again (or using Ctrl + Shift + L) unlocks the selected nodes. Locked nodes can only be selected in the scene tree. They can easily be identified with a padlock next to their node names in the scene tree. Clicking on this padlock also unlocks the nodes.
Group selected nodes (Ctrl + G). This allows selection of the root node if any of the children are selected. Using Ctrl + G ungroups them. Additionally, clicking the ungroup button in the scene tree performs the same action.
Ruler Mode (M): When enabled you can click and drag to measure distance in the scene in meters.
Use Local Space (T): If enabled, gizmos of a node are drawn using the current node's rotation angle instead of the global viewport axes.
Use Snap (Y): If enabled, movement, and rotation snap to grid. Snapping can also temporarily be activated using Ctrl while performing the action. The settings for changing snap options are explained below.
Use Trackball (U): When enabled, dragging the center of a node (represented by a subtle ray disc highlight) will rotate the node like a physical trackball.
Preserve Children Transform (P): When enabled, transforming a node will preserve the global transform of its children.
Toggle preview sunlight: If no DirectionalLight3D exist in the scene, a preview of sunlight can be used as a light source. See Preview environment and light for more details.
Toggle preview environment: If no WorldEnvironment exists in the scene, a preview of the environment can be used as a placeholder. See Preview environment and light for more details.
Edit Sun and Environment Settings (three dots): Opens the menu to configure preview sunlight and environment settings. See Preview environment and light for more details.
Transform menu: It has three options:
Snap Object to Floor: Snaps an object to a solid floor.
Transform Dialog: Opens a dialog to adjust transform parameters (translate, rotate, scale, and transform) manually.
Snap Settings: Allows you to change transform, rotate snap (in degrees), and scale snap (in percent) settings.
View menu: Controls the view options and enables additional viewports:
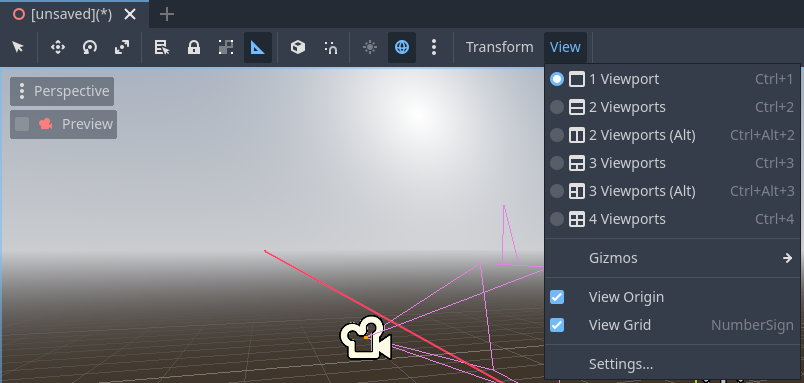
In this menu, you can also show/hide grids, which are set to 1x1 meter by default, and the origin, where the blue, green, and red axis lines intersect. Moreover, specific types of gizmos can be toggled in this menu.
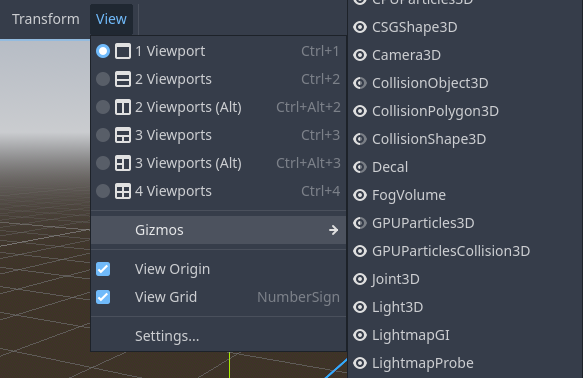
An open eye means that the gizmo is visible, a closed eye means it is hidden. A half-open eye means that it is also visible through opaque surfaces.
Clicking on Settings in this view menu opens a window to change the Vertical Field of View (VFOV) parameter (in degrees), Z-Near, and Z-Far values.
Next to the View menu, additional buttons may be visible. In the toolbar image at the beginning of this chapter, an additional Mesh button appears because a MeshInstance3D is selected. This menu provides some quick actions or tools to work on a specific node or selection.
View menu of viewport
Below the Select tool, in the 3D viewport, clicking on the three dots opens the View menu for the viewport. Hiding all shown gizmos in the editor's 3D view can also be performed through this menu:
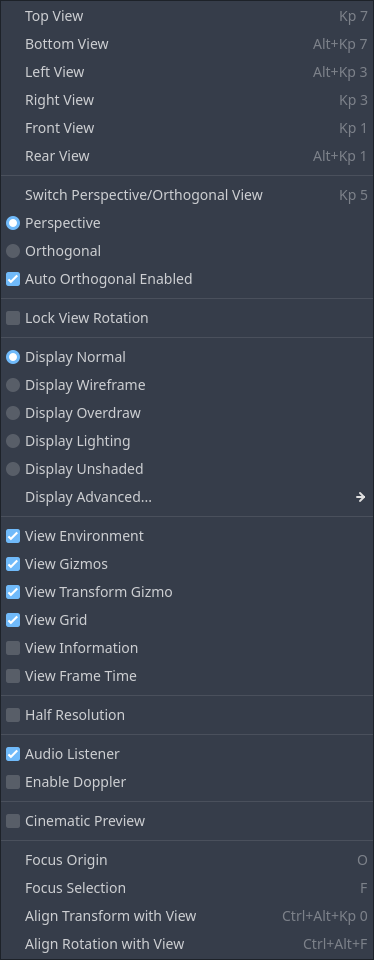
This menu also displays the current view type and enables quick adjustment of the viewport's viewing angle. Additionally, it offers options to modify the appearance of nodes within the viewport.
座標系
Godotは3Dの全てに メートル法 を使用しており、1単位は1メートルに相当します。3D物理および、その他の分野はメートル法で調整されています。異なるスケールの使用を試みるのは一般的に良い考えではありません (何をしているのかわかっている場合を除く)。
3Dアセットについて作業するときは、常に正しいスケールで作業することが最適です (DCCツールをメートル法に設定します)。 Godotはインポート後のスケーリングは可能で、ほとんどの場合これは機能しますが、まれにレンダリングや物理などのデリケートな領域で浮動小数点精度の問題(グリッチやアーティファクトなど)が発生する可能性があります。アーティストは常に適切なスケールで作業するようにしてください!
Y軸は「上方向」に使用されます。水平X/Z軸に関しては、Godot は 右手 座標系を使用します。つまり位置合わせが必要なほとんどのオブジェクト (ライトやカメラなど) では、Z軸が「指し示す」方向として使用されます。この規則はおおよそ次のことを意味します。
X軸は左右
Y軸は上下
Z軸は前後
他の3Dソフトウェアとの比較について、次の表をご覧ください。
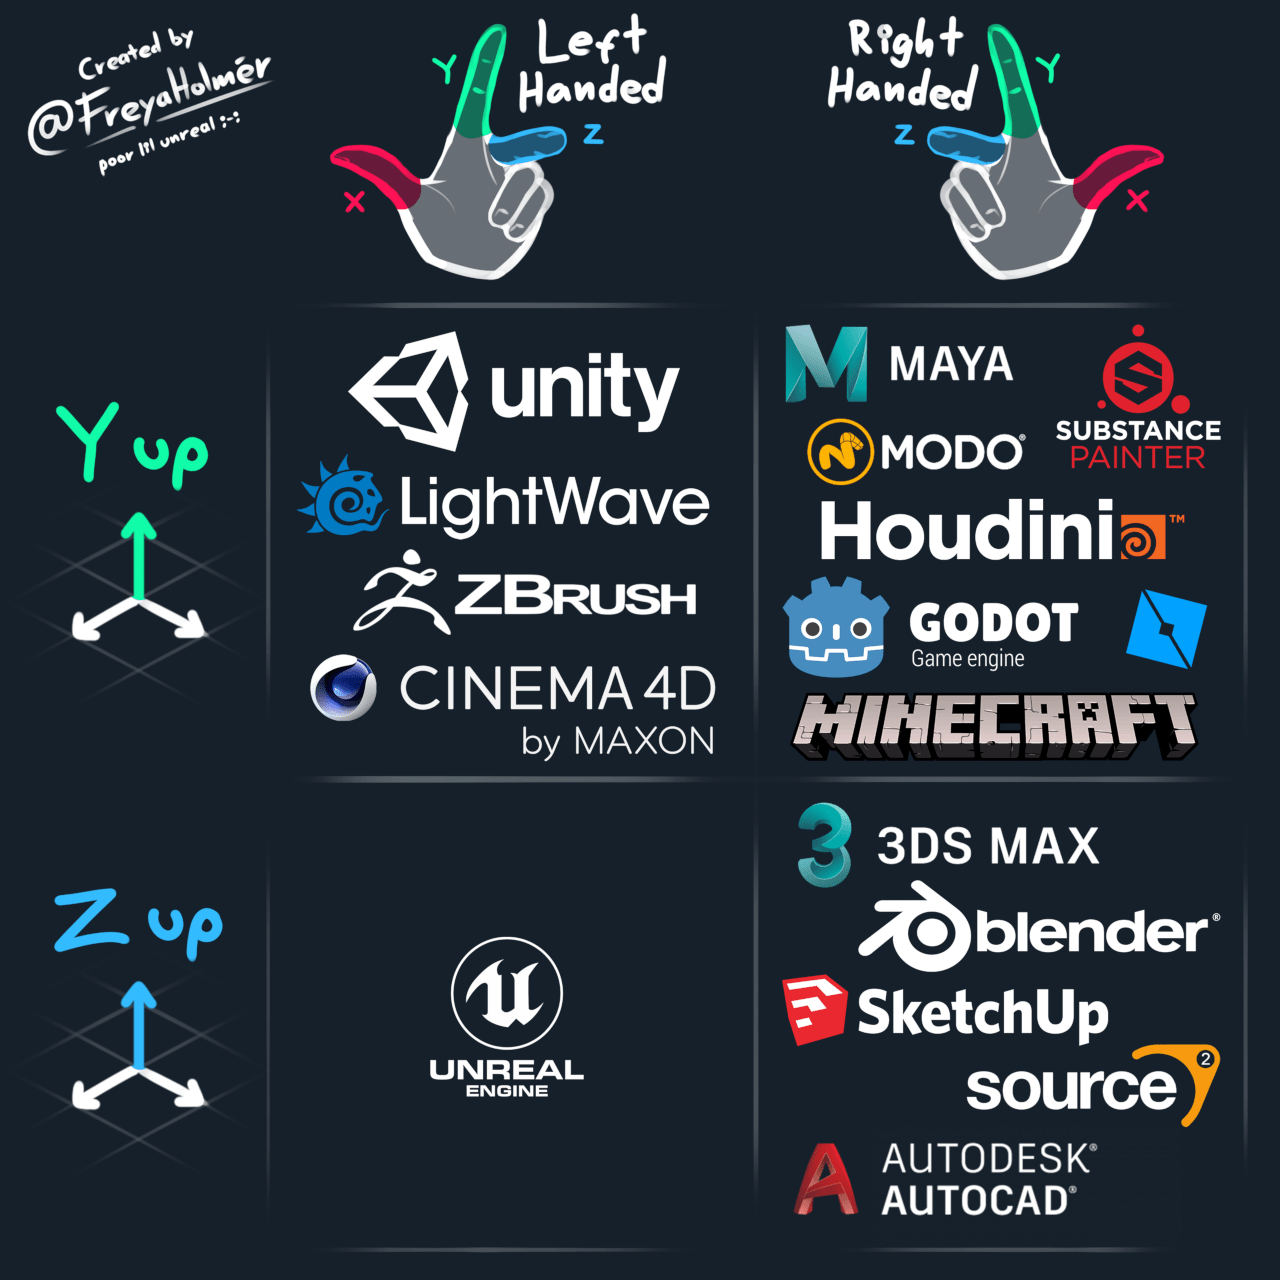
画像提供:Freya Holmér
空間と操作のギズモ
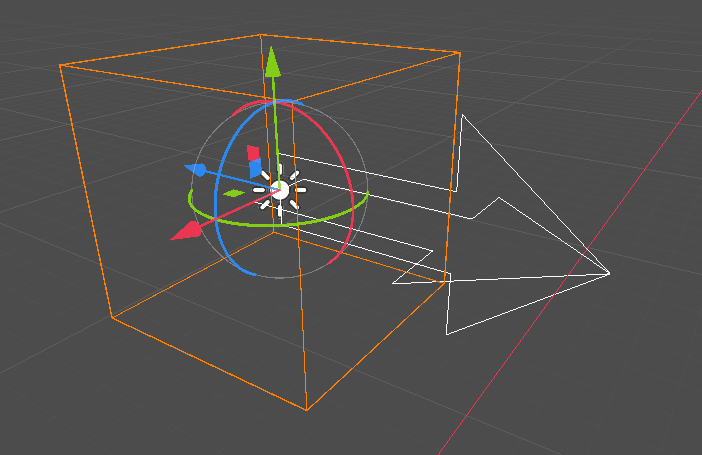
Moving, rotating, and scaling objects in the 3D view is done through the manipulator gizmos. Each axis is represented by a color: Red, Green, Blue represent X, Y, Z respectively. This convention applies to the grid and other gizmos too (and also to the shader language, ordering of components for Vector3, Color, etc.).
いくつかの便利なキーバインド:
To snap placement or rotation, press Ctrl while moving, scaling, or rotating.
ビューを選択したオブジェクトの中央に配置するには、F を押します。
In the viewport, the arrows can be clicked and held to move the object on an axis. The arcs can be clicked and held to rotate the object. To lock one axis and move the object freely in the other two axes, the colored rectangles can be clicked, held, and dragged.
If the transform mode is changed from Select Mode to Scale Mode, the arrows will be replaced by cubes, which can be dragged to scale an object as if the object is being moved.
Navigating the 3D environment
In 3D environments, it is often important to adjust the viewpoint or angle from which you are viewing the scene. In Godot, navigating the 3D environment in the viewport (or spatial editor) can be done in multiple ways.
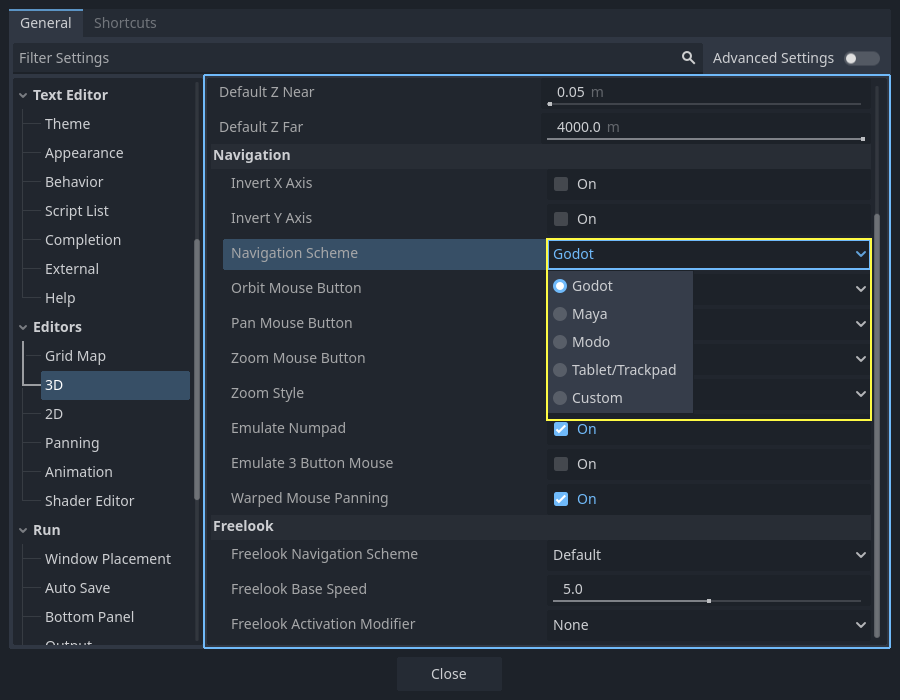
The default 3D scene navigation controls are similar to Blender (aiming to have some sort of consistency in the free software pipeline), but options are included to customize mouse buttons and behavior to be similar to other tools in the Editor Settings. To change the controls to Maya or Modo controls, you can navigate to Editor Settings > Editors > 3D. Then, under Navigation, search for Navigation Scheme.
Using the default settings, the following shortcuts control how one can navigate in the viewport:
Pressing the middle mouse button and dragging the mouse allows you to orbit around the center of what is on the screen.
It is also possible to left-click and hold the manipulator gizmo located on the top right of the viewport to orbit around the center:

Left-clicking on one of the colored circles will set the view to the chosen orthogonal and the viewport's view menu will be updated accordingly.

If the Perspective view is enabled on the viewport (can be seen on the viewport's View menu, not the View menu on the main toolbar), holding down the right mouse button on the viewport or pressing Shift + F switches to "free-look" mode. In this mode you can move the mouse to look around, use the W A S D keys to fly around the view, E to go up, and Q to go down. To disable this mode, release the right mouse button or press Shift + F again.
In the free-look mode, you can temporarily increase the flying speed using Shift or decrease it using Alt. To change and keep the speed modifier use mouse wheel up or mouse wheel down, to increase or decrease it, respectively.
In orthogonal mode, holding the right mouse button will pan the view instead. Use Keypad 5 to toggle between perspective and orthogonal view.
Blenderスタイルの変換ショートカットを使用する
Godot 4.2 以降では、ノードの移動、回転、スケーリングに Blender スタイルのショートカットを有効にすることができます。Blender ではショートカットは次のとおりです。
G : 移動
R : 回転
S : スケーリング
3Dエディタのビューポートにフォーカスを合わせた状態で、上記のショートカットキーを押した後、マウスを動かすか数値を入力すると、選択したノードが 3D単位で指定した量だけ移動します。軸を文字で指定し、次に距離 (キーボードで値を入力する場合) を指定すると、特定の軸への移動を制限できます。
たとえば、選択したノードを 2.5 単位上方へ移動させるには、次のシーケンスを順番に入力します (Godot では Y+ が上方になります)。
G-Y-2-.-5-Enter
Godot で Blender スタイルの変換ショートカットを使用するには、エディター設定の ショートカット タブに移動し、Spatial Editorセクションで次の操作を行います。
移動変換を開始 を G にバインドします。
回転変換を開始 を R にバインドします。
スケール変換を開始 を S にバインドします。
最後に**スケールモード** のバインドを解除して、そのショートカットが 回転変換を開始 と競合しないようにします。
Tip
More shortcuts can be found on the 3D / Spatial editor page.
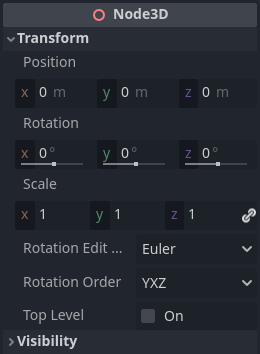
Node3Dノード
Node2D は2Dのベースノードです。Control は、すべてのGUIのベースノードです。 この推論に従って、3Dエンジンはすべての3Dに対して Node3D ノードを使用します。
Node3D には、親ノードを基準としたローカル変換があります (親ノードもNode3D型であるか、またはNode3D型から継承している必要があります)。この変換には、3×4 の Transform3D または、位置、オイラー回転 (X軸, Y軸, Z軸の角度)、スケールを表す3つの Vector3 メンバーとしてアクセスできます。
3Dコンテンツ
画像コンテンツの読み込みと描画が簡単な2Dとは異なり、3Dはもう少し難しくなります。コンテンツは、特別な3Dツール(通常DCCと呼ばれます)で作成し、Godotでインポートするために交換用のファイル形式にエクスポートする必要があります。3D形式は画像ほど標準化されていないため、これが必要になります。
生成されたジオメトリ
ArrayMesh リソースを直接使用して、カスタムジオメトリを作成することができます。単純に配列を作成し、ArrayMesh.add_surface_from_arrays() 関数を使用します。SurfaceTool というヘルパークラスも利用できます。これは、インデックス作成、法線、接線などの生成のためのより単純なAPIとヘルパーを提供します。
いずれの場合でも、頂点配列を作成して3D APIに送信するとパフォーマンスが大幅に低下するため、このメソッドは静的なジオメトリ(頻繁に更新されないモデル)を生成するためのものです。
注釈
To learn about prototyping inside Godot or using external tools, see CSGによるプロトタイピング.
即時ジオメトリ
頻繁に更新される単純なジオメトリを生成する必要がある場合、Godotには MeshInstance3D ノードで使用できる特別な ImmediateMesh リソースがあります。これはポイント、ライン、三角形などを作成するための OpenGL 1.x スタイルの即時モードAPI です。
3Dでの2D
Godotは強力な2Dエンジンを搭載していますが、多くのタイプのゲームは3D環境で2Dを使用しています。回転しない固定カメラ(直交または遠近法)を使用することで、Sprite3D や AnimatedSprite3D などのノードを使用して、3D 背景、よりリアルな視差、照明/影の効果などのミキシングを利用した2Dゲームを作成できます。
欠点は、もちろん、プレーンな2Dと比較して複雑さが増し、パフォーマンスが低下することと、ピクセル単位で作業ができないことです。
環境
シーンの編集に加えて、環境を編集することもよくあります。 Godotは WorldEnvironment ノードを提供します。これにより、背景色、モード(スカイボックスを置くなど)を変更し、いくつかのタイプの組み込みのポストプロセッシングエフェクトを適用できます。環境はカメラでも上書きできます。
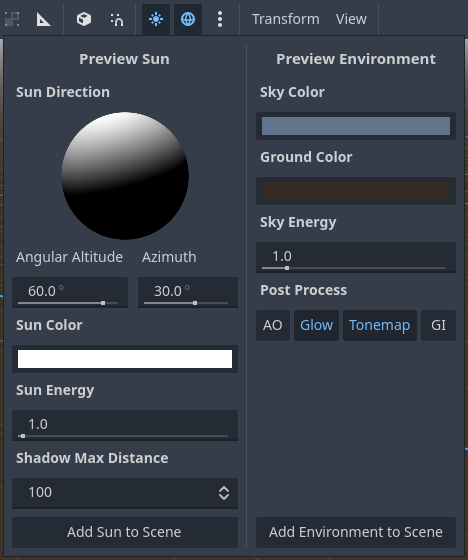
Preview environment and light
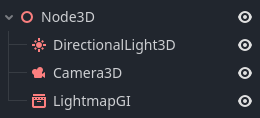
デフォルトでは WorldEnvironment ノード、または DirectionalLight3D ノードを持たない3Dシーンでは、シーンを照らすために不足しているものを確認するためのプレビュー機能が有効になります。
プレビュー用のライトと環境は、エディター内のシーンでのみ機能します。シーンを実行したりプロジェクトをエクスポートしたときは機能しません。
The preview light and environment can be turned on or off from the top menu by clicking on their respective icon.

The three dots dropdown menu next to those icons can be used to adjust the properties of the preview environment and light if they are enabled.
同じプロジェクトのすべてのシーンに対して、同じプレビュー用のライトと環境が使用されるため、プレビュー用のライトと環境が必要となるすべてのシーンに適用される調整のみを行ってください。
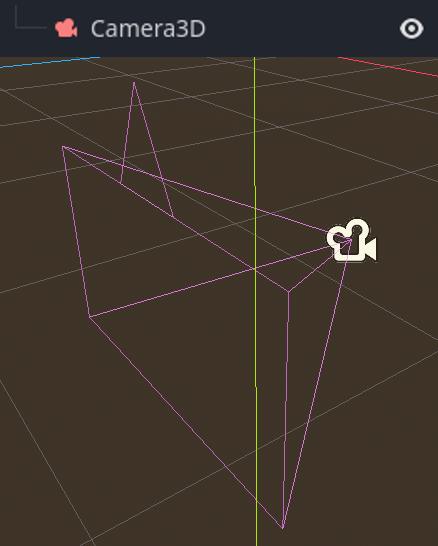
カメラ
3D空間にいくつのオブジェクトを配置しても、シーンに Camera3D も追加されない限り何も表示されません。カメラは正射投影または透視投影のいずれかで動作します。
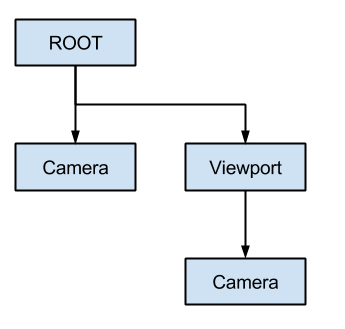
カメラは、親または祖父母のビューポートに関連付けられています(表示のみ)。シーンツリーのルートはビューポートであるため、カメラはデフォルトでその上に表示されますが、サブビューポート(レンダーターゲットまたはピクチャーインピクチャーとして)が必要な場合は、その表示用に子カメラが必要です。
複数のカメラを扱う場合、各ビューポートに次のルールが適用されます:
シーン ツリーにカメラが存在しない場合、最初に入力したカメラがアクティブなカメラになります。その後でシーンに入ってくるカメラは無視されます(current に設定されていないかぎり)。
カメラに"current"プロパティが設定されている場合、シーン内の他のカメラに関係なくそれが使用されます。このプロパティが設定されている場合は、それまでのカメラを置き換えて、アクティブになります。
アクティブなカメラがシーンツリーを離れると、ツリー順の最初のカメラが代わりになります。
ライト
背景環境はポリゴン表面に現れる環境光を放射します。しかしシーン内に光源が配置されていないと、背景環境が非常に明るい場合を除き、シーンは非常に暗く見えます。
ほとんどの屋外シーンには指向性ライト (太陽や月) がありますが、屋内シーンには複数の位置ライト (ランプ、たいまつなど) があります。Godot でのライトの設定の詳細については、3Dライトとシャドウ を参照してください。