Attention: Here be dragons
This is the latest
(unstable) version of this documentation, which may document features
not available in or compatible with released stable versions of Godot.
Checking the stable version of the documentation...
Prototipando niveles con CSG
CSG stands for Constructive Solid Geometry, and is a tool to combine basic shapes or custom meshes to create more complex shapes. In 3D modeling software, CSG is mostly known as "Boolean Operators".
Level prototyping is one of the main uses of CSG in Godot. This technique allows users to create the most common shapes by combining primitives. Interior environments can be created by using inverted primitives.
Nota
The CSG nodes in Godot are mainly intended for prototyping. There is no built-in support for UV mapping or editing 3D polygons (though extruded 2D polygons can be used with the CSGPolygon3D node).
If you're looking for an easy to use level design tool for a project, you may want to use FuncGodot or Cyclops Level Builder instead.
Ver también
You can check how to use CSG nodes to build various shapes (such as stairs or roads) using the Constructive Solid Geometry demo project.
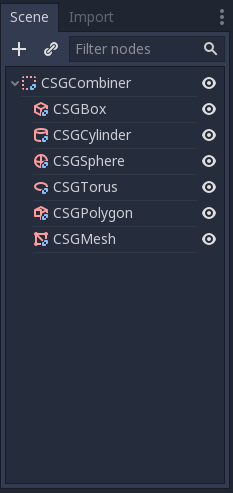
Introducción a nodos CSG
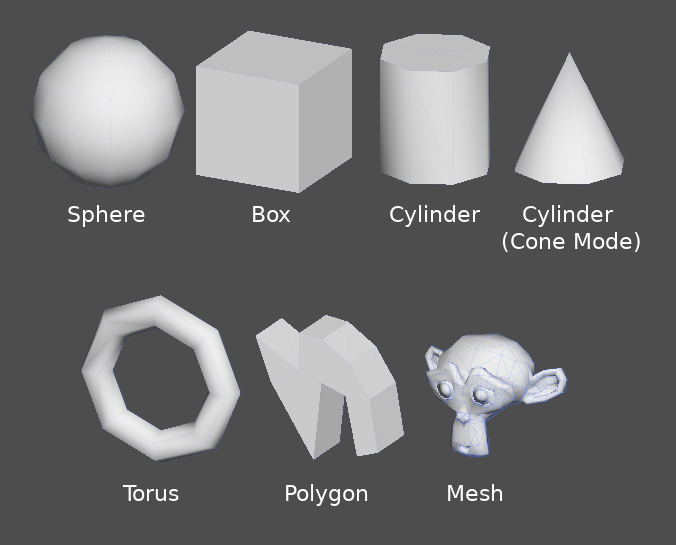
Al igual que otras características de Godot, el CSG se apoya en forma de nodos. Estos son los nodos de CSG:
CSGCylinder3D (also supports cone)
Funcionalidades de herramientas CSG
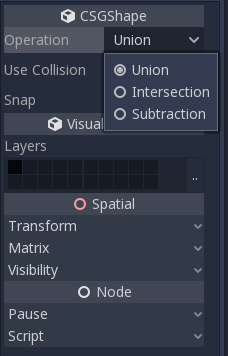
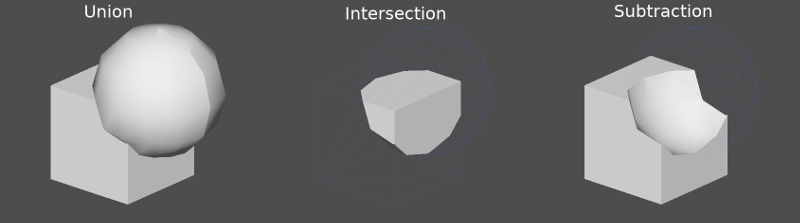
Cada nodo CSG soporta 3 tipos de operaciones booleanas:
Unión: La geometría de ambas primitivas se fusiona, la geometría que se interseca se elimina.
Intersección: Sólo queda la geometría de intersección, el resto se elimina.
Sustracción: La segunda forma se resta de la primera, dejando una mella con su forma.
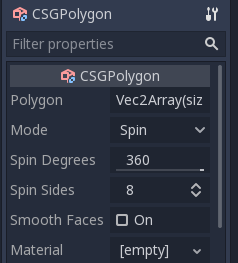
PolígonoCSG
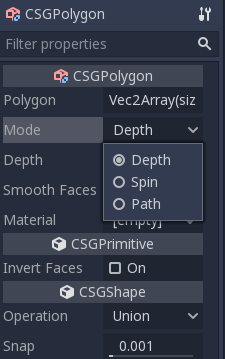
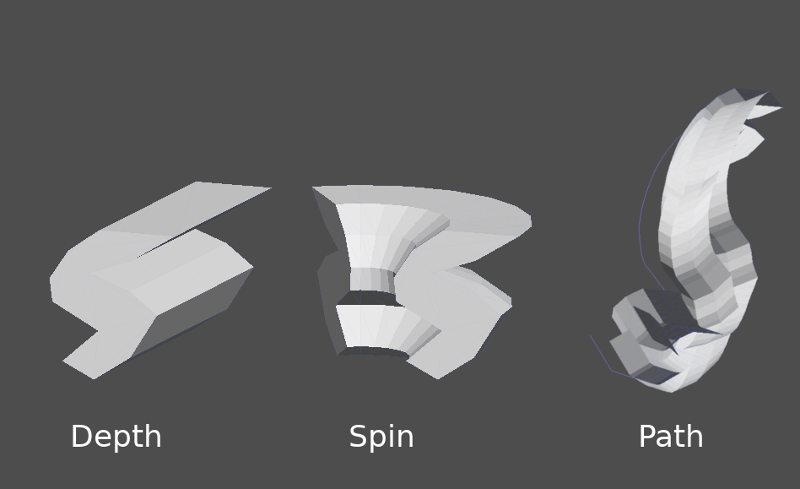
The CSGPolygon3D node extrude along a Polygon drawn in 2D (in X, Y coordinates) in the following ways:
Profundidad: Extraído de vuelta una cantidad dada.
Girar: Extruido mientras gira alrededor de su origen.
Ruta: Extruido a lo largo de un nodo Ruta. Esta operación se llama comúnmente "lofting".
Nota
The Path mode must be provided with a Path3D node to work. In the Path node, draw the path and the polygon in CSGPolygon3D will extrude along the given path.
Mallas personalizadas
Se pueden usar mallas personalizadas para CSGMesh3D siempre que la malla sea múltiple. La malla se puede modelar en otro software e importar a Godot. Se admiten múltiples materiales.
For a mesh to be used as a CSG mesh, it is required to:
be closed
cada arista debe conectarse sólo a otras dos caras
have volume
And it is recommended to avoid:
negative volume
self-intersection
interior faces
Godot uses the manifold library to implement CSG meshes. The technical definition of "manifold" used by Godot is the following, adapted from that library's definition of "manifold":
Every edge of every triangle must contain the same two vertices (by index) as exactly one other triangle edge, and the start and end vertices must switch places between these two edges. The triangle vertices must appear in clockwise order when viewed from the outside of the Godot Engine manifold mesh.
Making an existing mesh manifold with Blender
If you have an existing mesh that is not already manifold, you can make it manifold using Blender.
In Blender, install and enable the 3D Print Toolbox addon.
Select the mesh you want to make manifold. Open the sidebar by clicking on the arrow:

In the 3D Print tab, under Clean Up, click the Make Manifold button:

The mesh should now be manifold, and can be used as a custom mesh.
CSGCombiner3D
The CSGCombiner3D node is an empty shape used for organization. It will only combine children nodes.
Orden de procesamiento
Every CSG node will first process its children nodes and their operations: union, intersection, or subtraction, in tree order, and apply them to itself one after the other.
Nota
En interés del rendimiento, asegúrate de que la geometría del CSG siga siendo relativamente simple, ya que las mallas complejas pueden tardar un tiempo en procesarse. Si agregas objetos juntos (como objetos de mesa y de habitación), crearlos como árboles CSG separados. Forzar demasiados objetos en un solo árbol eventualmente comenzará a afectar el rendimiento. Utiliza las operaciones binarias sólo donde realmente las necesites.
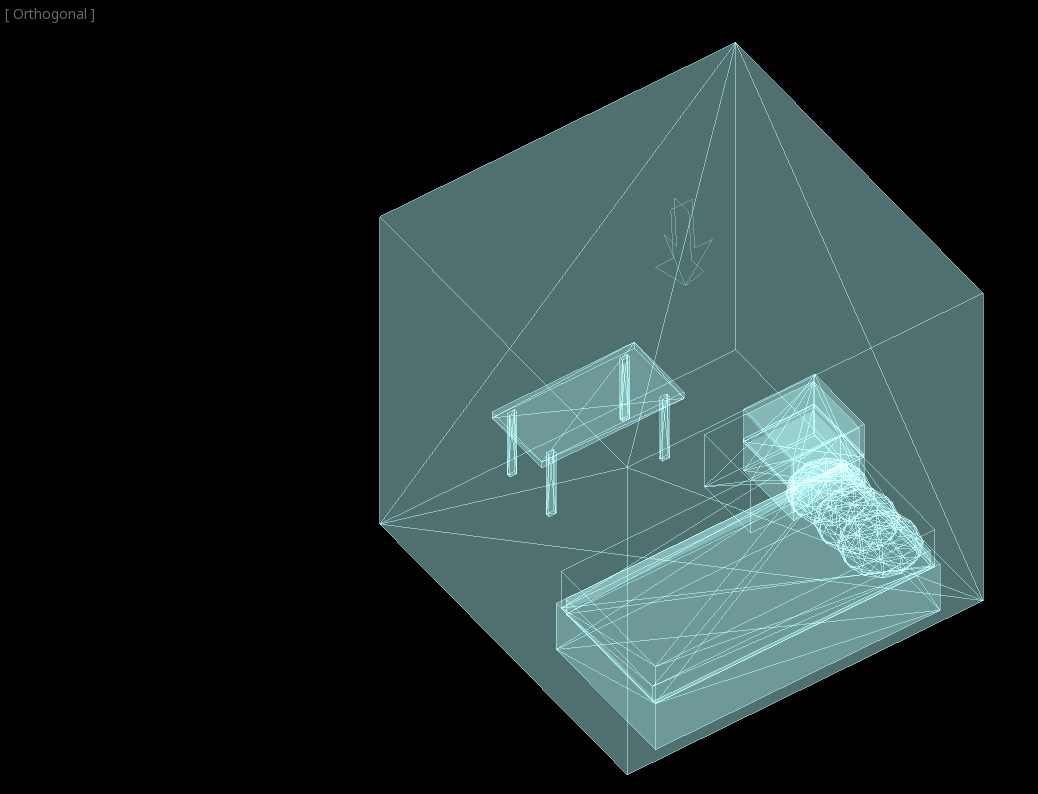
Prototipando un nivel
Haremos un prototipo de una sala para practicar el uso de herramientas CSG.
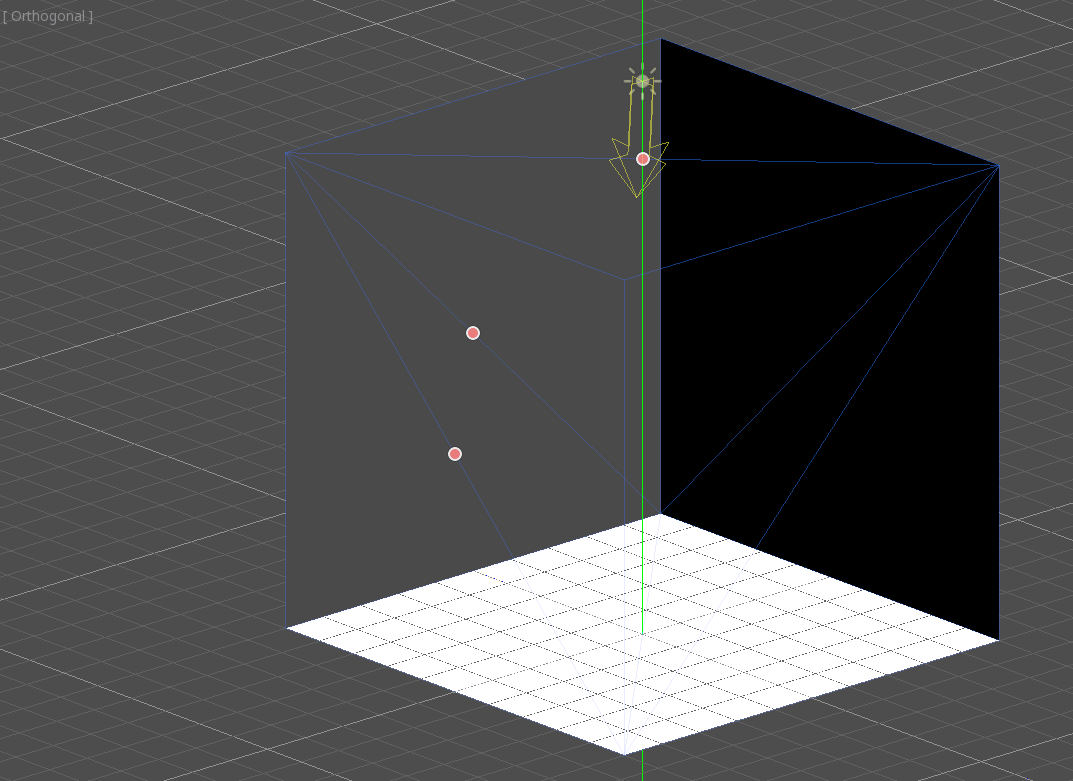
Truco
Trabajar en la proyección Ortonormal da una mejor visión al combinar las formas del CSG.
Nuestro nivel contendrá estos objetos:
una habitación,
una cama,
una lámpara,
un escritorio,
una estantería.
Create a scene with a Node3D node as root node.
Truco
La iluminación por defecto del entorno no proporciona un sombreado claro en algunos ángulos. Cambia el modo de visualización usando Display Overdraw en el menú de vista 3D, o añade un nodo DirectionalLight para ayudarte a ver con claridad.
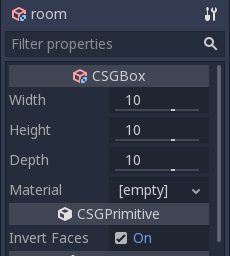
Create a CSGBox3D and name it room, enable Invert Faces and change the
dimensions of your room.
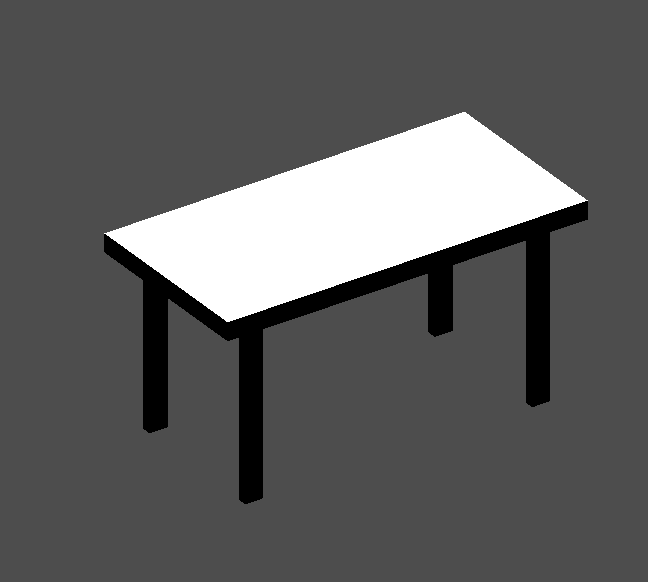
A continuación, crea un CSGCombiner3D y nómbralo desk.
Un escritorio tiene una superficie y 4 patas:
Create 1 CSGBox3D children node in Union mode for the surface and adjust the dimensions.
Create 4 CSGBox3D children nodes in Union mode for the legs and adjust the dimensions.
Ajusta su ubicación para que se parece a un escritorio.
Nota
CSG nodes inside a CSGCombiner3D will only process their operation within the combiner. Therefore, CSGCombiner3Ds are used to organize CSG nodes.
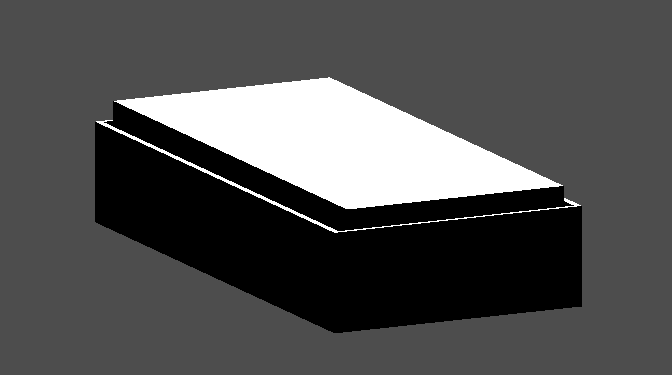
Create a CSGCombiner3D and name it bed.
Our bed consists of 3 parts: the bed, the mattress and a pillow. Create a CSGBox3D and adjust its dimension for the bed. Create another CSGBox3D and adjust its dimension for the mattress.
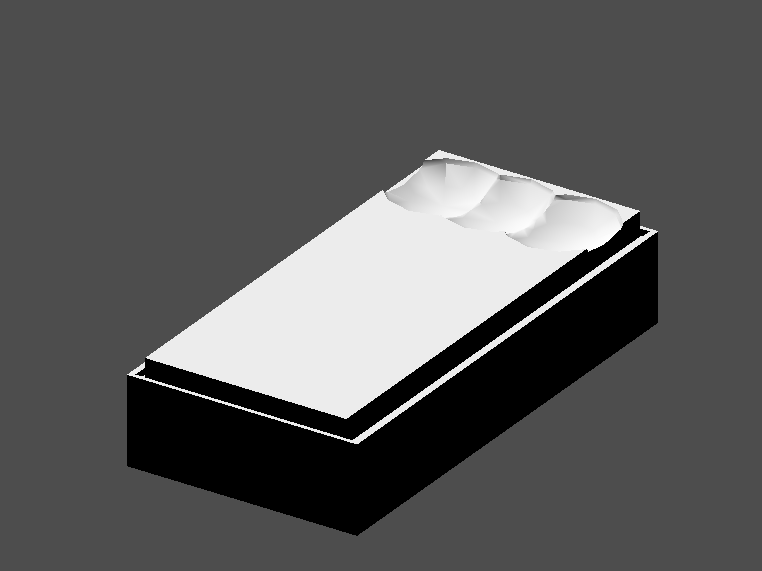
We will create another CSGCombiner3D named pillow as the child of bed.
The scene tree should look like this:

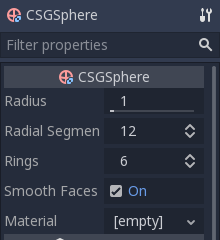
We will combine 3 CSGSphere3D nodes in Union mode to form a pillow. Scale the Y axis of the spheres and enable Smooth Faces.
Selecciona el nodo pillow y cambia el modo a Sustracción; las esferas combinadas harán un agujero en el colchón.
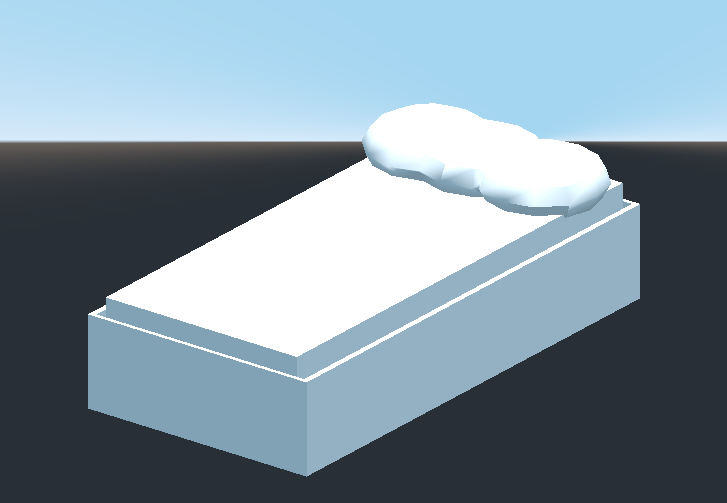
Try to re-parent the pillow node to the root Node3D node; the hole will
disappear.
Nota
This is to illustrate the effect of CSG processing order. Since the root node is not a CSG node, the CSGCombiner3D nodes are the end of the operations; this shows the use of CSGCombiner3D to organize the CSG scene.
Deshacer el parentesco después de observar el efecto. La cama que has construido debería ser así:
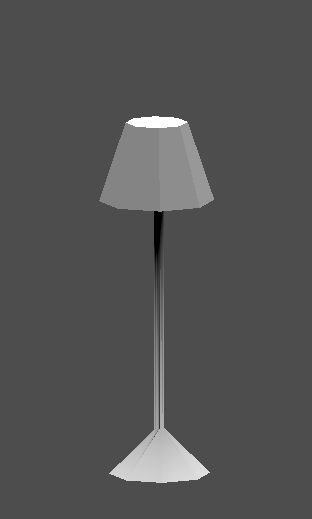
Create a CSGCombiner3D and name it lamp.
A lamp consists of 3 parts: the stand, the pole and the lampshade. Create a CSGCylinder3D, enable the Cone option and make it the stand. Create another CSGCylinder3D and adjust the dimensions to use it as a pole.
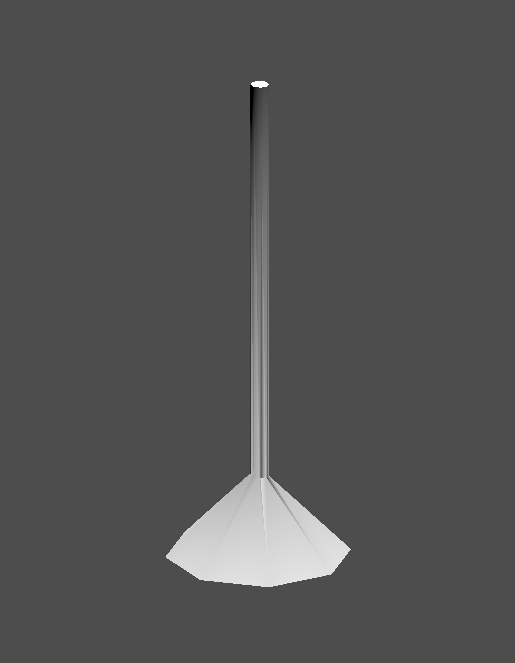
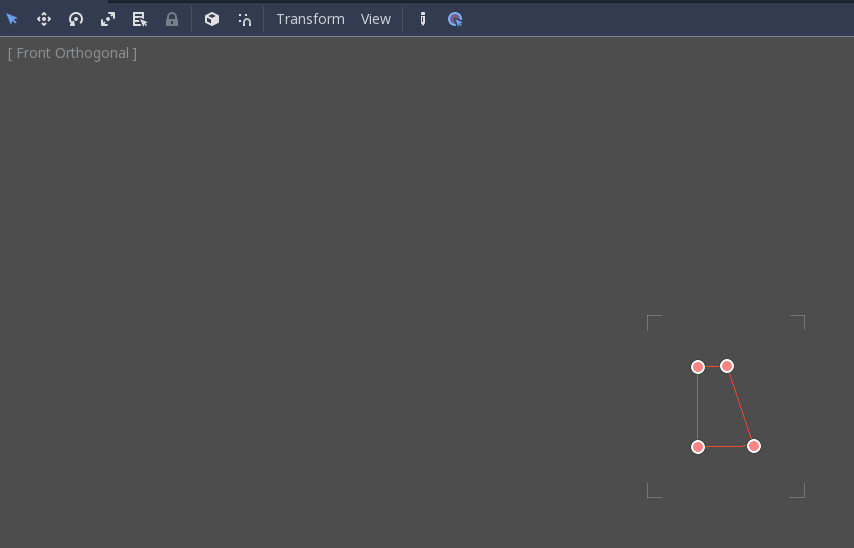
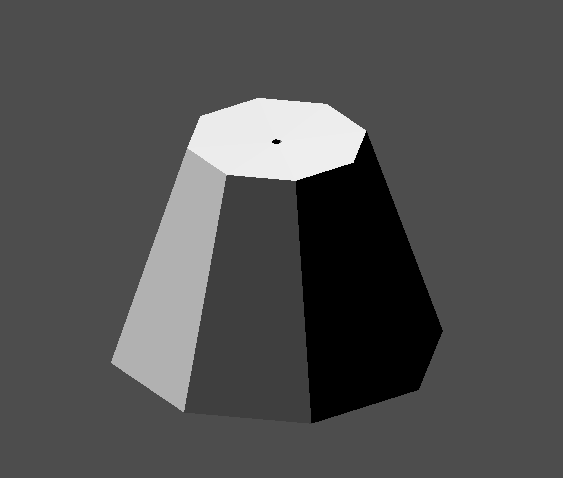
We will use a CSGPolygon3D for the lampshade. Use the Spin mode for the CSGPolygon3D and draw a trapezoid while in Front View (numeric keypad 1); this shape will extrude around the origin and form the lampshade.
Ajusta la colocación de las 3 partes para que parezca una lámpara.
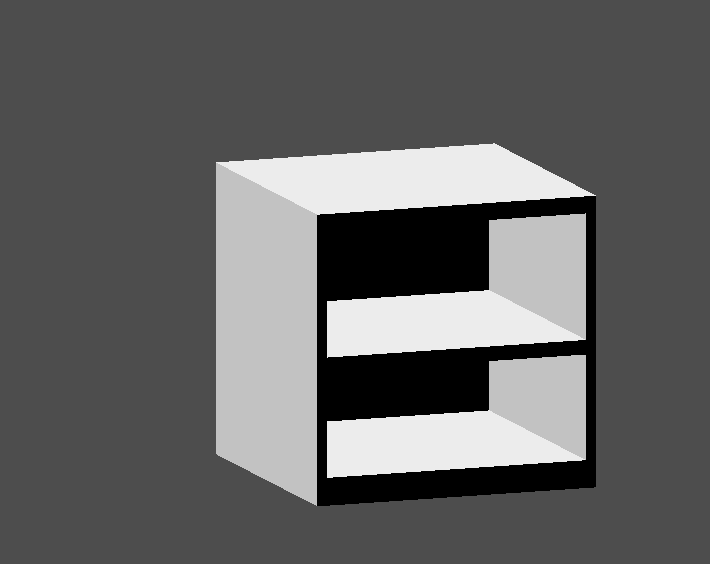
Create a CSGCombiner3D and name it bookshelf.
We will use 3 CSGBox3D nodes for the bookshelf. Create a CSGBox3D and adjust its dimensions; this will be the size of the bookshelf.
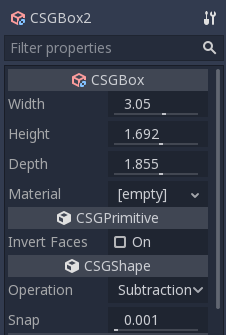
Duplicate the CSGBox3D and shorten the dimensions of each axis and change the mode to Subtraction.
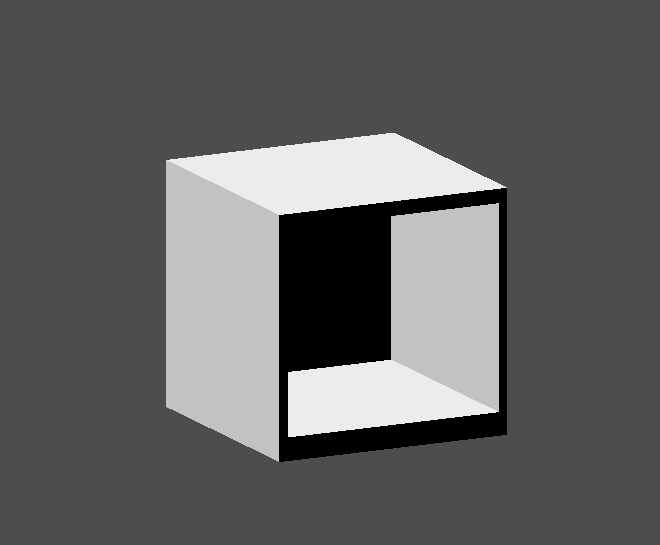
You've almost built a shelf. Create one more CSGBox3D for dividing the shelf into two levels.
Ubica los muebles en el cuarto del modo que desees, tu escene debería verse así:
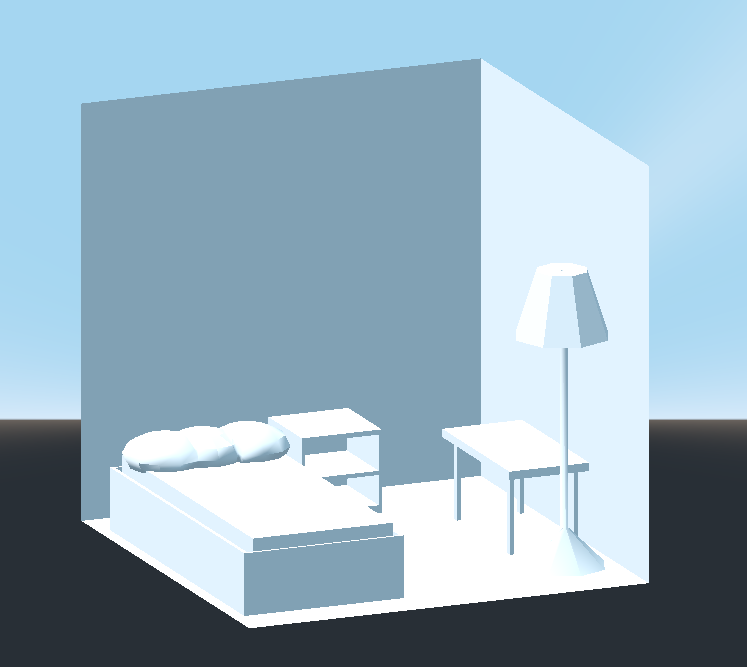
Has hecho un prototipo con éxito de una habitación con las herramientas CSG en Godot. Las herramientas CSG pueden utilizarse para diseñar todo tipo de niveles, como un laberinto o una ciudad; explora sus limitaciones a la hora de diseñar tu juego.
Usar texturas prototipo
Godot's Material estándar 3D y material ORM 3D supports triplanar mapping, which can be used to automatically apply a texture to arbitrary objects without distortion. This is handy when using CSG as Godot doesn't support editing UV maps on CSG nodes yet. Triplanar mapping is relatively slow, which usually restricts its usage to organic surfaces like terrain. Still, when prototyping, it can be used to quickly apply textures to CSG-based levels.
Nota
Si necesitas algunas texturas para el prototipo, Kenney hizo unas "texturas de prototipo con licencia CC0" <https://kenney.nl/assets/prototype-textures>`__.
Existen dos modos de aplicar un material a un nodo CSG:
Applying it to a CSGCombiner3D node as a material override (Geometry > Material Override in the Inspector). This will affect its children automatically, but will make it impossible to change the material in individual children.
Aplicar un material a los nodos individuales (Material en el Inspector). De esta manera, cada nodo CSG puede tener su propia apariencia. Los nodos CSG sustractivos aplicarán su material a los nodos en los que están "excavando".
To apply triplanar mapping to a CSG node, select it, go to the Inspector, click the [empty] text next to Material Override (or Material for individual CSG nodes). Choose New StandardMaterial3D. Click the newly created material's icon to edit it. Unfold the Albedo section and load a texture into the Texture property. Now, unfold the Uv1 section and check Triplanar. You can change the texture offset and scale on each axis by playing with the Scale and Offset properties just above. Higher values in the Scale property will cause the texture to repeat more often.
Truco
You can copy a StandardMaterial3D to reuse it across CSG nodes. To do so, click the dropdown arrow next to a material property in the Inspector and choose Copy. To paste it, select the node you'd like to apply the material onto, click the dropdown arrow next to its material property then choose Paste.
Converting to MeshInstance3D
Since Godot 4.4, you can convert a CSG node and its children to a MeshInstance3D node.
Esto tiene varios beneficios:
Bake lightmaps, since UV2 can be generated on a MeshInstance3D.
Bake occlusion culling, since the occlusion culling bake process only takes MeshInstance3D into account.
Faster loading times, since the CSG mesh no longer needs to be rebuilt when the scene loads.
Better performance when updating the node's transform if using the mesh within another CSG node.
To convert a CSG node to a MeshInstance3D node, select it, then choose CSG > Bake Mesh Instance in the toolbar. The MeshInstance3D node will be created as a sibling. Note that the CSG node that was used for baking is not hidden automatically, so remember to hide it to prevent its geometry from overlapping with the newly created MeshInstance3D.
You can also create a trimesh collision shape using CSG > Bake Collision Shape. The generated CollisionShape3D node must be a child of a StaticBody3D or AnimatableBody3D node to be effective.
Truco
Remember to keep the original CSG node in the scene tree, so that you can perform changes to the geometry later if needed. To make changes to the geometry, remove the MeshInstance3D node and make the root CSG node visible again.
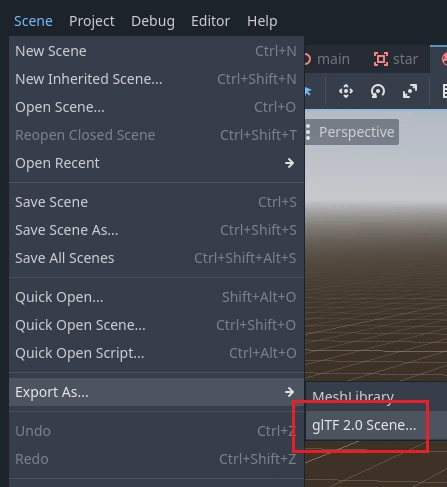
Exportar como glTF
It can be useful to block out a level using CSG, then export it as a 3d model, to import into 3D modeling software. You can do this by selecting Scene > Export As... > glTF 2.0 Scene.