Using signals
In this lesson, we will look at signals. They are messages that nodes emit when something specific happens to them, like a button being pressed. Other nodes can connect to that signal and call a function when the event occurs.
Signals are a delegation mechanism built into Godot that allows one game object to react to a change in another without them referencing one another. Using signals limits coupling and keeps your code flexible.
For example, you might have a life bar on the screen that represents the player's health. When the player takes damage or uses a healing potion, you want the bar to reflect the change. To do so, in Godot, you would use signals.
Like methods (Callable), signals are a first-class type since Godot 4.0. This means you can pass them around as method arguments directly without having to pass them as strings, which allows for better autocompletion and is less error-prone. See the Signal class reference for a list of what you can do with the Signal type directly.
See also
As mentioned in the introduction, signals are Godot's version of the observer pattern. You can learn more about it in Game Programming Patterns.
We will now use a signal to make our Godot icon from the previous lesson (Listening to player input) move and stop by pressing a button.
Note
For this project, we will be following the Godot naming conventions.
GDScript: Classes (nodes) use PascalCase, variables and functions use snake_case, and constants use ALL_CAPS (See GDScript style guide).
C#: Classes, export variables and methods use PascalCase, private fields use _camelCase, local variables and parameters use camelCase (See C# style guide). Be careful to type the method names precisely when connecting signals.
Scene setup
To add a button to our game, we will create a new scene which will include
both a Button and the sprite_2d.tscn scene we created in
the Creating your first script lesson.
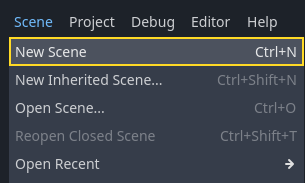
Create a new scene by going to the menu .
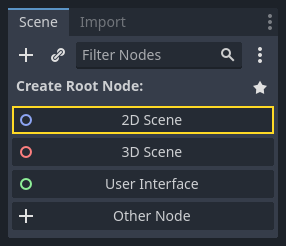
In the Scene dock, click the button. This will add a Node2D as our root.
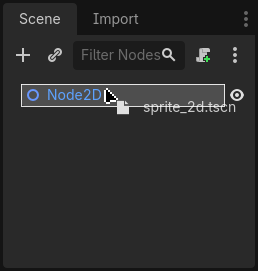
In the FileSystem dock, click and drag the sprite_2d.tscn file you saved
previously onto the Node2D to instantiate it.
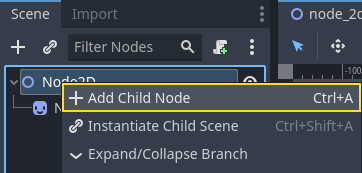
We want to add another node as a sibling of the Sprite2D. To do so, right-click on Node2D and select .
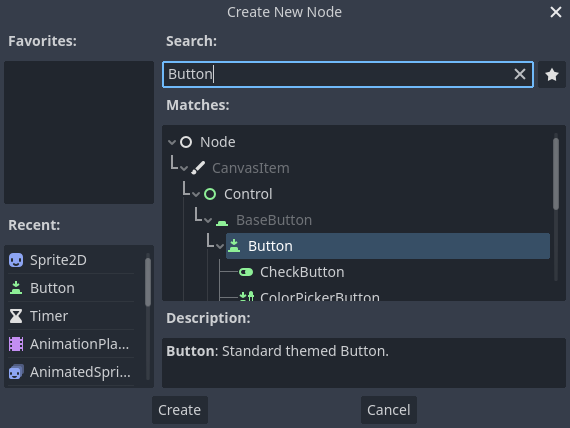
Search for the Button node and add it.
The node is small by default. Click and drag on the bottom-right handle of the Button in the viewport to resize it.
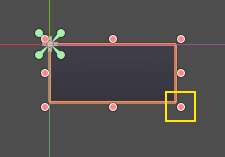
If you don't see the handles, ensure the select tool is active in the toolbar.
Click and drag on the button itself to move it closer to the sprite.
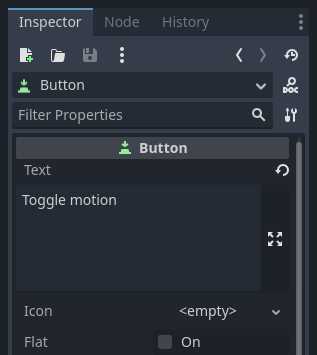
You can also write a label on the Button by editing its Text property
in the Inspector. Enter Toggle motion.
Your scene tree and viewport should look like this.
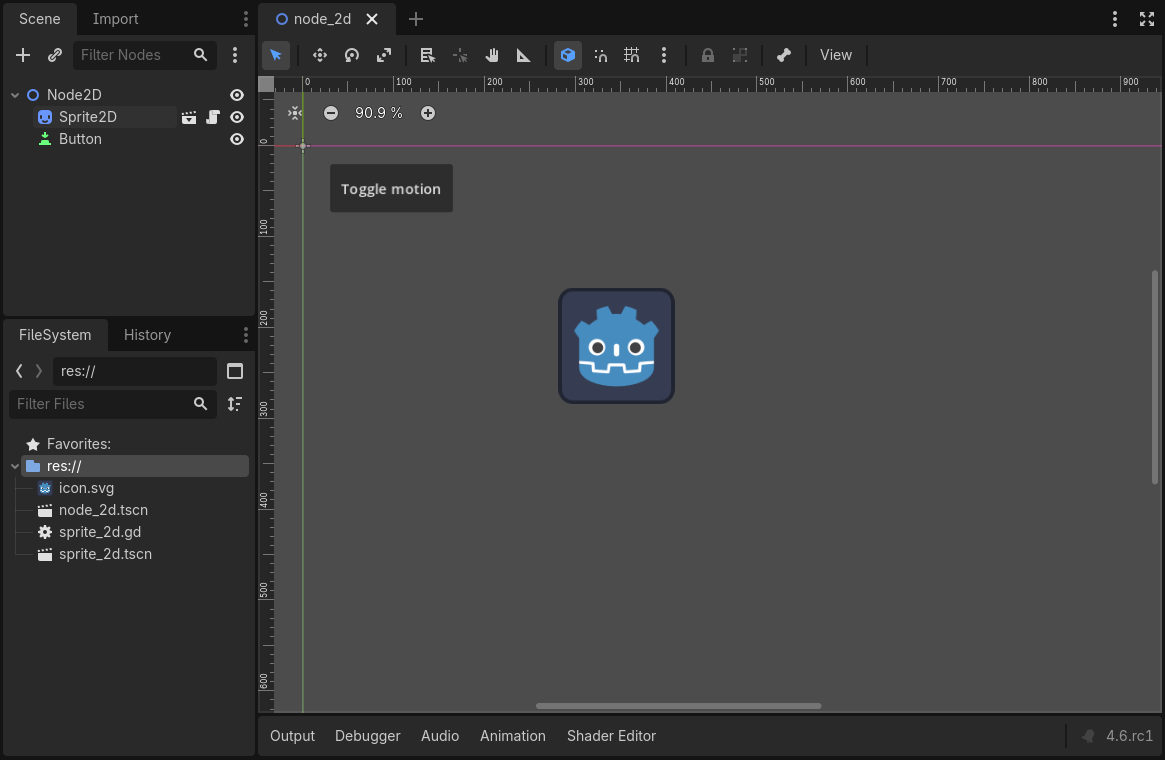
Save your newly created scene as node_2d.tscn, if you haven't already.
You can then run it with F6 (Cmd + R on macOS).
At the moment, the button will be visible, but nothing will happen if you
press it.
Connecting a signal in the editor
Here, we want to connect the Button's "pressed" signal to our Sprite2D, and we want to call a new function that will toggle its motion on and off. We need to have a script attached to the Sprite2D node, which we do from the previous lesson.
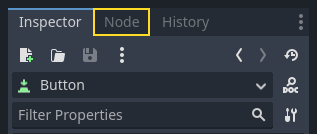
You can connect signals in the Signals dock. Select the Button node and, on the right side of the editor, click on the tab named Signals next to the Inspector.
The dock displays a list of signals available on the selected node.
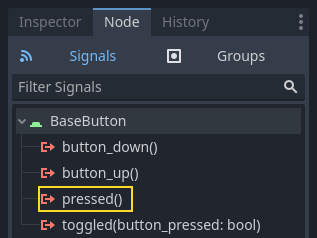
Double-click the "pressed" signal to open the node connection window.

There, you can connect the signal to the Sprite2D node. The node needs a receiver method, a function that Godot will call when the Button emits the signal. The editor generates one for you. By convention, we name these callback methods "_on_node_name_signal_name". Here, it'll be "_on_button_pressed".
Note
When connecting signals via the editor's Signals dock, you can use two modes. The simple one only allows you to connect to nodes that have a script attached to them and creates a new callback function on them.
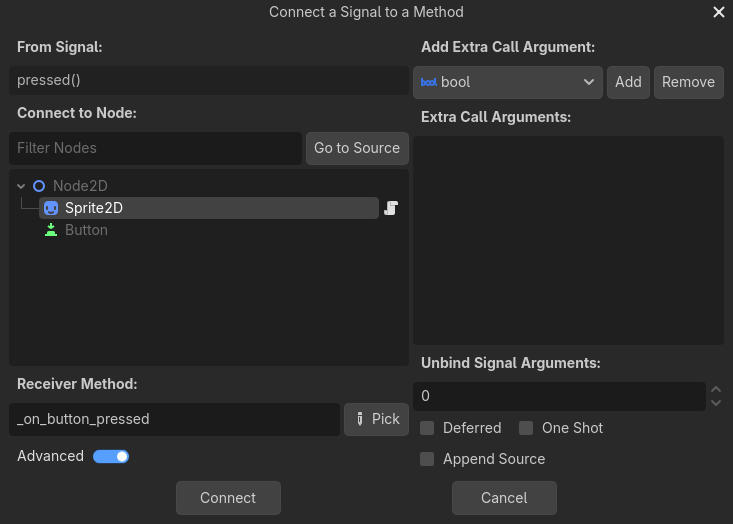
The advanced view lets you connect to any node and any built-in function, add arguments to the callback, and set options. You can toggle the mode in the window's bottom-right by clicking the button.
Note
If you are using an external editor (such as VS Code), this automatic code generation might not work. In this case, you need to connect the signal via code as explained in the next section.
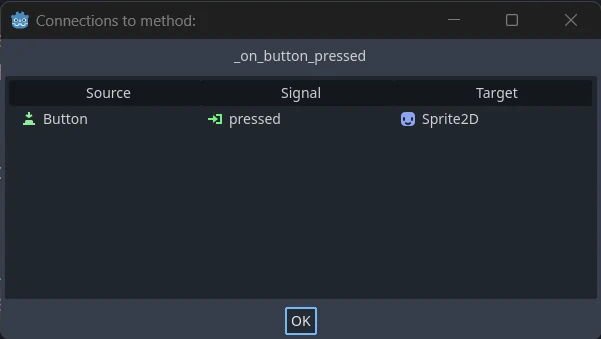
Click the button to complete the signal connection and jump to the Script workspace. You should see the new method with a connection icon in the left margin.
If you click the icon, a window pops up and displays information about the connection. This feature is only available when connecting nodes in the editor.
Let's replace the line with the pass keyword with code that'll toggle the
node's motion.
Our Sprite2D moves thanks to code in the _process() function. Godot provides
a method to toggle processing on and off: Node.set_process(). Another method of the Node class,
is_processing(), returns true if idle processing is active. We can use
the not keyword to invert the value.
func _on_button_pressed():
    set_process(not is_processing())
// We also specified this function name in PascalCase in the editor's connection window.
private void OnButtonPressed()
{
    SetProcess(!IsProcessing());
}
This function will toggle processing and, in turn, the icon's motion on and off upon pressing the button.
Before trying the game, we need to simplify our _process() function to move
the node automatically and not wait for user input. Replace it with the
following code, which we saw two lessons ago:
func _process(delta):
    rotation += angular_speed * delta
    var velocity = Vector2.UP.rotated(rotation) * speed
    position += velocity * delta
public override void _Process(double delta)
{
    Rotation += _angularSpeed * (float)delta;
    var velocity = Vector2.Up.Rotated(Rotation) * _speed;
    Position += velocity * (float)delta;
}
Your complete sprite_2d.gd code should look like the following.
extends Sprite2D

var speed = 400
var angular_speed = PI


func _process(delta):
    rotation += angular_speed * delta
    var velocity = Vector2.UP.rotated(rotation) * speed
    position += velocity * delta


func _on_button_pressed():
    set_process(not is_processing())
using Godot;

public partial class MySprite2D : Sprite2D
{
    private float _speed = 400;
    private float _angularSpeed = Mathf.Pi;

    public override void _Process(double delta)
    {
        Rotation += _angularSpeed * (float)delta;
        var velocity = Vector2.Up.Rotated(Rotation) * _speed;
        Position += velocity * (float)delta;
    }

    // We also specified this function name in PascalCase in the editor's connection window.
    private void OnButtonPressed()
    {
        SetProcess(!IsProcessing());
    }
}
Run the current scene by pressing F6 (Cmd + R on macOS), and click the button to see the sprite start and stop.
Connecting a signal via code
You can connect signals via code instead of using the editor. This is necessary when you create nodes or instantiate scenes inside of a script.
Let's use a different node here. Godot has a Timer node that's useful to implement skill cooldown times, weapon reloading, and more.
Head back to the 2D workspace. You can either click the "2D" text at the top of the window or press Ctrl + F1 (Ctrl + Cmd + 1 on macOS).
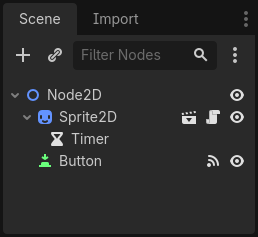
In the Scene dock, right-click on the Sprite2D node and add a new child node. Search for Timer and add the corresponding node. Your scene should now look like this.
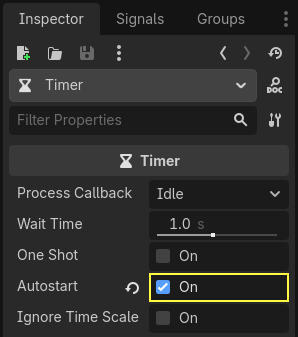
With the Timer node selected, go to the Inspector and enable the Autostart property.
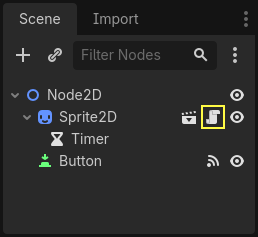
Click the script icon next to Sprite2D to jump back to the scripting workspace.
We need to do two operations to connect the nodes via code:
Get a reference to the Timer from the Sprite2D.
Call the
connect()method on the Timer's "timeout" signal.
Note
To connect to a signal via code, you need to call the connect()
method of the signal you want to listen to. In this case, we want to
listen to the Timer's "timeout" signal.
We want to connect the signal when the scene is instantiated, and we can do that using the Node._ready() built-in function, which is called automatically by the engine when a node is fully instantiated.
To get a reference to a node relative to the current one, we use the method Node.get_node(). We can store the reference in a variable.
func _ready():
    var timer = get_node("Timer")
public override void _Ready()
{
    var timer = GetNode<Timer>("Timer");
}
The function get_node() looks at the Sprite2D's children and gets nodes by
their name. For example, if you renamed the Timer node to "BlinkingTimer" in the
editor, you would have to change the call to get_node("BlinkingTimer").
We can now connect the Timer to the Sprite2D in the _ready() function.
func _ready():
    var timer = get_node("Timer")
    timer.timeout.connect(_on_timer_timeout)
public override void _Ready()
{
    var timer = GetNode<Timer>("Timer");
    timer.Timeout += OnTimerTimeout;
}
The line reads like so: we connect the Timer's "timeout" signal to the node to
which the script is attached. When the Timer emits timeout, we want to call
the function _on_timer_timeout(), that we need to define. Let's add it at the
bottom of our script and use it to toggle our sprite's visibility.
Note
By convention, we name these callback methods in GDScript as "_on_node_name_signal_name" and in C# as "OnNodeNameSignalName". Here, it'll be "_on_timer_timeout" for GDScript and OnTimerTimeout() for C#.
func _on_timer_timeout():
    visible = not visible
private void OnTimerTimeout()
{
    Visible = !Visible;
}
The visible property is a boolean that controls the visibility of our node.
The line visible = not visible toggles the value. If visible is
true, it becomes false, and vice-versa.
If you run the Node2D scene now, you will see that the sprite blinks on and off, at one second intervals.
Complete script
That's it for our little moving and blinking Godot icon demo!
Here is the complete sprite_2d.gd file for reference.
extends Sprite2D

var speed = 400
var angular_speed = PI


func _ready():
    var timer = get_node("Timer")
    timer.timeout.connect(_on_timer_timeout)


func _process(delta):
    rotation += angular_speed * delta
    var velocity = Vector2.UP.rotated(rotation) * speed
    position += velocity * delta


func _on_button_pressed():
    set_process(not is_processing())


func _on_timer_timeout():
    visible = not visible
using Godot;

public partial class MySprite2D : Sprite2D
{
    private float _speed = 400;
    private float _angularSpeed = Mathf.Pi;

    public override void _Ready()
    {
        var timer = GetNode<Timer>("Timer");
        timer.Timeout += OnTimerTimeout;
    }

    public override void _Process(double delta)
    {
        Rotation += _angularSpeed * (float)delta;
        var velocity = Vector2.Up.Rotated(Rotation) * _speed;
        Position += velocity * (float)delta;
    }

    // We also specified this function name in PascalCase in the editor's connection window.
    private void OnButtonPressed()
    {
        SetProcess(!IsProcessing());
    }

    private void OnTimerTimeout()
    {
        Visible = !Visible;
    }
}
Custom signals
Note
This section is a reference on how to define and use your own signals, and does not build upon the project created in previous lessons.
You can define custom signals in a script. Say, for example, that you want to show a game over screen when the player's health reaches zero. To do so, you could define a signal named "died" or "health_depleted" when their health reaches 0.
extends Node2D

signal health_depleted

var health = 10
using Godot;

public partial class MyNode2D : Node2D
{
    [Signal]
    public delegate void HealthDepletedEventHandler();

    private int _health = 10;
}
Note
As signals represent events that just occurred, we generally use an action verb in the past tense in their names.
Your signals work the same way as built-in ones: they appear in the Signals tab and you can connect to them like any other.

To emit a signal in your scripts, call emit() on the signal.
func take_damage(amount):
    health -= amount
    if health <= 0:
        health_depleted.emit()
public void TakeDamage(int amount)
{
    _health -= amount;

    if (_health <= 0)
    {
        EmitSignal(SignalName.HealthDepleted);
    }
}
A signal can optionally declare one or more arguments. Specify the argument names between parentheses:
extends Node2D

signal health_changed(old_value, new_value)

var health = 10
using Godot;

public partial class MyNode : Node
{
    [Signal]
    public delegate void HealthChangedEventHandler(int oldValue, int newValue);

    private int _health = 10;
}
Note
The signal arguments show up in the editor's Signals dock, and Godot can use them to generate callback functions for you. However, you can still emit any number of arguments when you emit signals. So it's up to you to emit the correct values.
To emit values along with the signal, add them as extra arguments to the
emit() function:
func take_damage(amount):
    var old_health = health
    health -= amount
    health_changed.emit(old_health, health)
public void TakeDamage(int amount)
{
    int oldHealth = _health;
    _health -= amount;
    EmitSignal(SignalName.HealthChanged, oldHealth, _health);
}
Summary
Any node in Godot emits signals when something specific happens to them, like a button being pressed. Other nodes can connect to individual signals and react to selected events.
Signals have many uses. With them, you can react to a node entering or exiting the game world, to a collision, to a character entering or leaving an area, to an element of the interface changing size, and much more.
For example, an Area2D representing a coin emits a
body_entered signal whenever the player's physics body enters its collision
shape, allowing you to know when the player collected it.
In the next section, Your first 2D game, you'll create a complete 2D game and put everything you learned so far into practice.