Using decals
Note
Decals are only supported in the Forward+ and Mobile renderers, not the Compatibility renderer.
If using the Compatibility renderer, consider using Sprite3D as an alternative for projecting decals onto (mostly) flat surfaces.
Decals are projected textures that apply on opaque or transparent surfaces in 3D. This projection happens in real-time and doesn't rely on mesh generation. This allows you to move decals every frame with only a small performance impact, even when applied on complex meshes.
While decals cannot add actual geometry detail onto the projected surface, decals can still make use of physically-based rendering to provide similar properties to full-blown PBR materials.
On this page, you'll learn:
How to set up decals in the 3D editor.
How to create decals during gameplay in a 3D scene (such as bullet impacts).
How to balance decal configuration between performance and quality.
See also
The Godot demo projects repository contains a 3D decals demo.
If you're looking to write arbitrary 3D text on top of a surface, use 3D text placed close to a surface instead of a Decal node.
Use cases
Static decoration
Sometimes, the fastest way to add texture detail to a scene is to use decals. This is especially the case for organic detail, such as patches of dirt or sand scattered on a large surface. Decals can help break up texture repetition in scenes and make patterns look more natural. On a smaller scale, decals can also be used to create detail variations for objects. For example, decals can be used to add nuts and bolts on top of hard-surface geometry.
Since decals can inject their own PBR properties on top of the projected surfaces, they can also be used to create footprints or wet puddles.
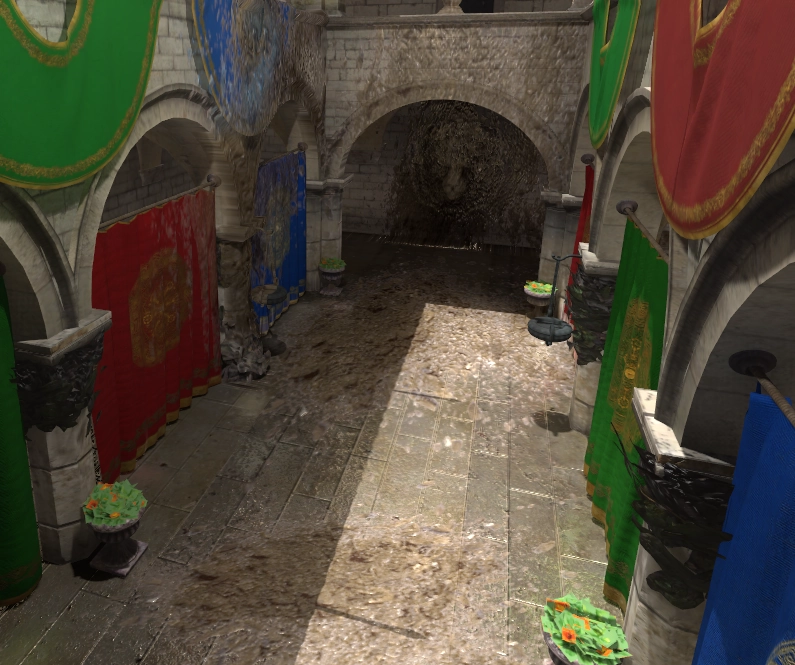
Dirt added on top of level geometry using decals
Dynamic gameplay elements
Decals can represent temporary or persistent gameplay effects such as bullet impacts and explosion scorches.
Using an AnimationPlayer node or a script, decals can be made to fade over time
(and then be removed using queue_free()) to improve performance.
Blob shadows
Blob shadows are frequently used in mobile projects (or to follow a retro art style), as real-time lighting tends to be too expensive on low-end mobile devices. However, when relying on baked lightmaps with fully baked lights, dynamic objects will not cast any shadow from those lights. This makes dynamic objects in lightmapped scenes look flat in comparison to real-time lighting, with dynamic objects almost looking like they're floating.
Thanks to blob shadows, dynamic objects can still cast an approximative shadow. Not only this helps with depth perception in the scene, but this can also be a gameplay element, especially in 3D platformers. The blob shadow's length can be extended to let the player know where they will land if they fall straight down.
Even with real-time lighting, blob shadows can still be useful as a form of ambient occlusion for situations where SSAO is too expensive or too unstable due to its screen-space nature. For example, vehicles' underside shadows are well-represented using blob shadows.

Blob shadow under object comparison
Quick start guide
Creating decals in the editor
Create a Decal node in the 3D editor.
In the inspector, expand the Textures section and load a texture in Textures > Albedo.
Move the Decal node towards an object, then rotate it so the decal is visible (and in the right orientation). If the decal appears mirrored, try to rotate it by 180 degrees. You can double-check whether it's in the right orientation by increasing Parameters > Normal Fade to 0.5. This will prevent the Decal from being projected on surfaces that are not facing the decal.
If your decal is meant to affect static objects only, configure it to prevent affecting dynamic objects (or vice versa). To do so, change the decal's Cull Mask property to exclude certain layers. After doing this, modify your dynamic objects' MeshInstance3D nodes to change their visibility layers. For instance, you can move them from layer 1 to layer 2, then disable layer 2 in the decal's Cull Mask property.
Decal node properties
Extents: The size of the decal. The Y axis determines the length of the decal's projection. Keep the projection length as short as possible to improve culling opportunities, therefore improving performance.
Textures
Albedo: The albedo (diffuse/color) map to use for the decal. In most situations, this is the texture you want to set first. If using a normal or ORM map, an albedo map must be set to provide an alpha channel. This alpha channel will be used as a mask to determine how much the normal/ORM maps will affect the underlying surface.
Normal: The normal map to use for the decal. This can be used to increase perceived detail on the decal by modifying how light reacts to it. The impact of this texture is multiplied by the albedo texture's alpha channel (but not Albedo Mix).
ORM: The Occlusion/Roughness/Metallic map to use for the decal. This is an optimized format for storing PBR material maps. Ambient Occlusion map is stored in the red channel, roughness map in the green channel, metallic map in the blue channel. The impact of this texture is multiplied by the albedo texture's alpha channel (but not Albedo Mix).
Emission: The emission texture to use for the decal. Unlike Albedo, this texture will appear to glow in the dark.
Parameters
Emission Energy: The brightness of the emission texture.
Modulate: Multiplies the color of the albedo and emission textures. Use this to tint decals (e.g. for paint decals, or to increase variation by randomizing each decal's modulation).
Albedo Mix: The opacity of the albedo texture. Unlike using an albedo texture with a more transparent alpha channel, decreasing this value below
1.0does not reduce the impact of the normal/ORM texture on the underlying surface. Set this to0.0when creating normal/ORM-only decals such as footsteps or wet puddles.Normal Fade: Fades the Decal if the angle between the Decal's AABB and the target surface becomes too large. A value of
0.0projects the decal regardless of angle, while a value of0.999limits the decal to surfaces that are nearly perpendicular. Setting Normal Fade to a value greater than0.0has a small performance cost due to the added normal angle computations.
Vertical Fade
Upper Fade: The curve over which the decal will fade as the surface gets further from the center of the AABB (towards the decal's projection angle). Only positive values are valid.
Lower Fade: The curve over which the decal will fade as the surface gets further from the center of the AABB (away from the decal's projection angle). Only positive values are valid.
Distance Fade
Enabled: Controls whether distance fade (a form of LOD) is enabled. The decal will fade out over Begin + Length, after which it will be culled and not sent to the shader at all. Use this to reduce the number of active decals in a scene and thus improve performance.
Begin: The distance from the camera at which the decal begins to fade away (in 3D units).
Length: The distance over which the decal fades (in 3D units). The decal becomes slowly more transparent over this distance and is completely invisible at the end. Higher values result in a smoother fade-out transition, which is more suited when the camera moves fast.
Cull Mask
Cull Mask: Specifies which VisualInstance3D layers this decal will project on. By default, decals affect all layers. This is used so you can specify which types of objects receive the decal and which do not. This is especially useful so you can ensure that dynamic objects don't accidentally receive a Decal intended for the terrain under them.
Decal rendering order
By default, decals are ordered based on the size of their AABB and the distance to the camera. AABBs that are closer to the camera are rendered first, which means that decal rendering order can sometimes appear to change depending on camera position if some decals are positioned at the same location.
To resolve this, you can adjust the Sorting Offset property in the VisualInstance3D section of the Decal node inspector. This offset is not a strict priority order, but a guideline that the renderer will use as the AABB size still affects how decal sorting works. Therefore, higher values will always result in the decal being drawn above other decals with a lower sorting offset.
If you want to ensure a decal is always rendered on top of other decals, you need to set its Sorting Offset property to a positive value greater than the AABB length of the largest decal that may overlap it. To make this decal drawn behind other decals instead, set the Sorting Offset to the same negative value.

VisualInstance3D Sorting Offset comparison on Decals
Tweaking performance and quality
Decal rendering performance is mostly determined by their screen coverage, but also their number. In general, a few large decals that cover up most of the screen will be more expensive to render than many small decals that are scattered around.
To improve rendering performance, you can enable the Distance Fade property as described above. This will make distant decals fade out when they are far away from the camera (and may have little to no impact on the final scene rendering). Using node groups, you can also prevent non-essential decorative decals from spawning based on user configuration.
The way decals are rendered also has an impact on performance. The Rendering > Textures > Decals > Filter advanced project setting lets you control how decal textures should be filtered. Nearest/Linear does not use mipmaps. However, decals will look grainy at a distance. Nearest/Linear Mipmaps will look smoother at a distance, but decals will look blurry when viewed from oblique angles. This can be resolved by using Nearest/Linear Mipmaps Anisotropic, which provides the highest quality, but is also slower to render.
If your project has a pixel art style, consider setting the filter to one of the Nearest values so that decals use nearest-neighbor filtering. Otherwise, stick to Linear.
Limitations
Decals cannot affect material properties other than the ones listed above, such as height (for parallax mapping).
For performance reasons, decals use purely fixed rendering logic. This means decals cannot use custom shaders. However, custom shaders on the projected surfaces are able to read the information that is overridden by decals on top of them, such as roughness and metallic.
When using the Forward+ renderer, Godot uses a clustering approach for decal rendering. As many decals as desired can be added (as long as performance allows). However, there's still a default limit of 512 clustered elements that can be present in the current camera view. A clustered element is an omni light, a spot light, a decal or a reflection probe. This limit can be increased by adjusting Max Clustered Elements in Project Settings > Rendering > Limits > Cluster Builder.
When using the Mobile renderer, only 8 decals can be applied on each individual Mesh resource. If there are more decals affecting a single mesh, not all of them will be rendered on the mesh.