Work in progress
The content of this page was not yet updated for Godot
4.2
and may be outdated. If you know how to improve this page or you can confirm
that it's up to date, feel free to open a pull request.
Scène Player et actions d'entrée
Dans les deux prochaines leçons, nous allons concevoir la scène du joueur, enregistrer des actions d'entrée personnalisées, et coder le mouvement du joueur. À la fin, vous aurez un personnage jouable qui se déplace dans huit directions.
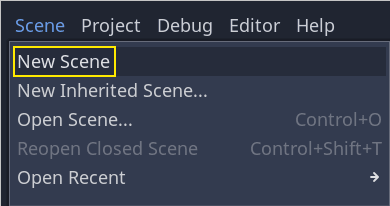
Create a new scene by going to the Scene menu in the top-left and clicking New Scene.
Create a CharacterBody3D node as the root
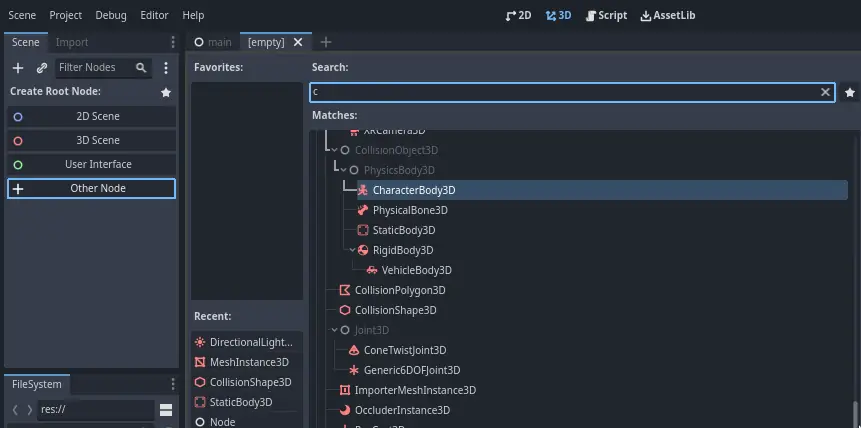
Name the CharacterBody3D to Player.
Character bodies are complementary to the area and rigid bodies used in the 2D
game tutorial. Like rigid bodies, they can move and collide with the
environment, but instead of being controlled by the physics engine, you dictate
their movement. You will see how we use the node's unique features when we code
the jump and squash mechanics.
Voir aussi
Pour en savoir plus sur les différents types de nœuds de physique, consultez la Introduction à la physique.
Pour l'instant, nous allons créer un rig basique pour le modèle 3D de notre personnage. Ça nous permettra de faire pivoter le modèle plus tard depuis le code pendant qu'il joue une animation.
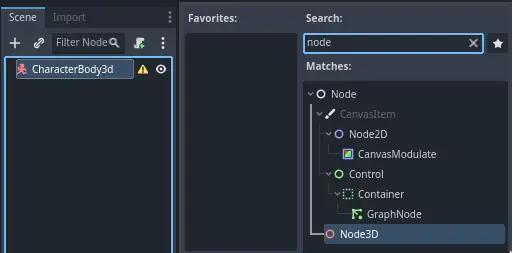
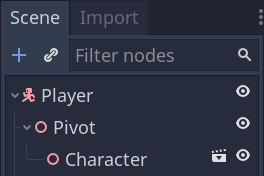
Add a Node3D node as a child of Player and name it Pivot
Then, in the FileSystem dock, expand the art/ folder
by double-clicking it and drag and
drop player.glb onto Pivot.
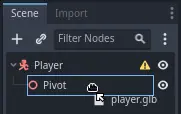
This should instantiate the model as a child of Pivot.
You can rename it to Character.
Note
The .glb files contain 3D scene data based on the open source GLTF 2.0
specification. They're a modern and powerful alternative to a proprietary format
like FBX, which Godot also supports. To produce these files, we designed the
model in Blender 3D and exported it to GLTF.
As with all kinds of physics nodes, we need a collision shape for our character
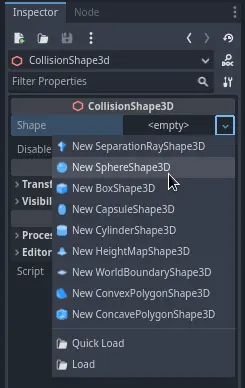
to collide with the environment. Select the Player node again and add a child node
CollisionShape3D. In the Inspector, on the Shape property, add a new SphereShape3D.
The sphere's wireframe appears below the character.
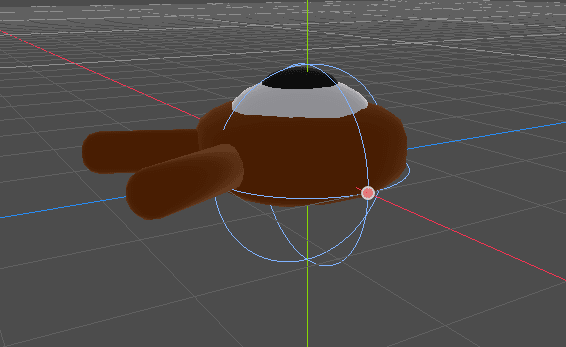
Il s'agira de la forme utilisée par le moteur physique pour collisionner avec l'environnement, nous voulons donc qu'elle s'adapte mieux au modèle 3D. Réduisez-la un peu en faisant glisser le point orange dans la fenêtre. Ma sphère a un rayon d'environ 0.8 mètre.
Ensuite, déplacez la forme vers le haut pour que le bas s'aligne approximativement avec le plan de la grille.
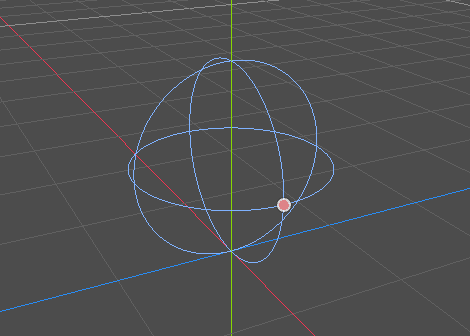
You can toggle the model's visibility by clicking the eye icon next to the
Character or the Pivot nodes.
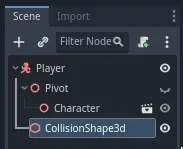
Save the scene as player.tscn
Les nœuds étant prêts, nous pouvons presque commencer à coder. Mais d'abord, nous devons définir quelques actions d'entrée.
Création d'actions d'entrée
Pour déplacer le personnage, nous écouterons l'entrée du joueur, comme l'appui sur les touches fléchées. Dans Godot, plutôt que d'écrire toutes les liaisons dans le code, il y a un système puissant qui nous permet d'attribuer une étiquette à un ensemble de touches et de boutons. Cela simplifie nos scripts et les rend plus lisibles.
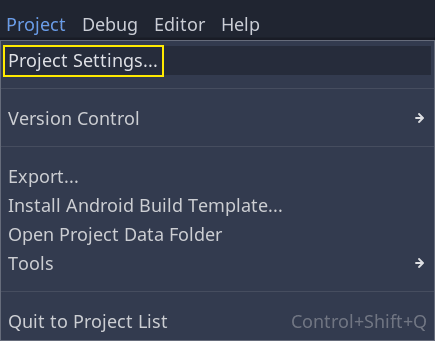
This system is the Input Map. To access its editor, head to the Project menu and select Project Settings.
En haut, il y a plusieurs onglets. Cliquez sur Contrôles. Cette fenêtre vous permet d'ajouter de nouvelles actions en haut ; ce sont vos étiquettes. Dans la partie inférieure, vous pouvez lier des clés à ces actions.
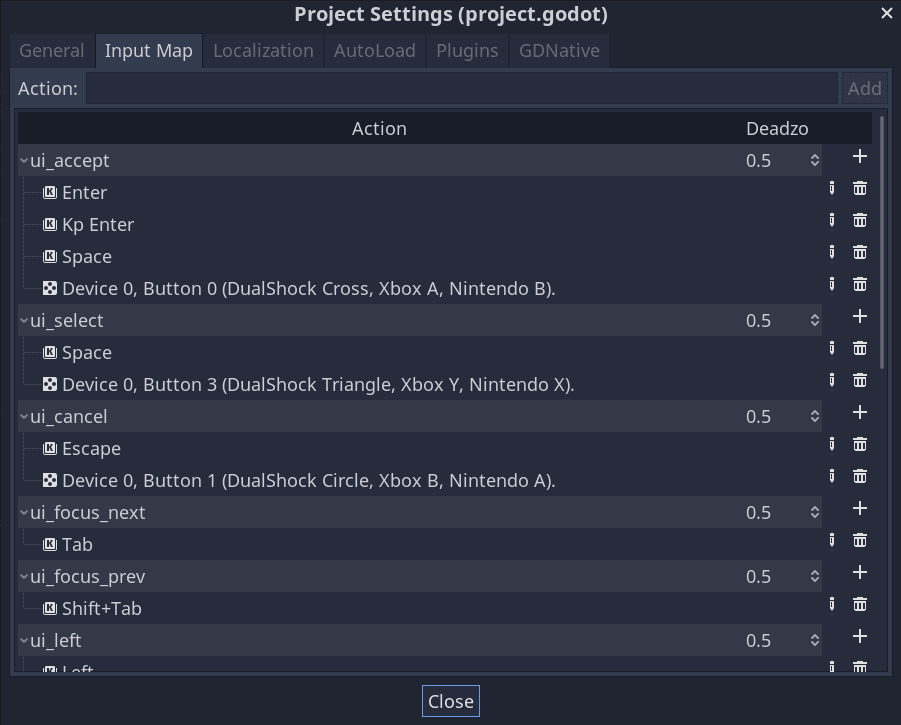
Les projets Godot viennent avec des actions prédéfinies conçues pour la conception d'interfaces utilisateur, que nous pourrions utiliser ici. Mais nous allons définir nos propres actions pour prendre en charge les manettes.
Nous allons nommer nos actions move_left, move_right, move_forward, move_back, et jump.
Pour ajouter une action, écrivez son nom dans la barre en haut et appuyez sur Entrée.

Create the following five actions:

To bind a key or button to an action, click the "+" button to its right. Do this
for move_left. Press the left arrow key and click OK.
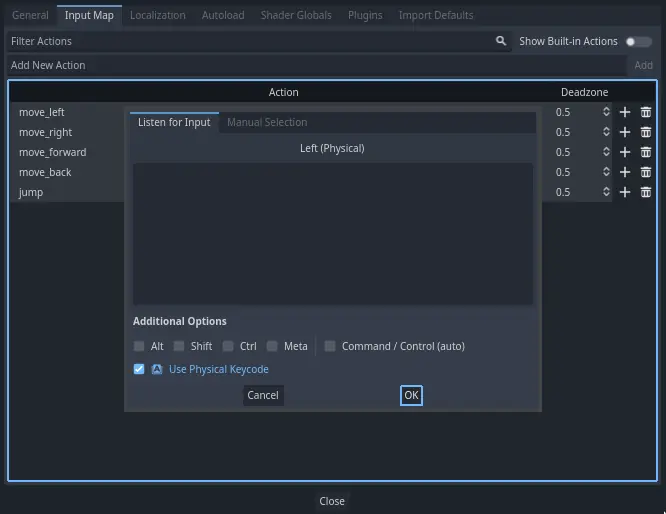
Bind also the A key, onto the action move_left.

Let's now add support for a gamepad's left joystick. Click the "+" button again but this time, select Manual Selection -> Joypad Axes.
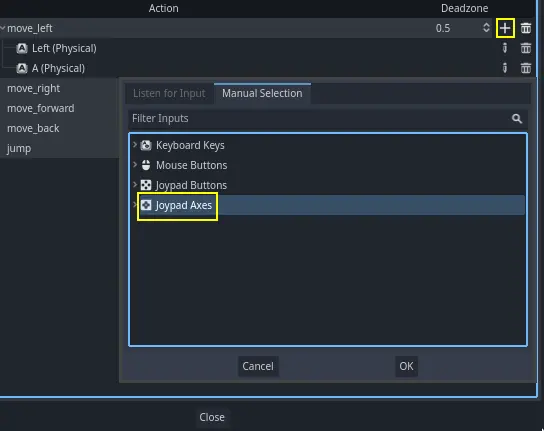
Select the negative X axis of the left joystick.
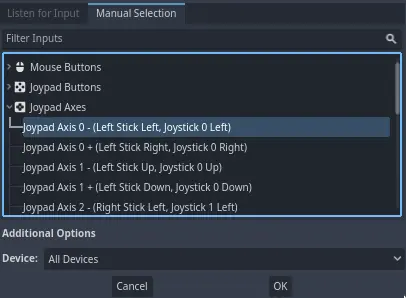
Leave the other values as default and press OK
Note
If you want controllers to have different input actions, you should use the Devices option in Additional Options. Device 0 corresponds to the first plugged gamepad, Device 1 corresponds to the second plugged gamepad, and so on.
Do the same for the other input actions. For example, bind the right arrow, D,
and the left joystick's positive axis to move_right. After binding all keys,
your interface should look like this.
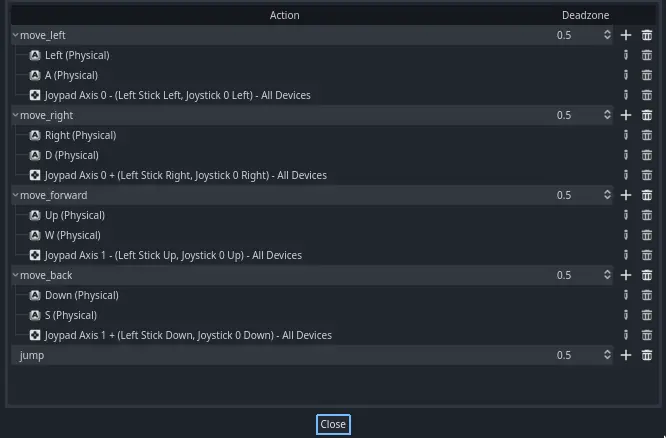
The final action to set up is the jump action. Bind the Space key and the gamepad's
A button.
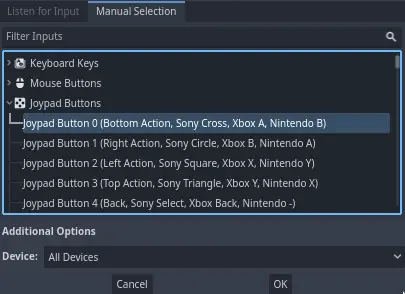
Votre action d'entrée de saut devrait ressembler à ceci.

Voilà toutes les actions dont nous avons besoin pour ce jeu. Vous pouvez utiliser ce menu pour étiqueter tout groupe de touches et de boutons dans vos projets.
Dans la partie suivante, nous allons coder et tester le mouvement du joueur.