Work in progress
The content of this page was not yet updated for Godot
4.2
and may be outdated. If you know how to improve this page or you can confirm
that it's up to date, feel free to open a pull request.
Contrôler des milliers de poissons en utilisant les Particles
The problem with MeshInstance3D is that it is expensive to update their transform array. It is great for placing many static objects around the scene. But it is still difficult to move the objects around the scene.
To make each instance move in an interesting way, we will use a GPUParticles3D node. Particles take advantage of GPU acceleration by computing and setting the per-instance information in a Shader.
Créez d'abord un nœud Particles. Ensuite, sous "Draw Passes" définissez le "Draw Pass 1" de la particule sur votre Mesh. Puis sous "Process Material" créez un nouveau ShaderMaterial.
Définissez le shader_type sur particles.
shader_type particles
Ajoutez ensuite les deux fonctions suivantes :
float rand_from_seed(in uint seed) {
  int k;
  int s = int(seed);
  if (s == 0)
    s = 305420679;
  k = s / 127773;
  s = 16807 * (s - k * 127773) - 2836 * k;
  if (s < 0)
    s += 2147483647;
  seed = uint(s);
  return float(seed % uint(65536)) / 65535.0;
}

uint hash(uint x) {
  x = ((x >> uint(16)) ^ x) * uint(73244475);
  x = ((x >> uint(16)) ^ x) * uint(73244475);
  x = (x >> uint(16)) ^ x;
  return x;
}
These functions come from the default ParticleProcessMaterial.
They are used to generate a random number from each particle's RANDOM_SEED.
A unique thing about particle shaders is that some built-in variables are saved across frames.
TRANSFORM, COLOR, and CUSTOM can all be accessed in the shader of the mesh, and
also in the particle shader the next time it is run.
Next, setup your start() function. Particles shaders contain a start() function and a
process() function.
The code in the start() function only runs when the particle system starts.
The code in the process() function will always run.
We need to generate 4 random numbers: 3 to create a random position and one for the random offset of the swim cycle.
First, generate 4 seeds inside the start() function using the hash() function provided above:
uint alt_seed1 = hash(NUMBER + uint(1) + RANDOM_SEED);
uint alt_seed2 = hash(NUMBER + uint(27) + RANDOM_SEED);
uint alt_seed3 = hash(NUMBER + uint(43) + RANDOM_SEED);
uint alt_seed4 = hash(NUMBER + uint(111) + RANDOM_SEED);
Ensuite, utilisez ces graines pour générer des nombres aléatoires à l'aide de rand_from_seed :
CUSTOM.x = rand_from_seed(alt_seed1);
vec3 position = vec3(rand_from_seed(alt_seed2) * 2.0 - 1.0,
                     rand_from_seed(alt_seed3) * 2.0 - 1.0,
                     rand_from_seed(alt_seed4) * 2.0 - 1.0);
Enfin, affectez position à TRANSFORM[3].xyz, qui est la partie du transform qui contient l'information de position.
TRANSFORM[3].xyz = position * 20.0;
Remember, all this code so far goes inside the start() function.
Le vertex shader de votre maillage peut rester exactement le même que dans le tutoriel précédent.
Vous pouvez maintenant déplacer chaque poisson individuellement à chaque image, soit en ajoutant directement à son TRANSFORM, soit en réécrivant sa VELOCITY.
Let's transform the fish by setting their VELOCITY in the start() function.
VELOCITY.z = 10.0;
C'est la façon la plus simple de régler VELOCITY : chaque particule (ou poisson) aura la même vitesse.
Juste en définissant VELOCITY vous pouvez faire nager les poissons comme vous voulez. Par exemple, essayez le code ci-dessous.
VELOCITY.z = cos(TIME + CUSTOM.x * 6.28) * 4.0 + 6.0;
Cela donnera à chaque poisson une vitesse unique entre 2 et 10.
You can also let each fish change its velocity over time if you set the velocity in the process()
function.
Si vous avez utilisé CUSTOM.y dans le dernier tutoriel, vous pouvez également définir la vitesse de l'animation de nage en fonction de la VELOCITY. Utilisez simplement CUSTOM.y.
CUSTOM.y = VELOCITY.z * 0.1;
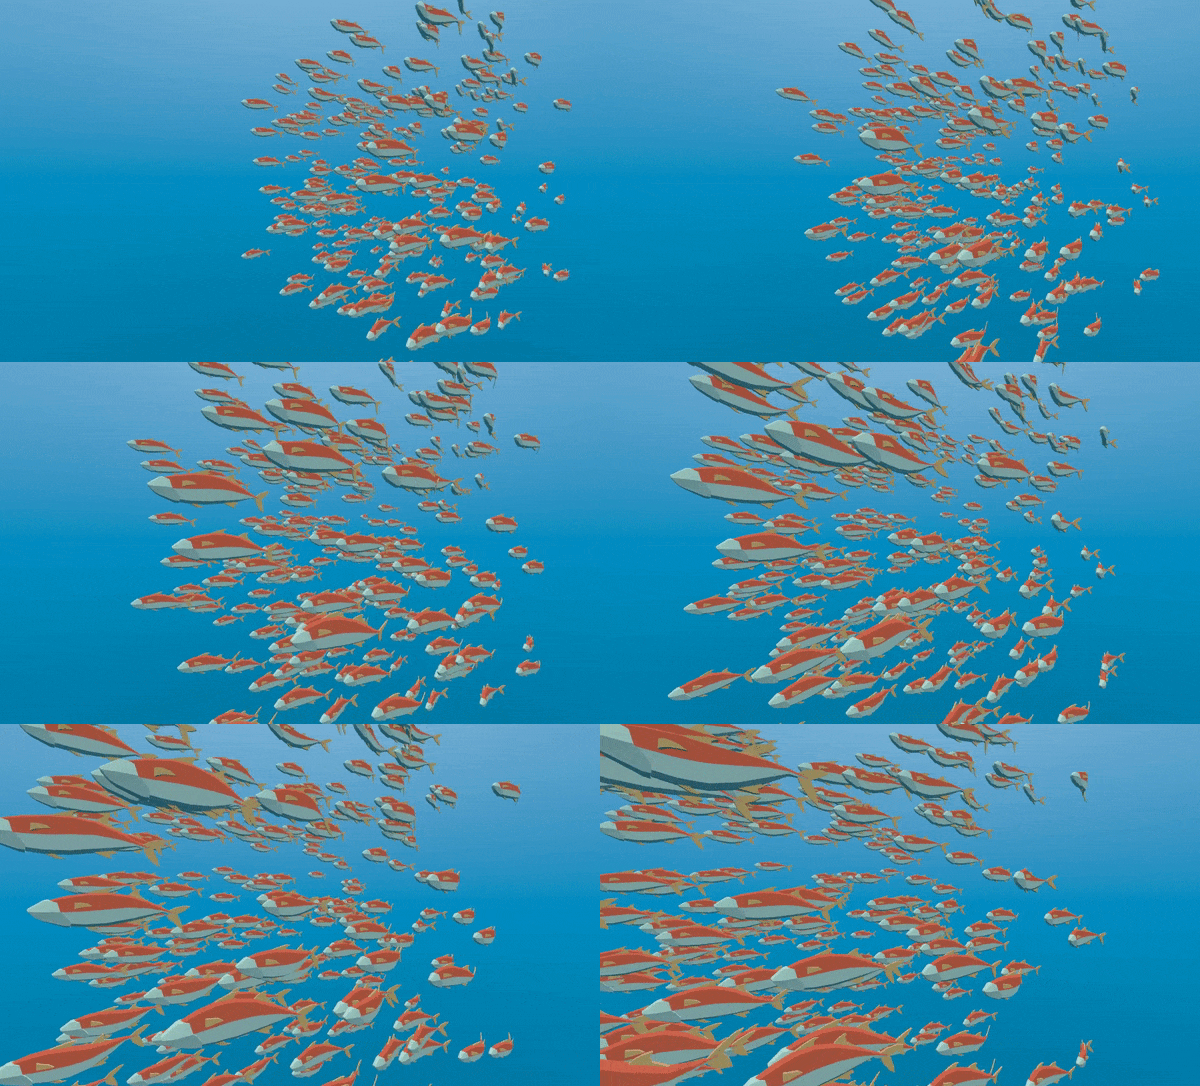
Ce code vous donne le comportement suivant :

Using a ParticleProcessMaterial you can make the fish behavior as simple or complex as you like. In this
tutorial we only set Velocity, but in your own Shaders you can also set COLOR, rotation, scale
(through TRANSFORM). Please refer to the Particles Shader Reference
for more information on particle shaders.