Attention: Here be dragons
This is the latest
(unstable) version of this documentation, which may document features
not available in or compatible with released stable versions of Godot.
Checking the stable version of the documentation...
Déplacer le joueur avec du code
C'est l'heure de coder ! Nous allons utiliser les actions que nous avons créées dans la partie précédente pour déplacer le personnage.
Note
Pour ce projet, nous suivrons les conventions de nommage de Godot.
GDScript : Les classes (nœuds) utilisent le PascalCase, les variables et les fonctions utilisent le snake_case, et les constantes utilisent le ALL_CAPS (Voir Guide de style GDScript).
C# : Les classes, les variables d'exportation et les méthodes utilisent PascalCase, les attributs privés utilisent _camelCase, les variables locales et les paramètres utilisent camelCase (Voir Guide de style C#). Attention à taper les noms des méthodes précisément lorsque vous connectez des signaux.
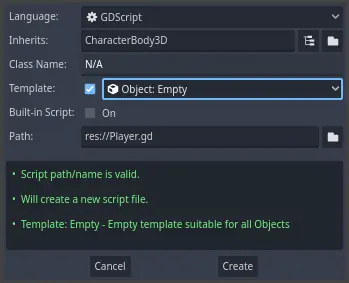
Faîtes un clic droit sur le nœud Player et sélectionnez Attacher un script pour lui ajouter un nouveau script. Dans la fenêtre contextuelle, mettez le Modèle à Empty avant d'appuyer sur le bouton Créer. Nous l'avons défini sur Empty car nous voulons écrire notre propre code pour le mouvement des joueurs.
Commençons par les propriétés de la classe. Nous allons définir une vitesse de déplacement, une accélération de chute qui représente la gravité, et une vélocité que nous utiliserons pour déplacer le personnage.
extends CharacterBody3D

# How fast the player moves in meters per second.
@export var speed = 14
# The downward acceleration when in the air, in meters per second squared.
@export var fall_acceleration = 75

var target_velocity = Vector3.ZERO
using Godot;

public partial class Player : CharacterBody3D
{
    // Don't forget to rebuild the project so the editor knows about the new export variable.

    // How fast the player moves in meters per second.
    [Export]
    public int Speed { get; set; } = 14;
    // The downward acceleration when in the air, in meters per second squared.
    [Export]
    public int FallAcceleration { get; set; } = 75;

    private Vector3 _targetVelocity = Vector3.Zero;
}
Ce sont des propriétés courantes pour un corps pouvant se déplacer. La target_velocity est un vecteur 3D combinant une vitesse et une direction. Ici, nous la définissons comme propriété car nous voulons la mettre à jour et réutiliser sa valeur d'une image à l'autre.
Note
Les valeurs sont assez différentes du code 2D car les distances sont exprimées en mètres. En 2D, mille unités (pixels) peuvent ne correspondre qu'à la moitié de la largeur de votre écran, en 3D, c'est un kilomètre.
Codons le déplacement maintenant. Nous commençons par calculer le vecteur de direction d'entrée en utilisant l'objet Input global, dans _physics_process().
func _physics_process(delta):
    # We create a local variable to store the input direction.
    var direction = Vector3.ZERO

    # We check for each move input and update the direction accordingly.
    if Input.is_action_pressed("move_right"):
        direction.x += 1
    if Input.is_action_pressed("move_left"):
        direction.x -= 1
    if Input.is_action_pressed("move_back"):
        # Notice how we are working with the vector's x and z axes.
        # In 3D, the XZ plane is the ground plane.
        direction.z += 1
    if Input.is_action_pressed("move_forward"):
        direction.z -= 1
public override void _PhysicsProcess(double delta)
{
    // We create a local variable to store the input direction.
    var direction = Vector3.Zero;

    // We check for each move input and update the direction accordingly.
    if (Input.IsActionPressed("move_right"))
    {
        direction.X += 1.0f;
    }
    if (Input.IsActionPressed("move_left"))
    {
        direction.X -= 1.0f;
    }
    if (Input.IsActionPressed("move_back"))
    {
        // Notice how we are working with the vector's X and Z axes.
        // In 3D, the XZ plane is the ground plane.
        direction.Z += 1.0f;
    }
    if (Input.IsActionPressed("move_forward"))
    {
        direction.Z -= 1.0f;
    }
}
Ici, au lieu de _process(), nous allons faire tous nos calculs dans la fonction virtuelle _physics_process(). Elle est conçue spécifiquement pour le code lié à la physique, comme le déplacement d'un corps cinématique ou rigide. Elle nous permet de mettre à jour le nœud à un intervalle fixe.
Voir aussi
Pour en savoir plus sur la différence entre _process() et _physics_process(), voir Traitement physique et traitement passif.
Nous commençons par initialiser une variable direction à Vector3.ZERO. Ensuite, nous vérifions si le joueur appuie sur une ou plusieurs des entrées move_*, et nous mettons à jour les composants x et z du vecteur en conséquence. Ils correspondent aux axes du plan du sol.
Ces quatre conditions nous donnent huit possibilités et huit directions possibles.
Dans le cas où le joueur appuie, par exemple, sur W et D simultanément, le vecteur aura une longueur d'environ 1.4. Mais s'il appuie sur une seule touche, le vecteur aura une longueur de 1. Nous voulons que la longueur du vecteur soit consistante. Pour ce faire, nous pouvons appeler sa méthode normalize().
func _physics_process(delta):
    #...

    if direction != Vector3.ZERO:
        direction = direction.normalized()
        # Setting the basis property will affect the rotation of the node.
        $Pivot.basis = Basis.looking_at(direction)
public override void _PhysicsProcess(double delta)
{
    // ...

    if (direction != Vector3.Zero)
    {
        direction = direction.Normalized();
        // Setting the basis property will affect the rotation of the node.
        GetNode<Node3D>("Pivot").Basis = Basis.LookingAt(direction);
    }
}
Ici, nous normalisons seulement le vecteur si la direction a une longueur supérieure à zéro, ce qui signifie que le joueur appuie sur une touche de direction.
Nous calculons la direction dans laquelle le $Pivot regarde en créant une Basis qui regarde dans la direction direction.
Ensuite, nous mettons à jour la vélocité. Nous devons calculer la vélocité au sol et la vitesse de chute séparément. Assurez-vous d'indenter une fois vers l'arrière pour que les lignes soient à l'intérieur de la fonction _physics_process() mais en dehors de la condition que nous venons d'écrire.
func _physics_process(delta):
    #...
    if direction != Vector3.ZERO:
        #...

    # Ground Velocity
    target_velocity.x = direction.x * speed
    target_velocity.z = direction.z * speed

    # Vertical Velocity
    if not is_on_floor(): # If in the air, fall towards the floor. Literally gravity
        target_velocity.y = target_velocity.y - (fall_acceleration * delta)

    # Moving the Character
    velocity = target_velocity
    move_and_slide()
public override void _PhysicsProcess(double delta)
{
    // ...
    if (direction != Vector3.Zero)
    {
        // ...
    }

    // Ground velocity
    _targetVelocity.X = direction.X * Speed;
    _targetVelocity.Z = direction.Z * Speed;

    // Vertical velocity
    if (!IsOnFloor()) // If in the air, fall towards the floor. Literally gravity
    {
        _targetVelocity.Y -= FallAcceleration * (float)delta;
    }

    // Moving the character
    Velocity = _targetVelocity;
    MoveAndSlide();
}
La fonction CharacterBody3D.is_on_floor() renvoie true si le corps est entré en collision avec le sol à cette trame. C'est pour cela que nous appliquons la gravité au Player seulement pendant qu'il est en l'air.
Pour la vélocité verticale, nous soustrayons l'accélération de la chute multipliée par l'écart de temps à chaque trame. Cette ligne de code causera la chute de notre personnage à chaque trame, tant qu'il n'est pas sur ou en collision avec le sol.
Le moteur de physique peut seulement détecter les interactions avec les murs, le sol, ou d'autres corps pendant une image donnée si des mouvements et des collisions se produisent. Nous utiliserons cette propriété plus tard pour coder le saut.
Sur la dernière ligne, nous appelons KinematicBody.move_and_slide(). C'est une méthode puissante de la classe KinematicBody qui nous permet de déplacer fluidement un personnage. S'il touche un mur au milieu du déplacement, le moteur va essayer de le fluidifier pour vous. Il utilise la valeur native velocity de CharacterBody3D
Et c'est tout le code dont vous avez besoin pour déplacer le personnage sur le sol.
Voici le code de player.gd complet pour référence.
extends CharacterBody3D

# How fast the player moves in meters per second.
@export var speed = 14
# The downward acceleration when in the air, in meters per second squared.
@export var fall_acceleration = 75

var target_velocity = Vector3.ZERO


func _physics_process(delta):
    var direction = Vector3.ZERO

    if Input.is_action_pressed("move_right"):
        direction.x += 1
    if Input.is_action_pressed("move_left"):
        direction.x -= 1
    if Input.is_action_pressed("move_back"):
        direction.z += 1
    if Input.is_action_pressed("move_forward"):
        direction.z -= 1

    if direction != Vector3.ZERO:
        direction = direction.normalized()
        # Setting the basis property will affect the rotation of the node.
        $Pivot.basis = Basis.looking_at(direction)

    # Ground Velocity
    target_velocity.x = direction.x * speed
    target_velocity.z = direction.z * speed

    # Vertical Velocity
    if not is_on_floor(): # If in the air, fall towards the floor. Literally gravity
        target_velocity.y = target_velocity.y - (fall_acceleration * delta)

    # Moving the Character
    velocity = target_velocity
    move_and_slide()
using Godot;

public partial class Player : CharacterBody3D
{
    // How fast the player moves in meters per second.
    [Export]
    public int Speed { get; set; } = 14;
    // The downward acceleration when in the air, in meters per second squared.
    [Export]
    public int FallAcceleration { get; set; } = 75;

    private Vector3 _targetVelocity = Vector3.Zero;

    public override void _PhysicsProcess(double delta)
    {
        var direction = Vector3.Zero;

        if (Input.IsActionPressed("move_right"))
        {
            direction.X += 1.0f;
        }
        if (Input.IsActionPressed("move_left"))
        {
            direction.X -= 1.0f;
        }
        if (Input.IsActionPressed("move_back"))
        {
            direction.Z += 1.0f;
        }
        if (Input.IsActionPressed("move_forward"))
        {
            direction.Z -= 1.0f;
        }

        if (direction != Vector3.Zero)
        {
            direction = direction.Normalized();
            // Setting the basis property will affect the rotation of the node.
            GetNode<Node3D>("Pivot").Basis = Basis.LookingAt(direction);
        }

        // Ground velocity
        _targetVelocity.X = direction.X * Speed;
        _targetVelocity.Z = direction.Z * Speed;

        // Vertical velocity
        if (!IsOnFloor()) // If in the air, fall towards the floor. Literally gravity
        {
            _targetVelocity.Y -= FallAcceleration * (float)delta;
        }

        // Moving the character
        Velocity = _targetVelocity;
        MoveAndSlide();
    }
}
Tester le mouvement de notre joueur
Nous allons mettre notre joueur dans la scène Main pour le tester. Pour ce faire, nous devons instancier le joueur, puis ajouter une caméra. Contrairement à la 2D, en 3D, vous ne verrez rien si votre viewport n'a pas de caméra pointant vers quelque chose.
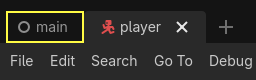
Enregistrez votre scène Player et ouvrez la scène Main. Vous pouvez cliquer sur l'onglet Main en haut de l'éditeur pour le faire.
Si vous avez déjà fermé la scène, dirigez-vous vers le dock Système de fichiers et double-cliquez sur main.tscn pour la rouvrir.
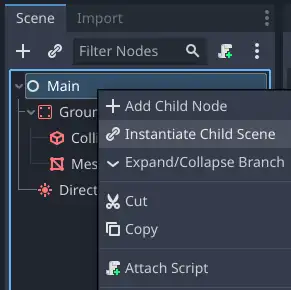
Pour instancier le Player, faîtes un clic droit sur le nœud Main et sélectionnez Instancier une scène enfant.
Dans la fenêtre contextuelle, double-cliquez sur Player.tscn. Le personnage devrait apparaître au milieu du viewport.
Ajout d'une caméra
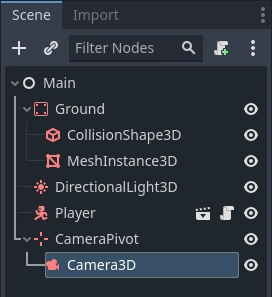
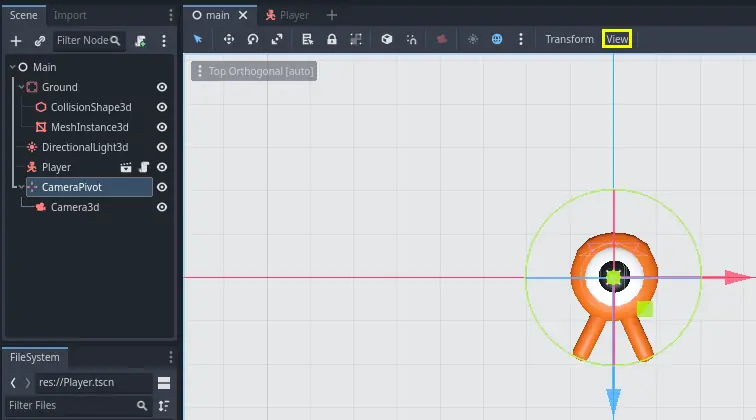
Ajoutons ensuite la caméra. Comme nous l'avons fait avec le Pivot du Player, nous allons créer un rig basique. Faîtes un clic-droit sur le nœud Main à nouveau, mais sélectionnez Ajouter un nœud enfant cette fois. Créez un nouveau Marker3D, nommez-le CameraPivot. Sélectionnez CameraPivot et ajoutez-lui un nœud Camera3D comme enfant. Votre arbre de scène devrait ressembler à ceci.
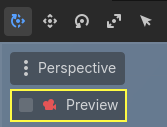
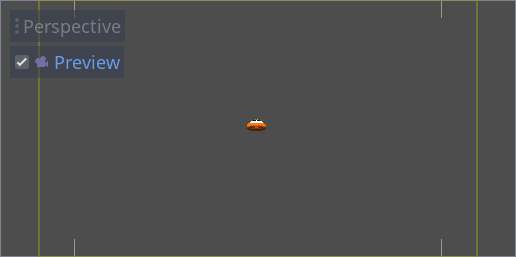
Remarquez la case à cocher Aperçu qui apparaît en haut à gauche de la vue 3D lorsque la Camera est sélectionnée. Vous pouvez cliquer dessus pour avoir un aperçu de la projection de la caméra dans le jeu.
Nous allons utiliser le Pivot pour faire pivoter la caméra comme si elle était sur une grue. Divisons d'abord la vue 3D pour pouvoir naviguer librement dans la scène tout en voyant ce que voit la caméra.
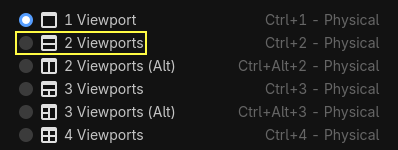
Dans la barre d'outils juste au-dessus de la fenêtre d'affichage, cliquez sur Affichage, puis 2 vues. Vous pouvez également appuyer sur Ctrl + 2 (Cmd + 2 sur MacOS).
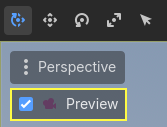
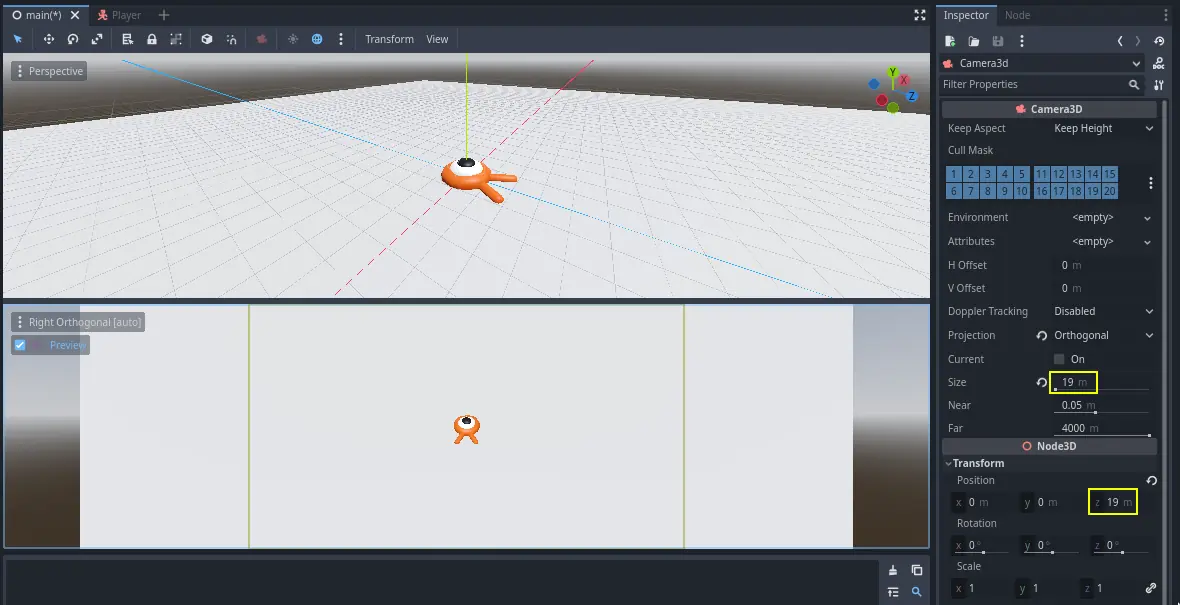
Dans le vue du bas, sélectionnez votre Camera3D et activez l'aperçu de la caméra en cliquant sur la case à cocher.
Dans la vue du haut, vérifiez que Camera3D est sélectionnée, puis déplacez la caméra d'environ 19 unités sur l'axe Z (le bleu).
C'est là que la magie opère. Sélectionnez le CameraPivot et faîtes-le pivoter de -45 degrés autour de l'axe X (en utilisant le cercle rouge). Vous verrez la caméra bouger comme si elle était attachée à une grue.
Vous pouvez lancer la scène en appuyant sur F6 (Cmd + R sur macOS) et utiliser les touches fléchées pour déplacer le personnage.

Nous pouvons voir un certain espace vide autour du personnage à cause de la projection en perspective. Dans ce jeu, nous utiliserons une projection orthographique à la place pour mieux encadrer la zone de jeu et faciliter la lecture des distances pour le joueur.
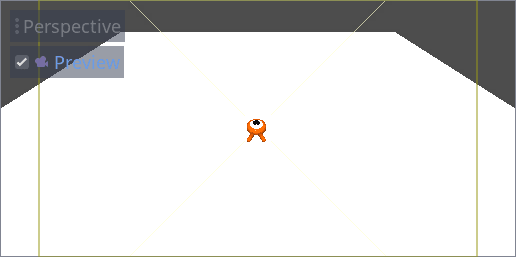
Sélectionnez à nouveau la Camera et, dans l'Inspecteur, réglez la Projection sur Orthogonal et la Size à 19. Le personnage devrait maintenant avoir l'air plus plat et le sol devrait remplir tout l'arrière-plan.
Note
Lors de l'utilisation d'une caméra orthogonale dans Godot 4, la qualité de l'ombre directionnelle dépend de la valeur Far de la caméra. Plus la valeur Far est élevée, plus la caméra pourra voir loin. Cependant, des valeurs Far élevées diminuent également la qualité de l'ombre car le rendu de l'ombre doit couvrir une plus grande distance.
Si les ombres directionnelles sont trop floues après le passage à une caméra orthogonale, diminuez la propriété Far de la caméra à une valeur inférieure telle que 100. Ne diminuez pas trop cette propriété Far, ou les objets au loin commenceront à disparaître.
Testez votre scène et vous devriez être capable de vous déplacer dans les 8 directions sans passer à travers le sol !
Avec ceci, nous avons à la fois le mouvement du joueur et la vue en place. Ensuite, nous allons travailler sur les monstres.