Attention: Here be dragons
This is the latest
(unstable) version of this documentation, which may document features
not available in or compatible with released stable versions of Godot.
Checking the stable version of the documentation...
코드로 플레이어 움직이기
이제 코딩할 시간입니다! 이전 부분에서 만든 입력 동작을 사용하여 캐릭터를 이동시키겠습니다.
참고
이 프로젝트에서, 우리는 Godot의 명명 규칙을 따를 것입니다.
GDScript: 클래스(노드)는 파스칼 표기법(PascalCase)을 사용하고, 변수와 함수는 스네이크_표기법(snake_case)을 사용하며, 상수는 전부 대문자(ALL_CAPS)를 사용합니다(GDScript 스타일 가이드 참조).
C#: 클래스, export 변수 그리고 메서드는 파스칼 표기법(PascalCase)을 사용합니다. private 필드는 카멜 표기법(_camelCase)를 사용합니다. 지역변수와 매개변수는 카멜 표기법(camelCase)을 사용합니다(C# 스타일 가이드 참고). 시그널을 연결할 때는 메서드 이름을 정확하게 입력하도록 주의하세요.
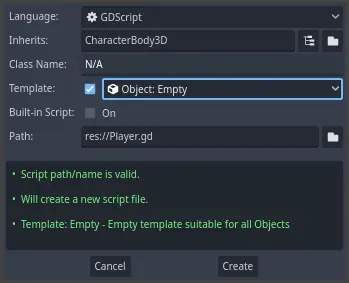
Player 노드를 마우스 오른쪽 버튼으로 클릭하고 스크립트 붙이기를 선택하여 새 스크립트를 추가합니다. 팝업에서 템플릿을 비었음으로 설정한 후 만들기 버튼을 누릅니다. 우리가 비었음으로 설정하는 이유는 플레이어 이동을 위한 코드를 직접 작성하고자 하기 때문입니다.
먼저 클래스의 속성부터 시작하겠습니다. 이동 속도, 중력을 나타내는 낙하 가속도, 그리고 캐릭터를 이동시키기 위해 사용할 속도를 정의하겠습니다.
extends CharacterBody3D

# How fast the player moves in meters per second.
@export var speed = 14
# The downward acceleration when in the air, in meters per second squared.
@export var fall_acceleration = 75

var target_velocity = Vector3.ZERO
using Godot;

public partial class Player : CharacterBody3D
{
    // Don't forget to rebuild the project so the editor knows about the new export variable.

    // How fast the player moves in meters per second.
    [Export]
    public int Speed { get; set; } = 14;
    // The downward acceleration when in the air, in meters per second squared.
    [Export]
    public int FallAcceleration { get; set; } = 75;

    private Vector3 _targetVelocity = Vector3.Zero;
}
이것들은 이동하는 객체에 대한 일반적인 속성입니다. target_velocity 는 속도와 방향을 결합한 :ref:`3D 벡터 <class_Vector3>`입니다. 여기에서는 프레임마다 값을 업데이트하고 재사용하기 위해 속성으로 정의합니다.
참고
값은 2D 코드와 상당히 다릅니다. 이는 거리가 미터 단위로 측정되기 때문입니다. 2D에서는 천 단위(픽셀)가 화면 너비의 절반에 불과할 수 있지만, 3D에서는 이는 1킬로미터에 해당합니다.
이제 이동 코드를 작성해보겠습니다. 먼저 글로벌 Input 객체를 사용하여 _physics_process() 에서 입력 방향 벡터를 계산합니다.
func _physics_process(delta):
    # We create a local variable to store the input direction.
    var direction = Vector3.ZERO

    # We check for each move input and update the direction accordingly.
    if Input.is_action_pressed("move_right"):
        direction.x += 1
    if Input.is_action_pressed("move_left"):
        direction.x -= 1
    if Input.is_action_pressed("move_back"):
        # Notice how we are working with the vector's x and z axes.
        # In 3D, the XZ plane is the ground plane.
        direction.z += 1
    if Input.is_action_pressed("move_forward"):
        direction.z -= 1
public override void _PhysicsProcess(double delta)
{
    // We create a local variable to store the input direction.
    var direction = Vector3.Zero;

    // We check for each move input and update the direction accordingly.
    if (Input.IsActionPressed("move_right"))
    {
        direction.X += 1.0f;
    }
    if (Input.IsActionPressed("move_left"))
    {
        direction.X -= 1.0f;
    }
    if (Input.IsActionPressed("move_back"))
    {
        // Notice how we are working with the vector's X and Z axes.
        // In 3D, the XZ plane is the ground plane.
        direction.Z += 1.0f;
    }
    if (Input.IsActionPressed("move_forward"))
    {
        direction.Z -= 1.0f;
    }
}
여기서는 모든 계산을 _physics_process() 가상 함수를 사용하여 수행할 것입니다. 이 함수는 _process() 와 마찬가지로 매 프레임마다 노드를 업데이트할 수 있게 해주지만, 주로 키네마틱이나 리지드 바디와 같은 물리 관련 코드를 처리하도록 설계되었습니다.
더 보기
_process() 와 _physics_process() 의 차이점에 대해 자세히 알아보려면 :ref:`doc_idle_and_physics_processing`를 참조하세요.
먼저 Vector3.ZERO 로 초기화된 direction 변수를 설정합니다. 그런 다음, 플레이어가 하나 이상의 move_* 입력을 누르고 있는지 확인하고 벡터의 x 및 z 컴포넌트를 적절히 업데이트합니다. 이 컴포넌트들은 지면 평면의 축에 해당합니다.
이 네 가지 조건은 여덟 가지 가능성과 여덟 가지 가능한 방향을 제공합니다.
플레이어가 W와 D를 동시에 누를 경우, 벡터의 길이는 약 1.4 가 됩니다. 하지만 단일 키를 누를 경우, 길이는 1 이 됩니다. 우리는 벡터의 길이가 일관되도록 하여 대각선으로 이동할 때 더 빨리 움직이지 않도록 하고 싶습니다. 이를 위해 normalized() 메서드를 호출할 수 있습니다.
func _physics_process(delta):
    #...

    if direction != Vector3.ZERO:
        direction = direction.normalized()
        # Setting the basis property will affect the rotation of the node.
        $Pivot.basis = Basis.looking_at(direction)
public override void _PhysicsProcess(double delta)
{
    // ...

    if (direction != Vector3.Zero)
    {
        direction = direction.Normalized();
        // Setting the basis property will affect the rotation of the node.
        GetNode<Node3D>("Pivot").Basis = Basis.LookingAt(direction);
    }
}
여기서 우리는 벡터의 길이가 0보다 클 때만 벡터를 정규화합니다. 이는 플레이어가 방향 키를 누르고 있음을 의미합니다.
우리는 direction 방향을 바라보는 Basis <class_Basis>`를 생성하여 ``$Pivot` 이 바라보는 방향을 계산합니다.
그런 다음, 속도를 업데이트합니다. 지면 속도와 낙하 속도를 별도로 계산해야 합니다. 방금 작성한 조건문 바깥에 있지만 _physics_process() 함수 내부에 해당 줄이 있도록 한 탭을 뒤로 이동하는 것을 잊지 마세요.
func _physics_process(delta):
    #...
    if direction != Vector3.ZERO:
        #...

    # Ground Velocity
    target_velocity.x = direction.x * speed
    target_velocity.z = direction.z * speed

    # Vertical Velocity
    if not is_on_floor(): # If in the air, fall towards the floor. Literally gravity
        target_velocity.y = target_velocity.y - (fall_acceleration * delta)

    # Moving the Character
    velocity = target_velocity
    move_and_slide()
public override void _PhysicsProcess(double delta)
{
    // ...
    if (direction != Vector3.Zero)
    {
        // ...
    }

    // Ground velocity
    _targetVelocity.X = direction.X * Speed;
    _targetVelocity.Z = direction.Z * Speed;

    // Vertical velocity
    if (!IsOnFloor()) // If in the air, fall towards the floor. Literally gravity
    {
        _targetVelocity.Y -= FallAcceleration * (float)delta;
    }

    // Moving the character
    Velocity = _targetVelocity;
    MoveAndSlide();
}
CharacterBody3D.is_on_floor() 함수는 몸체가 이번 프레임에서 바닥과 충돌했는지 여부를 반환합니다. 그래서 우리는 Player 가 공중에 있을 때만 중력을 적용합니다.
수직 속도의 경우, 매 프레임마다 델타 시간에 낙하 가속도를 곱하여 빼줍니다. 이 코드 줄은 캐릭터가 바닥에 있거나 바닥과 충돌하지 않는 한 매 프레임마다 캐릭터가 떨어지게 만듭니다.
물리 엔진은 주어진 프레임 동안 움직임과 콜리전이 발생할 때만 벽, 바닥 또는 다른 물체와의 상호작용을 감지할 수 있습니다. 우리는 이 속성을 나중에 점프를 코딩할 때 사용할 것입니다.
마지막 줄에서 우리는 CharacterBody3D.move_and_slide() 를 호출합니다. 이 메서드는 CharacterBody3D 클래스의 강력한 메서드로, 캐릭터를 부드럽게 이동할 수 있게 해줍니다. 움직이는 도중에 벽에 부딪히면, 엔진이 그 충격을 부드럽게 처리하려고 합니다. 이 메서드는 :ref:`CharacterBody3D <class_CharacterBody3D>`의 기본 속성인 velocity 값을 사용합니다
이것이 캐릭터를 바닥에서 이동시키는 데 필요한 모든 코드입니다.
여기에 참고용으로 전체 Player.gd 코드를 제공합니다.
extends CharacterBody3D

# How fast the player moves in meters per second.
@export var speed = 14
# The downward acceleration when in the air, in meters per second squared.
@export var fall_acceleration = 75

var target_velocity = Vector3.ZERO


func _physics_process(delta):
    var direction = Vector3.ZERO

    if Input.is_action_pressed("move_right"):
        direction.x += 1
    if Input.is_action_pressed("move_left"):
        direction.x -= 1
    if Input.is_action_pressed("move_back"):
        direction.z += 1
    if Input.is_action_pressed("move_forward"):
        direction.z -= 1

    if direction != Vector3.ZERO:
        direction = direction.normalized()
        # Setting the basis property will affect the rotation of the node.
        $Pivot.basis = Basis.looking_at(direction)

    # Ground Velocity
    target_velocity.x = direction.x * speed
    target_velocity.z = direction.z * speed

    # Vertical Velocity
    if not is_on_floor(): # If in the air, fall towards the floor. Literally gravity
        target_velocity.y = target_velocity.y - (fall_acceleration * delta)

    # Moving the Character
    velocity = target_velocity
    move_and_slide()
using Godot;

public partial class Player : CharacterBody3D
{
    // How fast the player moves in meters per second.
    [Export]
    public int Speed { get; set; } = 14;
    // The downward acceleration when in the air, in meters per second squared.
    [Export]
    public int FallAcceleration { get; set; } = 75;

    private Vector3 _targetVelocity = Vector3.Zero;

    public override void _PhysicsProcess(double delta)
    {
        var direction = Vector3.Zero;

        if (Input.IsActionPressed("move_right"))
        {
            direction.X += 1.0f;
        }
        if (Input.IsActionPressed("move_left"))
        {
            direction.X -= 1.0f;
        }
        if (Input.IsActionPressed("move_back"))
        {
            direction.Z += 1.0f;
        }
        if (Input.IsActionPressed("move_forward"))
        {
            direction.Z -= 1.0f;
        }

        if (direction != Vector3.Zero)
        {
            direction = direction.Normalized();
            // Setting the basis property will affect the rotation of the node.
            GetNode<Node3D>("Pivot").Basis = Basis.LookingAt(direction);
        }

        // Ground velocity
        _targetVelocity.X = direction.X * Speed;
        _targetVelocity.Z = direction.Z * Speed;

        // Vertical velocity
        if (!IsOnFloor()) // If in the air, fall towards the floor. Literally gravity
        {
            _targetVelocity.Y -= FallAcceleration * (float)delta;
        }

        // Moving the character
        Velocity = _targetVelocity;
        MoveAndSlide();
    }
}
플레이어의 움직임 테스트하기
플레이어를 테스트하기 위해 Main 씬에 배치하겠습니다. 이를 위해 플레이어를 인스턴스화하고 카메라를 추가해야 합니다. 2D와 달리, 3D에서는 뷰포트에 카메라가 어떤 것을 가리키지 않으면 아무것도 보이지 않습니다.
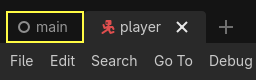
Player 씬을 저장하고 Main 씬을 엽니다. 이를 위해 편집기 상단의 Main 탭을 클릭할 수 있습니다.
씬을 이전에 닫았다면, 파일시스템 독으로 이동하여 main.tscn을 더블 클릭하여 다시 엽니다.
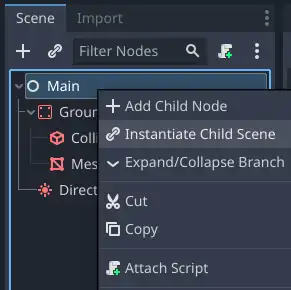
Player를 인스턴스화하려면 Main 노드를 마우스 오른쪽 버튼으로 클릭하고 자식 씬 인스턴스화를 선택합니다.
팝업에서 player.tscn 을 더블 클릭합니다. 캐릭터가 뷰포트의 중앙에 나타나야 합니다.
카메라 추가하기
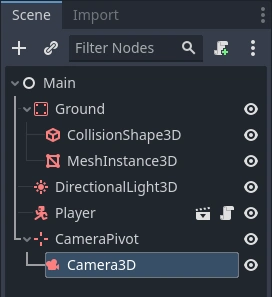
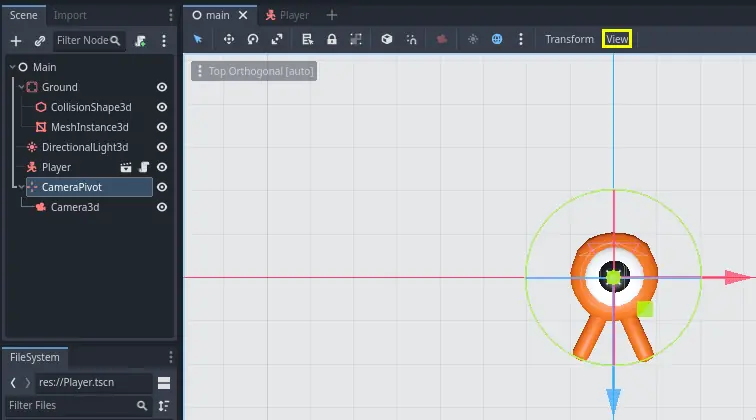
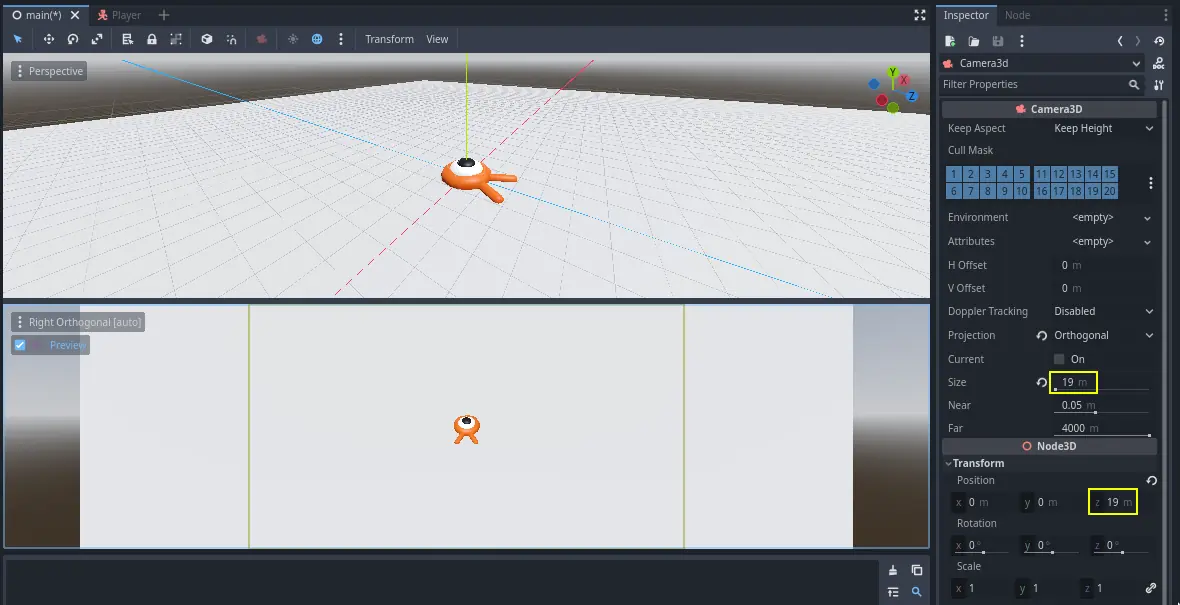
다음으로 카메라를 추가하겠습니다. Player의 Pivot을 만들었던 것처럼 기초 리그를 만들 것입니다. 다시 Main 노드를 마우스 오른쪽 버튼으로 클릭하고 자식 노드 추가를 선택합니다. 새로운 Marker3D를 만들고 이름을 CameraPivot으로 지정합니다. CameraPivot을 선택하고 자식 노드로 Camera3D를 추가합니다. 씬 트리는 다음과 비슷하게 보여야 합니다.
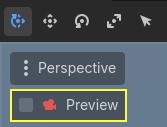
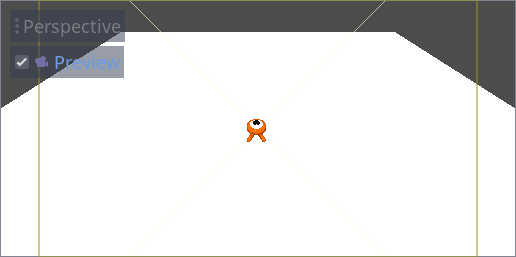
Camera를 선택했을 때 3D 뷰의 왼쪽 상단에 나타나는 미리보기 체크박스를 확인하세요. 클릭하면 게임 내 카메라 투영을 미리 볼 수 있습니다.
우리는 피벗을 사용하여 카메라를 마치 크레인에 있는 것처럼 회전시킬 것입니다. 먼저 3D 뷰를 분할하여 씬을 자유롭게 탐색하고 카메라가 보는 것을 볼 수 있도록 하겠습니다.
뷰포트 바로 위의 툴바에서 보기를 클릭한 다음 뷰포트 2개를 선택합니다. Ctrl + 2(macOS에서는 Cmd + 2)를 누를 수도 있습니다.

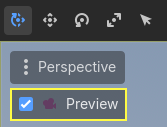
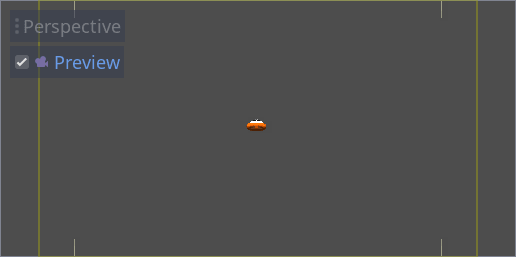
하단 뷰에서 Camera3D를 선택하고 체크박스를 클릭하여 카메라 미리보기를 켭니다.
상단 뷰에서 Camera3D 가 선택되어 있는지 확인하고, Z축을 따라 카메라를 약 19 단위만큼 이동시킵니다(파란색 화살표를 드래그).
이제 마법이 일어나는 순간입니다. CameraPivot 을 선택하고 X축을 기준으로 -45 도 회전시킵니다(빨간색 원을 사용). 그러면 카메라가 마치 크레인에 부착된 것처럼 움직이는 것을 볼 수 있습니다.
씬을 실행하려면 F6 키를 누르고, 화살표 키를 눌러 캐릭터를 이동시킬 수 있습니다.
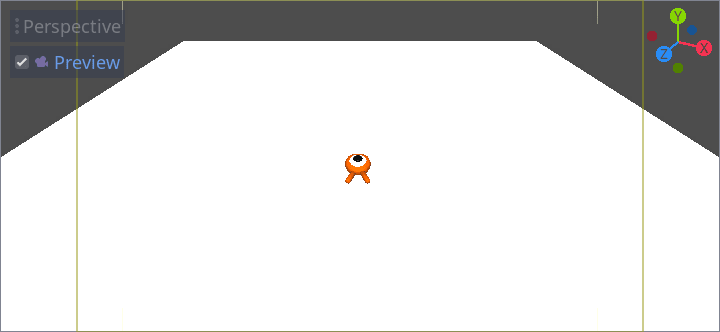
원근 투영으로 인해 캐릭터 주변에 빈 공간이 보입니다. 이 게임에서는 게임 플레이 영역을 더 잘 구성하고 플레이어가 거리를 읽기 쉽게 하기 위해 정사 투영을 사용할 것입니다.
다시 Camera를 선택하고 인스펙터에서 투영을 직교로 설정하고 크기를 19로 설정합니다. 이제 캐릭터가 더 평평하게 보이고 지면이 배경을 채우게 됩니다.
참고
Godot 4에서 직교 카메라를 사용할 때 방향성 그림자 품질은 카메라의 원경 값에 따라 달라집니다. 원경 값이 높을수록 카메라가 더 멀리 볼 수 있습니다. 그러나 원경 값이 높을수록 섀도 렌더링이 더 먼 거리를 커버해야 하므로 그림자 품질도 떨어집니다.
직교 카메라로 전환한 후 방향 그림자가 너무 흐릿하게 보이면 카메라의 원경 속성을 100과 같이 낮은 값으로 줄이세요. 이 원경 속성을 너무 많이 낮추면 멀리 있는 물체가 사라지기 시작합니다.
씬을 테스트하면 8방향으로 모두 움직일 수 있어야 하며 바닥을 통과할 때 끊김 현상이 없어야 합니다!
궁극적으로 플레이어의 움직임과 시야를 모두 확보했습니다. 다음으로 몬스터에 대한 작업을 진행하겠습니다.