Attention: Here be dragons
This is the latest
(unstable) version of this documentation, which may document features
not available in or compatible with released stable versions of Godot.
Checking the stable version of the documentation...
Générer des monstres
Dans cette partie, nous allons faire apparaître des monstres aléatoirement le long d'un chemin. D'ici la fin, vous aurez des monstres qui parcourront le plateau de jeu.
Double-cliquez sur main.tscn dans le dock Système de fichiers pour ouvrir la scène Main.
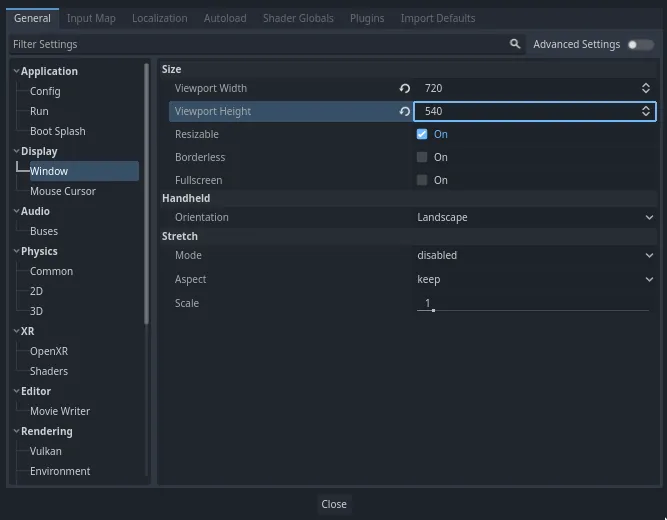
Avant de tracer le chemin, nous allons changer la définition du jeu. Notre jeu a une taille de fenêtre par défaut de 1152x648. Nous allons la définir à 720x540, une belle petite boîte.
Allez dans Projet -> Paramètres du projet.

Si Contrôles est encore ouvert, passez à l'onglet Général.
Dans le menu de gauche, naviguez jusqu'à Affichage -> Fenêtre. À droite, définissez la Viewport Width à 720 et la Viewport Height à 540.
Création du chemin d'apparition
Comme vous l'avez fait dans le tutoriel du jeu 2D, vous allez tracer un chemin et utiliser un nœud PathFollow3D pour échantillonner des emplacements aléatoires dessus.
Cependant, en 3D, c'est un peu plus compliqué de dessiner le chemin. Nous voulons qu'il soit autour de la vue du jeu pour que les monstres apparaissent à l'extérieur de l'écran. Mais si nous traçons un chemin, nous ne le verrons pas dans l'aperçu de la caméra.
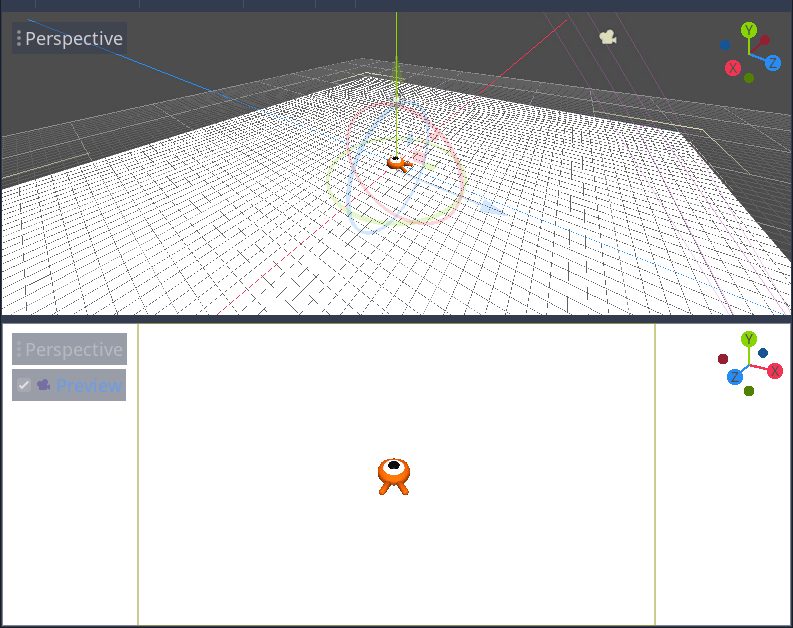
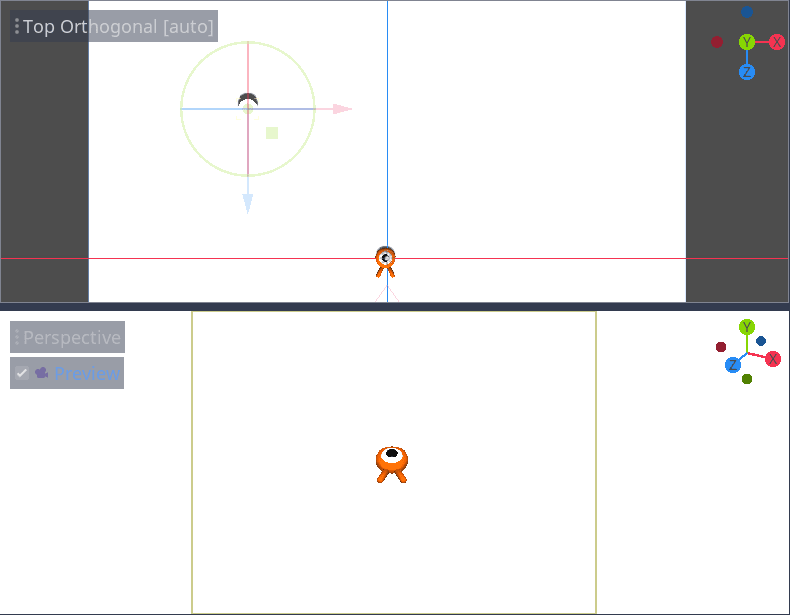
Pour trouver les limites de la vue, nous pouvons utiliser des modèles temporaires. Votre fenêtre d'affichage devrait toujours être divisée en deux parties, avec l'aperçu de la caméra en bas. Si ce n'est pas le cas, appuyez sur Ctrl + 2 (Cmd + 2 sur MacOS) pour diviser la vue en deux. Sélectionnez le nœud Camera3D et cochez la case Aperçu dans la vue du bas.
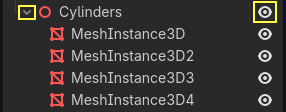
Ajout de cylindres génériques
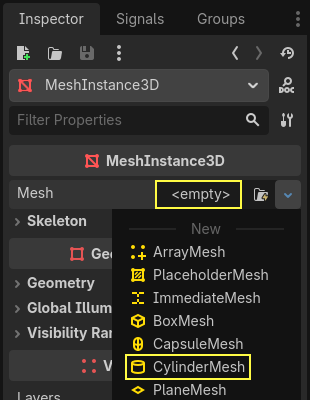
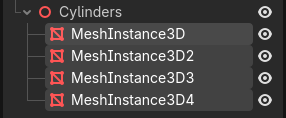
Ajoutons les modèles temporaires. Ajoutez un nouveau Node3D comme enfant du nœud Main, et nommez-le Cylinders. Nous l'utiliserons pour regrouper les cylindres. Sélectionnez Cylinders et ajoutez un nœud enfant MeshInstance3D

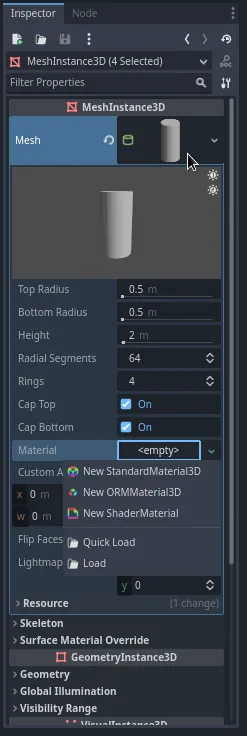
Dans l'Inspecteur, assignez un CylinderMesh à la propriété Mesh.
Définissez la vue du haut sur la vue de dessus orthogonale en utilisant le menu dans le coin supérieur gauche de la fenêtre d'affichage. Vous pouvez également appuyer sur la touche 7 du pavé numérique.

La grille est un peu gênante pour moi. Vous pouvez la désactiver en allant dans le menu Affichage de la barre d'outils et en cliquant sur Afficher la grille.
Vous voulez maintenant déplacer le cylindre le long du plan du sol, en regardant l'aperçu dans la vue du bas. Je recommande d'utiliser l'accrochage à la grille pour ce faire. Vous pouvez l'activer en cliquant sur l'icône d'aimant dans la barre d'outils ou en appuyant sur Y.

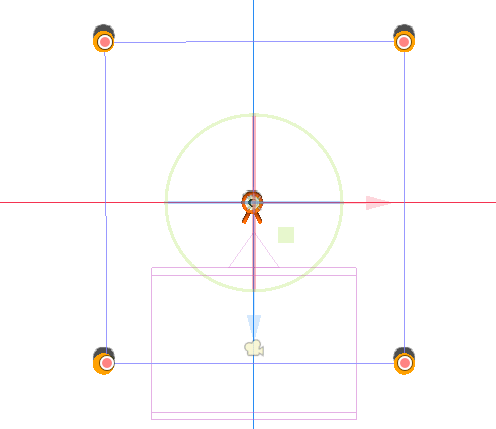
Placez le cylindre de façon à ce qu'il soit juste en dehors du champ de vision de la caméra dans le coin supérieur gauche.
Nous allons créer des copies du maillage et les placer autour de la zone de jeu. Appuyez sur Ctrl + D (Cmd + D sur MacOS) pour dupliquer le nœud. Vous pouvez également faire un clic droit sur le nœud dans le dock Scène et sélectionner Dupliquer. Déplacez la copie vers le bas le long de l'axe Z bleu jusqu'à ce qu'elle soit juste en dehors de l'aperçu de la caméra.
Sélectionnez les deux cylindres en maintenant la touche Shift et en cliquant sur celui qui n'est pas sélectionné, et dupliquez-les.
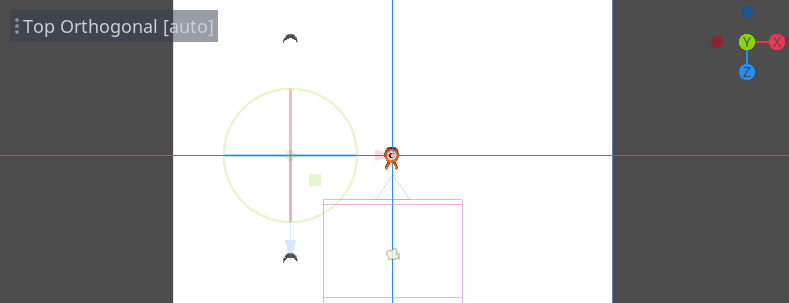
Déplacez-les vers la droite en faisant glisser l'axe X rouge.
Ils sont un peu difficiles à voir en blanc, n'est-ce pas ? Faisons-les ressortir en leur donnant un nouveau matériau.
En 3D, les matériaux définissent les propriétés visuelles d'une surface, comme sa couleur, comment elle reflète la lumière, etc. Nous pouvons les utiliser pour modifier la couleur d'un modèle.
Nous pouvons mettre à jour les quatre cylindres en même temps. Sélectionnez toutes les instances de modèles dans le dock Scène. Pour ce faire, vous pouvez cliquer sur la première et faire un shift-clic sur la dernière.
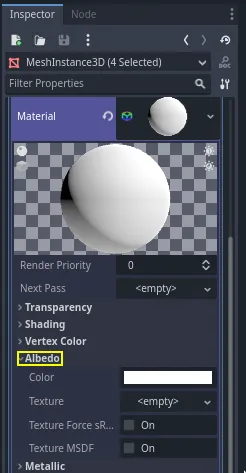
Dans l'Inspecteur, développez la section Material et assignez un StandardMaterial3D à l'emplacement 0.
Cliquez sur l'icône de sphère pour ouvrir la ressource du matériau. Vous obtenez un aperçu du matériau et une longue liste de sections remplies de propriétés. Vous pouvez les utiliser pour créer toutes sortes de surfaces, allant du métal jusqu'à la roche ou l'eau.
Étendre la section Albedo .
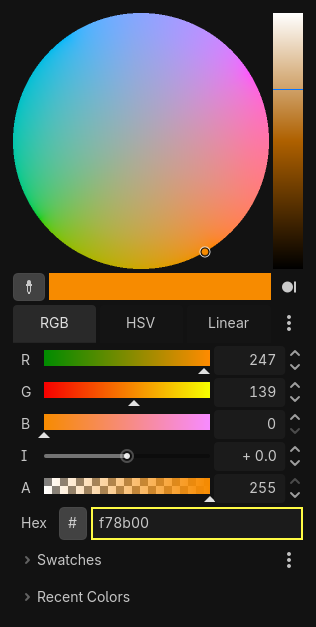
Appliquez une couleur qui contraste avec le fond, comme un orange vif.
Nous pouvons maintenant utiliser les cylindres comme des guides. Repliez-les dans le dock Scène en cliquant sur la flèche grise à côté d'eux. À l'avenir, vous pourrez également modifier leur visibilité en cliquant sur l'icône d'œil à côté de Cylinders.
Ajoutez un nœud Path3D comme enfant du nœud Main. Dans la barre d'outils, quatre icônes apparaissent. Cliquez sur l'outil Ajouter un point, symbolisé par un "+" vert.

Note
Vous pouvez survoler n'importe quelle icône pour voir une info-bulle décrivant l'outil.
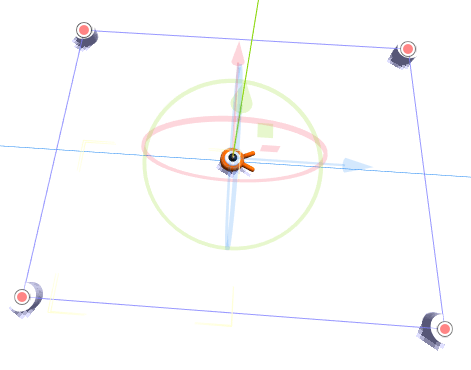
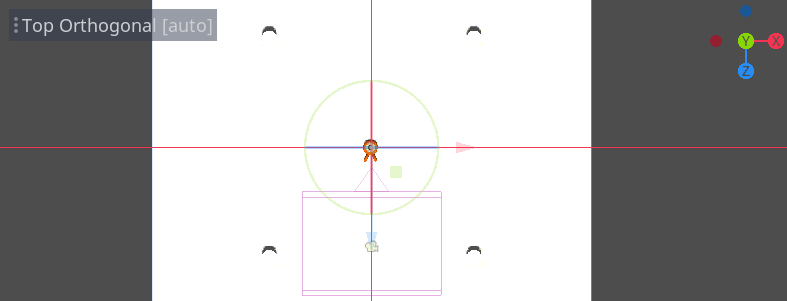
Cliquez au centre de chaque cylindre pour créer un point. Ensuite, cliquez sur l'icône Fermer la courbe dans la barre d'outils pour fermer le chemin. Si un point est un peu décalé, vous pouvez le glisser pour le repositionner.

Votre chemin devrait ressembler à ceci.
Pour échantillonner des positions aléatoires sur le chemin, nous avons besoin d'un nœud PathFollow3D. Ajoutez un PathFollow3D comme enfant du Path3D. Renommez les deux nœuds en SpawnLocation et SpawnPath, respectivement. C'est plus descriptif de ce pour quoi nous allons les utiliser.

Avec ça, nous sommes prêts à coder le mécanisme d'apparition.
Faire apparaître des monstres au hasard
Faites un clic droit sur le nœud Main et attachez-y un nouveau script.
Nous exportons d'abord une variable vers l'Inspecteur afin que nous puissions lui attribuer mob.tscn ou n'importe quel autre monstre.
extends Node

@export var mob_scene: PackedScene
using Godot;

public partial class Main : Node
{
    // Don't forget to rebuild the project so the editor knows about the new export variable.

    [Export]
    public PackedScene MobScene { get; set; }
}
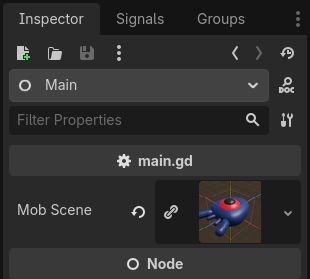
Nous voulons faire apparaître les mobs à des intervalles de temps réguliers. Pour ça, nous devons revenir à la scène et ajouter un timer. Mais avant cela, nous devons affecter le fichier Mob.tscn à la propriété mob_scene au dessus (sinon c'est null !)
Revenez à l'écran 3D et sélectionnez le nœud Main. Faites glisser mob.tscn depuis le dock Système de fichiers vers l'emplacement Mob Scene dans l'Inspecteur.
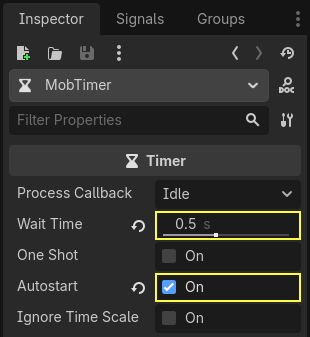
Ajoutez un nouveau nœud Timer comme enfant de Main. Nommez-le MobTimer.

Dans l'Inspecteur, réglez son Wait Time à 0.5 secondes et activez l'Autostart pour qu'il commence automatiquement au lancement du jeu.
Les timers émettent un signal timeout à chaque fois qu'ils atteignent la fin de leur Wait Time. Par défaut, ils redémarrent automatiquement, en émettant le signal dans un cycle. Nous pouvons nous connecter à ce signal depuis le nœud Main pour faire apparaître des monstres toutes les 0.5 secondes.
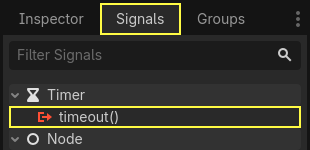
En gardant le MobTimer sélectionné, allez dans le dock Signaux à droite, et double-cliquez sur le signal timeout.
Connectez-le au nœud Main.
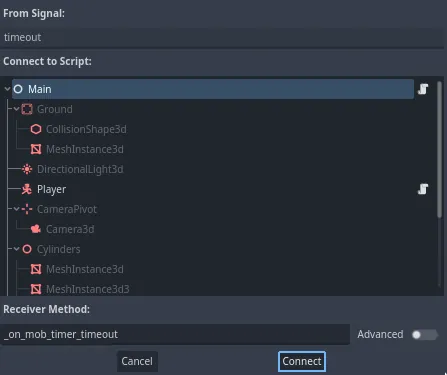
Cela vous ramènera au script, avec une nouvelle fonction vide _on_mob_timer_timeout().
Codons la logique d'apparition des mobs. Nous allons :
Instancier la scène du mob.
Échantillonner une position aléatoire sur le chemin d'apparition.
Récupérer la position du joueur.
Appeler la méthode
initialize()du mob, en lui passant la position aléatoire et la position du joueur.Ajouter le mob comme enfant du nœud Main.
func _on_mob_timer_timeout():
    # Create a new instance of the Mob scene.
    var mob = mob_scene.instantiate()

    # Choose a random location on the SpawnPath.
    # We store the reference to the SpawnLocation node.
    var mob_spawn_location = get_node("SpawnPath/SpawnLocation")
    # And give it a random offset.
    mob_spawn_location.progress_ratio = randf()

    var player_position = $Player.position
    mob.initialize(mob_spawn_location.position, player_position)

    # Spawn the mob by adding it to the Main scene.
    add_child(mob)
// We also specified this function name in PascalCase in the editor's connection window.
private void OnMobTimerTimeout()
{
    // Create a new instance of the Mob scene.
    Mob mob = MobScene.Instantiate<Mob>();

    // Choose a random location on the SpawnPath.
    // We store the reference to the SpawnLocation node.
    var mobSpawnLocation = GetNode<PathFollow3D>("SpawnPath/SpawnLocation");
    // And give it a random offset.
    mobSpawnLocation.ProgressRatio = GD.Randf();

    Vector3 playerPosition = GetNode<Player>("Player").Position;
    mob.Initialize(mobSpawnLocation.Position, playerPosition);

    // Spawn the mob by adding it to the Main scene.
    AddChild(mob);
}
Ci-dessus, randf() produit une valeur aléatoire entre 0 et 1, comme attendu par le progress_ratio du nœud PathFollow : 0 est le début du chemin, 1 est la fin du chemin. Le chemin que nous avons défini se situe autour du viewport de la caméra, donc toute valeur aléatoire entre 0 et 1 est une position aléatoire le long des bords du viewport !
Notez que si vous supprimez le Player de la scène principale, la ligne suivante
var player_position = $Player.position
Vector3 playerPosition = GetNode<Player>("Player").Position;
donne une erreur car il n'y a pas de $Player !
Voici le script complet main.gd jusqu'à présent, pour référence.
extends Node

@export var mob_scene: PackedScene


func _on_mob_timer_timeout():
    # Create a new instance of the Mob scene.
    var mob = mob_scene.instantiate()

    # Choose a random location on the SpawnPath.
    # We store the reference to the SpawnLocation node.
    var mob_spawn_location = get_node("SpawnPath/SpawnLocation")
    # And give it a random offset.
    mob_spawn_location.progress_ratio = randf()

    var player_position = $Player.position
    mob.initialize(mob_spawn_location.position, player_position)

    # Spawn the mob by adding it to the Main scene.
    add_child(mob)
using Godot;

public partial class Main : Node
{
    [Export]
    public PackedScene MobScene { get; set; }

    private void OnMobTimerTimeout()
    {
        // Create a new instance of the Mob scene.
        Mob mob = MobScene.Instantiate<Mob>();

        // Choose a random location on the SpawnPath.
        // We store the reference to the SpawnLocation node.
        var mobSpawnLocation = GetNode<PathFollow3D>("SpawnPath/SpawnLocation");
        // And give it a random offset.
        mobSpawnLocation.ProgressRatio = GD.Randf();

        Vector3 playerPosition = GetNode<Player>("Player").Position;
        mob.Initialize(mobSpawnLocation.Position, playerPosition);

        // Spawn the mob by adding it to the Main scene.
        AddChild(mob);
    }
}
Vous pouvez tester la scène en appuyant sur F6 (Cmd + R sur macOS). Vous devriez voir les monstres apparaître et se déplacer en ligne droite.
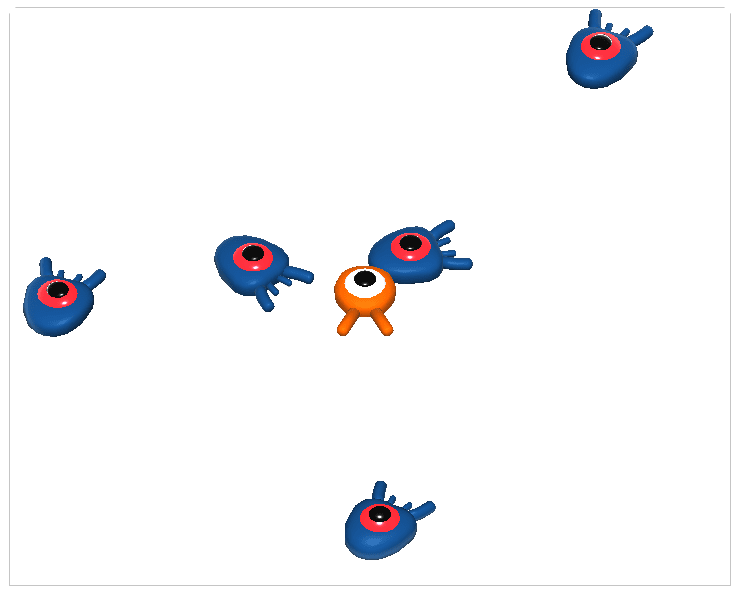
Pour l'instant, ils se heurtent et glissent les uns contre les autres lorsque leurs chemins se croisent. Nous aborderons ce problème dans la prochaine partie.