Up to date
This page is up to date for Godot 4.2.
If you still find outdated information, please open an issue.
自訂滑鼠游標
您可能希望更改遊戲中滑鼠游標的外觀,以便適應總體設計。自訂滑鼠游標有兩種方法:
使用專案設定
使用腳本
使用專案設定來自訂滑鼠游標更簡單(但也更受限)。第二種方法更方便定制,但涉及到腳本:
備註
您可以通過隱藏滑鼠游標,並在 _process 方法中將 Sprite 移動到的游標位置來顯示“軟體”滑鼠游標,但與“硬體”滑鼠游標相比,這至少會增加一影格延遲。因此,建議盡可能使用此處描述的方法。
如果您必須使用“軟體”的做法,可以考慮新增一個外推步驟,以便更好地顯示實際的滑鼠輸入。
使用專案設定
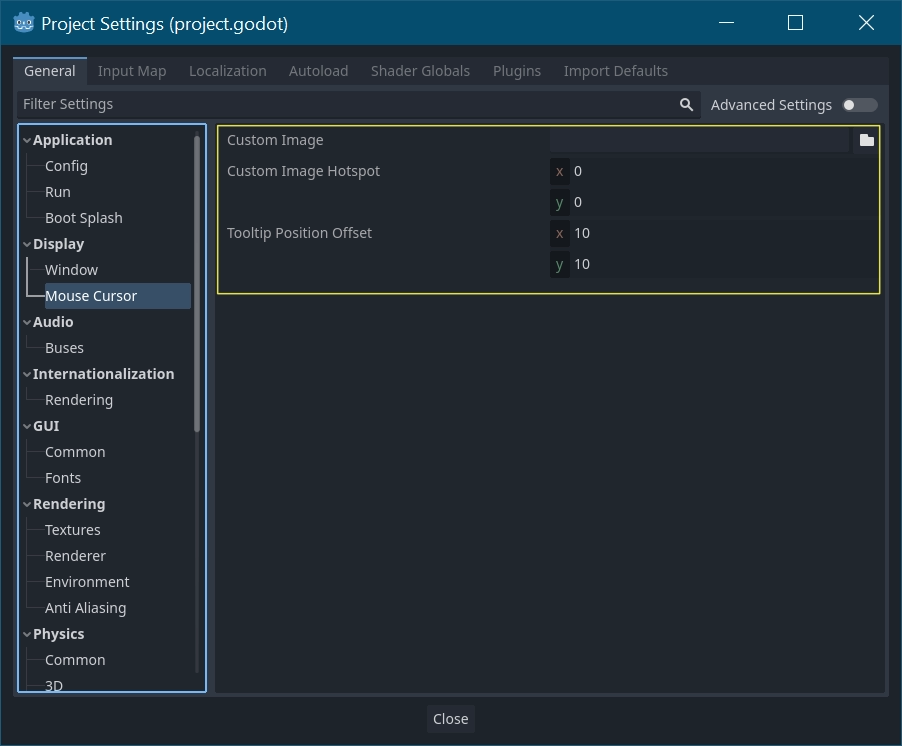
打開專案設定,轉到 Display>Mouse Cursor(顯示 > 滑鼠游標)。您將看到 Custom Image(自訂圖像)和 Custom Image Hotspot(自訂圖像熱點)。

自訂圖像是希望設定為滑鼠游標的圖像. 自訂熱點是圖像中的點, 您希望將其用作游標的偵測點.
警告
自訂影像**必須**最大為256×256像素。為了避免渲染問題,建議尺寸小於或等於128×128。
在網頁平台上,允許的最大遊標影像尺寸為128×128。
使用腳本
建立一個 Node 節點並附加下面的腳本。
extends Node


# Load the custom images for the mouse cursor.
var arrow = load("res://arrow.png")
var beam = load("res://beam.png")


func _ready():
    # Changes only the arrow shape of the cursor.
    # This is similar to changing it in the project settings.
    Input.set_custom_mouse_cursor(arrow)

    # Changes a specific shape of the cursor (here, the I-beam shape).
    Input.set_custom_mouse_cursor(beam, Input.CURSOR_IBEAM)
public override void _Ready()
{
    // Load the custom images for the mouse cursor.
    var arrow = ResourceLoader.Load("res://arrow.png");
    var beam = ResourceLoader.Load("res://beam.png");

    // Changes only the arrow shape of the cursor.
    // This is similar to changing it in the project settings.
    Input.SetCustomMouseCursor(arrow);

    // Changes a specific shape of the cursor (here, the I-beam shape).
    Input.SetCustomMouseCursor(beam, Input.CursorShape.Ibeam);
}
也參考
游標列表
正如 Input 類中所述(請參閱 CursorShape 列舉),你可以定義多個滑鼠游標。您想要使用哪一個取決於您的用例。