Attention: Here be dragons
This is the latest
(unstable) version of this documentation, which may document features
not available in or compatible with released stable versions of Godot.
Checking the stable version of the documentation...
產生怪物
在這一部分中,我們將沿著一條路徑隨機刷怪。在最後,怪物們就會在遊戲區域到處亂跑了。
按兩下*檔案系統*停靠面板中的 Main.tscn 打開 Main 場景。
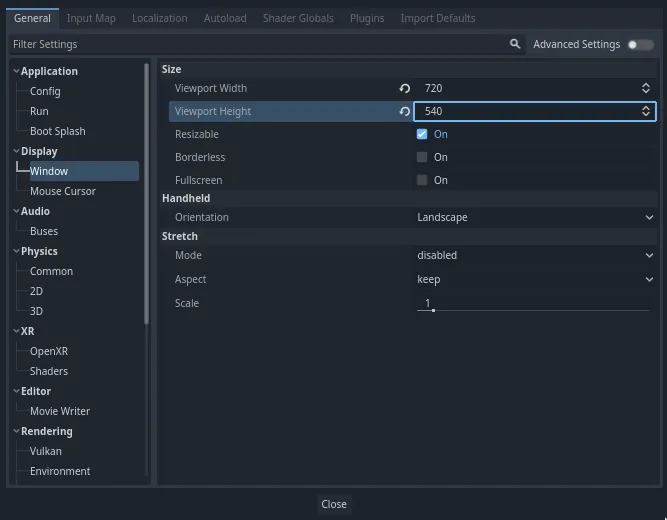
在繪製路徑之前,我們要修改遊戲的解析度。我們的遊戲預設的視窗大小是 1152x648。我們要把它設成 720x540,一個小巧的方塊。
選擇 [專案] -> [專案設定] 來打開這個對話框。現在就試試吧。

如果您還開著「輸入對應」,請切換到「通用」分頁。
在左側選單前往 Display -> Window。於右側將 Viewport Width 設為 720,Viewport Height 設為 540。
建立動畫
與 2D 遊戲教學中所做的一樣,你要設計一條路徑,使用 PathFollow3D 節點在路徑上隨機取位置。
不過在 3D 中,路徑繪製起來會有一點複雜。我們希望它是圍繞著遊戲視圖的,這樣怪物就會在螢幕外出現。但繪製的路徑也同樣不會在相機預覽中出現。
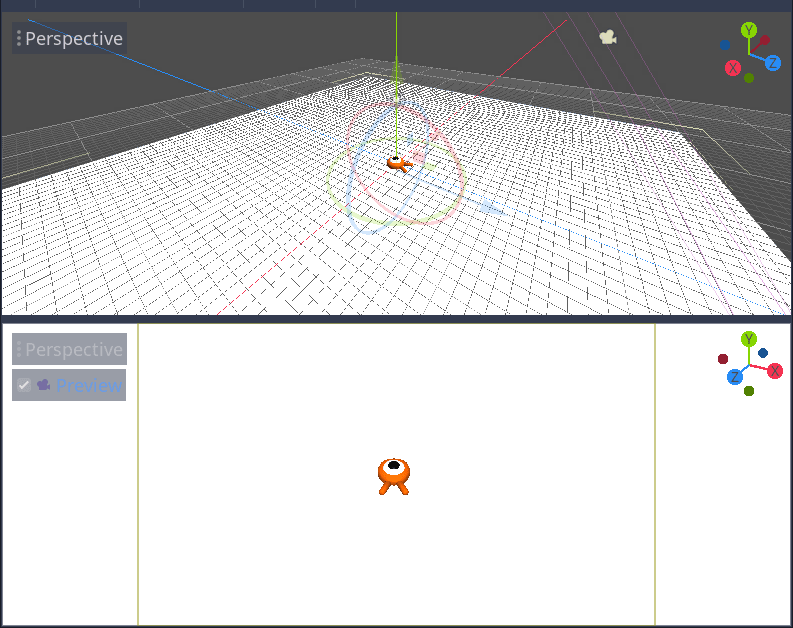
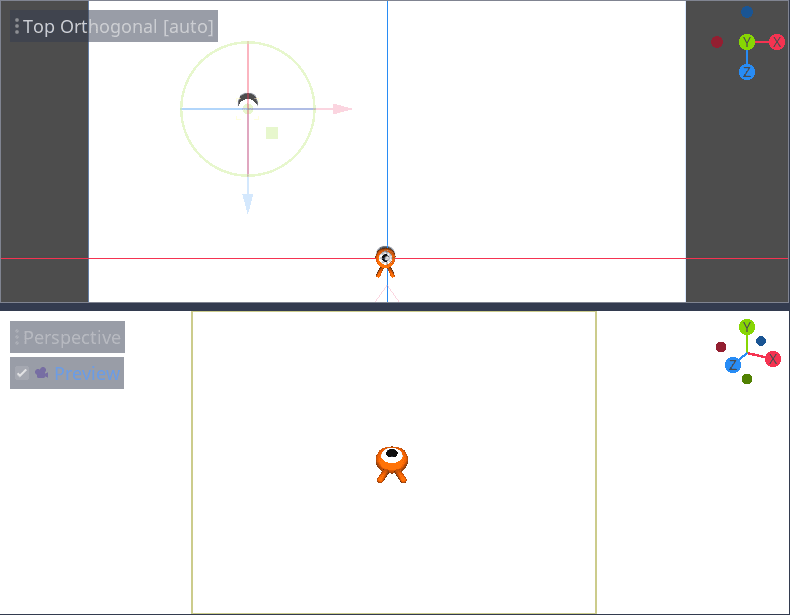
為了確認視野的邊界,我們可以使用一些暫用網格。你的檢視區應該還是分成上下兩部分,下方是相機預覽。如果不是,請按 Ctrl + 2`(macOS 上為 :kbd:`Cmd + 2)將視圖分割為兩個。選取 Camera3D 節點,並勾選下方檢視區的 預覽(Preview) 方框。
預留位置型
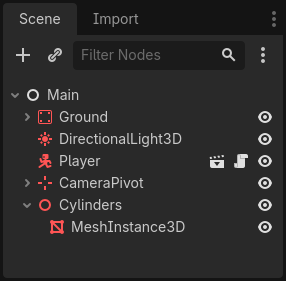
讓我們來新增一些占位網格。為 Main 節點新建一個 Node3D 節點作為子項,命名為 Cylinders。我們會用它將圓柱體進行群組。新增一個 MeshInstance3D 節點作為其子項
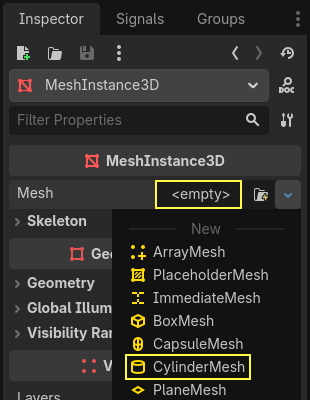
在「屬性檢視器」中,將一個「圓柱網格」(CylinderMesh) 指定給「網格」(Mesh) 屬性。
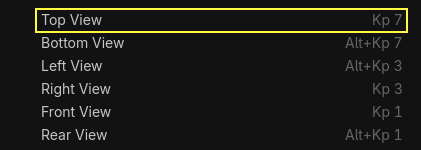
使用視口左上角的功能表,將上面的視口設為正交頂視圖。或者你也可以按小鍵盤的 7。
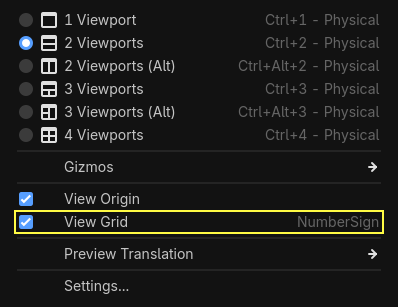
地面柵格可能有一點分散注意力。你可以在工具列的*視圖*功能表中點擊*查看柵格*進行開關。
你現在要沿著地平面移動圓柱體,看底部視口的相機預覽。我推薦使用網格捕捉來做這件事。你可以通過點擊工具列上的磁鐵圖示或按 Y 鍵來切換。

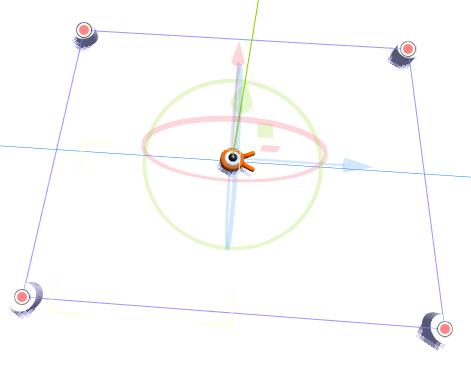
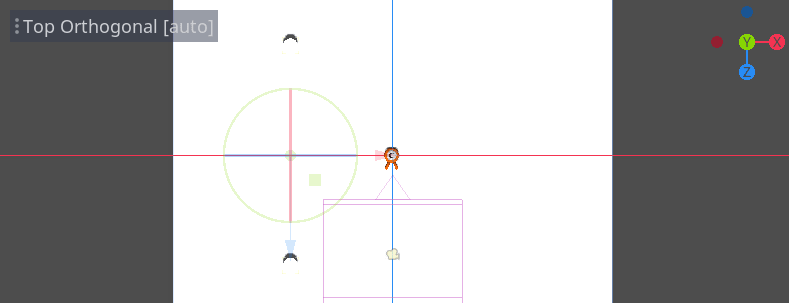
將圓柱體移到相機視圖的左上角,使其正好在視野之外。
我們將建立網格的副本,並將它們放置在遊戲區域周圍。按 Ctrl + D`(在 macOS 上則為 :kbd:`Cmd + D)來複製節點。你也可以在*場景*面板中右擊節點,選擇*製作副本*。沿著藍色 Z 軸向下移動副本,直到它正好在相機的預覽範圍之外。
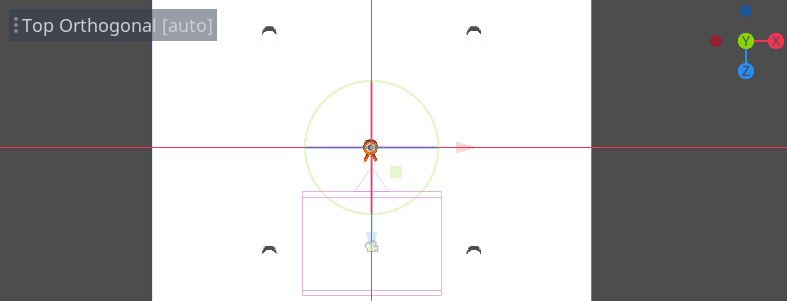
按住 Shift 鍵選擇兩個圓柱體,並點擊未選擇的那個圓柱體,然後複製它們。
拖拽紅色的 X 軸,將它們移動到右側。
白色的有點難以看清是吧?讓我們給它們一個全新的材質,讓它們凸顯出來。
在 3D 中,材質可以定義表面的外觀屬性,比如顏色、如何反射光照等。我們可以用材質來修改網格的顏色。
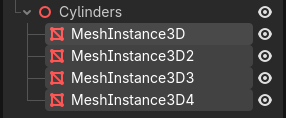
我們可以同時更新所有四個圓柱體。在*場景*面板中選中所有網格實例。要實作全選,可以先點擊第一個,然後按住 Shift 點擊最後一個。
在 屬性面板 中,展開 Material 區段,並將 StandardMaterial3D 指定給 0 號插槽。
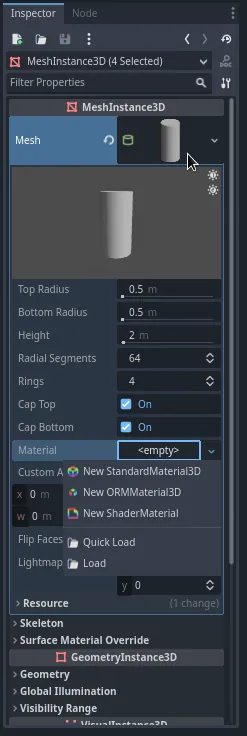
點擊球體圖示來打開材質資源。你會看到材質的預覽和一長串充滿屬性的部分。你可以用這些來建立各種表面,從金屬到岩石或水。
展開「Albedo」區塊。
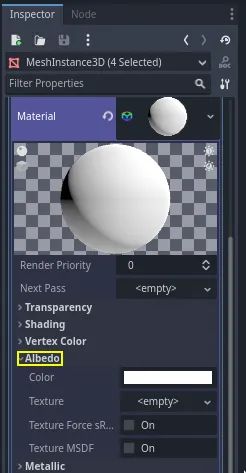
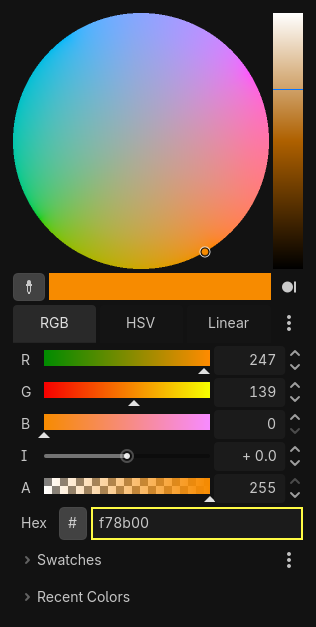
將顏色設為與背景色存在對比的顏色,比如亮橙色。
我們現在可以使用圓柱體作為參考。點擊它們旁邊的灰箭頭,將它們折疊在*場景*面板中。你也可以通過點擊 Cylinders 旁邊的眼睛圖示來切換它們的可見性。
新增一個 Path3D 節點作為 Main 的子節點。在工具列中會出現四個圖示。點擊*新增點*工具,即帶有綠色“+”號的圖示。
備註
滑鼠懸停在任意圖示上,就可以看到描述該工具的工具提示。
按一下每個圓柱體的中心以建立一個點。然後,按一下工具列中的*閉合曲線*圖示以關閉路徑。如果有任何一點偏離,您可以按一下並拖動它以重新定位它。
你的路徑應該會像這樣。
為了在路徑上取樣隨機位置,我們需要一個 PathFollow3D 節點。將一個 PathFollow3D 新增為 Path3D 的子節點。將這兩個節點分別重新命名為 SpawnLocation 和 SpawnPath 。這樣更能清楚描述它們的用途。
這樣,我們就可以著手編寫刷怪機制了。
產生怪物
在 Main 節點上按右鍵,然後附加一個新的腳本。
我們首先將一個變數匯出到*屬性檢視器*中,這樣我們就可以把 mob.tscn 或者其他任何怪物賦值給它。
extends Node

@export var mob_scene: PackedScene
using Godot;

public partial class Main : Node
{
    // Don't forget to rebuild the project so the editor knows about the new export variable.

    [Export]
    public PackedScene MobScene { get; set; }
}
我們希望以固定的時間間隔生成生物。為此,我們需要返回場景中並新增計時器。但是,在此之前,我們需要將 mob.tscn 檔分配給 mob_scene 屬性
回到 3D 螢幕,選中 Main 節點。將 mob.tscn 從*檔案系統*面板拖到*屬性檢視器*的 Mob Scene 槽中。
Timer ,命名為 MessageTimer 。
在 屬性檢視器 中,將它的 等待時間 設定為 0.5 秒,並開啟 自動啟動,這樣當我們執行遊戲時它就會自動開始。
計時器在每次到達 Wait Time 時都會發出 timeout 訊號。計時器預設會自動重啟,迴圈觸發訊號。我們可以將 Main 節點連接到這個訊號,每 0.5 秒生成一隻怪物。
With the MobTimer still selected, head to the Signals dock on the right, and
double-click the timeout signal.
將它連接到 Main 節點。
這樣你就會被帶回腳本,其中新建了一個空的 _on_mob_timer_timeout() 函式。
讓我們來編寫刷怪的邏輯吧。我們要做的是:
實體化並建立新的房間。
在生成路徑上隨機選取一個位置。
獲取玩家的位置。
呼叫小怪的
initialize()方法,傳入隨機位置和玩家的位置。將腳本附加到節點。
func _on_mob_timer_timeout():
    # Create a new instance of the Mob scene.
    var mob = mob_scene.instantiate()

    # Choose a random location on the SpawnPath.
    # We store the reference to the SpawnLocation node.
    var mob_spawn_location = get_node("SpawnPath/SpawnLocation")
    # And give it a random offset.
    mob_spawn_location.progress_ratio = randf()

    var player_position = $Player.position
    mob.initialize(mob_spawn_location.position, player_position)

    # Spawn the mob by adding it to the Main scene.
    add_child(mob)
// We also specified this function name in PascalCase in the editor's connection window.
private void OnMobTimerTimeout()
{
    // Create a new instance of the Mob scene.
    Mob mob = MobScene.Instantiate<Mob>();

    // Choose a random location on the SpawnPath.
    // We store the reference to the SpawnLocation node.
    var mobSpawnLocation = GetNode<PathFollow3D>("SpawnPath/SpawnLocation");
    // And give it a random offset.
    mobSpawnLocation.ProgressRatio = GD.Randf();

    Vector3 playerPosition = GetNode<Player>("Player").Position;
    mob.Initialize(mobSpawnLocation.Position, playerPosition);

    // Spawn the mob by adding it to the Main scene.
    AddChild(mob);
}
正如上面所示, randf () 會生成一個介於 0 和 1 之間的隨機值,這個數值是 PathFollow 節點的 progress_ratio 屬性所期望的:0 代表路徑的開始點,1 代表路徑的終點。 我們之前設定的路徑是圍繞著相機視口的,因此任何 0 到 1 之間的隨機值都代表著沿著視口邊緣的隨機位置!
請注意,如果您從主要場景中移除 Player 節點,那麼接下來這行
var player_position = $Player.position
Vector3 playerPosition = GetNode<Player>("Player").Position;
會產生錯誤,因為沒有名為 $Player 的節點!
這是目前完整的 main.gd 腳本,僅供參考。
extends Node

@export var mob_scene: PackedScene


func _on_mob_timer_timeout():
    # Create a new instance of the Mob scene.
    var mob = mob_scene.instantiate()

    # Choose a random location on the SpawnPath.
    # We store the reference to the SpawnLocation node.
    var mob_spawn_location = get_node("SpawnPath/SpawnLocation")
    # And give it a random offset.
    mob_spawn_location.progress_ratio = randf()

    var player_position = $Player.position
    mob.initialize(mob_spawn_location.position, player_position)

    # Spawn the mob by adding it to the Main scene.
    add_child(mob)
using Godot;

public partial class Main : Node
{
    [Export]
    public PackedScene MobScene { get; set; }

    private void OnMobTimerTimeout()
    {
        // Create a new instance of the Mob scene.
        Mob mob = MobScene.Instantiate<Mob>();

        // Choose a random location on the SpawnPath.
        // We store the reference to the SpawnLocation node.
        var mobSpawnLocation = GetNode<PathFollow3D>("SpawnPath/SpawnLocation");
        // And give it a random offset.
        mobSpawnLocation.ProgressRatio = GD.Randf();

        Vector3 playerPosition = GetNode<Player>("Player").Position;
        mob.Initialize(mobSpawnLocation.Position, playerPosition);

        // Spawn the mob by adding it to the Main scene.
        AddChild(mob);
    }
}
You can test the scene by pressing F6 (Cmd + R on macOS). You should see the monsters spawn and move in a straight line.
目前,它們會在路線的交叉點撞到一起滑來滑去。我們會在下一部分解決這個問題。