Attention: Here be dragons
This is the latest
(unstable) version of this documentation, which may document features
not available in or compatible with released stable versions of Godot.
Checking the stable version of the documentation...
自訂後期處理
前言
Godot 提供許多內建的後期處理效果,包括泛光(Bloom)、景深(DOF)與螢幕空間環境光遮蔽(SSAO),詳見 環境與後製處理。然而,進階應用可能需要自訂效果。本文將說明如何撰寫自訂的後期處理效果。
實作自訂後期處理著色器最簡單的方法,是利用 Godot 內建的螢幕紋理讀取功能。如果你還不熟悉,建議先閱讀 螢幕讀取著色器教學。
單通道後期處理
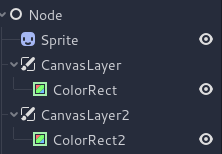
後期處理效果是 Godot 將影格算繪完成後套用到該影格的著色器。要將著色器套用到影格,請建立一個 CanvasLayer,並新增一個 ColorRect。將新的 ShaderMaterial 指派給新建的 ColorRect,並將 ColorRect 的錨點預設設為 Full Rect:
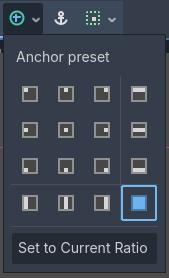
在 ColorRect 節點上將錨點預設設為 Full Rect
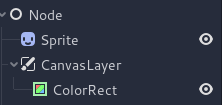
你的場景樹大致會長這樣:
備註
另一種更有效率的方法,是使用 BackBufferCopy 將螢幕區域複製到緩衝區,然後透過帶有 hint_screen_texture 的 sampler2D 在著色器腳本中存取。
備註
截至撰寫本文時,Godot 尚未支援同時渲染到多個緩衝區。你的後期處理著色器無法存取 Godot 未公開的其他渲染通道與緩衝區(如深度或法線/粗糙度)。你僅能存取經 Godot 以取樣器形式公開的已渲染畫面及緩衝區。
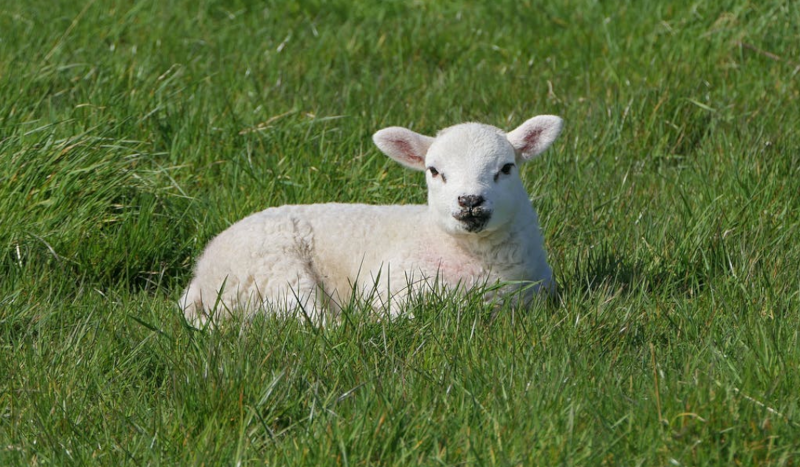
本範例將使用這張小羊的 Sprite。
將新的 Shader 指定給 ColorRect 的 ShaderMaterial。你可以透過帶有 hint_screen_texture 的 sampler2D 以及內建的 SCREEN_UV uniform 來存取該影格的紋理與 UV。
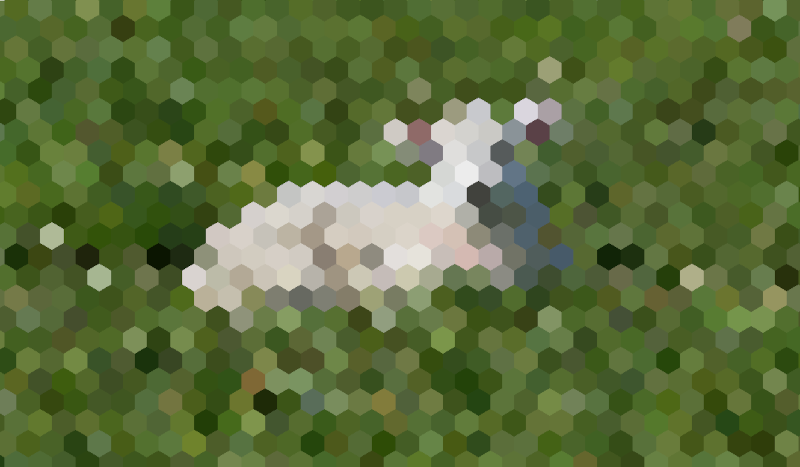
將以下程式碼複製到你的著色器。下方範例是來自 arlez80 的六角像素化著色器,
shader_type canvas_item;

uniform vec2 size = vec2(32.0, 28.0);
// If you intend to read from mipmaps with `textureLod()` LOD values greater than `0.0`,
// use `filter_nearest_mipmap` instead. This shader doesn't require it.
uniform sampler2D screen_texture : hint_screen_texture, repeat_disable, filter_nearest;

void fragment() {
        vec2 norm_size = size * SCREEN_PIXEL_SIZE;
        bool less_than_half = mod(SCREEN_UV.y / 2.0, norm_size.y) / norm_size.y < 0.5;
        vec2 uv = SCREEN_UV + vec2(norm_size.x * 0.5 * float(less_than_half), 0.0);
        vec2 center_uv = floor(uv / norm_size) * norm_size;
        vec2 norm_uv = mod(uv, norm_size) / norm_size;
        center_uv += mix(vec2(0.0, 0.0),
                         mix(mix(vec2(norm_size.x, -norm_size.y),
                                 vec2(0.0, -norm_size.y),
                                 float(norm_uv.x < 0.5)),
                             mix(vec2(0.0, -norm_size.y),
                                 vec2(-norm_size.x, -norm_size.y),
                                 float(norm_uv.x < 0.5)),
                             float(less_than_half)),
                         float(norm_uv.y < 0.3333333) * float(norm_uv.y / 0.3333333 < (abs(norm_uv.x - 0.5) * 2.0)));

        COLOR = textureLod(screen_texture, center_uv, 0.0);
}
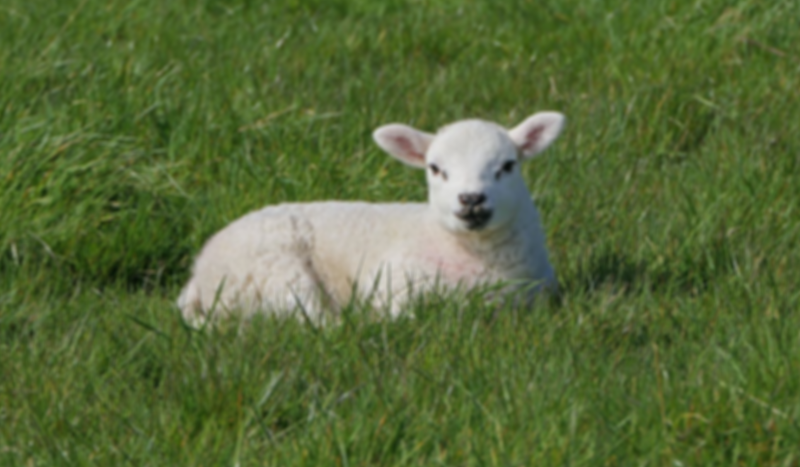
小羊會呈現出下圖的效果:
多通道後期處理
某些後期處理效果(如模糊)相當消耗資源。如果將這些效果拆成多個階段處理,可以大幅提升效能。在多通道材質中,每一次通道會接收前一階段的結果進行處理。
要製作多通道後期處理著色器,可以堆疊多個 CanvasLayer 與 ColorRect 節點。在上述範例中,你利用 CanvasLayer 來以下層的畫面作為著色器輸入。除了節點結構不同外,其餘步驟與單通道後期處理著色器相同。
你的場景樹大致會長這樣:
舉例來說,你可以將下列程式碼片段分別掛載在各個 ColorRect 上,實作全螢幕高斯模糊效果。著色器的執行順序取決於場景樹中 CanvasLayer 的排序,越上層的會先執行。對於這個模糊著色器來說,順序並不影響結果。
shader_type canvas_item;

uniform sampler2D screen_texture : hint_screen_texture, repeat_disable, filter_nearest;

// Blurs the screen in the X-direction.
void fragment() {
    vec3 col = texture(screen_texture, SCREEN_UV).xyz * 0.16;
    col += texture(screen_texture, SCREEN_UV + vec2(SCREEN_PIXEL_SIZE.x, 0.0)).xyz * 0.15;
    col += texture(screen_texture, SCREEN_UV + vec2(-SCREEN_PIXEL_SIZE.x, 0.0)).xyz * 0.15;
    col += texture(screen_texture, SCREEN_UV + vec2(2.0 * SCREEN_PIXEL_SIZE.x, 0.0)).xyz * 0.12;
    col += texture(screen_texture, SCREEN_UV + vec2(2.0 * -SCREEN_PIXEL_SIZE.x, 0.0)).xyz * 0.12;
    col += texture(screen_texture, SCREEN_UV + vec2(3.0 * SCREEN_PIXEL_SIZE.x, 0.0)).xyz * 0.09;
    col += texture(screen_texture, SCREEN_UV + vec2(3.0 * -SCREEN_PIXEL_SIZE.x, 0.0)).xyz * 0.09;
    col += texture(screen_texture, SCREEN_UV + vec2(4.0 * SCREEN_PIXEL_SIZE.x, 0.0)).xyz * 0.05;
    col += texture(screen_texture, SCREEN_UV + vec2(4.0 * -SCREEN_PIXEL_SIZE.x, 0.0)).xyz * 0.05;
    COLOR.xyz = col;
}
shader_type canvas_item;

uniform sampler2D screen_texture : hint_screen_texture, repeat_disable, filter_nearest;

// Blurs the screen in the Y-direction.
void fragment() {
    vec3 col = texture(screen_texture, SCREEN_UV).xyz * 0.16;
    col += texture(screen_texture, SCREEN_UV + vec2(0.0, SCREEN_PIXEL_SIZE.y)).xyz * 0.15;
    col += texture(screen_texture, SCREEN_UV + vec2(0.0, -SCREEN_PIXEL_SIZE.y)).xyz * 0.15;
    col += texture(screen_texture, SCREEN_UV + vec2(0.0, 2.0 * SCREEN_PIXEL_SIZE.y)).xyz * 0.12;
    col += texture(screen_texture, SCREEN_UV + vec2(0.0, 2.0 * -SCREEN_PIXEL_SIZE.y)).xyz * 0.12;
    col += texture(screen_texture, SCREEN_UV + vec2(0.0, 3.0 * SCREEN_PIXEL_SIZE.y)).xyz * 0.09;
    col += texture(screen_texture, SCREEN_UV + vec2(0.0, 3.0 * -SCREEN_PIXEL_SIZE.y)).xyz * 0.09;
    col += texture(screen_texture, SCREEN_UV + vec2(0.0, 4.0 * SCREEN_PIXEL_SIZE.y)).xyz * 0.05;
    col += texture(screen_texture, SCREEN_UV + vec2(0.0, 4.0 * -SCREEN_PIXEL_SIZE.y)).xyz * 0.05;
    COLOR.xyz = col;
}
執行上述程式碼後,你將會得到如下的全螢幕模糊效果。