Up to date
This page is up to date for Godot 4.2.
If you still find outdated information, please open an issue.
GDExtension C++ 範例
前言
GDNative的C++綁定建構在NativeScript GDNative API之上, 並提供了一種使用C++在Godot中 "擴充" 節點的更好方法. 這相當於在GDScript中編寫腳本, 而是在C++中編寫腳本.
在這份文件之外,你可能也會想看看 Godot 的 demo 專案。
設定專案
您需要一些先決條件:
Godot 4 可執行檔,
C++ 編譯器,
SCons 作為建構工具,
在這份文件之外,你可能也會想看看 Godot 的 demo 專案。
另請參閱:ref:《編譯》 <toc-devel-compiling>,因為建構工具與從原始程式碼編譯 Godot 所需的建構工具相同。
您可以從 GitHub 下載這些倉庫,或讓 Git 為您完成這些工作。請注意,這些倉庫現在對於不同版本的 Godot 具有不同的分支。為早期版本的 Godot 編寫的 GDNative 模組可以在較新版本中運作(除了 3.0 和 3.1 之間的 ARVR 介面的一次重大更改),但反之則不行,因此請確保下載正確的分支。還要注意,您用於生成 api.json 的 Godot 版本將成為最低版本。
備註
GDExtension 已經被合併到 godot-cpp 的 master 分支中,但它只與即將推出的 Godot 4.0 相容。因此,您需要使用 GDNative ,需使用 godot-cpp 的 3.x 分支,並按照此範例進行操作。
「master」分支是開發分支,它會定期更新以與 Godot 的「master」分支配合使用。
警告
我們的長期目標是針對早期版本 Godot 的 GDExtensions 將在以後的次要版本中工作,但反之則不然。例如,針對 Godot 4.2 的 GDExtension 在 Godot 4.3 中應該可以正常運作,但針對 Godot 4.3 的 GDExtension 在 Godot 4.2 中則無法運作。
然而,GDExtension 目前處於*實驗階段*,這意味著我們可能會破壞相容性以修復主要錯誤或包含關鍵功能。例如,為 Godot 4.0 建立的 GDExtension 與 Godot 4.1 不相容(請參閱:ref:updating_your_gdextension_for_godot_4_1)。
如果您使用 Git 對專案進行版本控制,最好將它們新增為 Git 子模組:
mkdir gdextension_cpp_example
cd gdextension_cpp_example
git init
git submodule add -b 4.1 https://github.com/godotengine/godot-cpp
cd godot-cpp
git submodule update --init
或者,您也可以將其克隆到專案資料夾:
mkdir gdextension_cpp_example
cd gdextension_cpp_example
git clone -b 4.1 https://github.com/godotengine/godot-cpp
備註
如果您決定只下載倉庫或將它們克隆到專案檔案夾中,請確保資料夾佈局與此處描述的相同,因為我們將在此處展示的程式碼假定專案遵循此佈局。
如果從介紹中指定的連結克隆範例, 子模組不會自動初始化. 您需要執行以下命令:
cd gdextension_cpp_example
git submodule update --init
這會將這兩個倉庫克隆到您的專案檔案夾中。
建構 C++ 綁定
現在我們已經下載了我們的先決條件, 現在是建構C++綁定的時候了.
倉庫包含目前 Godot 版本的中繼資料副本,但如果您需要為較新版本的 Godot 建構這些綁定,只需呼叫 Godot 可執行檔:
godot --dump-extension-api
The resulting extension_api.json file will be created in the executable's
directory. Copy it to the project folder and add custom_api_file=<PATH_TO_FILE>
to the scons command below.
要生成和編譯綁定, 使用這個命令(根據你的作業系統, 用 windows , linux 或 osx 代替 <platform> ):
The build process automatically detects the number of CPU threads to use for
parallel builds. To specify a number of CPU threads to use, add -jN at the
end of the SCons command line where N is the number of CPU threads to use.
cd godot-cpp
scons platform=<platform> custom_api_file=<PATH_TO_FILE>
cd ..
這一步將需要一段時間. 完成後, 您應該有一個靜態程式庫, 可以編譯到您的專案中, 儲存在 godot-cpp / bin / 中.
備註
您可能需要在 Windows 或 Linux 的命令列中新增 bits=64。
建立一個簡單的外掛程式
現在是建構實際外掛程式的時候了. 我們首先建立一個空的Godot專案, 我們將在其中放置一些檔.
打開Godot並建立一個新專案. 對於這個範例, 我們將它放在我們的GDNative模組的資料夾結構中名為 demo 的資料夾中.
在我們的演示專案中, 我們將建立一個包含名為 "Main" 的節點的場景, 我們將其保存為 main.tscn . 我們稍後再回過頭來看看.
回到頂級GDNative模組資料夾, 我們還將建立一個名為 src 的子資料夾, 我們將在其中放置原始檔案.
您現在應該在您的GDNative模組中有 demo , godot-cpp, godot_headers 和 src 目錄.
現在場景看起來會這樣:
gdextension_cpp_example/
|
+--demo/                  # game example/demo to test the extension
|
+--godot-cpp/             # C++ bindings
|
+--src/                   # source code of the extension we are building
在 src 資料夾中, 我們將首先為我們將要建立的GDNative節點建立標頭檔. 我們將它命名為 gdexample.h :
#ifndef GDEXAMPLE_H
#define GDEXAMPLE_H

#include <godot_cpp/classes/sprite2d.hpp>

namespace godot {

class GDExample : public Sprite2D {
    GDCLASS(GDExample, Sprite2D)

private:
    double time_passed;

protected:
    static void _bind_methods();

public:
    GDExample();
    ~GDExample();

    void _process(double delta) override;
};

}

#endif
以上有一些注意事項. 我們包括 Godot.hpp , 其中包含我們所有的基本定義. 之後, 我們包含 Sprite.hpp , 它包含對Sprite類的綁定. 我們將在我們的模組中擴充這個類.
我們使用命名空間 godot , 因為GDNative中的所有內容都在此命名空間中定義.
然後我們有了我們的類定義, 它通過容器類從我們的Sprite繼承. 我們稍後會看到一些副作用. 這也是NativeScript 1.1中將要改進的主要部分. GODOT_CLASS 宏為我們設定了一些內部事物.
之後, 我們宣告一個名為 time_passed 的成員變數.
在下一個塊中我們定義了我們的方法, 我們顯然已經定義了建構子和解構函式, 但是還有其他兩個函式可能看起來很熟悉.
第一個是 _register_methods , 這是一個靜態函式,Godot將呼叫它來找出可以在我們的NativeScript上呼叫哪些方法以及它暴露的屬性. 第二個是我們的 _process 函式, 它與您在GDScript中習慣的 _process 函式完全相同. 第三個是我們的 _init 函式, 它是在Godot正確設定我們的物件之後呼叫的. 即使您沒有在其中放置任何程式碼, 它也必須存在.
所以, 讓我們通過建立 gdexample.cpp 檔來實作我們的函式:
#include "gdexample.h"
#include <godot_cpp/core/class_db.hpp>

using namespace godot;

void GDExample::_bind_methods() {
}

GDExample::GDExample() {
    // Initialize any variables here.
    time_passed = 0.0;
}

GDExample::~GDExample() {
    // Add your cleanup here.
}

void GDExample::_process(double delta) {
    time_passed += delta;

    Vector2 new_position = Vector2(10.0 + (10.0 * sin(time_passed * 2.0)), 10.0 + (10.0 * cos(time_passed * 1.5)));

    set_position(new_position);
}
這一點應該很簡單。我們正在實作我們在頭檔案中定義的類別的每個方法。
注意我們的“_process”函式,它追蹤已經過去了多少時間,並使用正弦和餘弦函式計算精靈的新位置。
還有一個我們需要的C++檔; 我們將它命名為 gdlibrary.cpp . 我們的GDNative外掛程式可以包含多個NativeScripts, 每個都有自己的標頭檔和原始檔案, 就像我們在上面實作了 GDExample 一樣. 我們現在需要的是一小段程式碼, 告訴Godot我們的GDNative外掛程式中的所有NativeScripts.
#include "register_types.h"

#include "gdexample.h"

#include <gdextension_interface.h>
#include <godot_cpp/core/defs.hpp>
#include <godot_cpp/godot.hpp>

using namespace godot;

void initialize_example_module(ModuleInitializationLevel p_level) {
    if (p_level != MODULE_INITIALIZATION_LEVEL_SCENE) {
        return;
    }

    ClassDB::register_class<GDExample>();
}

void uninitialize_example_module(ModuleInitializationLevel p_level) {
    if (p_level != MODULE_INITIALIZATION_LEVEL_SCENE) {
        return;
    }
}

extern "C" {
// Initialization.
GDExtensionBool GDE_EXPORT example_library_init(GDExtensionInterfaceGetProcAddress p_get_proc_address, const GDExtensionClassLibraryPtr p_library, GDExtensionInitialization *r_initialization) {
    godot::GDExtensionBinding::InitObject init_obj(p_get_proc_address, p_library, r_initialization);

    init_obj.register_initializer(initialize_example_module);
    init_obj.register_terminator(uninitialize_example_module);
    init_obj.set_minimum_library_initialization_level(MODULE_INITIALIZATION_LEVEL_SCENE);

    return init_obj.init();
}
}
當Godot載入我們的外掛程式並解除安裝它時, 分別呼叫 godot_gdnative_init 和 godot_gdnative_terminate 函式. 我們在這裡所做的只是解析我們的綁定模組中的函式來初始化它們, 但您可能需要根據需要設定更多內容.
The important function is the third function called example_library_init.
We first call a function in our bindings library that creates an initialization object.
This object registers the initialization and termination functions of the GDExtension.
Furthermore, it sets the level of initialization (core, servers, scene, editor, level).
最後,我們需要名為「register_types.h」的「register_types.cpp」頭檔。
#ifndef GDEXAMPLE_REGISTER_TYPES_H
#define GDEXAMPLE_REGISTER_TYPES_H

#include <godot_cpp/core/class_db.hpp>

using namespace godot;

void initialize_example_module(ModuleInitializationLevel p_level);
void uninitialize_example_module(ModuleInitializationLevel p_level);

#endif // GDEXAMPLE_REGISTER_TYPES_H
編譯外掛程式
手工編寫 SCons 用於建構的 SConstruct 檔案並不容易。出於這個範例的目的,只需使用我們已經準備好的:download:這個硬編碼的 SConstruct 檔 <files/cpp_example/SConstruct>。我們將在後續教學中介紹如何使用這些建構檔的更可定制的詳細範例。
備註
這個 SConstruct 檔被編寫為與最新的godot-cpp master分支一起使用, 您可能需要使用舊版本進行小的更改, 或者參考Godot 3.0文件中的 SConstruct 檔.
一旦你下載了 SConstruct 檔案,把它放在你的GDNative模組資料夾中,除了 godot-cpp 、 godot-headers 和 demo 之外,然後運作:
scons platform=<platform>
您現在應該能夠在 demo / bin / <platform> 中找到該模組.
備註
在這裡, 我們編譯了godot-cpp和我們的gdexample庫作為除錯版本. 對於優化的建構, 您應該使用 target = release 開關編譯它們.
使用模組
在我們跳回Godot之前, 我們需要在 demo / bin / 中再建立兩個檔. 兩者都可以使用Godot編輯器建立, 但直接建立它們可能會更快.
第一個是一個檔, 讓Godot知道應該為每個平臺載入什麼動態庫, 並稱為 gdexample.gdnlib .
[configuration]

entry_symbol = "example_library_init"
compatibility_minimum = "4.1"

[libraries]

macos.debug = "res://bin/libgdexample.macos.template_debug.framework"
macos.release = "res://bin/libgdexample.macos.template_release.framework"
windows.debug.x86_32 = "res://bin/libgdexample.windows.template_debug.x86_32.dll"
windows.release.x86_32 = "res://bin/libgdexample.windows.template_release.x86_32.dll"
windows.debug.x86_64 = "res://bin/libgdexample.windows.template_debug.x86_64.dll"
windows.release.x86_64 = "res://bin/libgdexample.windows.template_release.x86_64.dll"
linux.debug.x86_64 = "res://bin/libgdexample.linux.template_debug.x86_64.so"
linux.release.x86_64 = "res://bin/libgdexample.linux.template_release.x86_64.so"
linux.debug.arm64 = "res://bin/libgdexample.linux.template_debug.arm64.so"
linux.release.arm64 = "res://bin/libgdexample.linux.template_release.arm64.so"
linux.debug.rv64 = "res://bin/libgdexample.linux.template_debug.rv64.so"
linux.release.rv64 = "res://bin/libgdexample.linux.template_release.rv64.so"
android.debug.x86_64 = "res://bin/libgdexample.android.template_debug.x86_64.so"
android.release.x86_64 = "res://bin/libgdexample.android.template_release.x86_64.so"
android.debug.arm64 = "res://bin/libgdexample.android.template_debug.arm64.so"
android.release.arm64 = "res://bin/libgdexample.android.template_release.arm64.so"
該檔案包含一個「configuration」部分,用於控制模組的入口函式。您還應該使用“compatability_minimum”設定最低相容的 Godot 版本,這可以防止舊版本的 Godot 嘗試載入您的擴充功能。
entry 部分是重要的一點: 它告訴Godot每個支援平臺的專案檔案系統中動態庫的位置. 匯出專案時, 這也將導致 僅 匯出該檔, 這意味著封包不會包含與目標平臺不相容的庫.
最後, dependencies 部分允許您命名應包含的其他動態庫. 當您的GDNative外掛程式實作其他人的庫並要求您為專案提供協力廠商動態庫時, 這一點非常重要.
這是檢查正確檔案結構的另一個概述:
gdextension_cpp_example/
|
+--demo/                  # game example/demo to test the extension
|   |
|   +--main.tscn
|   |
|   +--bin/
|       |
|       +--gdexample.gdextension
|
+--godot-cpp/             # C++ bindings
|
+--src/                   # source code of the extension we are building
|   |
|   +--register_types.cpp
|   +--register_types.h
|   +--gdexample.cpp
|   +--gdexample.h
是時候跳回Godot了. 我們在開始時載入我們建立的主場景, 現在為場景新增一個Sprite:
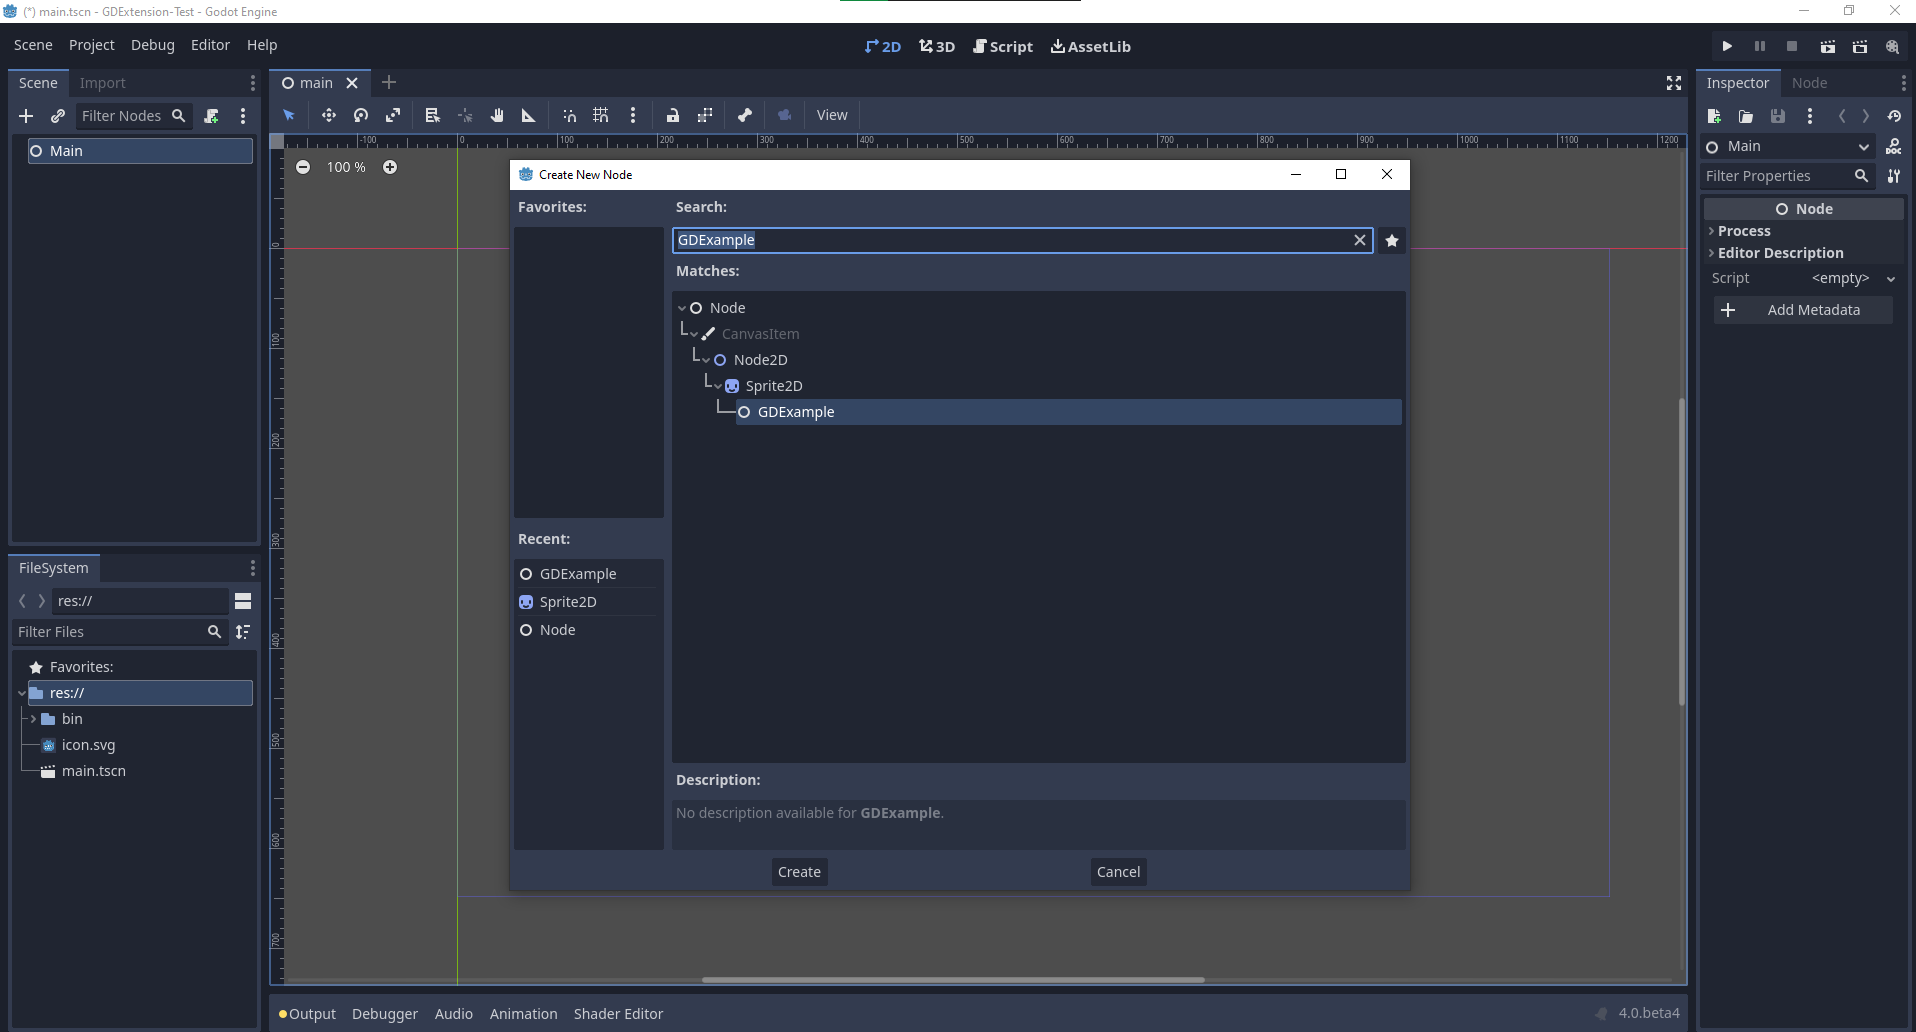
我們要將Godot徽標指定給這個精靈作為我們的紋理, 禁用 centered 屬性並將我們的 gdexample.gdns 檔拖到精靈的 script 屬性中:
我們終於準備好運作這個專案了:
新增自定編輯器圖示
預設情況下,Godot 使用場景停靠列中的節點圖示作為 GDExtension 節點。自訂圖示可以透過「gdextension」檔案新增。節點的圖示是透過引用其名稱和 SVG 檔案的資源路徑來設定的。
如:
[icons]

GDExample = "res://icons/gd_example.svg"
該路徑應指向 16 x 16 像素的 SVG 影像。閱讀建立圖示 <doc_editor_icons> 指南以取得更多資訊。
新增屬性
還有第三種選擇, 就像在GDScript中一樣, 您可以直接實作一個物件的 _get_property_list , _get 和 _set 方法, 但這遠遠超出了本教學的範圍.
我們將從直接綁定開始檢查兩者. 讓我們新增一個允許我們控制波浪幅度的屬性.
在我們的 gdexample.h 檔中, 我們只需新增一個成員變數, 如下所示:
...
private:
    double time_passed;
    double amplitude;

public:
    void set_amplitude(const double p_amplitude);
    double get_amplitude() const;
...
在我們的 gdexample.cpp 檔中, 我們需要進行一些更改, 我們只會顯示我們最終更改的方法, 不要刪除我們省略的行:
void GDExample::_bind_methods() {
    ClassDB::bind_method(D_METHOD("get_amplitude"), &GDExample::get_amplitude);
    ClassDB::bind_method(D_METHOD("set_amplitude", "p_amplitude"), &GDExample::set_amplitude);
    ClassDB::add_property("GDExample", PropertyInfo(Variant::FLOAT, "amplitude"), "set_amplitude", "get_amplitude");
}

GDExample::GDExample() {
    // Initialize any variables here.
    time_passed = 0.0;
    amplitude = 10.0;
}

void GDExample::_process(double delta) {
    time_passed += delta;

    Vector2 new_position = Vector2(
        amplitude + (amplitude * sin(time_passed * 2.0)),
        amplitude + (amplitude * cos(time_passed * 1.5))
    );

    set_position(new_position);
}

void GDExample::set_amplitude(const double p_amplitude) {
    amplitude = p_amplitude;
}

double GDExample::get_amplitude() const {
    return amplitude;
}
使用這些更改編譯模組後,就會看到介面上加入了一個屬性。您現在可以更改此屬性,當您運作專案時,您將看到我們的 Godot 圖示沿著更大的數位移動。
讓我們做同樣的事情但是為了我們動畫的速度並使用 setter 和 getter 函式。我們的 gdexample.h 標頭檔再次只需要幾行程式碼:
...
    double amplitude;
    double speed;
...
    void _process(double delta) override;
    void set_speed(const double p_speed);
    double get_speed() const;
...
這需要對我們的 gdexample.cpp 檔進行一些更改, 同樣我們只顯示已更改的方法, 所以不要刪除我們忽略的任何內容:
void GDExample::_bind_methods() {
    ...
    ClassDB::bind_method(D_METHOD("get_speed"), &GDExample::get_speed);
    ClassDB::bind_method(D_METHOD("set_speed", "p_speed"), &GDExample::set_speed);
    ClassDB::add_property("GDExample", PropertyInfo(Variant::FLOAT, "speed", PROPERTY_HINT_RANGE, "0,20,0.01"), "set_speed", "get_speed");
}

GDExample::GDExample() {
    time_passed = 0.0;
    amplitude = 10.0;
    speed = 1.0;
}

void GDExample::_process(double delta) {
    time_passed += speed * delta;

    Vector2 new_position = Vector2(
        amplitude + (amplitude * sin(time_passed * 2.0)),
        amplitude + (amplitude * cos(time_passed * 1.5))
    );

    set_position(new_position);
}

...

void GDExample::set_speed(const double p_speed) {
    speed = p_speed;
}

double GDExample::get_speed() const {
    return speed;
}
編譯完專案後,我們就會看到另一個名為 speed 的屬性。更改其值將使動畫更快或更慢。
備註
為簡單起見,我們在 register_property<class, type> 方法呼叫中省略了可選的參數。這些參數有 rpc_mode、usage、hint、hint_string。這些可用於進一步配置屬性在 Godot 方面的顯示和設定方式。
訊號
最後但同樣重要的是, 訊號也完全適用於GDNative. 讓模組對另一個物件發出的訊號作出反應, 需要在該物件上呼叫 connect . 我們想不出一個擺動Godot圖示的好範例, 我們需要展示一個更完整的範例.
這是必需的語法:
some_other_node->connect("the_signal", Callable(this, "my_method"));
To connect our signal the_signal from some other node with our method
my_method, we need to provide the connect method with the name of the signal
and a Callable. The Callable holds information about an object on which a method
can be called. In our case, it associates our current object instance this with the
method my_method of the object. Then the connect method will add this to the
observers of the_signal. Whenever the_signal is now emitted, Godot knows which
method of which object it needs to call.
Note that you can only call my_method if you've previously registered it in
your _bind_methods method. Otherwise Godot will not know about the existence
of my_method.
To learn more about Callable, check out the class reference here: Callable.
讓物件發出訊號更為常見。對於我們搖擺不定的 Godot 圖示,我們會做一些愚蠢的事情來展示它是如何工作的。每過一秒鐘我們就會發出一個訊號並傳遞新的位置。
在我們的 gdexample.h 標頭檔中,我們需要定義一個新成員 time_emit:
...
    double time_passed;
    double time_emit;
    double amplitude;
...
gdexample.cpp 這次的修改有點複雜。首先,你需要在我們的 _init 方法或建構子中設定 time_emit = 0.0。另外兩個修改我們將逐一查看。
在我們的 _register_methods 方法中,我們需要宣告我們的訊號。按如下方式實作:
void GDExample::_bind_methods() {
    ...
    ClassDB::add_property("GDExample", PropertyInfo(Variant::FLOAT, "speed", PROPERTY_HINT_RANGE, "0,20,0.01"), "set_speed", "get_speed");

    ADD_SIGNAL(MethodInfo("position_changed", PropertyInfo(Variant::OBJECT, "node"), PropertyInfo(Variant::VECTOR2, "new_pos")));
}
在這裡,我們的“ADD_SIGNAL”巨集可以是帶有“MethodInfo”參數的單一呼叫。 「MethodInfo」的第一個參數將是訊號的名稱,其其餘參數是「PropertyInfo」型別,描述每個方法參數的要點。 「PropertyInfo」 參數是使用參數的資料型別以及預設參數的名稱來定義的。
So here, we add a signal, with a MethodInfo which names the signal "position_changed". The
PropertyInfo parameters describe two essential arguments, one of type Object, the other
of type Vector2, respectively named "node" and "new_pos".
接下來我們需要修改我們的 _process 方法:
void GDExample::_process(double delta) {
    time_passed += speed * delta;

    Vector2 new_position = Vector2(
        amplitude + (amplitude * sin(time_passed * 2.0)),
        amplitude + (amplitude * cos(time_passed * 1.5))
    );

    set_position(new_position);

    time_emit += delta;
    if (time_emit > 1.0) {
        emit_signal("position_changed", this, new_position);

        time_emit = 0.0;
    }
}
經過一秒鐘後, 我們發出訊號並重設我們的計數器。我們可以將參數值直接新增給 emit_signal。
完成 GDNative 庫的編譯後,我們可以進入 Godot 並選擇我們的精靈節點。在**節點**面板上,我們可以找到我們新建的訊號,並通過點按**連接**按鈕或按兩下訊號將其連結起來。我們在主節點上新增了一個腳本並實作了這樣的訊號:
extends Node

func _on_Sprite2D_position_changed(node, new_pos):
    print("The position of " + node.get_class() + " is now " + str(new_pos))
每一秒,我們都會將我們的位置輸出到控制台。
下一步
以上只是一個簡單的範例, 但我們希望它向您展示基礎知識. 您可以在此範例的基礎上建構完整的腳本, 以使用C++控制Godot中的節點.