Attention: Here be dragons
This is the latest
(unstable) version of this documentation, which may document features
not available in or compatible with released stable versions of Godot.
Checking the stable version of the documentation...
Escena del jugador y acciones de entrada
En las próximas dos lecciones, diseñaremos la escena del jugador, registraremos acciones de entrada personalizadas y codificaremos el movimiento del jugador. Al final, tendrás un personaje jugable que se mueve en ocho direcciones.
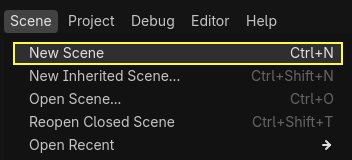
Create a new scene by going to the Scene menu in the top-left and clicking New Scene.
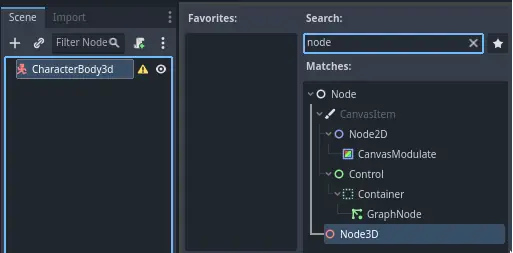
Haz clic en el botón Otro Nodo y selecciona el tipo de nodo CharacterBody3D para crear un CharacterBody3D como nodo raíz.

Rename the CharacterBody3D to Player.
Character bodies are complementary to the area and rigid bodies used in the 2D
game tutorial. Like rigid bodies, they can move and collide with the
environment, but instead of being controlled by the physics engine, you dictate
their movement. You will see how we use the node's unique features when we code
the jump and squash mechanics.
Ver también
Para obtener más información sobre los diferentes tipos de nodos de física, véase Introducción a la física.
Por ahora, vamos a crear un equipo básico para el modelo 3D de nuestro personaje. Esto nos permitirá rotar el modelo más tarde mediante código mientras reproduce una animación.
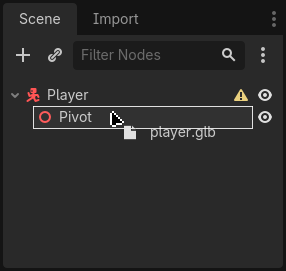
Agrega un nodo Node3D como hijo de Player y llámalo Pivot.
Luego, en el panel Sistema de Archivos, expande la carpeta art/ haciendo doble clic en ella y arrastrando y soltando player.glb sobre Pivot.
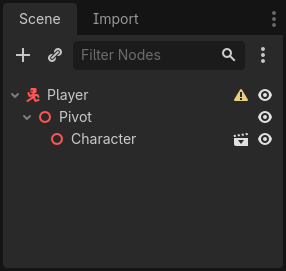
Esto debería crear una instancia del modelo como hijo de Pivot. Puedes cambiarle el nombre a Character.
Nota
The .glb files contain 3D scene data based on the open source glTF 2.0
specification. They're a modern and powerful alternative to a proprietary format
like FBX, which Godot also supports. To produce these files, we designed the
model in Blender 3D and exported it to glTF.
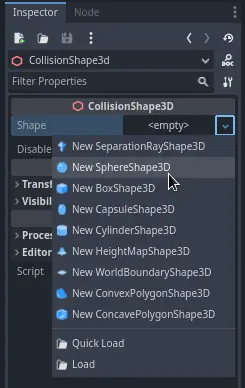
As with all kinds of physics nodes, we need a collision shape for our character
to collide with the environment. Select the Player node again and add a child node
CollisionShape3D. In the Inspector, on the Shape property,
add a new SphereShape3D.
La wireframe de la esfera aparecerá debajo del personaje.
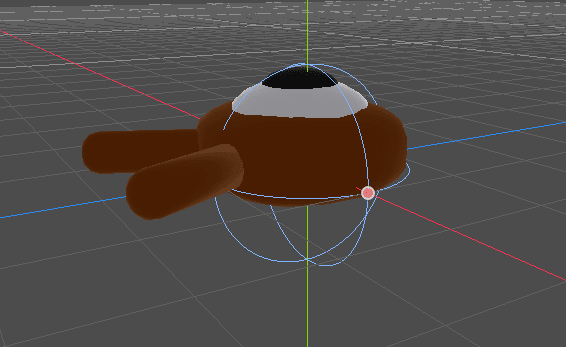
Será la forma que use el motor de física para colisionar con el entorno, por lo que queremos que se ajuste mejor al modelo 3D. Redúcelo un poco arrastrando el punto naranja en la ventana gráfica. Mi esfera tiene un radio de unos 0.8 metros.
Luego, mueva la forma hacia arriba para que su parte inferior se alinee aproximadamente con el plano de la cuadrícula.
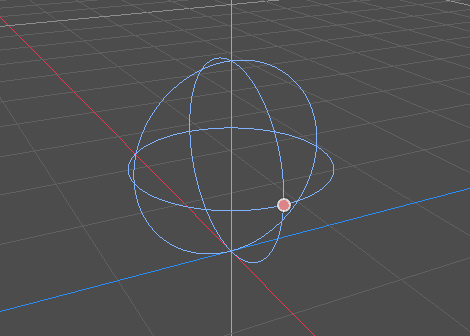
To make moving the shape easier, you can toggle the model's visibility by clicking
the eye icon next to the Character or the Pivot nodes.
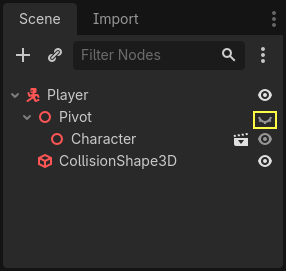
Guarda la escena como player.tscn.
Con los nodos listos, casi podemos comenzar a codificar. Pero primero, necesitamos definir algunas acciones de entrada.
Crear acciones de entrada
Para mover el personaje, escucharemos la entrada del jugador, como presionar las teclas de flecha. En Godot, aunque podríamos escribir todas las combinaciones de teclas en código, hay un poderoso sistema que te permite asignar una etiqueta a un conjunto de teclas y botones. Esto simplifica nuestros scripts y los hace más legibles.
This system is the Input Map. To access its editor, head to the Project menu and select Project Settings....

At the top, there are multiple tabs. Click on Input Map. This window allows you to add new actions at the top; they are your labels. In the bottom part, you can bind keys to these actions.

Godot projects come with some predefined actions designed for user interface design (see above screenshot). These will become visible if you enable the Show Built-in Actions toggle. We could use these here, but instead we're defining our own to support gamepads. Leave Show Built-in Actions disabled.
Vamos a nombrar nuestras acciones move_left, move_right, move_forward, move_back y jump.
To add an action, write its name in the bar at the top and press Enter or click the Add button.

Crea las siguientes cinco acciones:

To bind a key or button to an action, click the "+" button to its right. Do this
for move_left. Press the left arrow key and click OK.
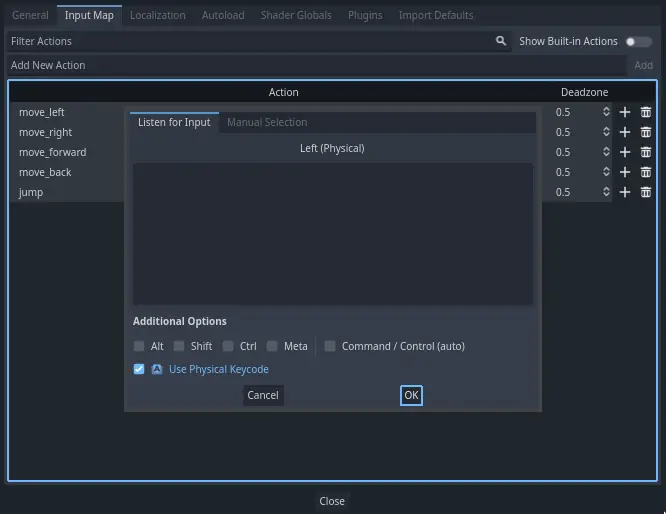
Asigna también la tecla A a la acción move_left.

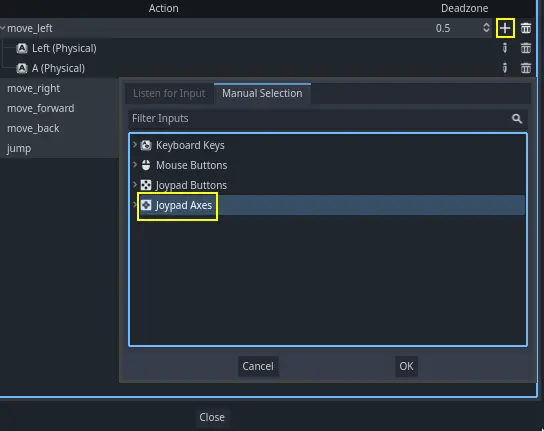
Let's now add support for a gamepad's left joystick. Click the "+" button again but this time, select the input within the input tree yourself. Select the negative X axis of the left joystick under Joypad Axes.
Deja los otros valores por defecto y presiona OK.
Nota
Si quieres que los controles tengan distintas acciones, deberías usar la opción Dispositivo en Opciones Adicionales. Dispositivo 0 corresponde al primer gamepad conectado, Dispositivo 1 corresponde al segundo gamepad conectado, y así.
Haz lo mismo para otras acciones de entrada. Por ejemplo, vincula la flecha derecha, D y el eje positivo del joystick izquierdo a move_right. Después de vincular todas las teclas, su interfaz debería verse así.
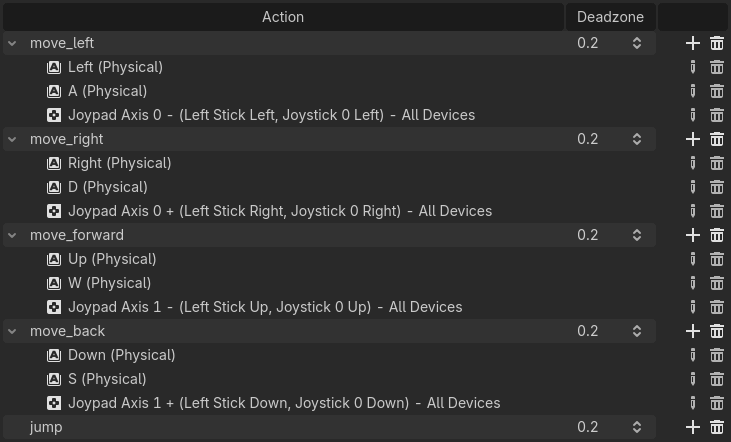
The final action to set up is the jump action. Bind the Space key and the gamepad's
A button located under Joypad Buttons.

Tu acción de entrada jump debería verse así.

Esas son todas las acciones necesarios por el juego. Puedes usar este menú para designar cualquier grupo de tecla o botón en sus proyectos.
En el siguiente parte, vamos a programar y verificar el movimiento de jugador.